Christmas Planters: 25 Beautiful Ideas for Porch and Indoors
A good Christmas planter does more work than almost any other decoration in the house. It greets visitors at the door, it fills a bare corner in the living room, it dresses a windowsill, and it keeps looking good long after the tree comes down. These 25 christmas planters cover every spot that needs one, from a wide front porch to a narrow balcony rail, and every idea comes with what you need, how long it takes, how hard it is, and what it costs in approximate bands, so you can choose with confidence and shop with a list.
Most of these christmas planter ideas use fresh cut evergreen branches, a sturdy container you already own, and a few red or gold accents, and several cost almost nothing if you forage the greenery and reuse a pot from the shed. The outdoor christmas planters in the first group survive cold wind and frost, and the last two groups sort the same ideas by container and by space.
25 Christmas Planters
These 25 ideas are grouped by place and by build, so you can start at the front porch, move indoors, make a DIY build, choose by container, and finish with small space and balcony looks. The first group covers christmas planters outdoor in full, from statement pairs to galvanized pots. Every idea keeps to the same format: what it is, what you need, how long it takes, how hard it is, what it costs in approximate bands, and the spot it suits best.
Front Porch. The front porch is where christmas front porch planters do their best work, because visitors see them before anything else in the house. For wreaths and door styling to pair with these pots, see our christmas front porch decor ideas.
1. Statement Pairs Flanking the Door
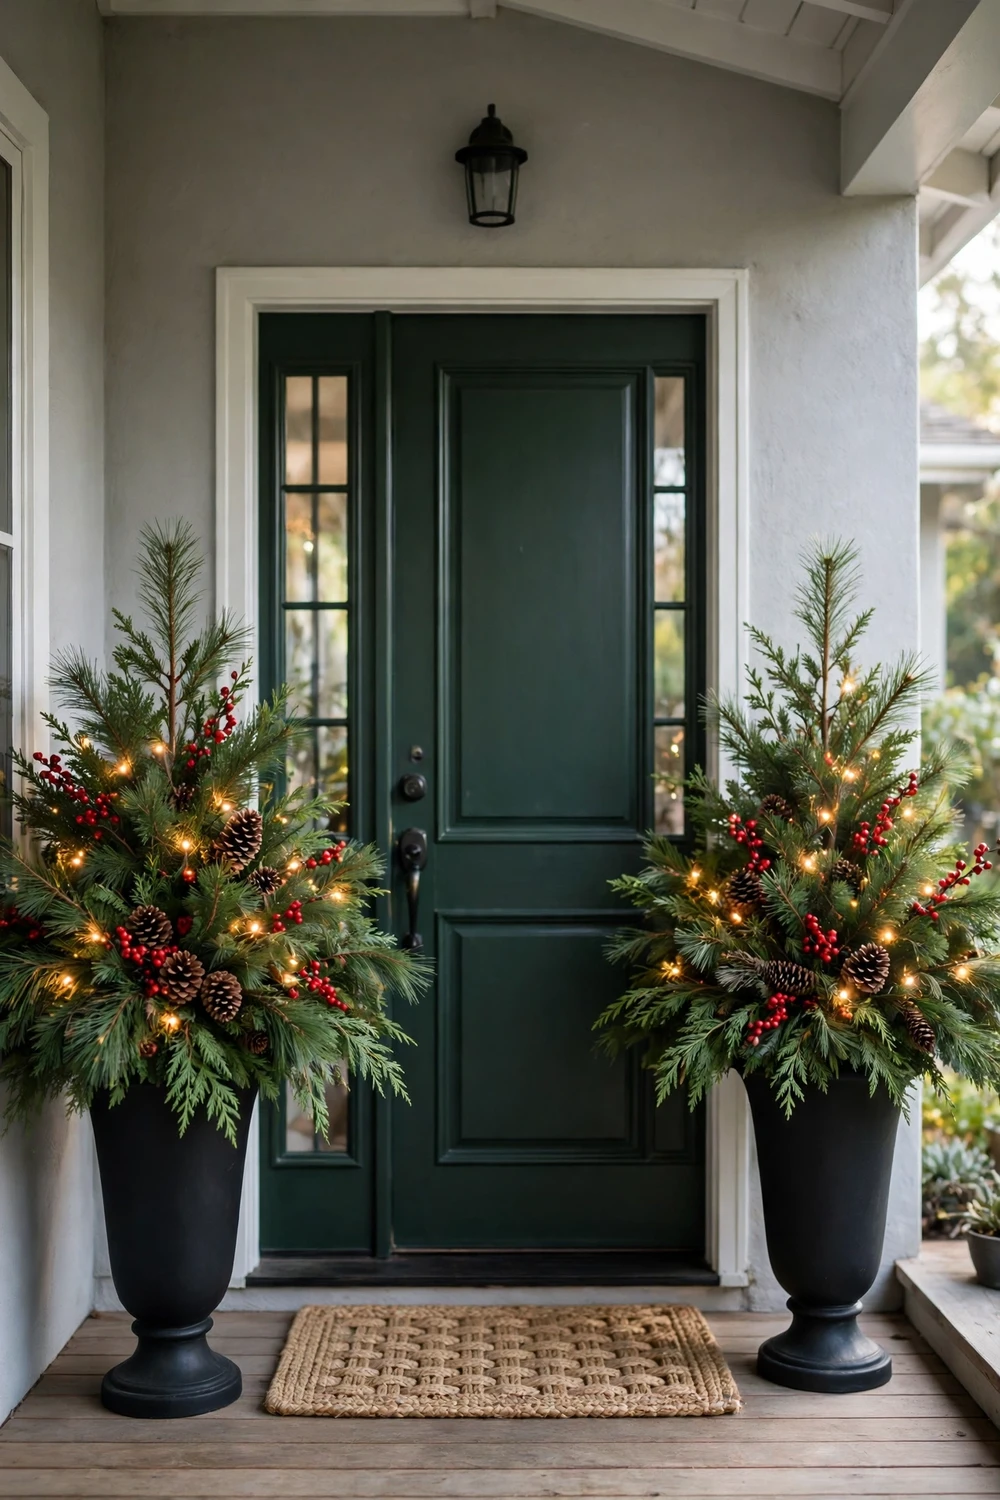
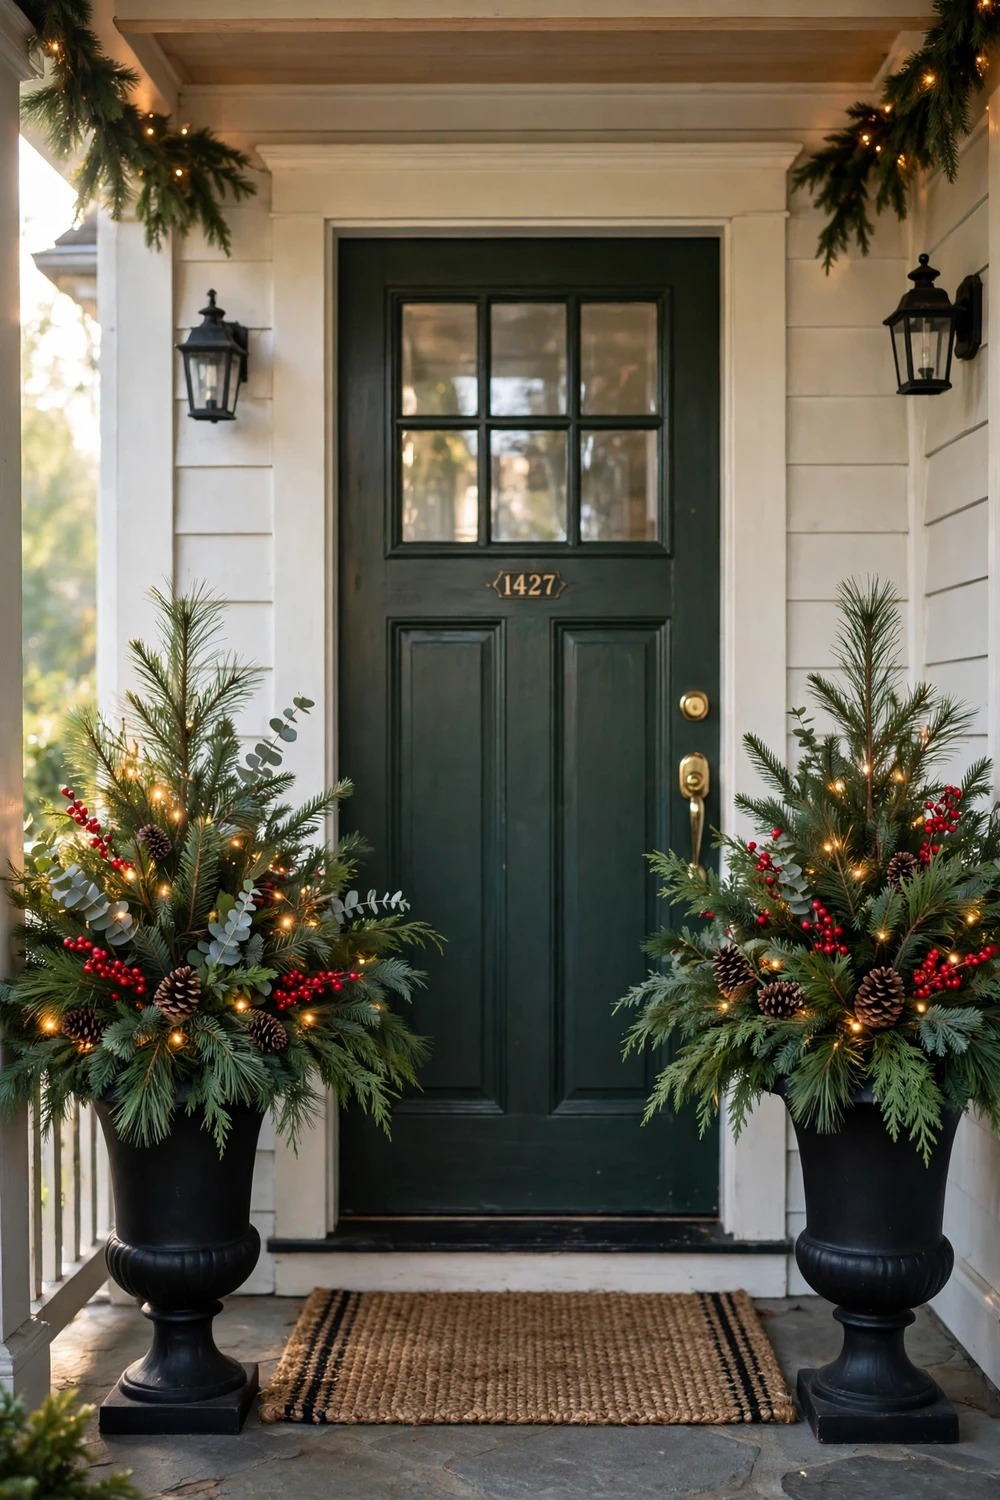
A pair of matching planters flanking the front door is the classic porch look, and it works because symmetry makes even a plain door look dressed. Fill two tall urns with the same mix of fir, pine and cedar branches, add red berry picks and a few pine cones to each one, and keep the two sides as close to identical as you can, so the door sits in the middle of a balanced frame.
You need: two matching tall urns, fresh fir, pine and cedar branches, red berry picks, pine cones, battery fairy lights.
Time: 1 hour for the pair / Difficulty: easy / Cost: about $25 to $40 approximate
Best for: front porch / Rental friendly: yes
2. Layered Porch Steps
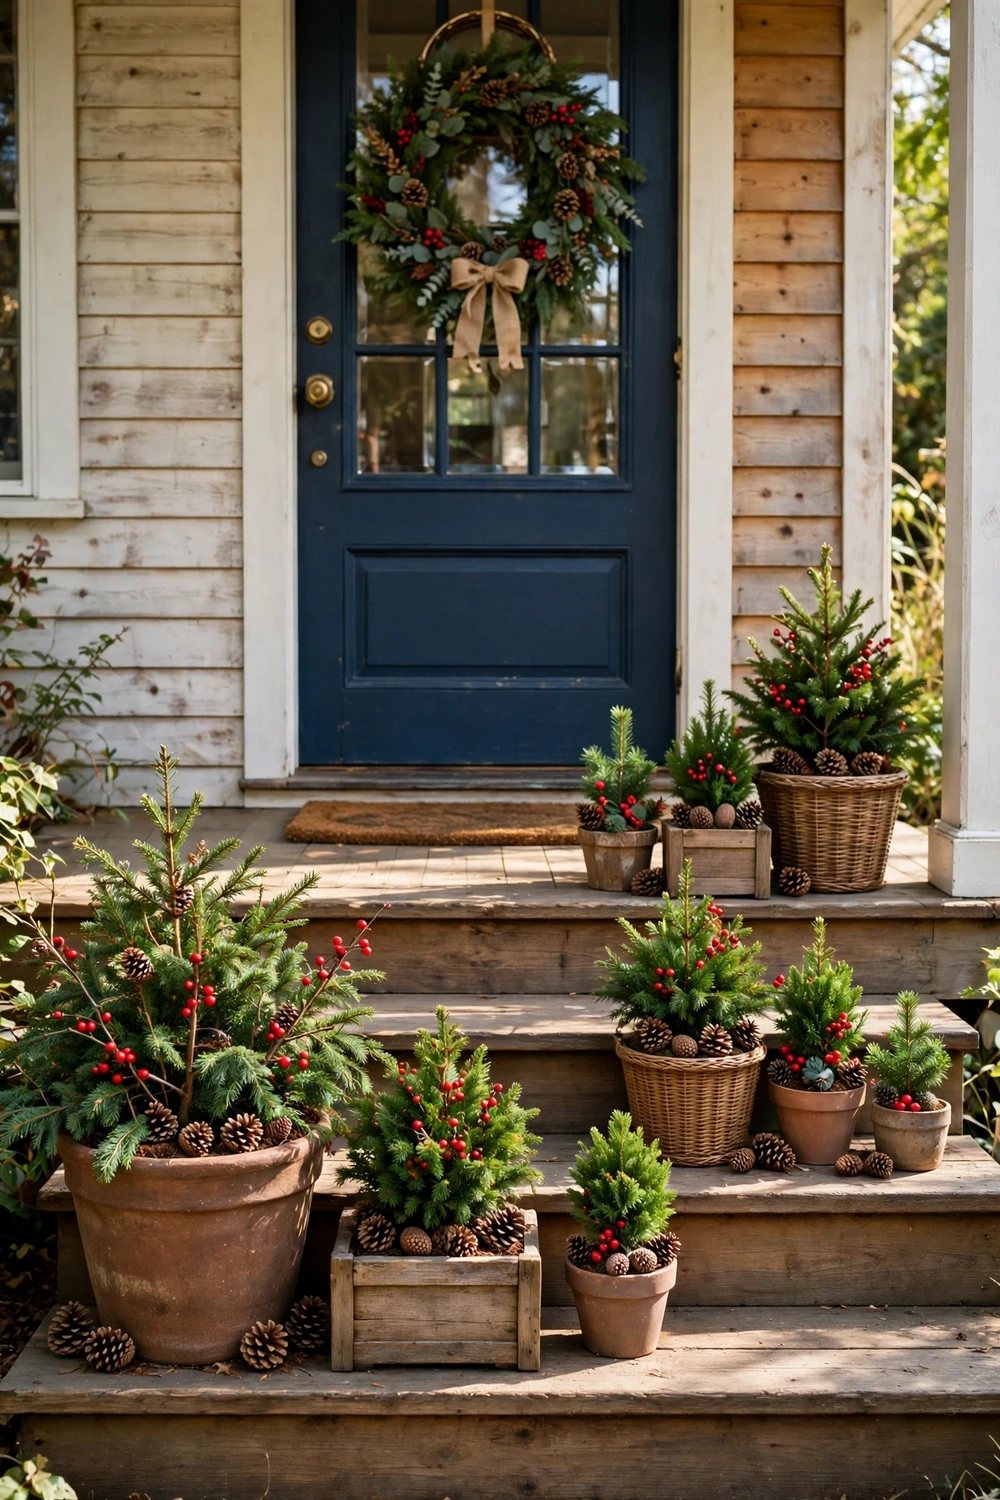
Layered planters on porch steps turn a plain staircase into a welcome in itself. Place the tallest pot on the top step, a medium pot on the middle step, and the smallest pot on the bottom step, and fill each one with the same evergreen mix so the steps read as one display instead of three separate pots.
You need: three planters in three sizes, fresh evergreen branches, red berry picks, pine cones.
Time: 45 minutes / Difficulty: easy / Cost: about $20 to $35 approximate
Best for: front porch steps / Rental friendly: yes
3. Lantern Planters
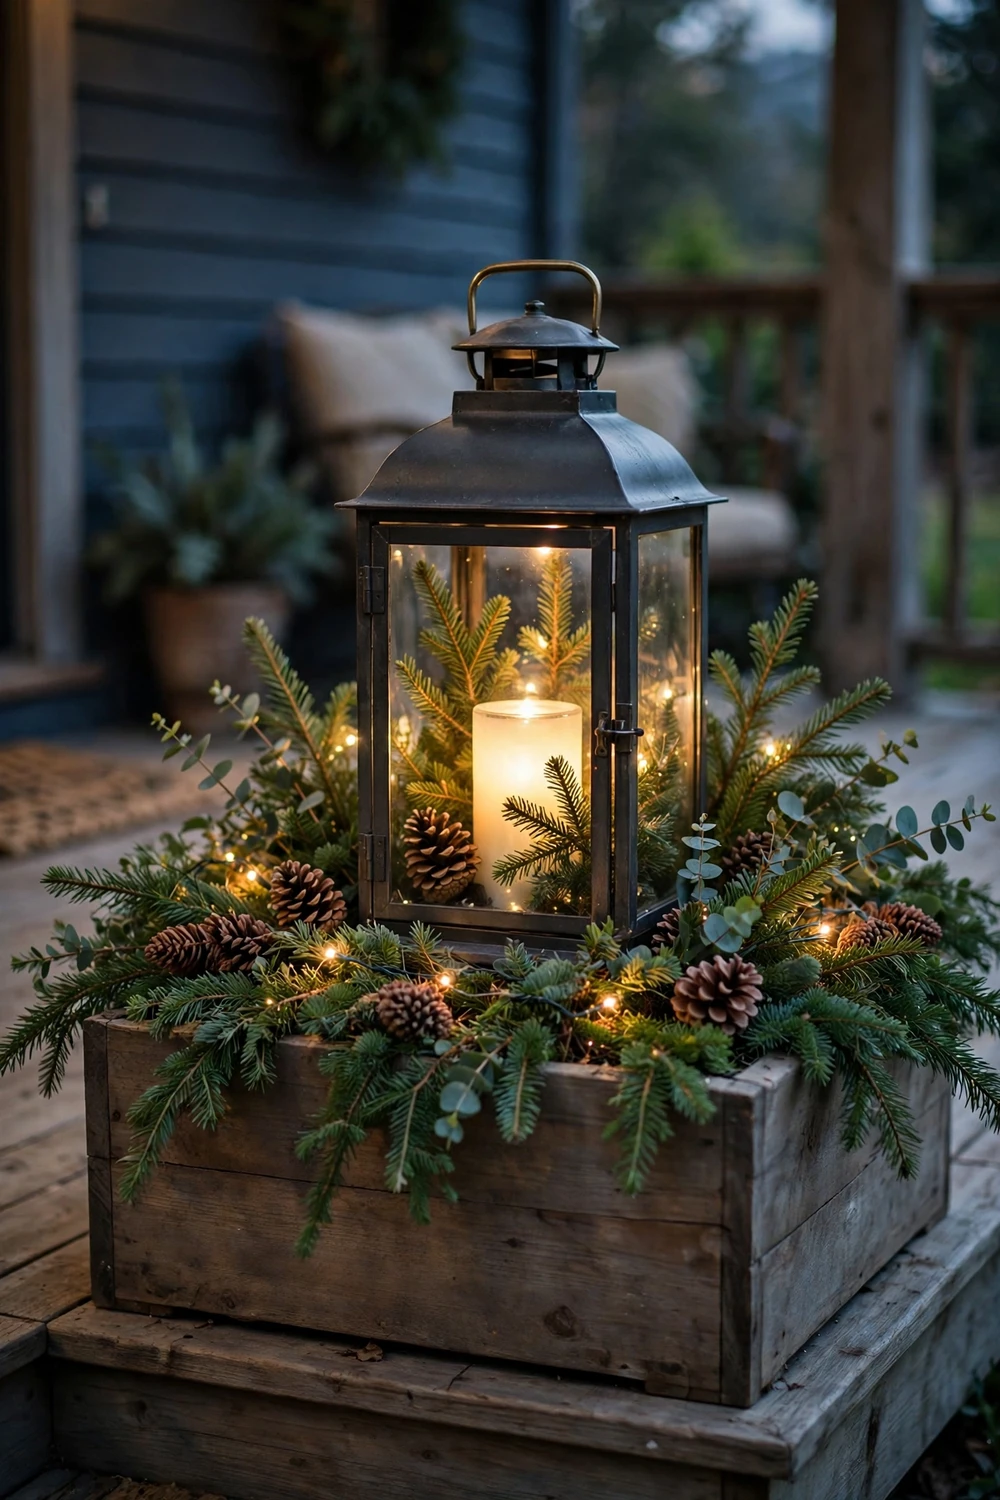
Fill a wide low planter with evergreen branches and pine cones, nestle a large lantern in the middle, and place a battery candle inside the lantern so the light shines through the glass without any flame near dry branches. Use battery candles only here, because a real flame beside dry evergreen branches is a risk no porch decoration is worth.
You need: one wide low planter, one large lantern, one battery candle, evergreen branches, pine cones.
Time: 30 minutes / Difficulty: easy / Cost: about $15 to $30 approximate
Best for: front porch / Rental friendly: yes
4. Topiary Frames
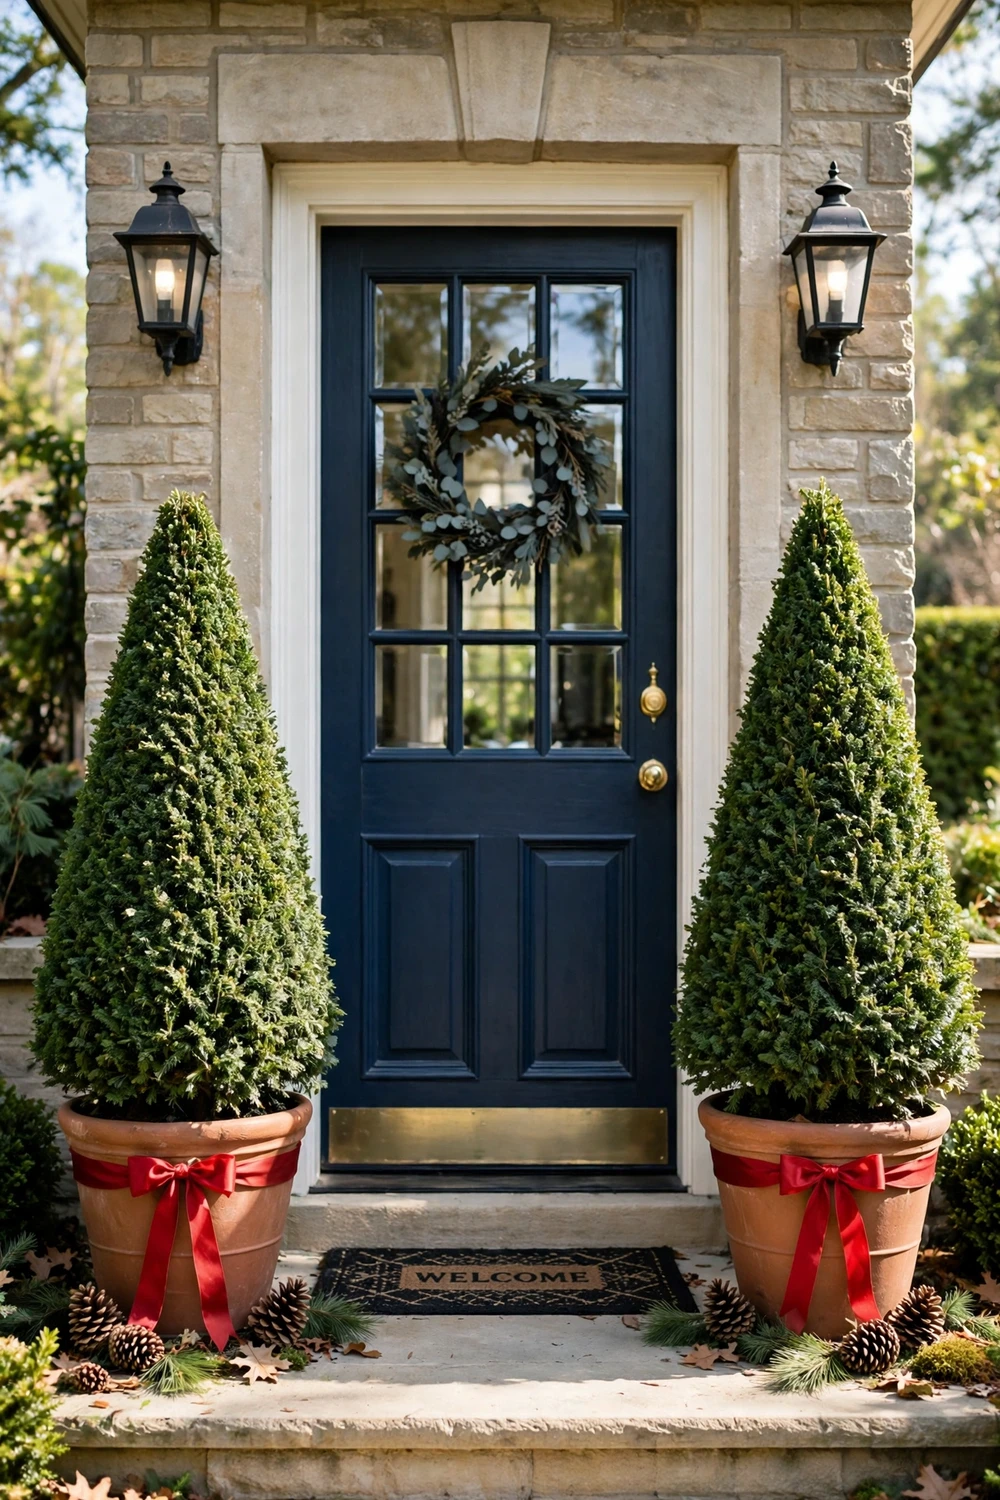
Topiary frames give a front door a formal look with very little work, because the cone shape does the styling for you. Place one cone shaped evergreen in a pot on each side of the door, tie a wide red ribbon bow around each pot, and tuck a few pine cones at the base so the pots look finished from every angle.
You need: two cone shaped topiary evergreens, two pots, wide red ribbon, pine cones.
Time: 20 minutes / Difficulty: easy / Cost: about $25 to $40 approximate
Best for: front porch / Rental friendly: yes
5. Galvanized Statement Pots
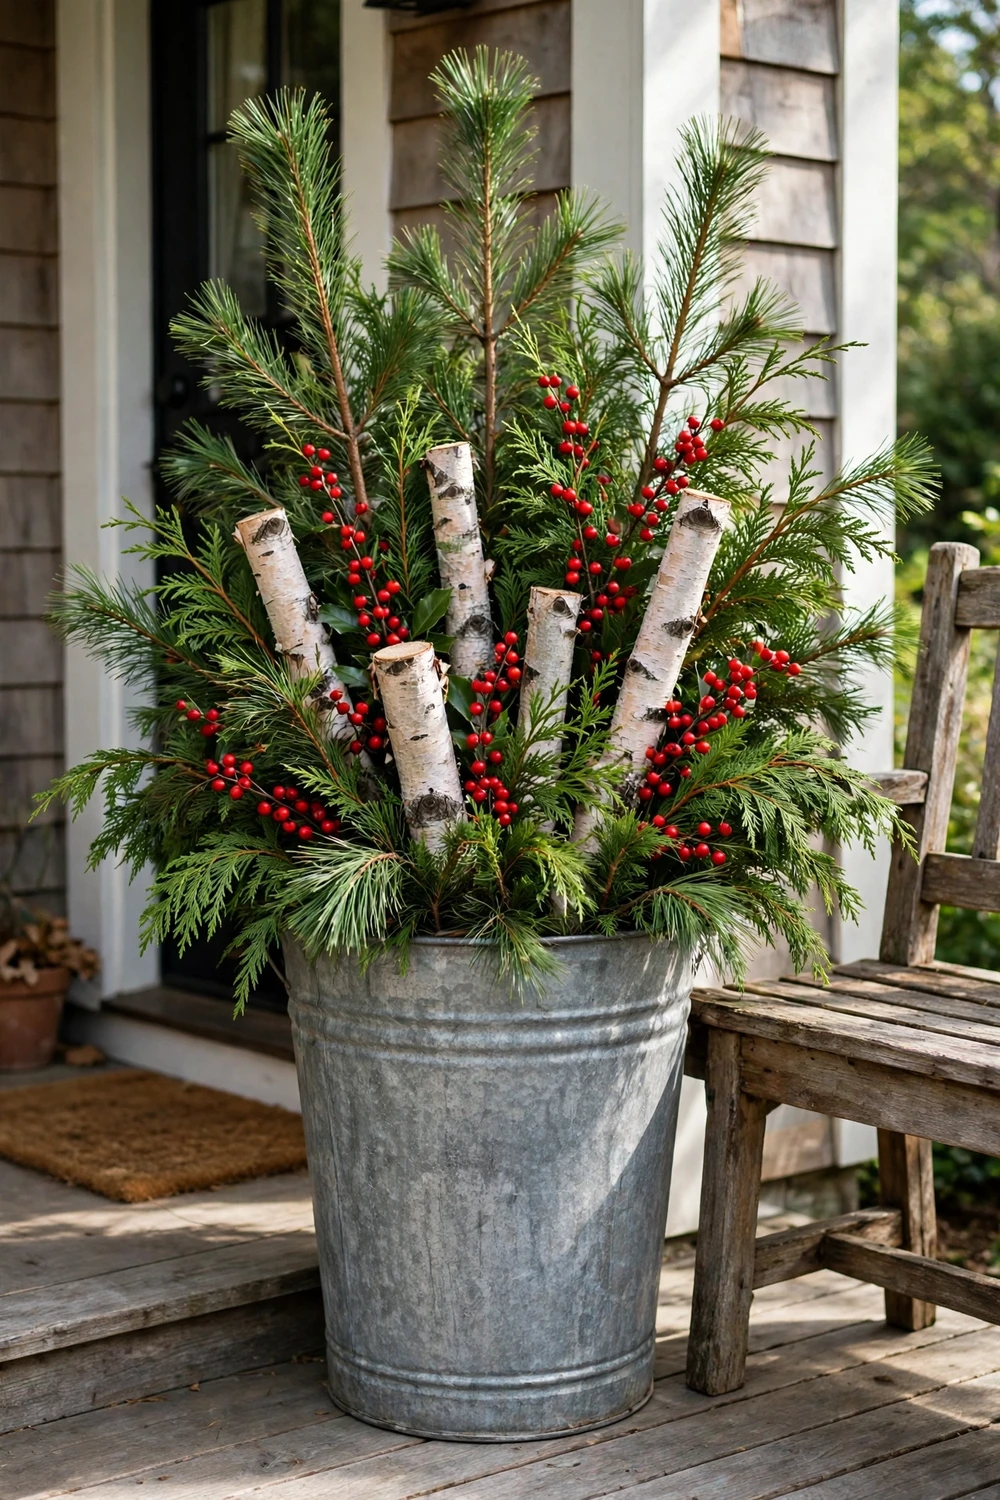
A galvanized bucket makes a bold statement pot, and the pale metal suits almost every house colour, from red brick to white siding. Fill one large galvanized bucket with tall evergreen branches, add three birch logs for height and a few red berry picks for colour, and let the branches lean slightly outward so the whole pot reads full and generous. These christmas porch pots suit exposed porches.
You need: one large galvanized bucket, tall evergreen branches, three birch logs, red berry picks.
Time: 30 minutes / Difficulty: easy / Cost: about $15 to $25 approximate
Best for: front porch / Rental friendly: yes
Indoor. No top ranking competitor covers indoor planters, so this group fills that gap. Keep the branches tidy and the soil contained, because indoor light is lower and the air is warmer and drier.
6. Entryway Planter
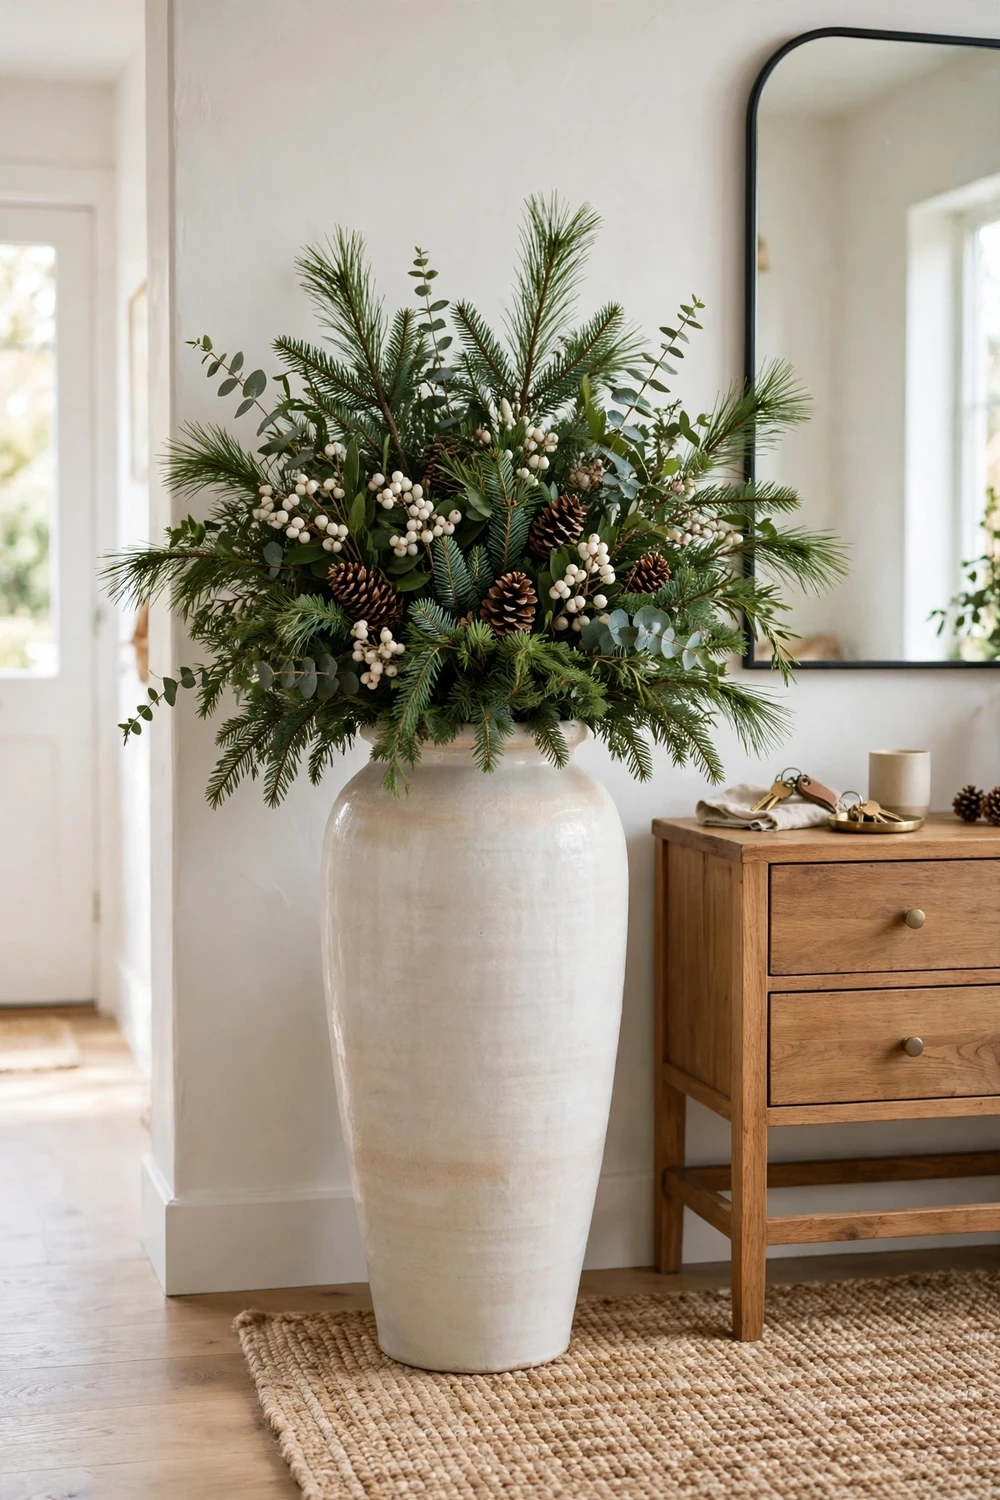
An entryway planter is the first thing guests see when the door opens, so it should be calm and full, not tall and spiky. Fill a tall ceramic urn with fir and cedar branches cut to just above the height of the console table, add white berries and pine cones for a soft look, and set the urn on a tray or a saucer so water never reaches the floor.
You need: one tall ceramic urn, fir and cedar branches, white berry picks, pine cones, a tray or saucer.
Time: 30 minutes / Difficulty: easy / Cost: about $15 to $25 approximate
Best for: entryway / Rental friendly: yes
7. Living Room Planter
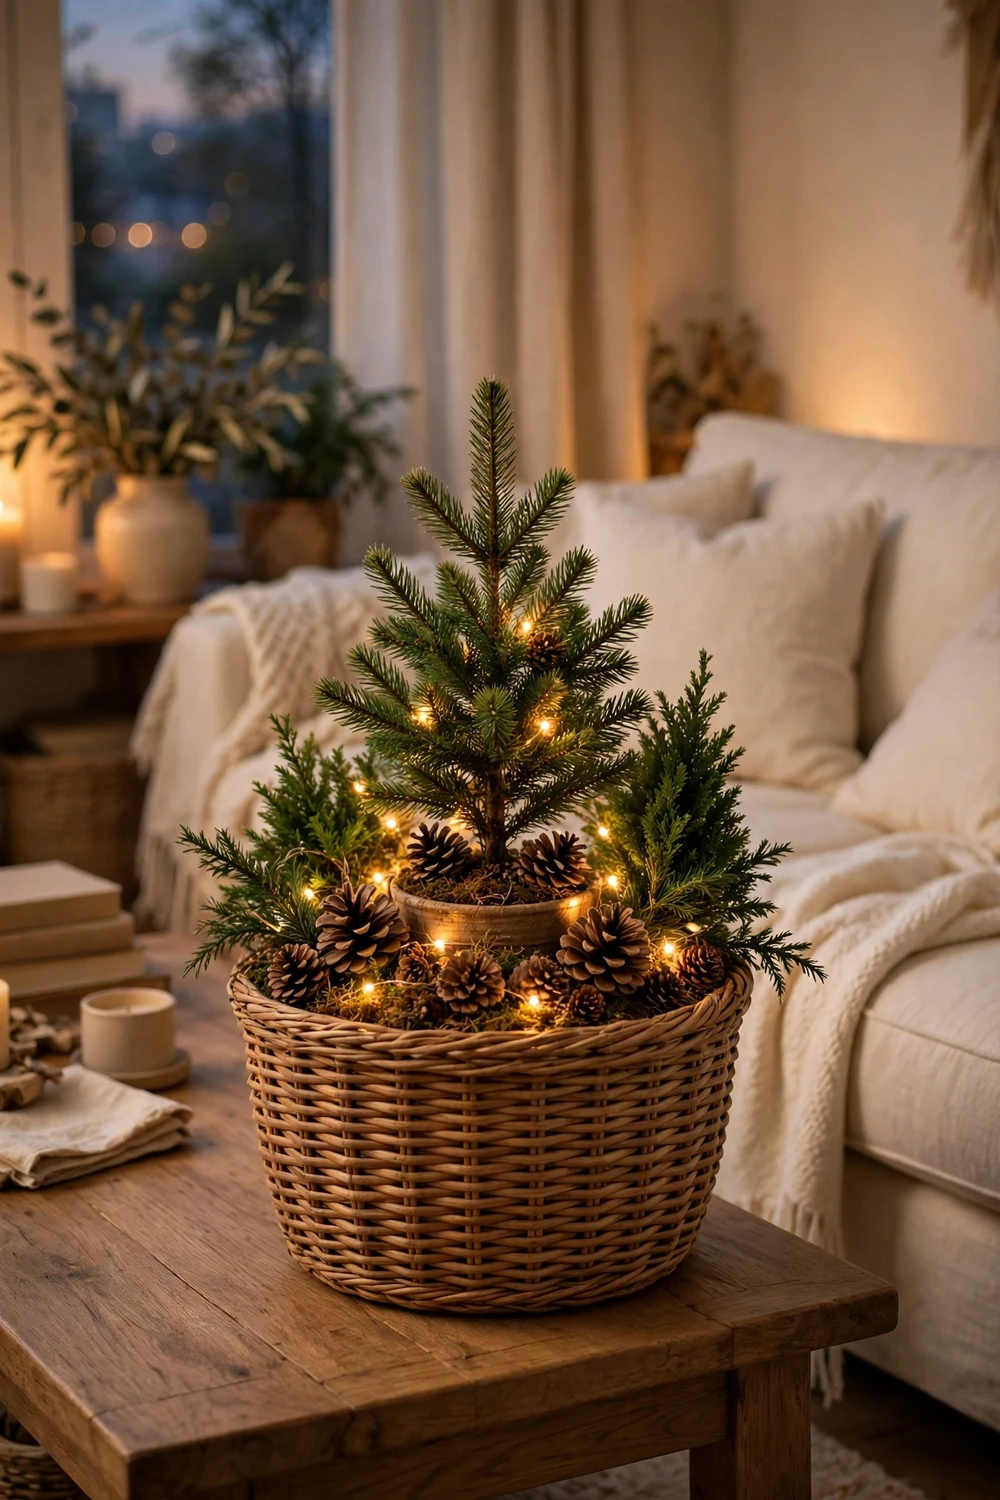
A living room planter in a woven basket brings the outdoors inside without making the room feel like a garden centre. Set a small potted evergreen inside a woven basket, line the basket with plastic first so water cannot soak through to the floor, and tuck pine cones and a short string of battery fairy lights around the base of the tree. The basket softens the pot, the lights warm the corner in the evening, and the whole piece can move to the dining room for a party and back again without a second thought. See our winter home decor ideas for the wider room picture.
You need: one small potted evergreen, one woven basket, plastic liner, pine cones, battery fairy lights.
Time: 20 minutes / Difficulty: easy / Cost: about $15 to $30 approximate
Best for: living room / Rental friendly: yes
8. Windowsill Planter
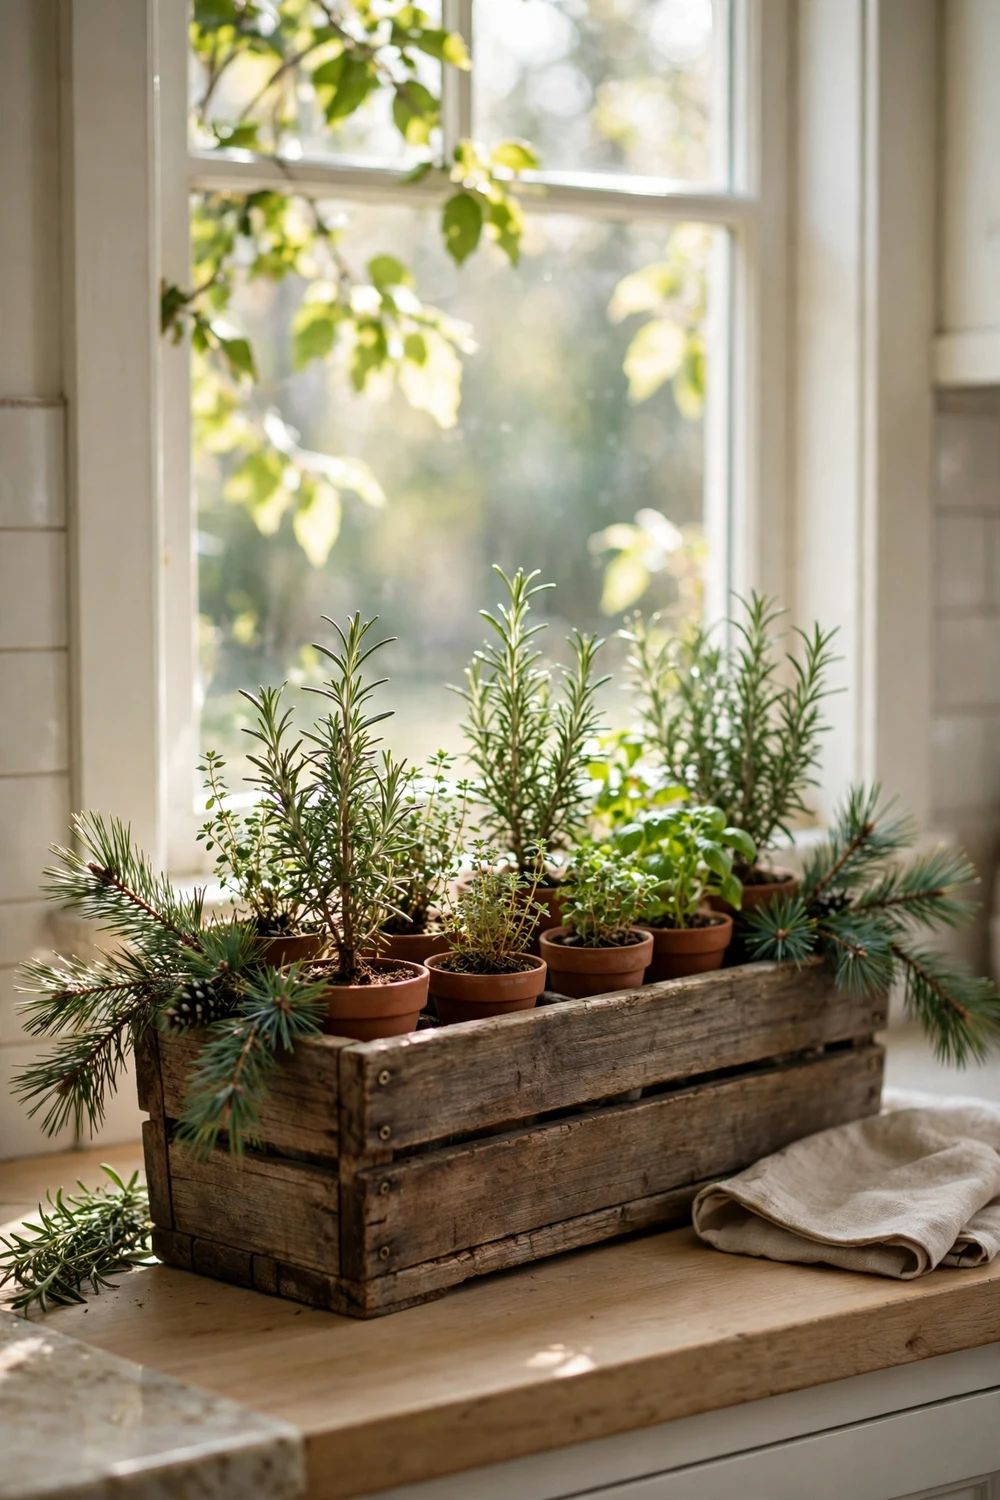
A windowsill planter is the smallest planter in this guide, and one of the most useful, because it gives you fresh scent and fresh herbs in the same pot. Fill a long low planter with small potted rosemary, thyme and pine sprigs, water it lightly once a week, and snip a sprig of rosemary for cooking whenever you need one.
You need: one long low planter, small potted rosemary and thyme, pine sprigs, potting soil.
Time: 20 minutes / Difficulty: easy / Cost: under $15 approximate
Best for: kitchen windowsill / Rental friendly: yes
9. Tabletop Planter
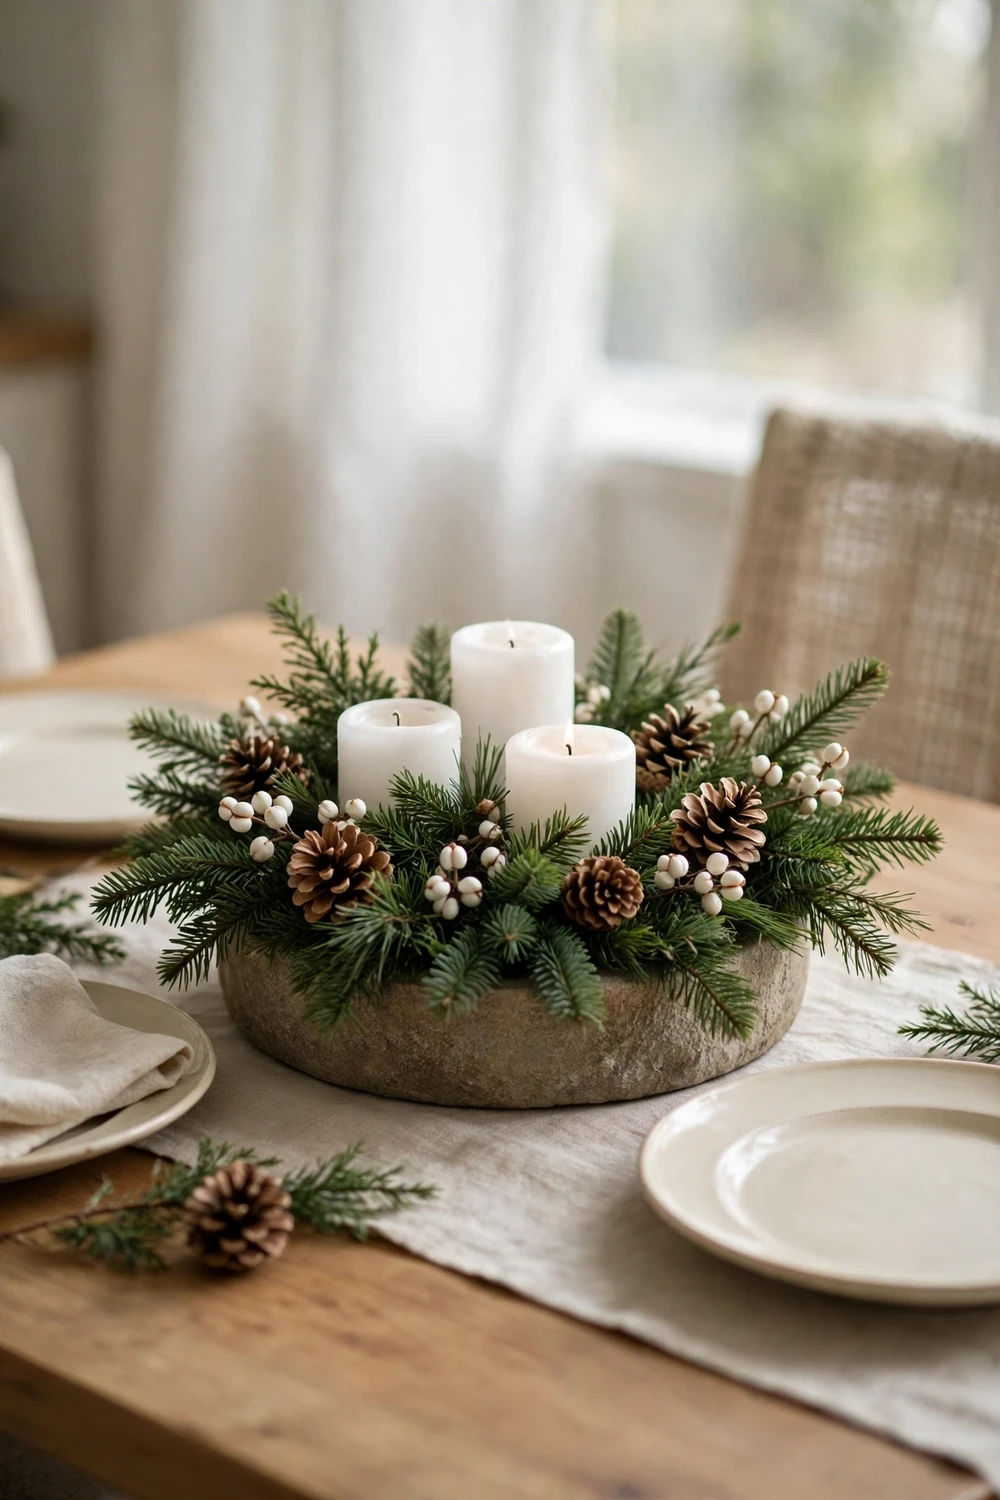
A tabletop planter is a centrepiece that does not block conversation, because it stays low and wide. Fill a low round bowl with evergreen sprigs, white berries and pine cones, set three short white candles in glass holders among the greenery, and keep the whole arrangement below eye level when seated, so guests can see each other across the table. Never leave lit candles unattended.
You need: one low round bowl, evergreen sprigs, white berry picks, pine cones, three candles in glass holders.
Time: 20 minutes / Difficulty: easy / Cost: under $15 approximate
Best for: dining table / Rental friendly: yes
10. Staircase Planter
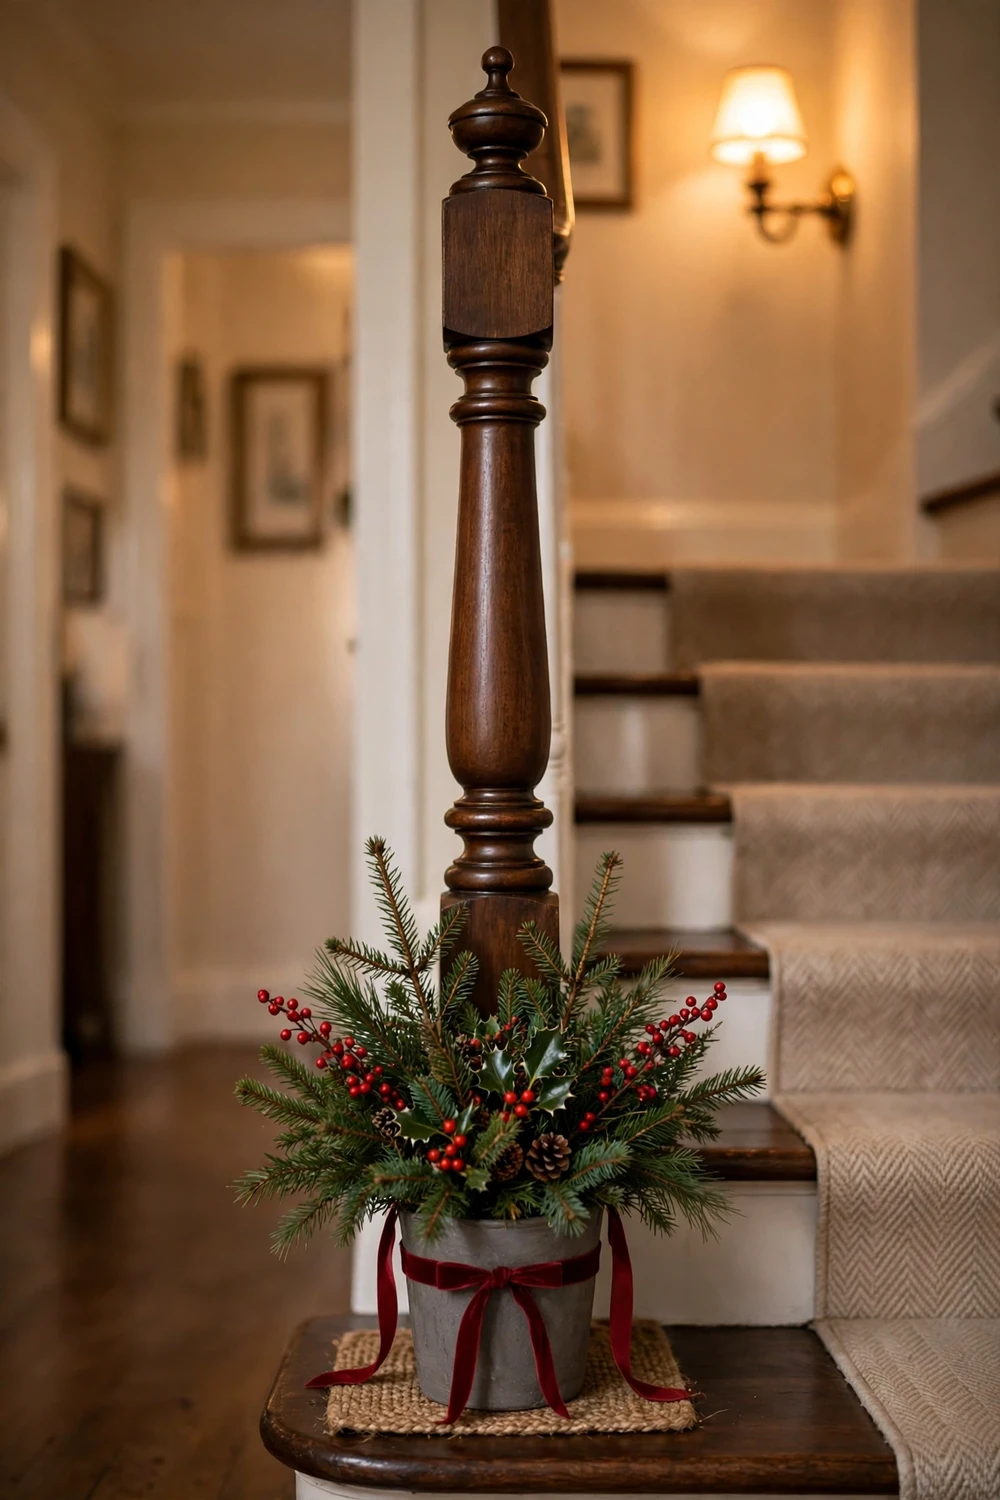
A staircase planter turns the newel post into a decoration without blocking the handrail or the stairs. Set a small heavy planter at the base of the newel post, fill it with short evergreen branches and red berries, and tie a wide red ribbon around the pot so it reads as part of the staircase, not as a pot that wandered in from the garden.
You need: one small heavy planter, short evergreen branches, red berry picks, wide red ribbon.
Time: 20 minutes / Difficulty: easy / Cost: under $15 approximate
Best for: staircase / Rental friendly: yes
DIY Builds. These five builds follow the step by step model of the best single tutorial in the search results, with a clear time, a clear skill level, and steps to follow in order. For more handmade pieces, our christmas wood crafts show how to make tealight holders, signs and small trees from simple pine and scrap wood.
11. Candy Cane Bucket Planters
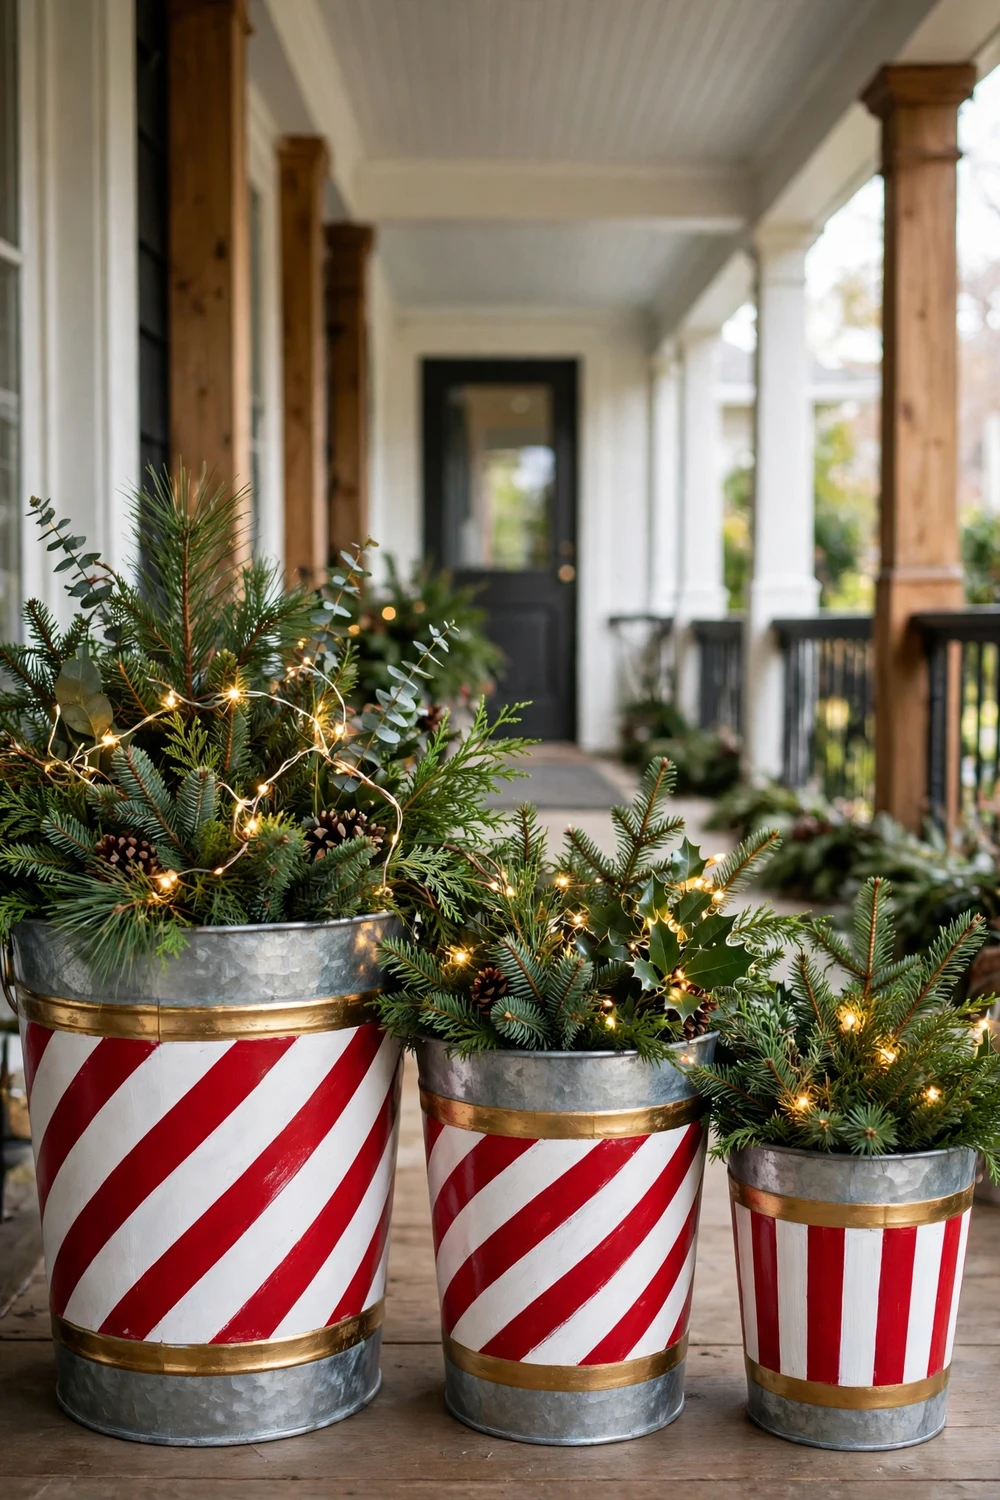
Start by cleaning three paint aisle buckets and painting them white, then tape diagonal stripes and paint every other stripe red, add a gold band near the rim of each bucket, and let the paint dry fully before you fill them. Then add a heavy filler to each bucket, stand evergreen branches in the middle, tuck berry picks and pine cones around the edges, and weave a short string of battery fairy lights through the branches.
You need: three buckets in three sizes, white and red outdoor paint, painter tape, gold paint, evergreen branches, berry picks, pine cones, battery fairy lights.
Time: 3 to 4 hours for the set of three / Difficulty: beginner / Cost: about $20 to $35 approximate
Best for: covered front porch / Rental friendly: yes
12. Wooden Crate Planters
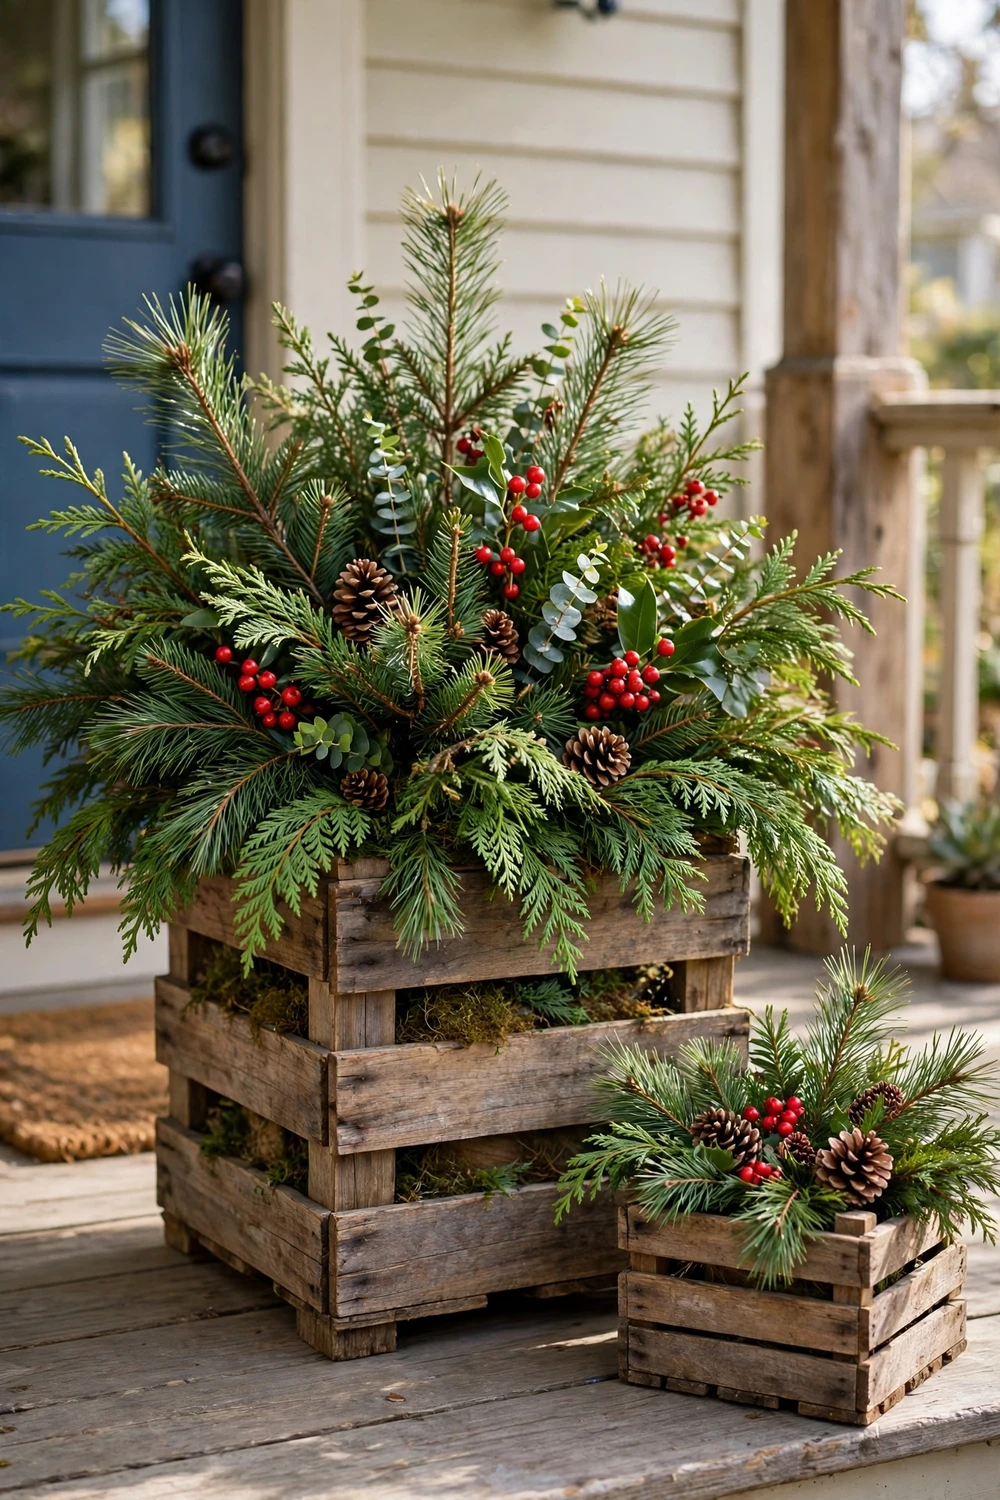
Start by lining a wooden crate with landscape fabric so soil and water stay inside, then add a plastic tray in the base to catch water, fill the crate with soil to about three quarters full, and stand evergreen branches in the middle with berry picks and pine cones around the edges. Sand any rough edges before you fill it, because a crate that splinters will catch every hand that lifts it, and set it on small feet or a tray so the base does not sit in a puddle after rain.
You need: one wooden crate, landscape fabric, one plastic tray, potting soil, evergreen branches, berry picks, pine cones.
Time: 1 hour / Difficulty: beginner / Cost: about $15 to $25 approximate
Best for: front porch / Rental friendly: yes
13. Woven Basket Planters
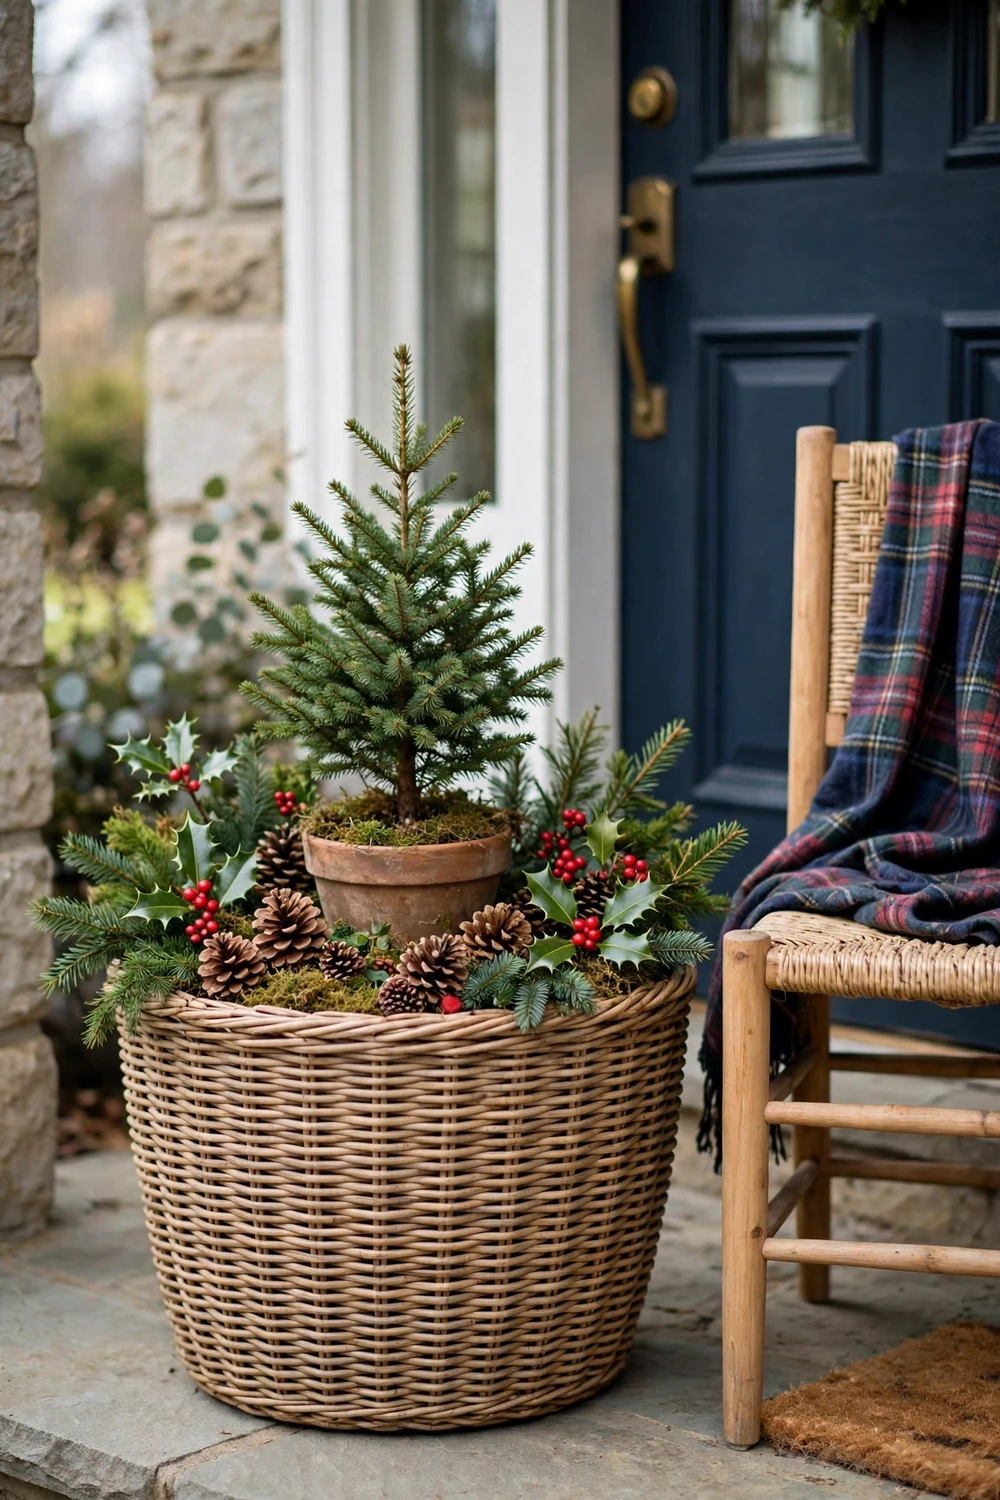
Start by lining a large woven basket with a plastic bag or a plant saucer so water cannot soak the weave, then set a potted evergreen inside the basket, pack the gap around the pot with moss or evergreen sprigs, and tuck red berries and pine cones around the base. Keep the basket under cover if you can, because a woven basket left in driving rain will stay damp and wear out fast, while the same basket on a covered porch lasts for years.
You need: one large woven basket, one small potted evergreen, plastic liner or saucer, moss or evergreen sprigs, red berry picks, pine cones.
Time: 30 minutes / Difficulty: beginner / Cost: about $15 to $25 approximate
Best for: covered front porch / Rental friendly: yes
14. Repurposed Tin Planters
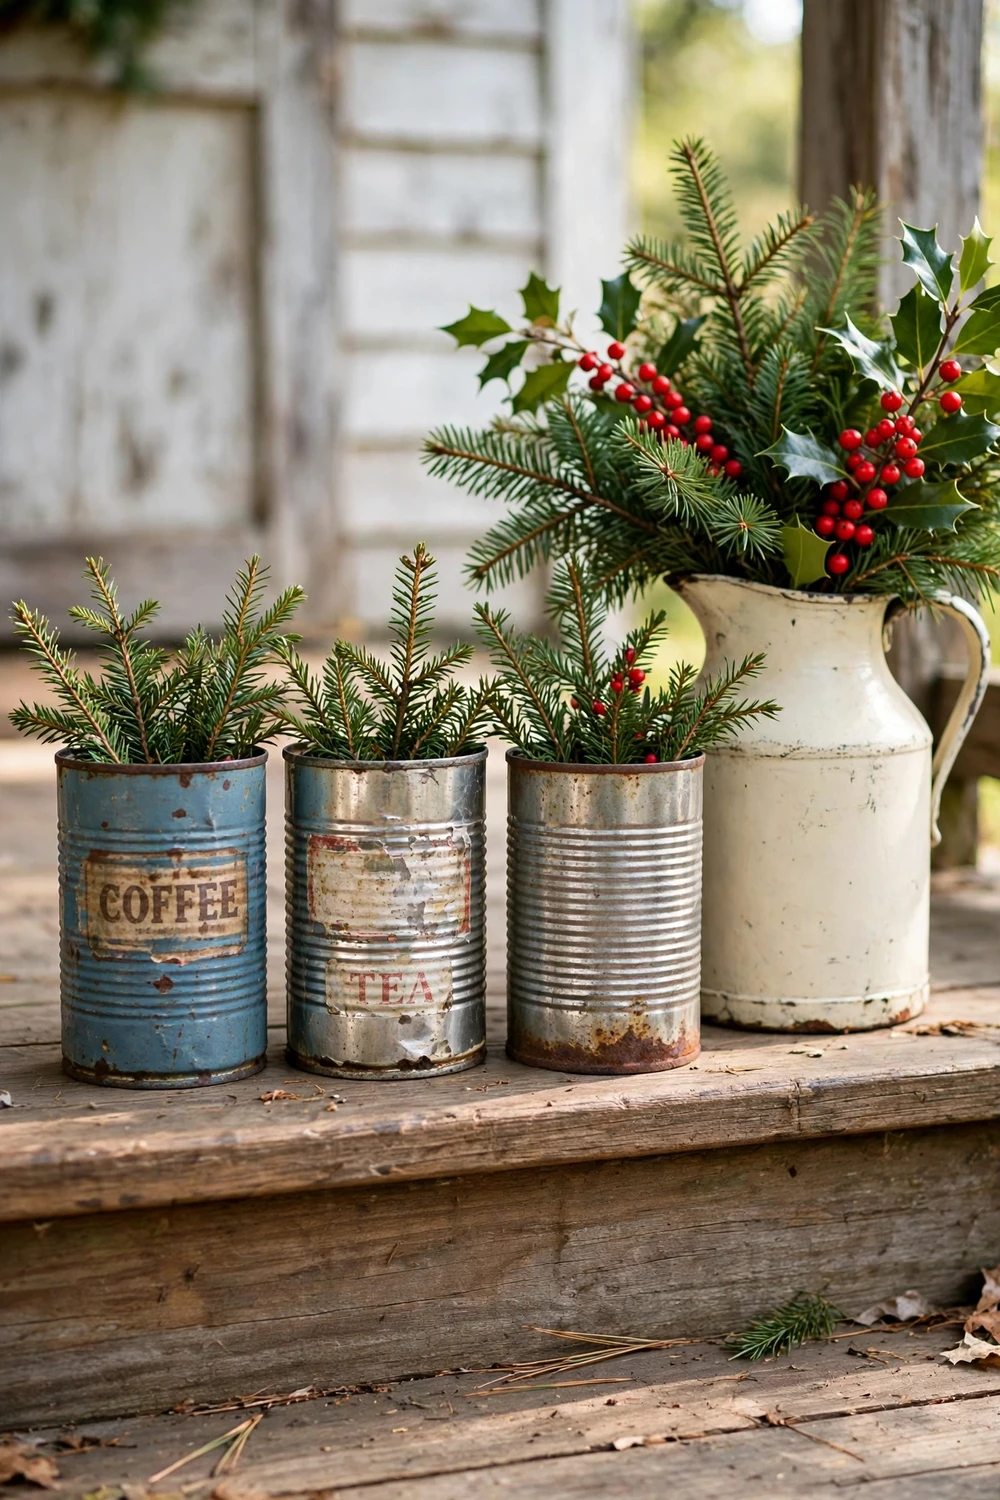
Start by cleaning three large tins and an old metal jug, drill drainage holes in the base of each one if you plan to use live plants, and paint the outside cream or leave the metal bare for a rustic look. Then fill each tin with soil or a heavy filler, stand a short evergreen sprig in the middle, add a red berry pick, and group the tins in odd numbers on a step or a table so they read as a set.
You need: three large clean tins and one old metal jug, a drill, outdoor paint, evergreen sprigs, red berry picks.
Time: 1 to 2 hours / Difficulty: beginner / Cost: under $10 approximate
Best for: porch steps and tables / Rental friendly: yes
15. Painted and Wrapped Pots
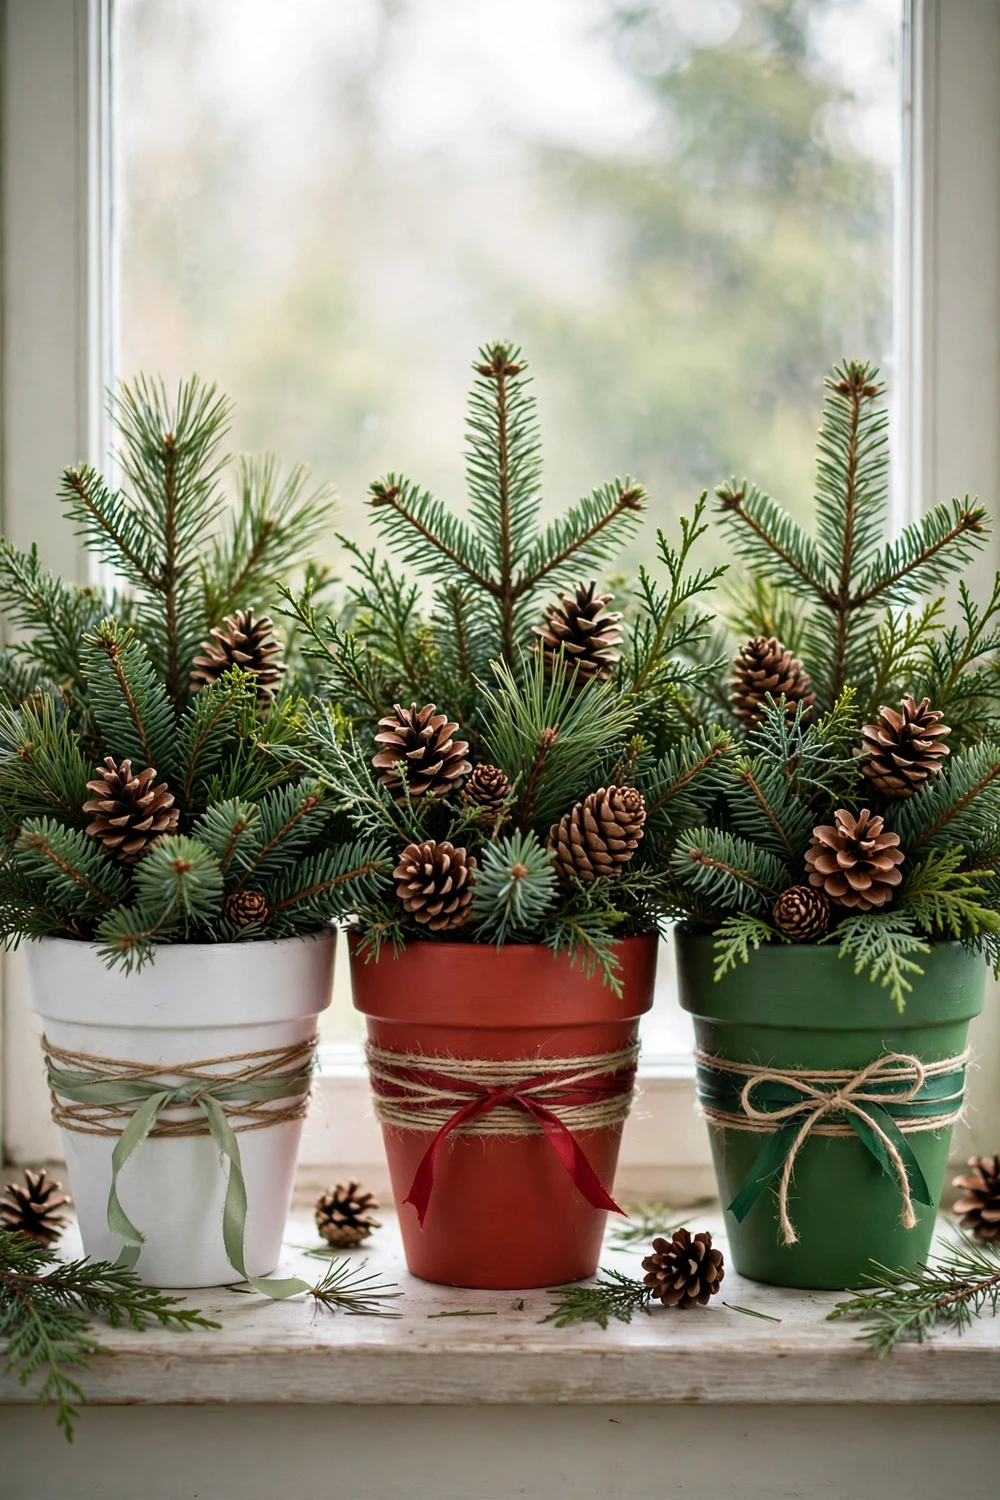
Start by cleaning three terracotta pots and painting them white, red and green with outdoor paint, let them dry fully, then wrap twine around the rim of one, tie a ribbon bow around the second, and leave the third plain so the set does not look overdone. Then fill each pot with evergreen branches and pine cones, and group them on a windowsill or a table where the paint can be seen up close.
You need: three terracotta pots, outdoor paint in white red and green, twine, ribbon, evergreen branches, pine cones.
Time: 1 to 2 hours plus drying time / Difficulty: beginner / Cost: about $10 to $20 approximate
Best for: windowsill and table / Rental friendly: yes
By Container. If you already own a container you love, start here. These christmas urn fillers are the heart of the guide, because the container decides the shape of the greenery.
16. Christmas Urn Fillers
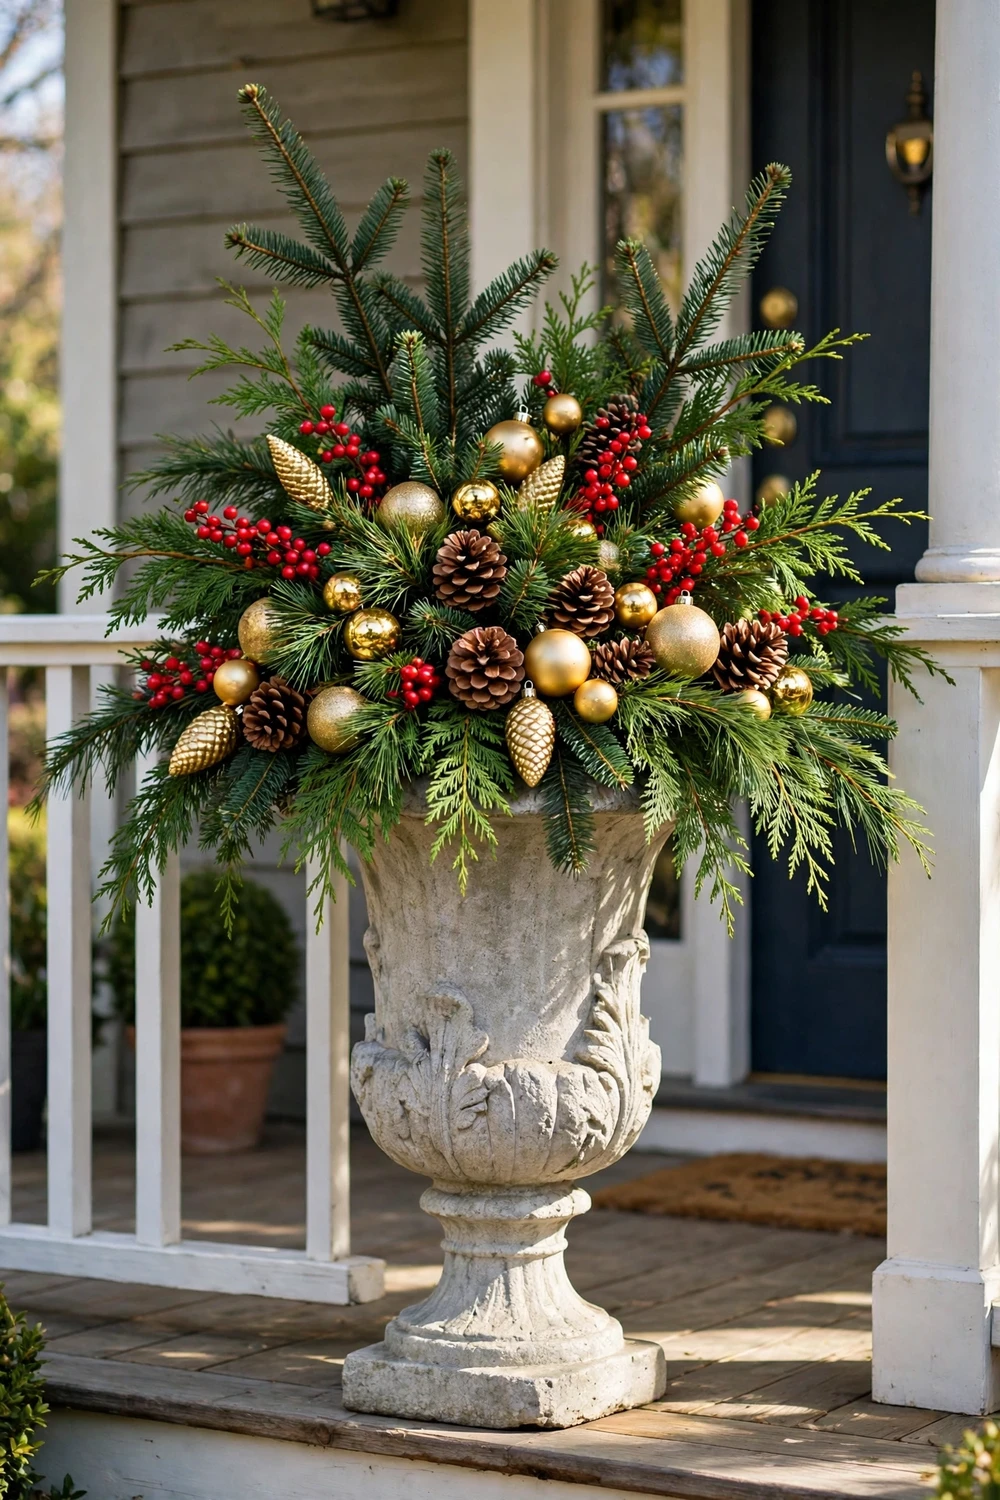
Christmas urn fillers are the tallest and most dramatic look in this guide, and they follow the classic thriller filler spiller recipe, one tall branch in the middle, full branches around it, and a little greenery spilling over the rim. Start with one tall fir branch as the thriller, add cedar and pine branches around it as the filler, tuck red berries and pine cones into the gaps, and finish with two or three gold ornaments near the front so the urn catches the light.
You need: one tall stone urn, one tall fir branch, cedar and pine branches, red berry picks, pine cones, gold ornaments.
Time: 45 minutes / Difficulty: easy / Cost: about $20 to $35 approximate
Best for: front porch / Rental friendly: yes
17. Window Box Evergreen
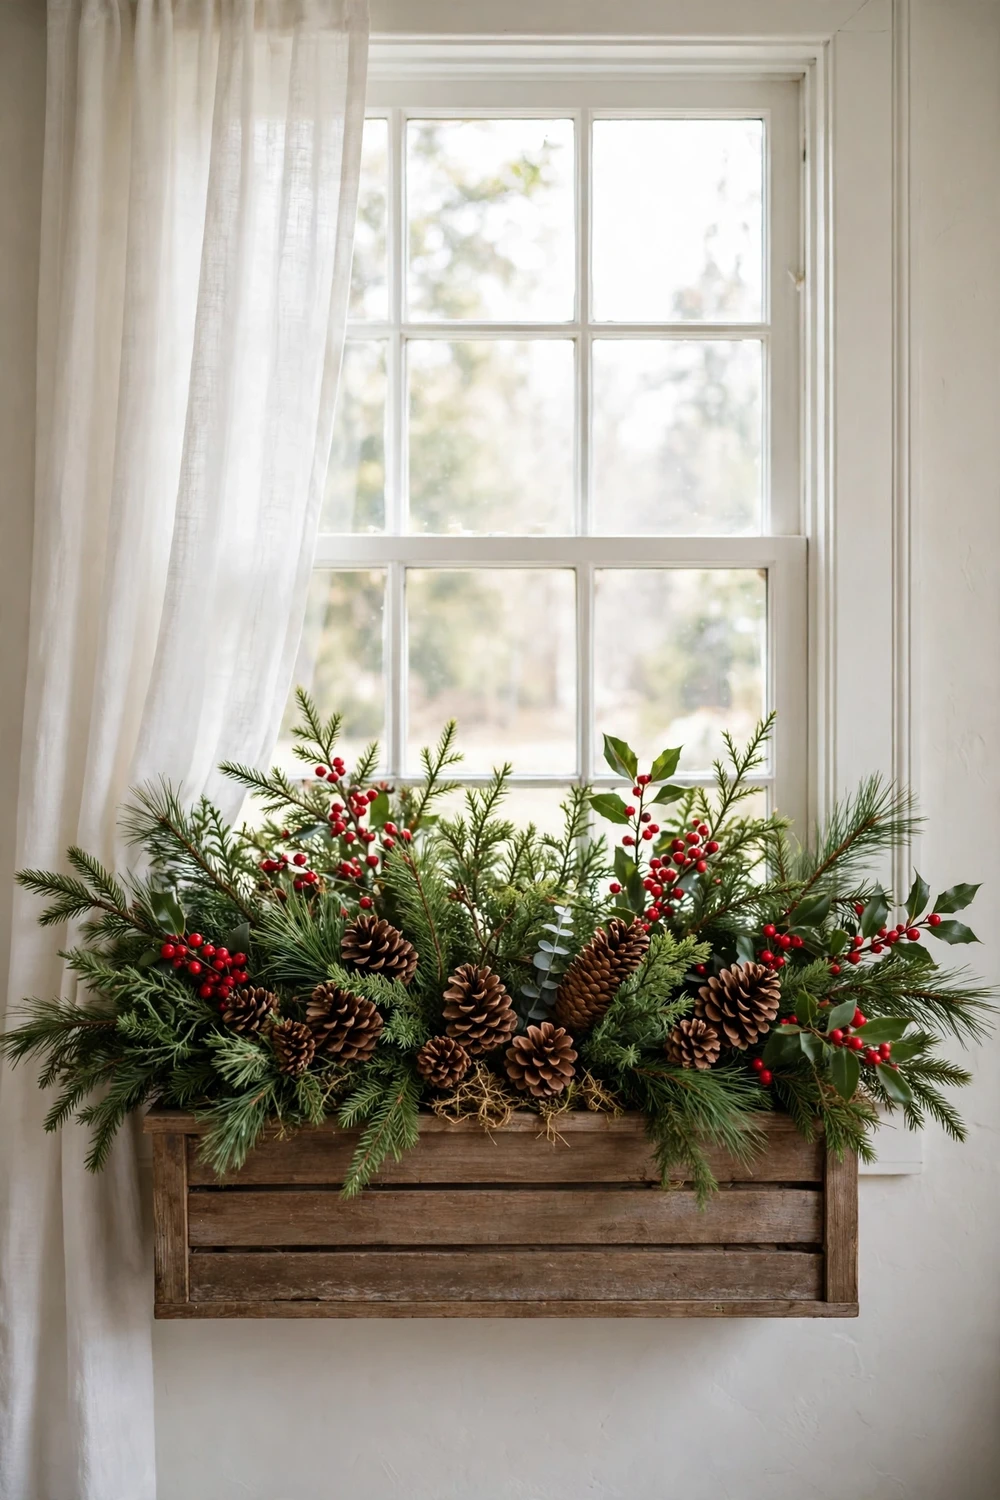
A window box evergreen display frames the window from outside and gives the room a green view from inside, so it works twice. Fill a wooden window box with short evergreen branches laid flat along the box, tuck red berries and pine cones between them, and add a few upright sprigs at the ends so the box looks full from the street.
You need: one wooden window box, short evergreen branches, red berry picks, pine cones, fixings for the box.
Time: 45 minutes / Difficulty: easy / Cost: about $15 to $25 approximate
Best for: windows / Rental friendly: no
18. Hanging Basket Planter
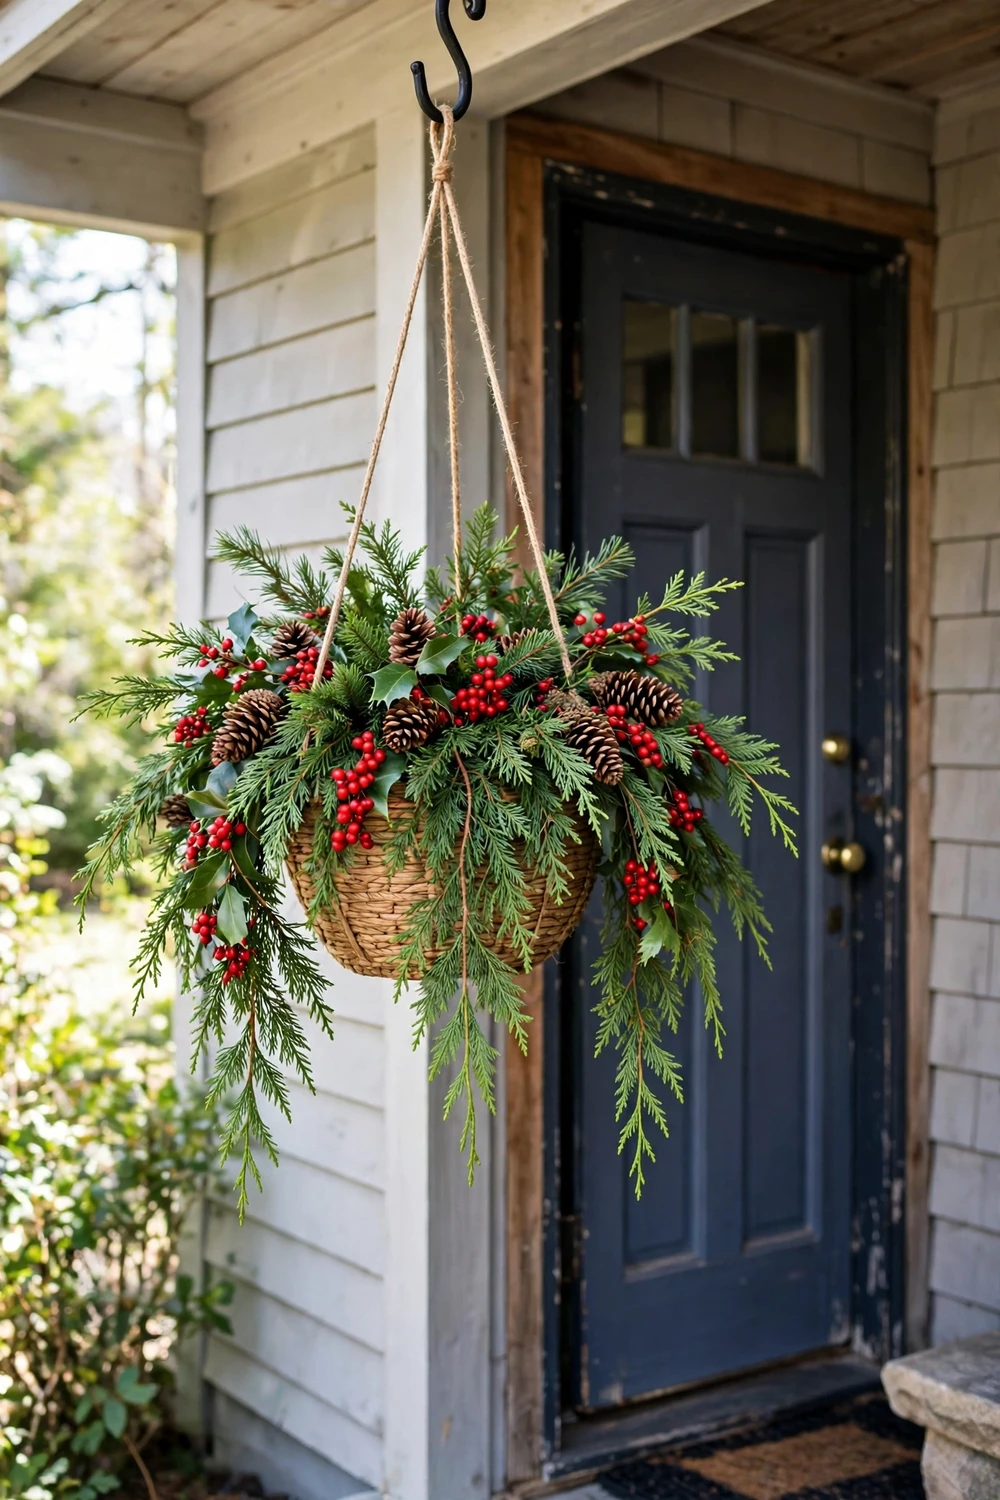
A hanging basket planter uses the air above the porch, which is often the only free space on a small porch. Fill a hanging basket with trailing evergreen branches that spill over the edge, tuck red berries and pine cones into the top, and hang it from a sturdy hook at a height where visitors will not walk into it.
You need: one hanging basket, trailing evergreen branches, red berry picks, pine cones, a sturdy hook.
Time: 30 minutes / Difficulty: easy / Cost: about $10 to $20 approximate
Best for: porch and balcony / Rental friendly: yes
19. Barrel and Tub Planter
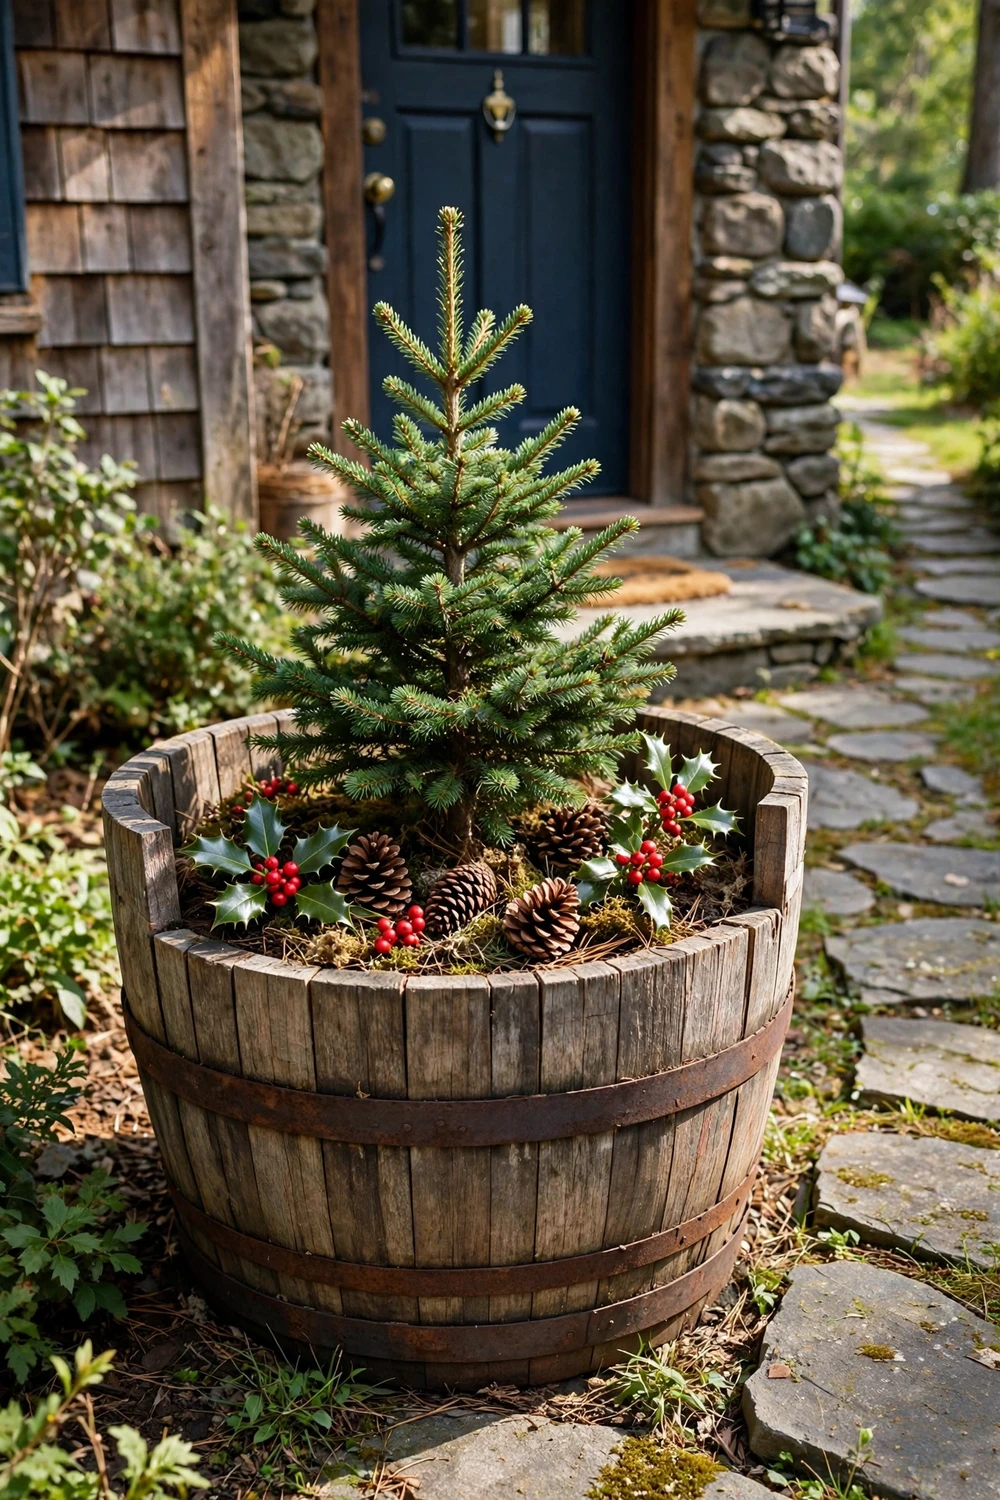
A barrel or tub planter is the largest container in this guide, and it suits a wide entrance where a small pot would look lost. Fill a wooden half barrel with soil, plant a small evergreen tree in the middle, and tuck red berries and pine cones around the base so the soil is hidden and the tree looks settled.
You need: one wooden half barrel, one small evergreen tree, potting soil, red berry picks, pine cones.
Time: 1 hour / Difficulty: easy / Cost: about $25 to $40 approximate
Best for: house entrance / Rental friendly: yes
20. Wall Planter by the Door
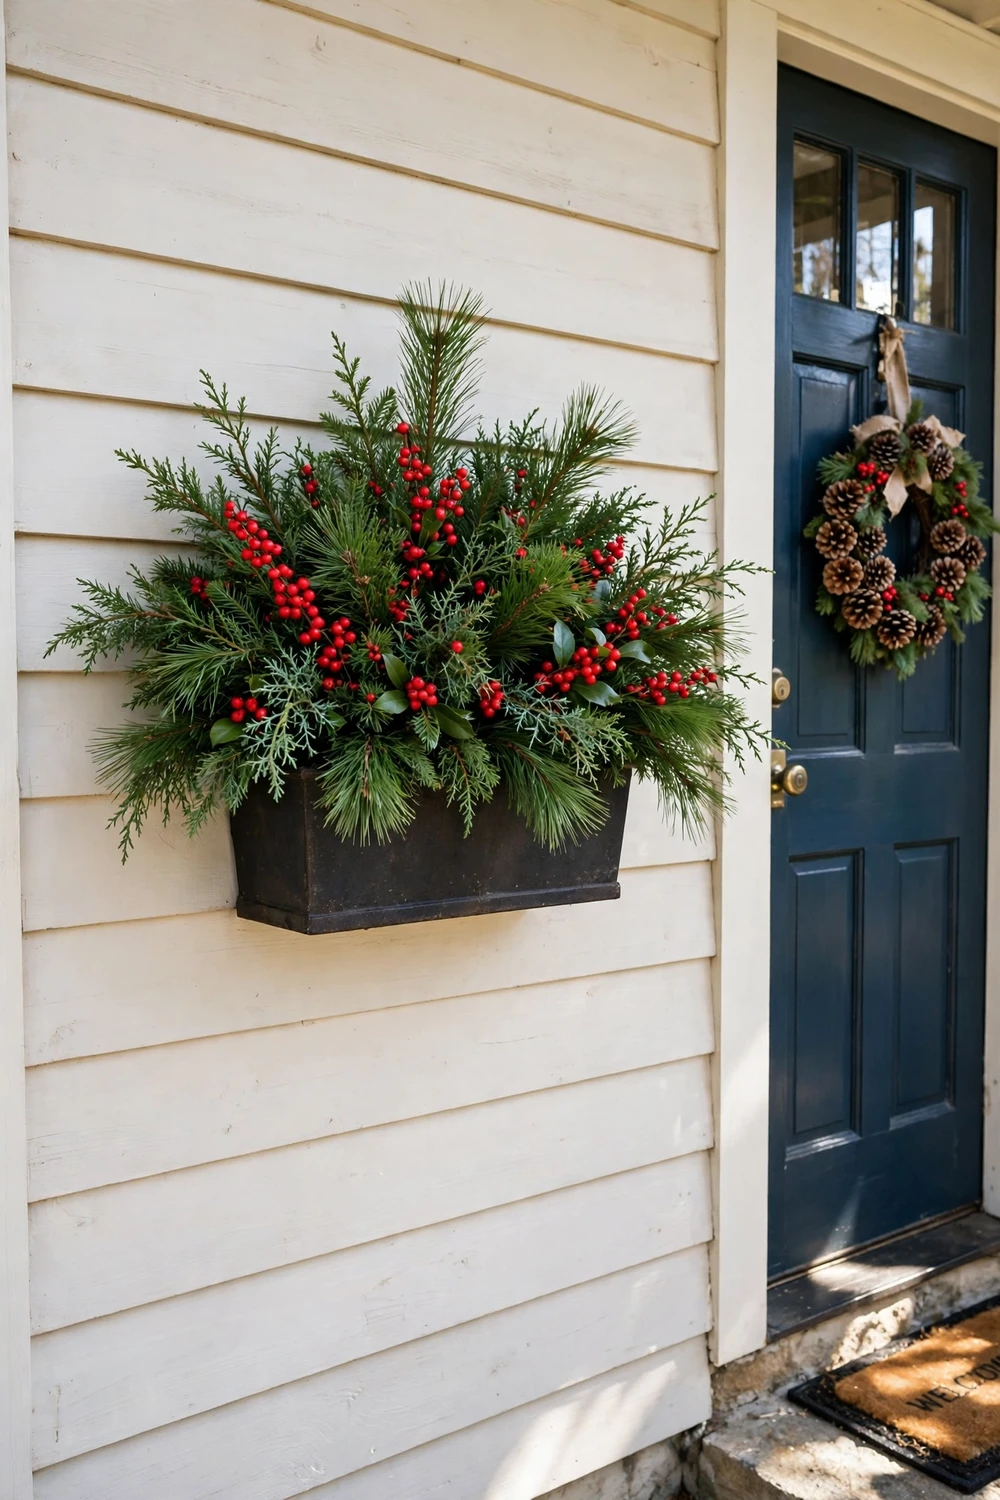
A wall planter by the door dresses a blank wall without taking up any floor space, which makes it ideal for a narrow porch. Fix a wall planter firmly beside the door, fill it with short evergreen sprigs and red berries, and add a small pine cone wreath above it so the wall reads as a finished display instead of a single pot on a wall.
You need: one wall planter, short evergreen sprigs, red berry picks, one small pine cone wreath, wall fixings.
Time: 45 minutes / Difficulty: easy / Cost: about $15 to $25 approximate
Best for: narrow porch / Rental friendly: no
Small Space and Balcony. Balcony planters are the gap only one ranking page covers well. The rule here is one pot that fits, greenery that stays compact, and a fixing that cannot fall.
21. Railing Planter
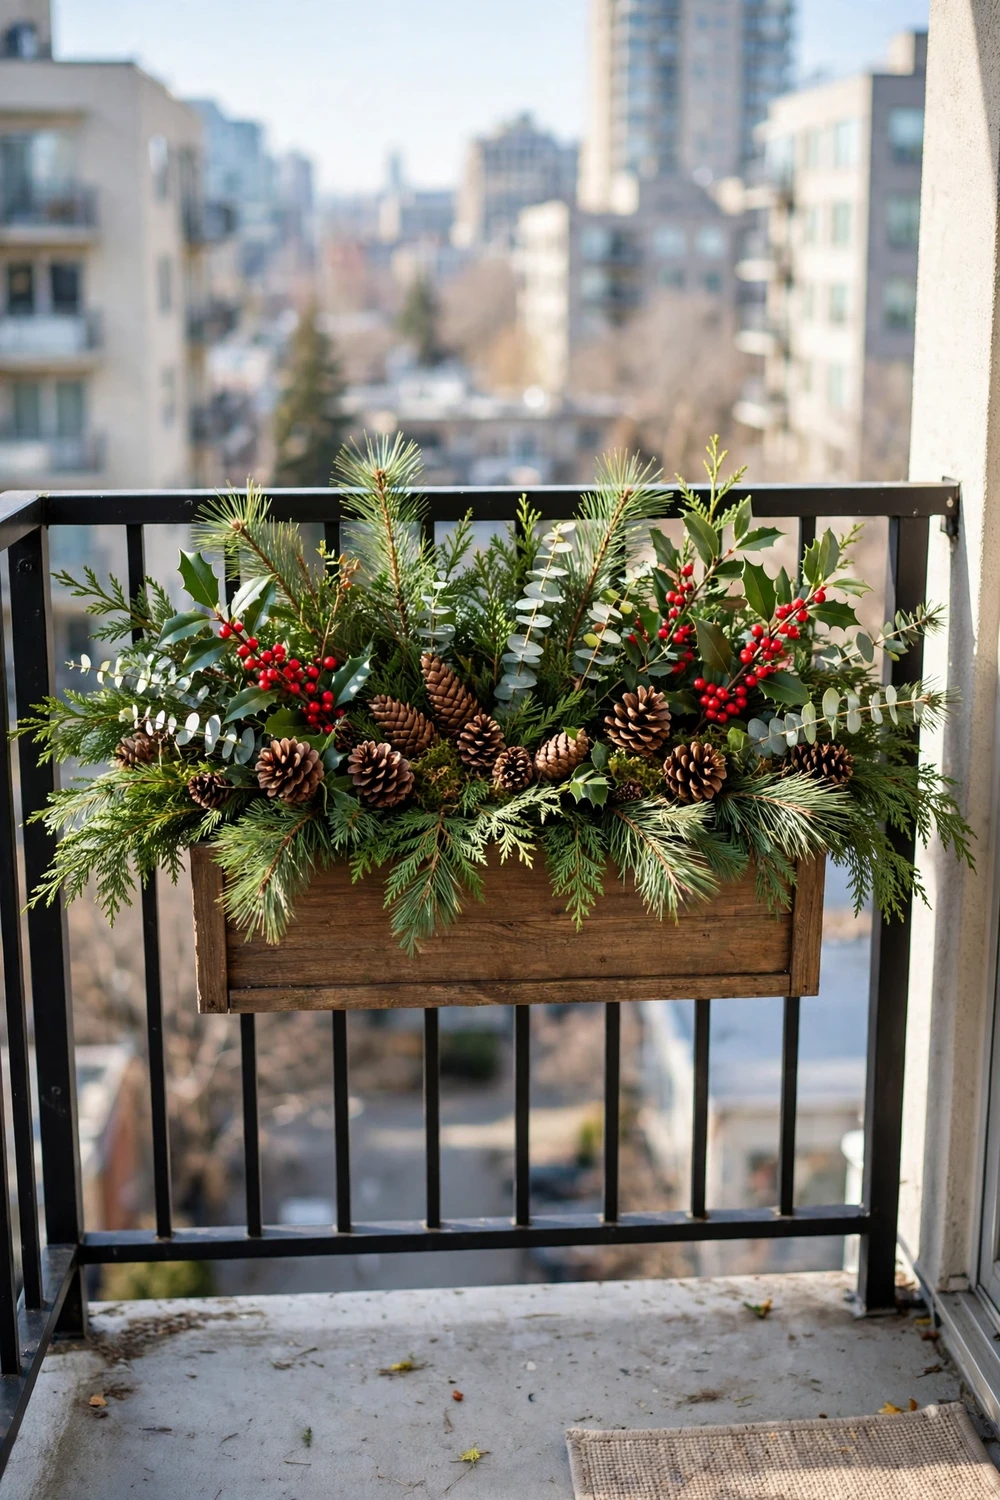
A railing planter turns the balcony rail into a garden, and it leaves the floor free for a chair and a cup of tea. Fix a railing planter box firmly to the inside of the rail, fill it with short evergreen branches and red berries, and keep the tallest branches below the top of the rail so wind cannot catch them and lever the box off its fixings. Use the inside of the rail, not the outside.
You need: one railing planter box, short evergreen branches, red berry picks, pine cones, rail fixings.
Time: 30 minutes / Difficulty: easy / Cost: about $15 to $25 approximate
Best for: balcony / Rental friendly: yes
22. Narrow Pot on a Balcony
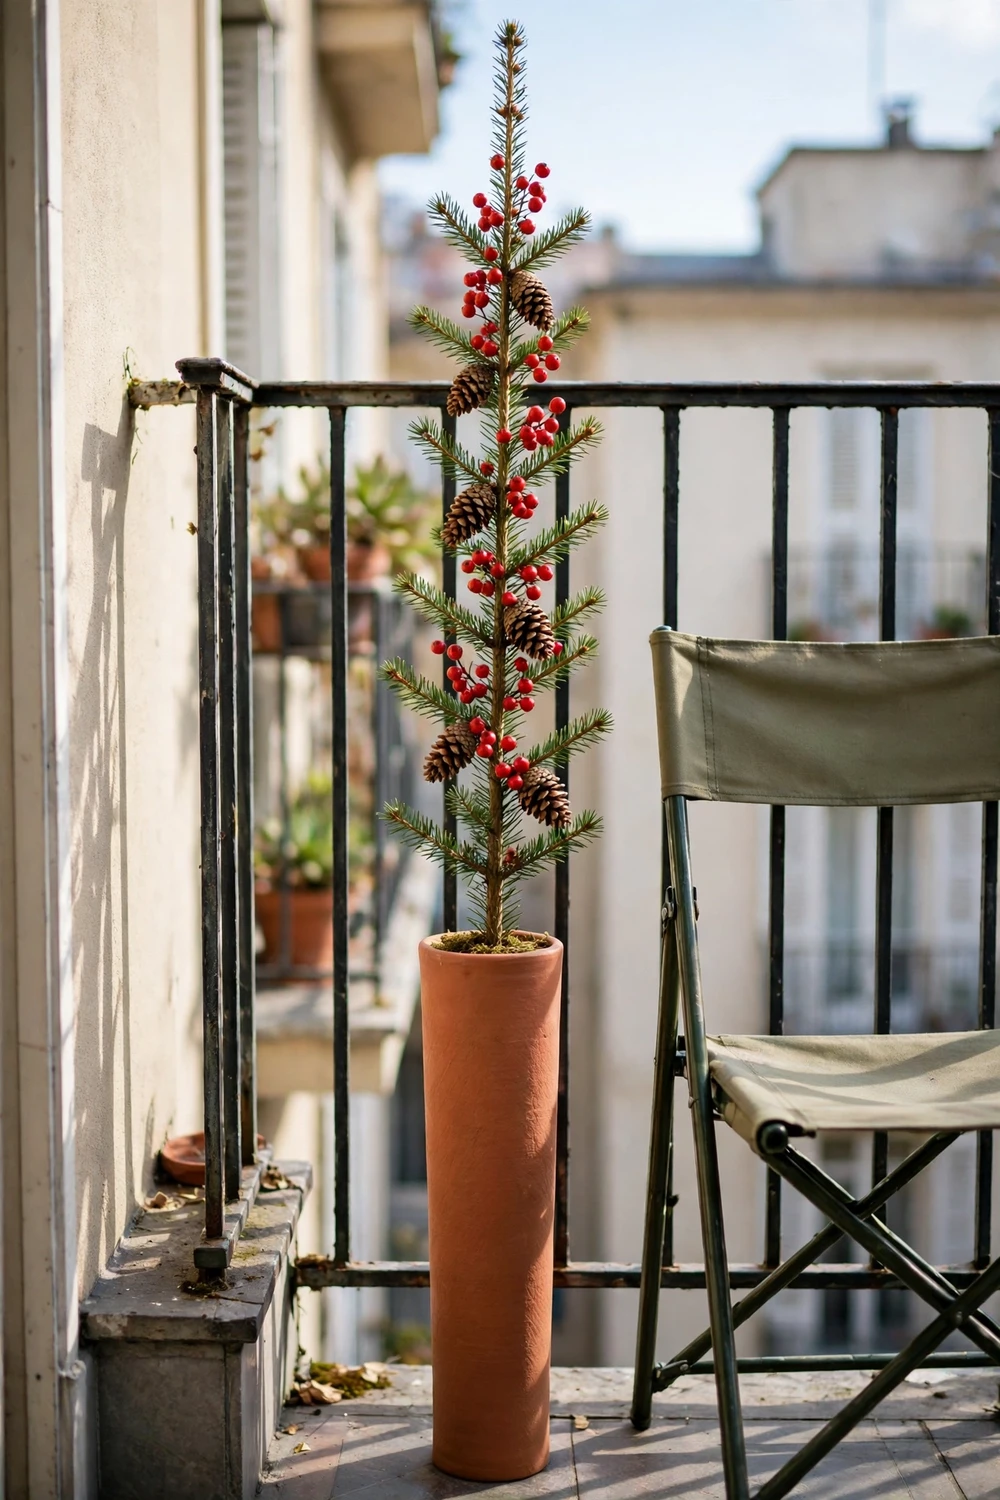
A tall narrow pot is the right shape for a balcony corner, because it gives you height without taking up floor space. Fill one tall narrow pot with a heavy filler at the base, stand a single upright evergreen stem in the middle, and tuck red berries and pine cones around the base so the pot looks full from the top.
You need: one tall narrow pot, heavy filler, one upright evergreen stem, red berry picks, pine cones.
Time: 20 minutes / Difficulty: easy / Cost: under $15 approximate
Best for: balcony corner / Rental friendly: yes
23. One Pot Mini Planter
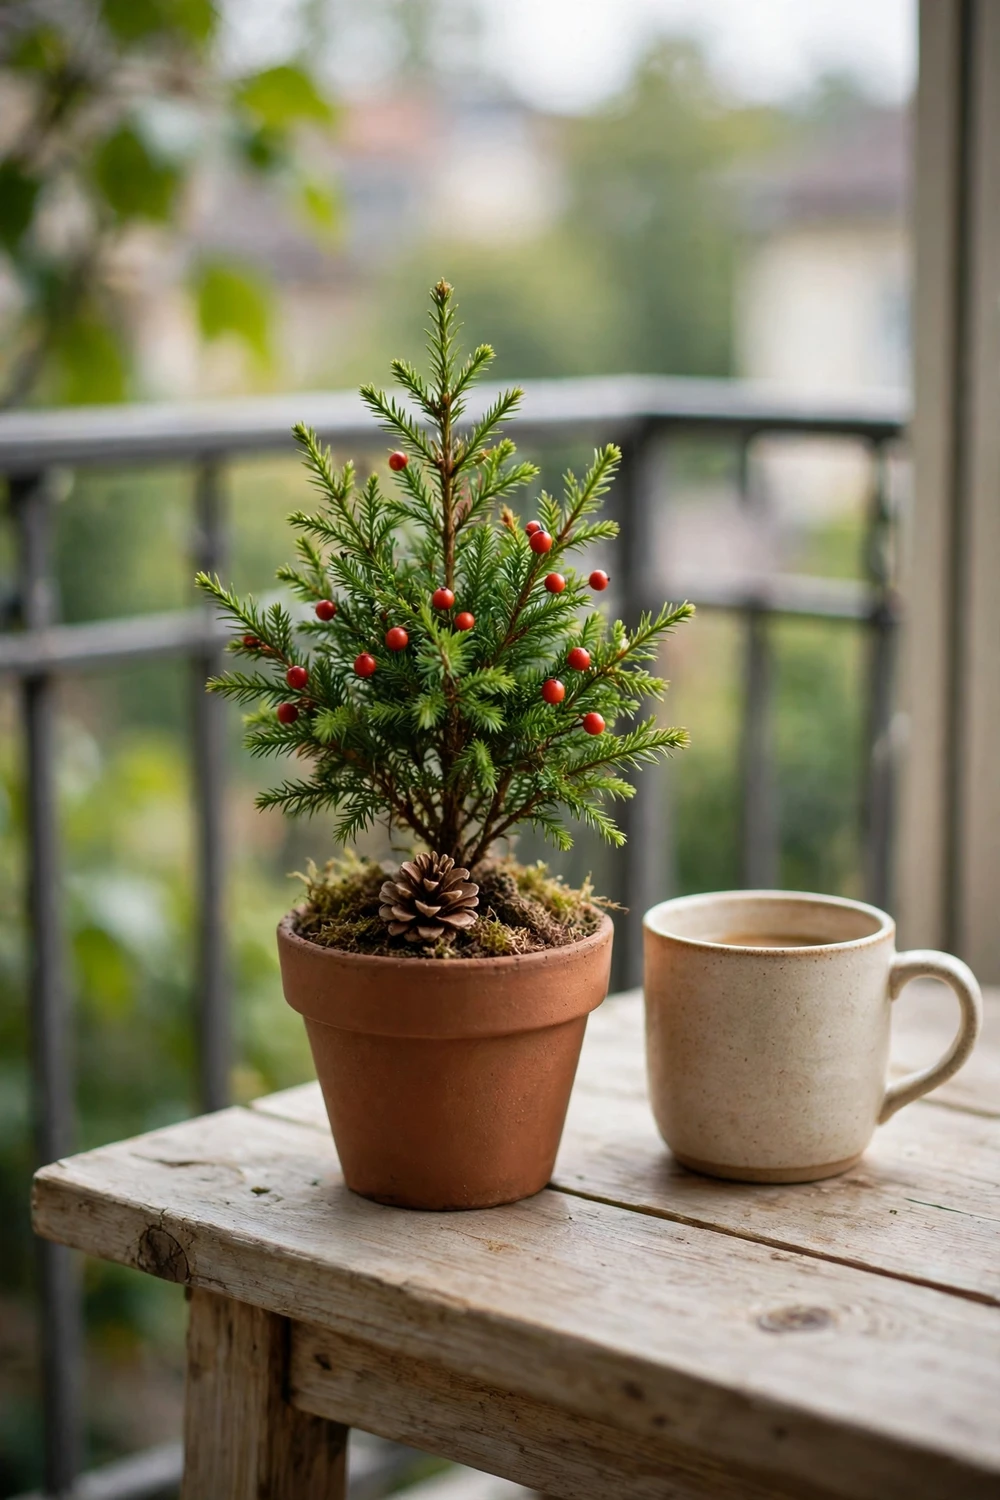
A one pot mini planter is the smallest idea in this guide, and it proves that a single pot can still feel like Christmas. Fill one small pot with a miniature evergreen, add two tiny red berry picks and one small pine cone, and set it on a balcony table or a windowsill where you will see it every morning.
You need: one small pot, one miniature evergreen, two tiny red berry picks, one small pine cone.
Time: 10 minutes / Difficulty: easy / Cost: under $10 approximate
Best for: balcony table and windowsill / Rental friendly: yes
24. Vertical Planter on a Wall
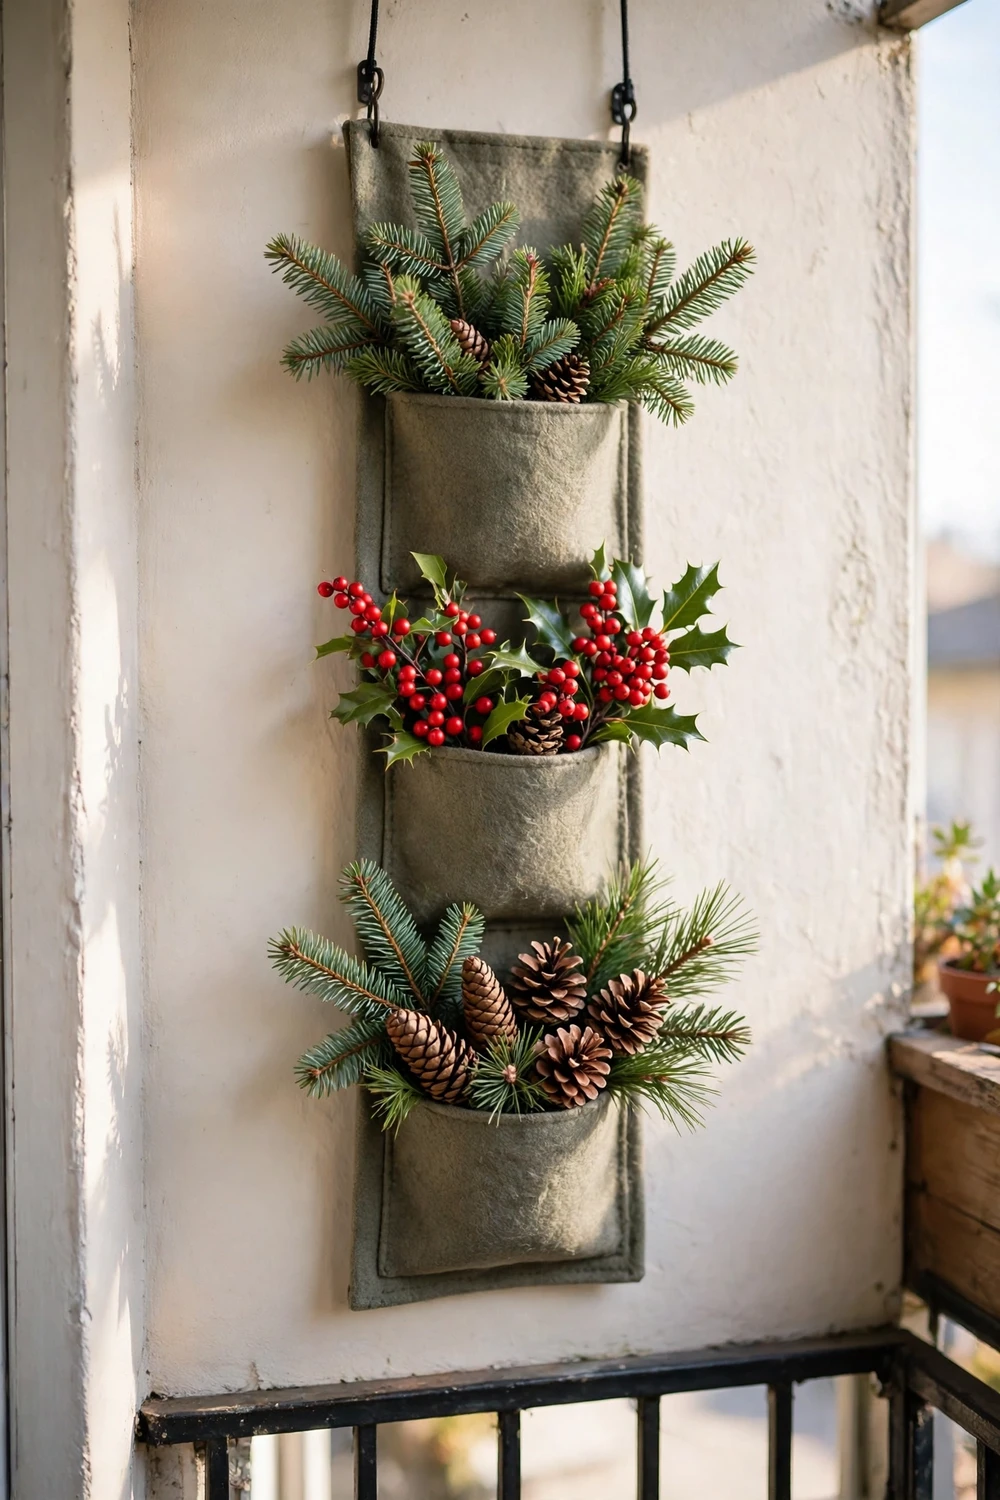
A vertical planter turns a blank balcony wall into a garden without using any floor at all. Fix a vertical planter with three pockets to the wall, fill each pocket with evergreen sprigs, red berries and a pine cone, and keep the top pocket lighter than the bottom two so the whole panel stays balanced.
You need: one vertical planter with three pockets, evergreen sprigs, red berry picks, pine cones, wall fixings or a freestanding frame.
Time: 45 minutes / Difficulty: easy / Cost: about $15 to $25 approximate
Best for: balcony wall / Rental friendly: yes
25. Door Basket Planter
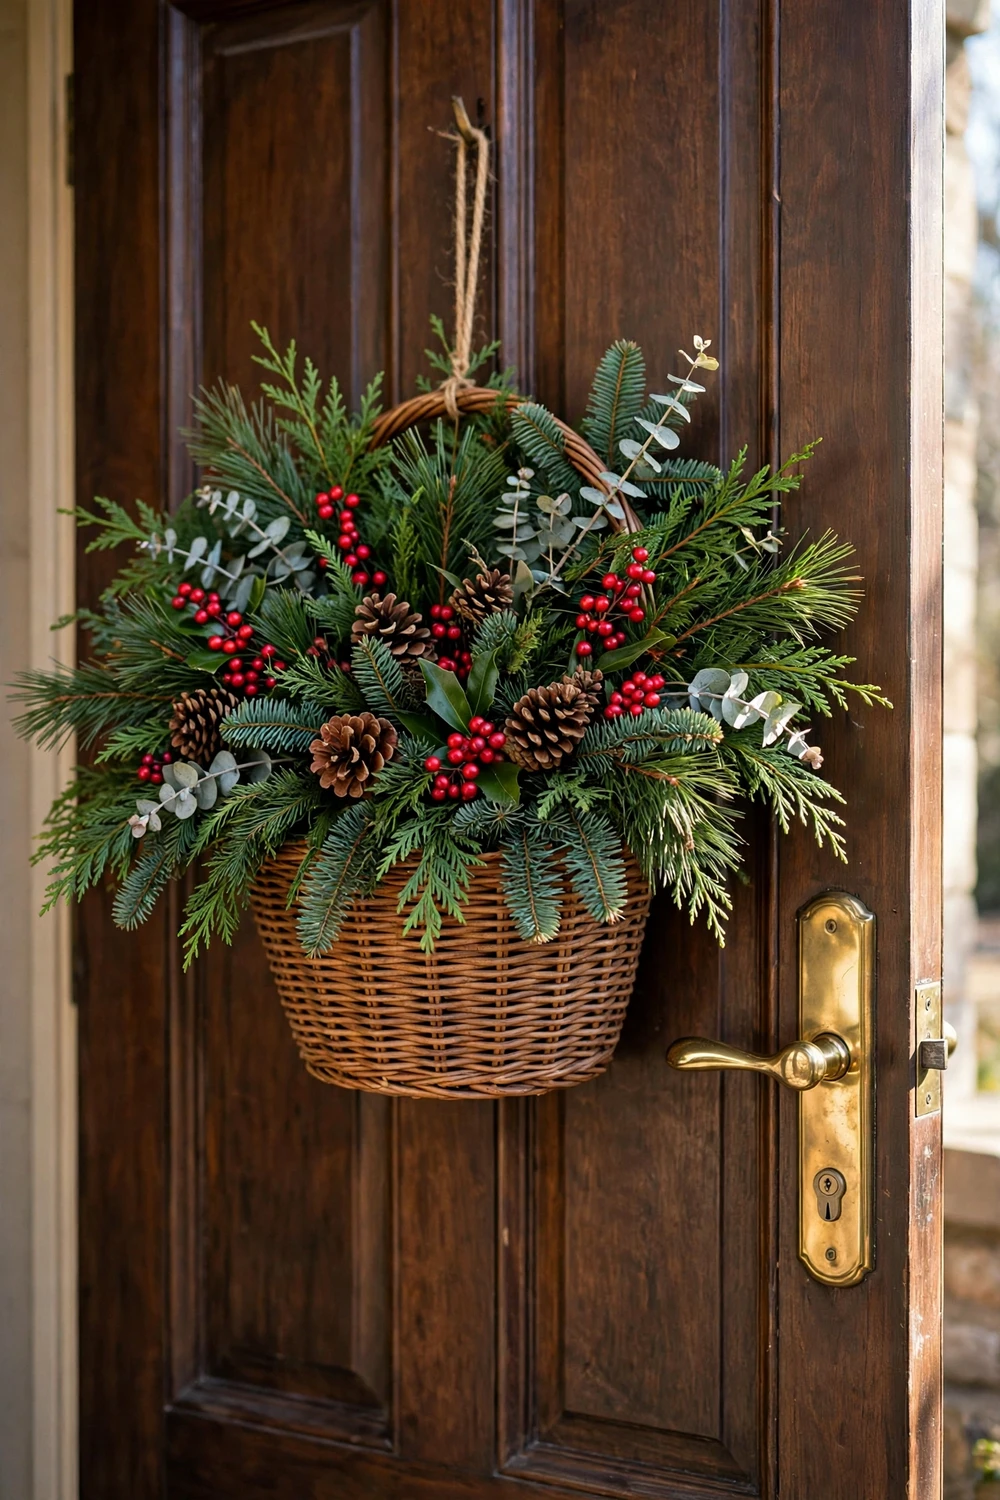
A door basket planter is the simplest balcony and front door idea in this guide, because it hangs from a hook and needs no floor, no wall, and no table. Hang a woven door basket from a sturdy door hook, fill it with short evergreen branches and red berries, and add two pine cones at the front so the basket looks full from the street.
You need: one woven door basket, one sturdy door hook, short evergreen branches, red berry picks, pine cones.
Time: 15 minutes / Difficulty: easy / Cost: under $15 approximate
Best for: front door and balcony door / Rental friendly: yes
How to Fill a Christmas Planter Step by Step
The method has a simple name, thriller filler spiller, and it describes the three jobs the greenery has to do. The thriller is one tall branch in the middle for height, the filler is a ring of full branches around it for body, and the spiller is a little greenery that falls over the rim and softens the edge of the pot.
Start with a lightweight filler in the base, because a planter filled with soil from bottom to top is far heavier than it needs to be. Use crumpled plastic bottles, foam blocks, or upside down nursery pots, then lay landscape fabric over the filler so soil cannot fall through the gaps. Add soil on top to a depth of about 12 inches, which gives the stems enough depth to stand firm.
Push the thriller branch into the soil in the middle first, and press the soil firm around its base. Add the filler branches around it, turning the pot as you go, so it looks full from every side. Tuck the spiller branches last, low around the rim, and finish with pine cones, berry picks and ornaments. Water well before the first hard frost, so the stems freeze in place and the soil sets solid around them.
Best Greenery and Plants for Christmas Planters
Fresh evergreen branches are the heart of most christmas planter ideas, and the best mix uses three textures, not one. Fir gives soft full branches, pine gives long needles and a strong scent, and cedar gives flat sprays that fill gaps and catch the light. Boxwood adds small neat leaves, holly adds glossy leaves and red berries, and red twig dogwood adds bare red stems that lift a green planter. Buy the branches fresh at a tree lot if you can.
Live plants need a different check from cut branches, because a live plant has to survive the winter in its pot, not just look good for a month. The rule is simple, a plant rated for your zone should be rated two zones colder when grown in a pot, because pots freeze harder than the ground, and a plant that survives in the garden may die in a pot on the same porch.
The table below gives only the hardiness figures the sources actually give, and it gives no figure where no source gives one.
| Plant | Hardiness the sources give |
|---|---|
| Dwarf balsam fir | Hardy to minus 40 degrees Fahrenheit |
| Japanese skimmia | Hardy to 5 degrees Fahrenheit, which is 15 degrees below zero Celsius |
| Boxwood | USDA zones 5 to 9 |
Other plants the sources name as good choices, without giving a zone for them, are lemon cypress, Norway spruce, juniper, holly, red twig dogwood, ornamental cabbage, and small boxwoods. Poinsettia is an indoor plant only, and it will not survive outside in cold weather, so keep it in a warm room and use evergreen branches for the outdoor pots instead. For a wider look at how these plants sit in a full winter room, our brown christmas tree guide shows the same warm green palette around a tree, which pairs naturally with a green planter beside it.
Which Pots Survive Winter Outdoors
Not every pot survives winter outdoors, and the difference is in the material, not the price. Terracotta and thin ceramic look beautiful, and they crack in freeze thaw cycles, because water soaks into the clay, freezes, expands, and splits the pot from the inside. Treat terracotta as an indoor pot, or bring it under cover before the coldest weather, or empty it and store it dry when the season ends.
Metal, thick plastic, wood, fibreglass and stone survive winter outdoors far better, because they do not soak up water in the same way. Galvanized metal buckets, thick plastic pots, wooden crates and barrels, fibreglass urns and stone urns are all good choices for a porch that faces frost, and a heavy stone urn has the added benefit of weight, which keeps it upright in wind. Wood needs one extra check, because a wooden crate or barrel that sits in a puddle will rot at the base, so set wood pots on small feet or a tray and keep them out of standing water.
How Long Fresh Greens Last and How to Keep Them Fresh
Fresh greens do not last a single fixed length of time, and any article that gives you one number is guessing. The sources for this guide disagree, and the honest answer is a climate dependent range, not a single figure. In mild damp climates, with fresh cut branches and good care, greens can last about two months, and in some cold damp places they can last three months or more. In dry windy cold, or with branches that were already old when you bought them, the same greens can look tired in about two weeks. Most porches will see something in between, and the range depends on climate, freshness and care, not on the calendar alone.
Freshness matters more than any other factor. Branches cut after the weather turns cold last longer than branches cut in warm weather, because cold slows the drying, and branches bought fresh from a tree lot last longer than branches that have sat in a shop for a week. Check before you buy, because needles that fall when you shake a branch gently are already drying out.
Cut every stem at an angle before you push it into the soil, because an angled cut takes up water better than a flat cut. Water and mist the branches until the soil freezes, because cut greenery still drinks while the soil is workable. An anti desiccant spray helps too, because it coats the needles and slows the water loss, and it is worth using on a planter that faces wind or winter sun.
Wind Proofing and Weight
A planter that blows over is not just a mess, it is a broken pot, scattered soil, and a branch that can scratch a door or a car, so wind proofing is part of building the planter, not an afterthought. The simplest wind proofing is weight low in the pot, and gravel or sand ballast low in the pot does that job better than soil alone. Add a layer of gravel or sand at the base before you add the filler and the soil, because weight at the bottom keeps the pot grounded while weight at the top makes it tip.
Keep the tallest branches to no more than about one and a half times the height of the container, because a branch taller than that catches the wind like a sail and levers the pot over, while a branch within that height stays balanced and still looks generous. A tall urn can carry taller branches than a low basket, because the urn itself is taller, so measure the pot first and cut the branches to match it.
A wide heavy base helps too, because a wide base spreads the weight and resists tipping better than a narrow base. Put the planter in a sheltered spot if you can, beside a wall, under a porch roof, or in a corner where the house breaks the wind. Check the planter after the first strong wind.
Christmas Planter Budget Guidance Without Invented Prices
A Christmas planter does not need a big budget, because the best materials are often free or already in the house. Forage the greenery first if you can, because fir, pine and cedar branches, pine cones, and bare red twig stems cost nothing when you cut them from your own garden or ask a neighbour, and a tree lot is the next best place to buy greens, because tree lots sell offcuts and bundles for far less than a garden centre charges for a single stem. Use what you own first, and buy only what fills a real gap, because a pot from the shed, a basket from a cupboard, and a tin from the kitchen are all planters waiting to happen.
Reuse the container every year, and reuse the decorations too, because the only thing a planter truly needs fresh each December is the greenery and new batteries for the lights. Leave painted stripes and gold bands on a bucket, stack the buckets and store them dry, and next December you will need only fresh branches and a fresh set of batteries. That reuse is where the real saving lives.
Plan one swap after Christmas instead of a whole new display, because the swap is cheaper than a second planter and it keeps the same pots working into February. Remove the red accents in the first week of January, add silver blue eucalyptus and frosted pine cones, and the same pots read as winter instead of Christmas, with no new container and no new greenery needed. For more ways to stretch simple materials, these budget friendly DIY home decor ideas show how far a small budget can go when you start with what you already own.
The After Christmas Swap
The after Christmas swap is the simplest way to make a Christmas planter last into February, and it takes less than half an hour. In the first week of January, take the planter apart gently, remove every red accent, the red berries, the red ribbon, the red ornaments, and the candy cane stripes if you can lift them off, and set those pieces aside in a box for next December. Keep the evergreen branches, the pine cones, and the container, because those are winter pieces, not Christmas pieces, and they look right for another six weeks without any change at all.
Then add the winter pieces, silver blue eucalyptus sprigs tucked between the evergreen branches, frosted pine cones dusted with white, and a few white berries in place of the red ones. The whole planter shifts from festive to calm in a single edit, and the same pots read wintry into February. The full room by room edit is in our winter decor after christmas guide.
Christmas Planters FAQ
What do you put in an outdoor Christmas planter?
Put fresh or faux evergreen branches in first, fir, pine, cedar and boxwood are the best choices, because they stay green through cold weather and hold their shape in wind. Then add red berry picks, pine cones, shatterproof ornaments, birch branches, and a short string of battery fairy lights, and finish with a tall branch in the middle so the planter has height.
How long do fresh greens last in a Christmas planter?
Fresh greens last a climate dependent range, not a single number. In mild damp climates with fresh branches and good care they can last about two months, and in some cold damp places they can last three months or more, while in dry windy cold they can look tired in about two weeks. Most porches see something in between. Cut stems at an angle, and water and mist until the soil freezes.
How do you keep a Christmas planter from blowing over?
Add gravel or sand ballast low in the pot before you add the filler and the soil, because weight at the base keeps the pot grounded. Keep the tallest branches to no more than about one and a half times the height of the container, because taller branches catch the wind and lever the pot over.
Can you reuse Christmas planters next year?
Yes, and reuse is where a planter saves the most money. Leave painted stripes and gold bands on buckets, stack the containers and store them dry, and keep the ribbons, ornaments and fairy lights in a labelled box. Next December you will need only fresh greens and new batteries.
What plants work best for outdoor Christmas planters?
Hardy evergreens work best, pine, fir, juniper, and boxwood, plus holly for berries, red twig dogwood for red stems, ornamental cabbage for low colour, and small boxwoods for a formal shape. Lemon cypress suits a sheltered porch, and dwarf balsam fir and Japanese skimmia suit cold places, with the hardiness figures given in the plant guide above.
Do I need real soil in my planter?
You need real soil if the planter holds a live plant, because a live plant needs soil to root in, water to drink, and drainage holes to let the extra water out. You do not need a full pot of soil for a cut greenery planter, because cut branches need only something to hold them upright. A lightweight filler in the base, a layer of landscape fabric, and about 12 inches of soil on top is enough, and the stems freeze in place once the soil sets.
When is the best time to make Christmas planters?
Right after Thanksgiving is ideal, because the soil is still workable, the greens are fresh at tree lots, and you will enjoy the planters for the whole season. A planter made in late November can carry you from Thanksgiving all the way to February, with one quick swap after Christmas.
If you start with one planter this week, start with the spot you see first every morning, the front door, the windowsill, or the table where you eat.



One Comment