Christmas Wood Crafts: 20 Easy Projects to Make and Gift
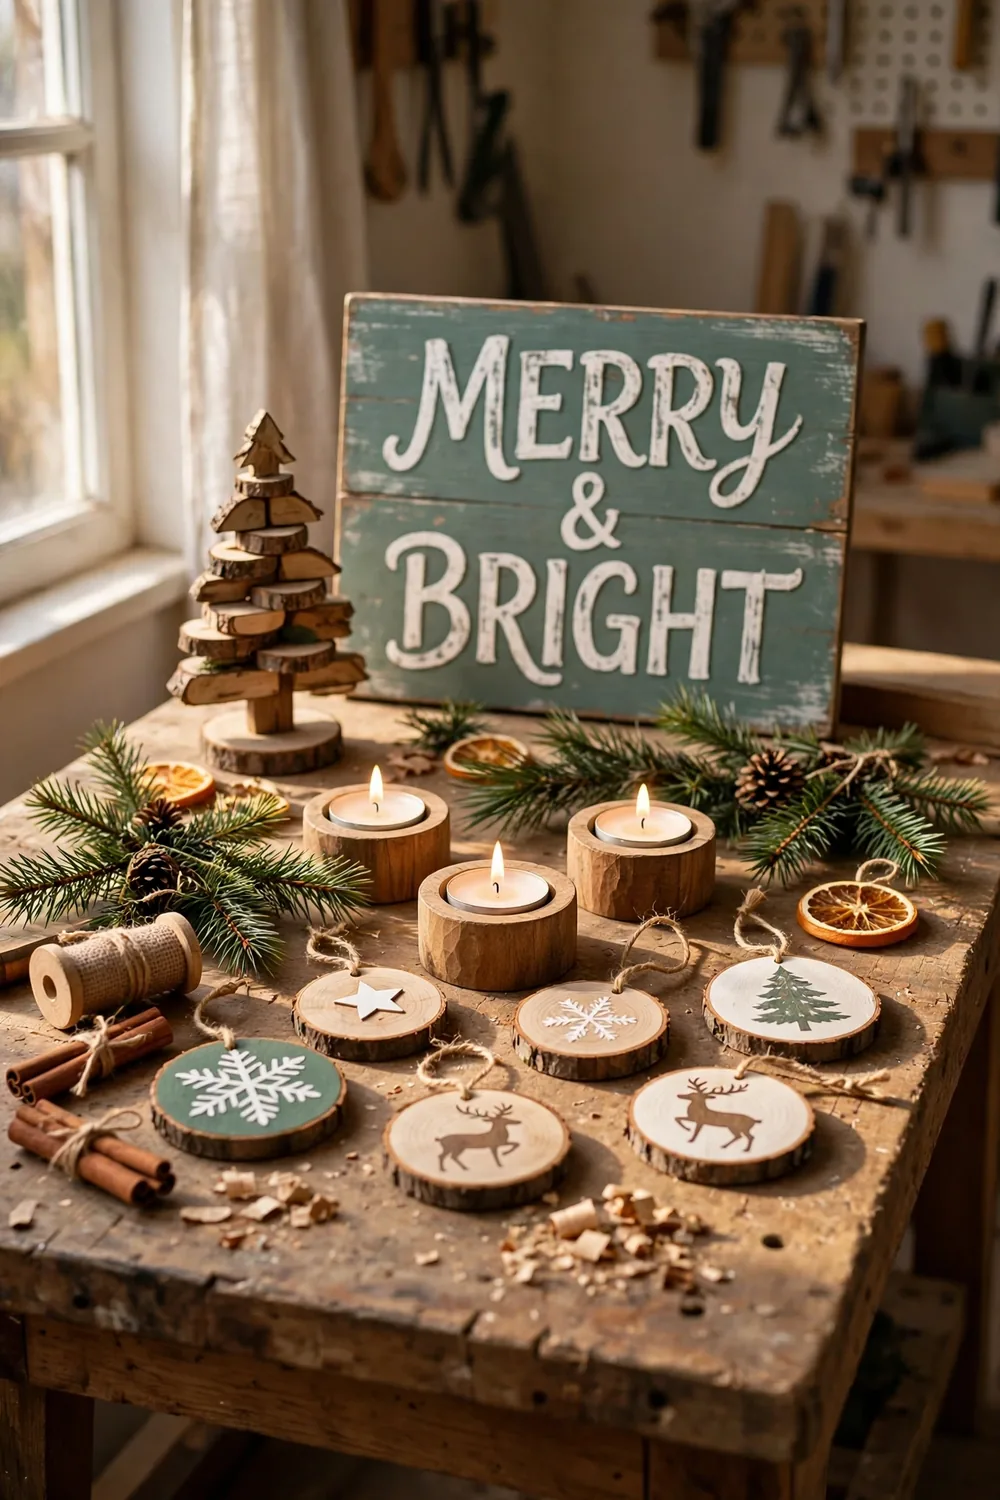
Wood is the warmest material you can craft with at Christmas. It smells like a workshop, it feels solid in the hand, and it suits every style, from rustic farmhouse to clean and modern. These 20 christmas wood crafts are grouped by purpose, so you can find a quick ornament, a sign for the wall, a centrepiece for the table, or a big outdoor piece, without scrolling through a hundred random ideas.
Before we start, one useful distinction: wood crafts split into two kinds. Some are decor for your own home, and some are gifts to make and give. This guide covers both, and it names the difference clearly, because a project you keep and a project you sell or gift are chosen in different ways. If you are new to woodworking, start with the easy projects in the first group. If you already own a saw and a sander, the medium projects will suit you better. These woodworking christmas projects need no special workshop, and most of them use a hand saw, sandpaper, and a drill.
Every project below comes with its tools and materials, a time and difficulty guide, and an approximate cost, so you can choose with confidence and shop with a list. These wood crafts for christmas are made to be finished in an afternoon or a weekend, and several of them use scrap wood you may already have at home.
How to Choose Your Wood
Pine is the best wood for beginners. It is soft, light, cheap, and easy to cut with a hand saw, and it takes paint well. Use pine for ornaments, small trees, signs, and anything you plan to paint. Its only weakness is softness: it dents easily, so keep it away from heavy use.
Plywood is the best wood for flat projects. It comes in thin sheets, it stays flat, and it cuts cleanly with a jigsaw, which makes it ideal for signs, silhouettes, snowflakes, and wall art. Choose a smooth faced plywood, and sand the edges well, because plywood edges show their layers.
Reclaimed wood and scrap wood give a project instant character. Old fence boards, pallet boards, and offcuts from other projects carry nail holes, grain, and colour that new wood cannot copy. Check every reclaimed board for nails and old paint before you cut it, and never use wood that smells of chemicals. For pallet wood, read the safety section below before you cut anything.
Hardwood suits projects that get handled a lot. Oak, walnut, and maple are strong and heavy, and they look beautiful with just oil or wax. They cost more and they are harder to cut, so save hardwood for serving boards, coasters, and keepsake pieces. For anything that touches food, like a serving board or a coaster, use a food safe finish, and never use a painted surface for food.
Buy your wood with a list, and buy a little extra. A spare board costs less than a second trip to the shop, and offcuts become ornaments and small gifts.
Essential Tools for Every Skill Level
You do not need a full workshop to start. Most christmas craft ideas wood projects need only a few basic tools, and you can add tools as your skills grow.
Beginner tools are enough for more than half of this list. A hand saw, a drill, sandpaper in two grits, wood glue, a tape measure, a pencil, and a paintbrush will carry you through ornaments, garlands, coasters, signs, and simple trees. A hot glue gun helps for attaching pinecones and small decorations, and a clamp holds small pieces steady while the glue dries.
Intermediate tools open up the medium projects. A jigsaw cuts curves and shapes that a hand saw cannot, and an orbital sander smooths large surfaces in minutes instead of hours. A wood burning tool adds lettering and fine detail to signs, coasters, and ornaments, and it is the tool that makes a simple piece look like a craft fair find. A Forstner bit drills clean flat holes for tealights, and a set of clamps keeps larger pieces square while glue sets.
Advanced tools are only needed for the most ambitious projects. A table saw cuts long straight boards fast, a router shapes edges, and a scroll saw cuts fine detailed shapes in thin wood. If you do not own these, borrow them, or choose a simpler version of the project. No project in this guide needs a tool you cannot borrow, hire, or work around.
Buy tools slowly and buy them once. A good hand saw and a decent drill will serve you for years, and they cost less than one large shop bought decoration.
Finishes That Last
A finish protects the wood and sets the look, so choose it on purpose. Paint is the easiest finish: it hides flaws, it comes in every colour, and it suits signs, trees, and ornaments. Use acrylic paint for indoor pieces and outdoor paint for porch pieces, and seal painted wood with a clear coat so it survives handling.
Stain shows the grain and deepens the colour, and it suits rustic and traditional projects. Apply it thinly, wipe off the excess, and let it dry fully before you add a second coat. Wax gives a soft warm glow and suits ornaments and small gifts, but it needs reapplying each year.
Polyurethane is the toughest indoor finish, and it suits table pieces that get wiped down, like serving boards and tealight holders. For food contact, use a food safe oil or a food safe wax instead, and never use polyurethane on a surface that touches food.
Outdoor pieces need outdoor sealant. A porch sign, a reindeer, or a snowman will face rain and frost, so seal every surface, including the bottom and the back, and store outdoor pieces under cover when the season ends.
Test every finish on a scrap piece first. A test shows the true colour, it shows whether the finish raises the grain, and it costs nothing to check.
Wood Craft Safety
Wood crafting is safe when you slow down and respect the tools. Wear safety glasses whenever you cut, sand, or drill, because even a small chip can hurt an eye. Wear a dust mask when you sand, and work in a well ventilated space when you use a wood burning tool, because burning wood makes smoke.
Clamp your work before you cut it. A board that moves while you saw is the most common cause of a bad cut and a hurt hand, and a clamp costs less than a bandage. Keep your hands behind the blade line, and never force a saw through wood: if it sticks, stop, check the line, and start again slowly.
Keep children and pets away from cutting and burning work, and store tools out of reach when you finish. Sharp tools stay sharp, and a saw left on a bench is an accident waiting to happen.
Pallet wood needs one extra check. Pallets are stamped with a code: HT means heat treated, and it is safe to cut and use. MB means methyl bromide fumigated, and it must never be cut or used indoors, because the chemical stays in the wood. If a pallet has no stamp, or you cannot read it, do not use it. When in doubt, buy new pine instead, and keep the pallet for the garden.
Christmas Wood Projects That Sell
If you want to sell what you make, small items sell first. Ornaments, coasters, tealight holders, small signs, and wood slice decorations cost little to make, they are easy to post, and buyers pick them up without thinking twice. Big pieces sell too, but they need a local buyer, because posting a porch sign costs more than the sign itself.
Price your work to cover materials and time. Add up the wood, the paint, and the finish, then add a fair amount for your hours. A piece priced too low sells fast but earns nothing, and a piece priced fairly finds the buyer who values handmade work. Keep a notebook of what each project costs you to make, so your prices stay honest.
Craft fairs and online shops are the two best places to sell christmas wood projects that sell well. At a fair, buyers touch the wood and talk to the maker, so bring a small display and a few pieces at different prices. Online, clear photos matter more than anything, so photograph each piece in daylight against a plain background, and show the size with a coin or a hand beside it.
Keep your style consistent. Buyers remember a maker whose pieces look like a set, so pick a palette, a finish, and a style, and repeat it across your pieces. A small range made well sells better than a large range made in a hurry.
20 Christmas Wood Crafts
These 20 projects are grouped by purpose, so you can start with gifts, move to the wall, then the table, and finish with the outdoors. Every project keeps to the same format: what it is, what you need, how long it takes, how hard it is, and what it costs. These wood craft ideas for christmas are written for real homes, so nothing here needs a professional workshop, and nothing here needs a tool you cannot borrow.
Ornaments and Small Gifts. Small projects are the best place to start. They are quick, they use little wood, and they make lovely gifts. These five projects suit beginners, and they are the ones to make first if you have never cut wood before.
1. Wood Slice Ornaments
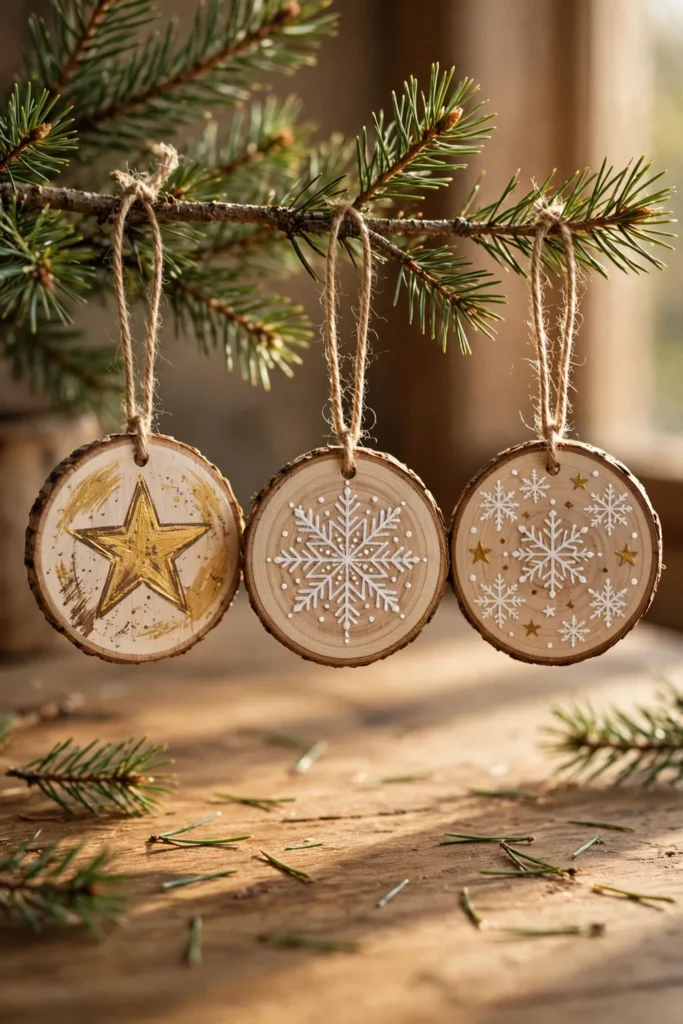
Wood slice ornaments are the easiest wooden xmas crafts you can make, and they look like they came from a craft fair. Cut thin slices from a branch, drill a small hole near the edge, and paint a star, a snowflake, or a simple tree on each one. A twine loop turns it into a hanging ornament, and a set of five in a small box makes a gift in itself.
You need: a dry branch, a saw, a drill, twine, paint, a paintbrush.
Time: 1 hour / Difficulty: easy / Cost: under $10
2. Wooden Star Ornaments

Wooden stars suit every tree, and they are satisfying to cut. Draw a star on thin plywood, cut it out with a jigsaw or a coping saw, and sand the edges smooth. Paint some red, some white, and leave some natural, then hang them with twine. A set of stars in three finishes looks better than a set in one colour, because the mix catches the light.
You need: thin plywood, a jigsaw or coping saw, sandpaper, paint, twine.
Time: 1 to 2 hours / Difficulty: easy / Cost: under $10
3. Wood Bead Garland
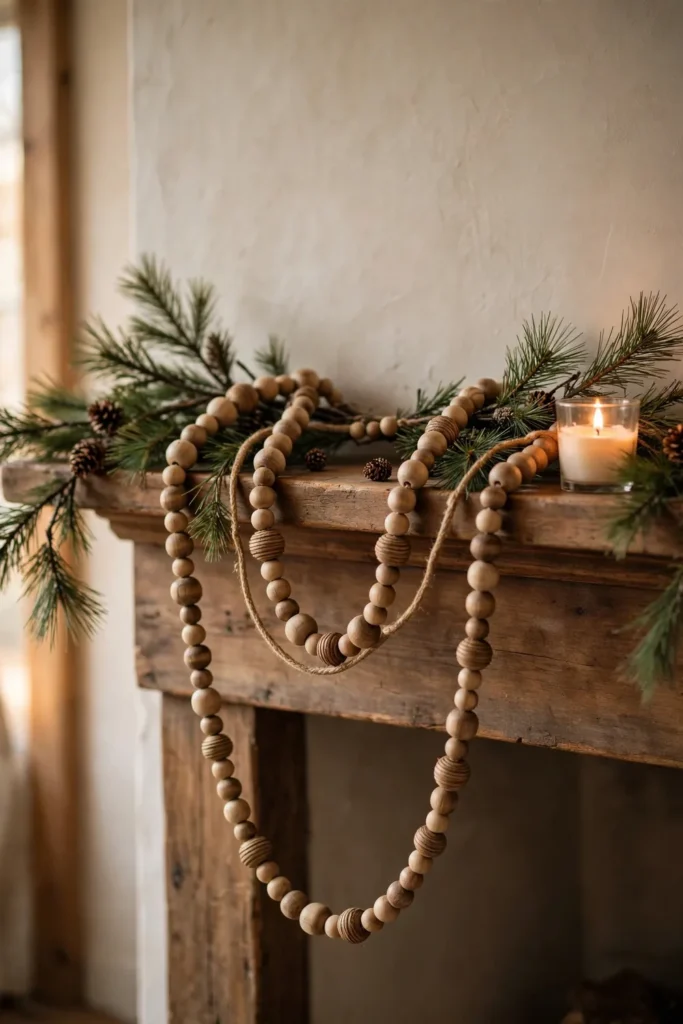
A wood bead garland is the simplest project in this guide, and one of the prettiest. Thread wood beads onto twine in mixed sizes, knot the ends, and drape it over a mantel, a tree, or a doorway. Leave the beads natural for a calm look, or paint a few red and green for a festive touch. It takes minutes to make, and it suits every room in the house.
You need: wood beads in mixed sizes, twine, scissors, optional paint.
Time: 30 minutes / Difficulty: easy / Cost: under $10
4. Mini Wooden Christmas Trees
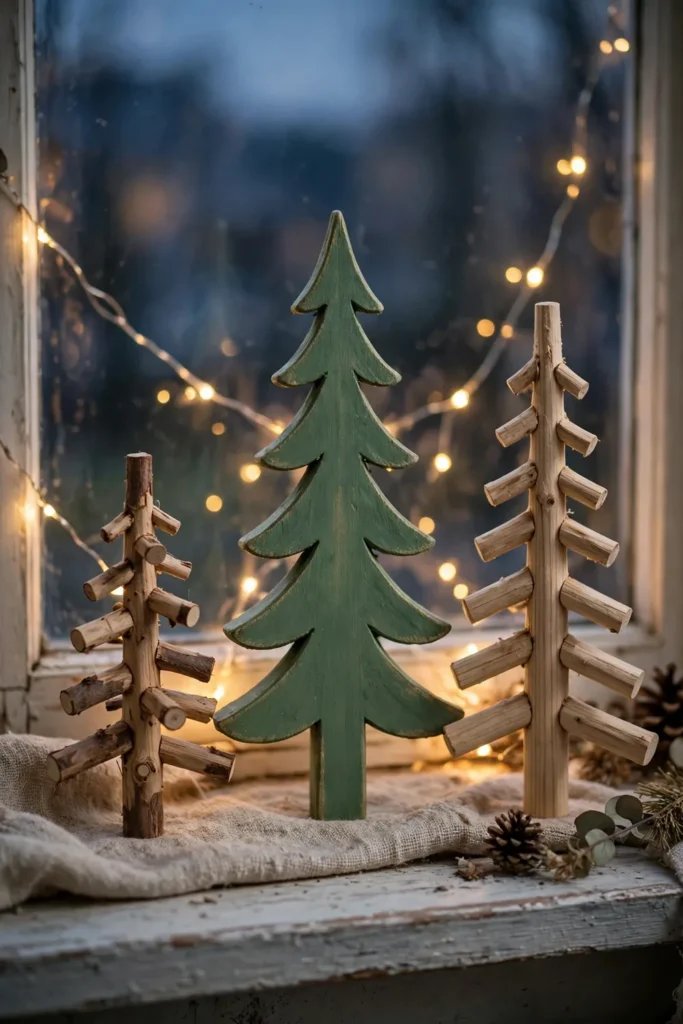
Mini wooden trees are the project to make when you want a tree for a small space. Cut simple triangle shapes from pine boards, sand them smooth, and stand them on small wood bases. Paint one green, leave one natural, and paint one white, and the three together look like a little forest. They suit a windowsill, a desk, or a bedside table, and they make a lovely gift for a teacher or a neighbour.
You need: pine boards, a saw, sandpaper, paint, small wood bases, wood glue.
Time: 1 to 2 hours / Difficulty: easy / Cost: about $10 to $15
5. Wooden Coasters with Christmas Motifs
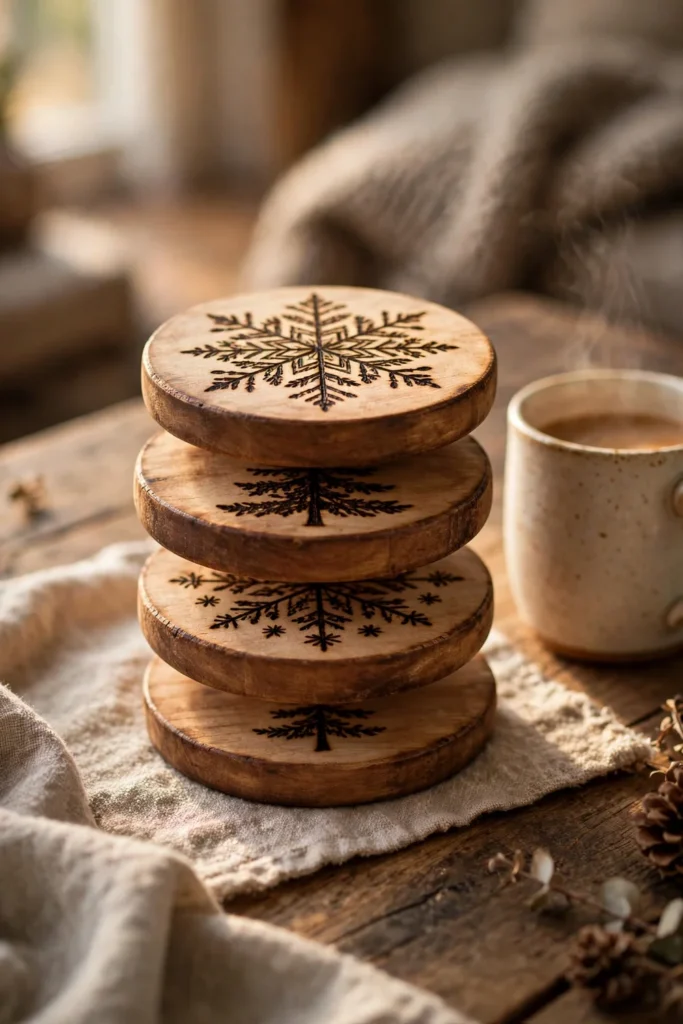
Wooden coasters are useful all year, and Christmas motifs make them a gift. Cut round coasters from wood slices or squares, sand them flat, and burn or paint a snowflake, a tree, or a star on each one. Seal them with a food safe finish so they survive wet mugs, and tie a set of four with twine. They are the easiest wooden Christmas gift for a complete beginner, because they need only a hand saw, sandpaper, and a drill.
You need: wood slices or squares, a wood burning tool or paint, sandpaper, food safe sealant, twine.
Time: 1 to 2 hours / Difficulty: easy / Cost: under $10
Signs and Wall Decor. A wooden sign changes a whole wall, and it costs far less than a shop bought one. These five projects suit the hallway, the living room, and the front door, and they are the pieces visitors notice first.
6. Rustic Merry Christmas Wood Sign
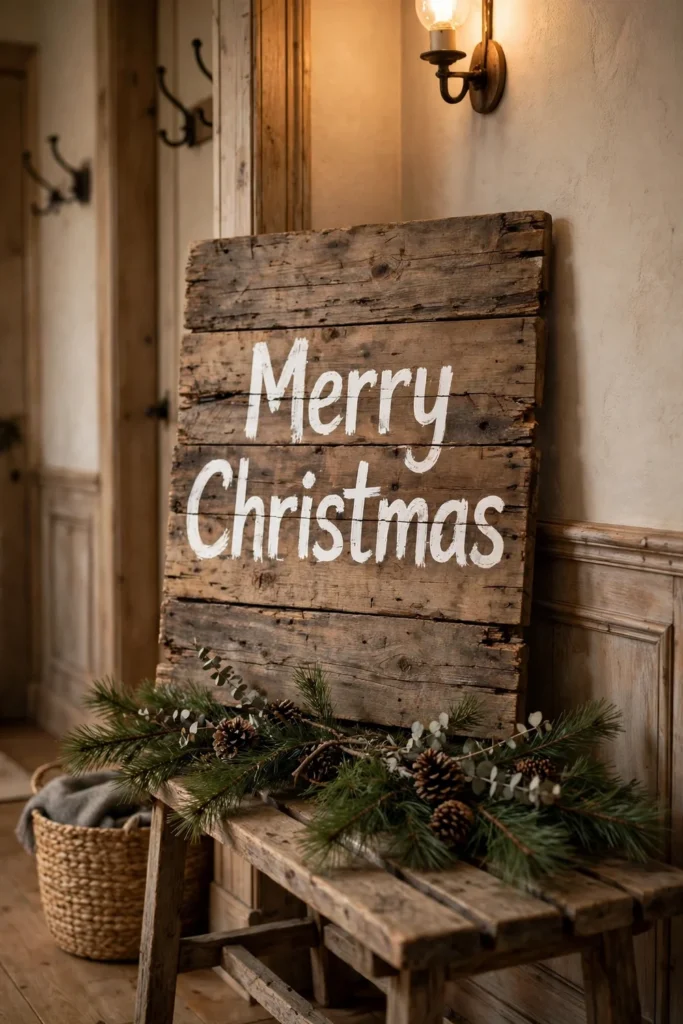
A rustic sign is the fastest way to make a hallway feel like Christmas. Paint a reclaimed wood board, stencil the words in white, and distress the edges lightly with sandpaper so the wood shows through. Hang it above a bench or lean it against a wall, and add a pine branch beside it. It suits farmhouse and cottage homes, and it stores flat when the season ends.
You need: a reclaimed wood board, paint, a stencil or vinyl letters, sandpaper, a saw.
Time: 2 to 3 hours / Difficulty: easy / Cost: about $10 to $20
7. Wooden Nativity Silhouette
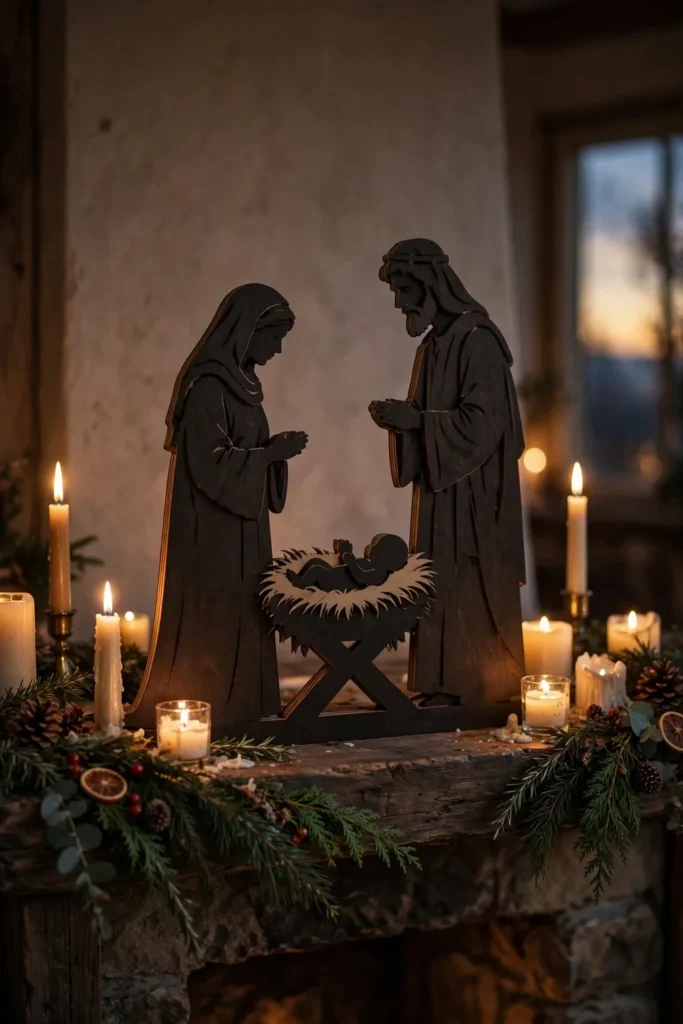
A nativity silhouette is quiet and beautiful, and it suits a mantel or a windowsill. Cut the shapes from plywood with a jigsaw, sand the edges, and paint them dark or leave them natural. Stand the figures on a wood base, and place a small tealight behind them so the light glows through the gaps. It is a medium project, because the shapes need patience, but the result is worth it.
You need: plywood, a jigsaw, sandpaper, paint, a wood base, a tealight.
Time: 2 to 3 hours / Difficulty: medium / Cost: about $10 to $20
8. Reclaimed Wood Advent Calendar

An advent calendar made from reclaimed wood becomes a family tradition. Fix small hooks to a wood board, hang numbered bags or small boxes from them, and fill each one with a sweet or a small note. Children love opening a new bag each morning, and the board can be refilled every year. Use wood you already have, and the whole project costs less than a shop bought calendar.
You need: reclaimed wood, small bags or boxes, hooks, number tags, paint.
Time: 3 to 4 hours / Difficulty: medium / Cost: about $15 to $25
9. Wooden Wreath with Pinecones
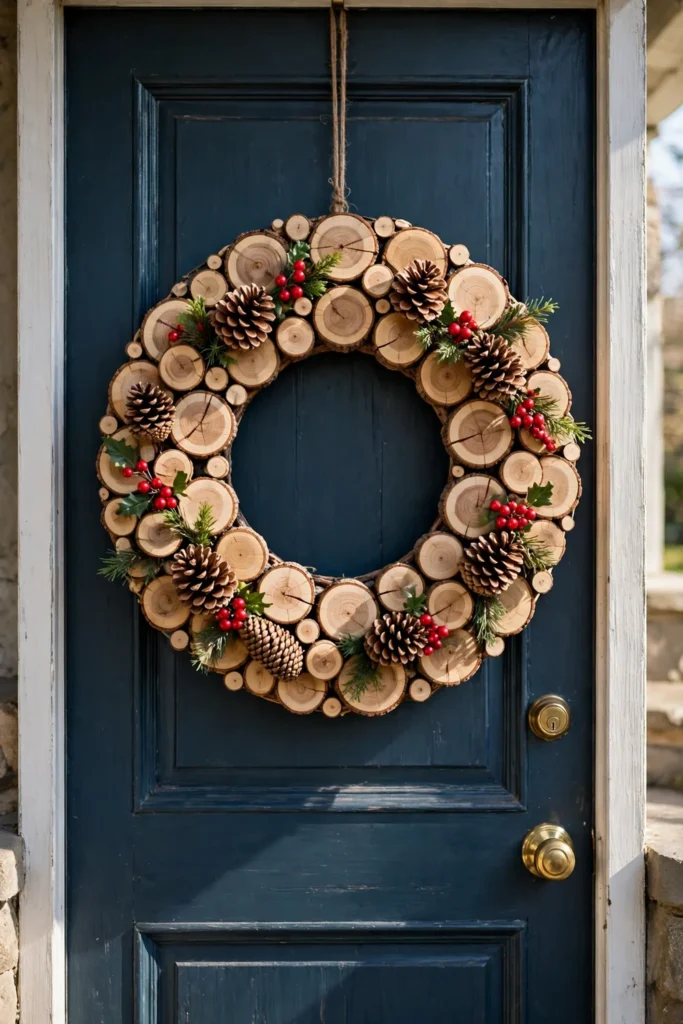
A wooden wreath lasts for years, unlike a fresh one. Glue wood slices in a circle on a wood ring, add pinecones and red berries with hot glue, and tie a ribbon bow at the top. Hang it on the front door, and it will still look good in January. If you enjoy making ornaments by hand, these easy DIY Christmas ornaments use the same natural materials in different ways.
You need: wood slices, a wood ring or wreath form, hot glue, pinecones, red berries, ribbon.
Time: 2 hours / Difficulty: easy / Cost: about $10 to $20
10. Layered Wood Snowflake Wall Art
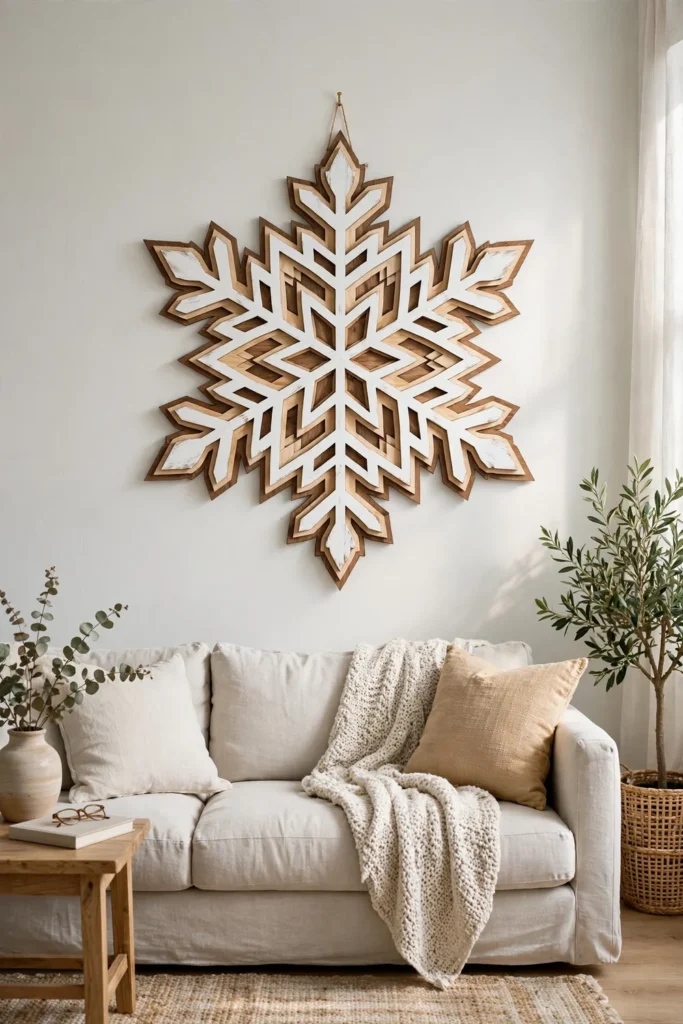
A layered snowflake is the most striking piece in this group, and it suits a plain wall. Cut two snowflake shapes from thin plywood, one slightly smaller than the other, paint one white and leave one natural, then glue them together so the layers show. Hang it above a sofa or on a hallway wall, and it becomes the feature of the room. It needs a steady hand with a jigsaw, but the cutting is simpler than it looks.
You need: thin plywood, a jigsaw or scroll saw, paint, hanging hardware, wood glue.
Time: 2 to 3 hours / Difficulty: medium / Cost: about $10 to $15
Table and Mantel. The table is where Christmas happens, so these five projects are made to be used and seen. They suit the dining table, the coffee table, and the mantel, and they all use wood you can find easily.
11. Wooden Tealight Holders
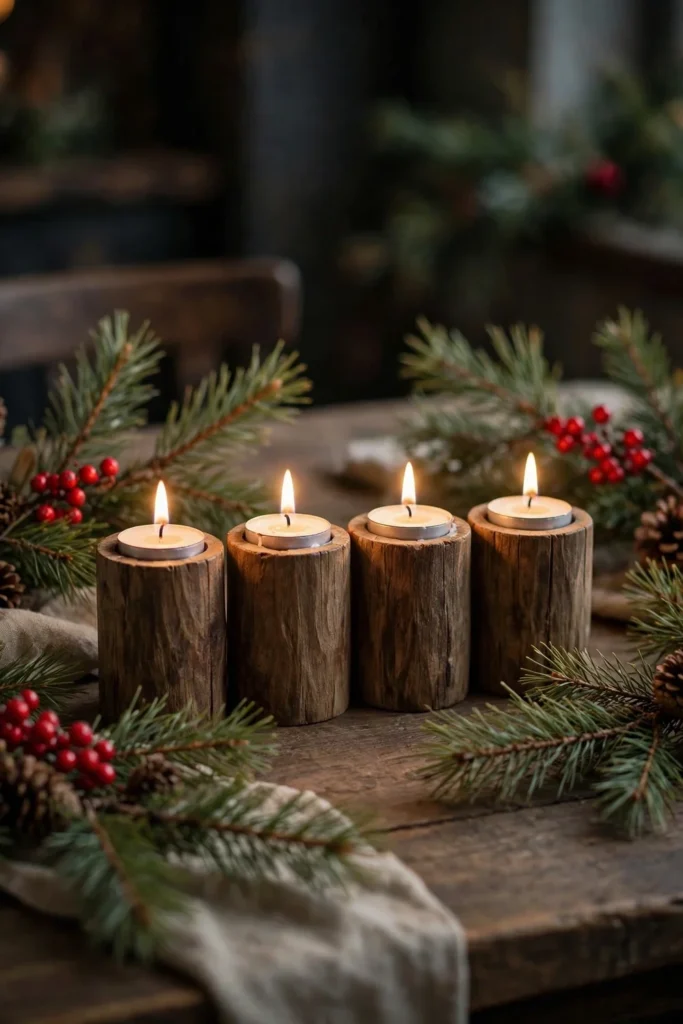
Wooden tealight holders make a table glow, and they take an hour to make. Drill a shallow hole in a wood block with a Forstner bit, sand it smooth, and drop in a tealight. Make three in different heights and line them along the table, or give a set as a gift. Never leave a lit candle unattended, and keep the holders away from curtains and paper.
You need: wood blocks or slices, a drill with a Forstner bit, sandpaper, tealights.
Time: 1 hour / Difficulty: easy / Cost: under $10
12. Wood Slice Chargers
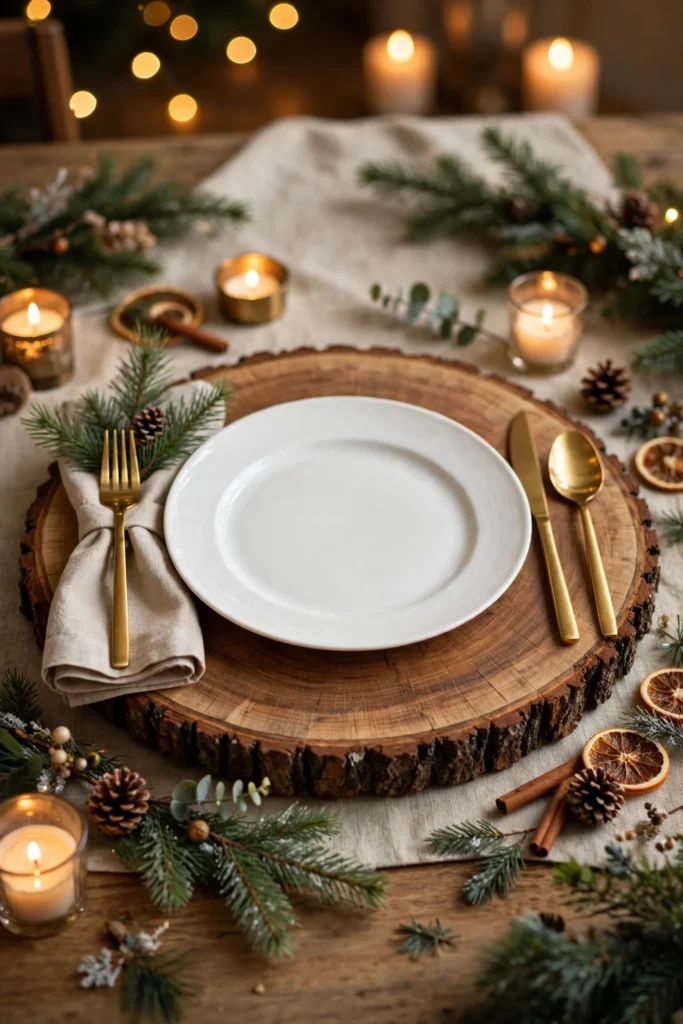
Wood slice chargers turn an ordinary Christmas dinner into a rustic feast. Cut large slices from a log, sand them flat, and seal them with a food safe finish. Place a plate on each one, and the bark edge becomes part of the table decoration. They suit farmhouse tables, and they wipe clean with a damp cloth.
You need: large wood slices, sandpaper, food safe sealant.
Time: 1 hour / Difficulty: easy / Cost: under $15
13. Wooden Village Houses
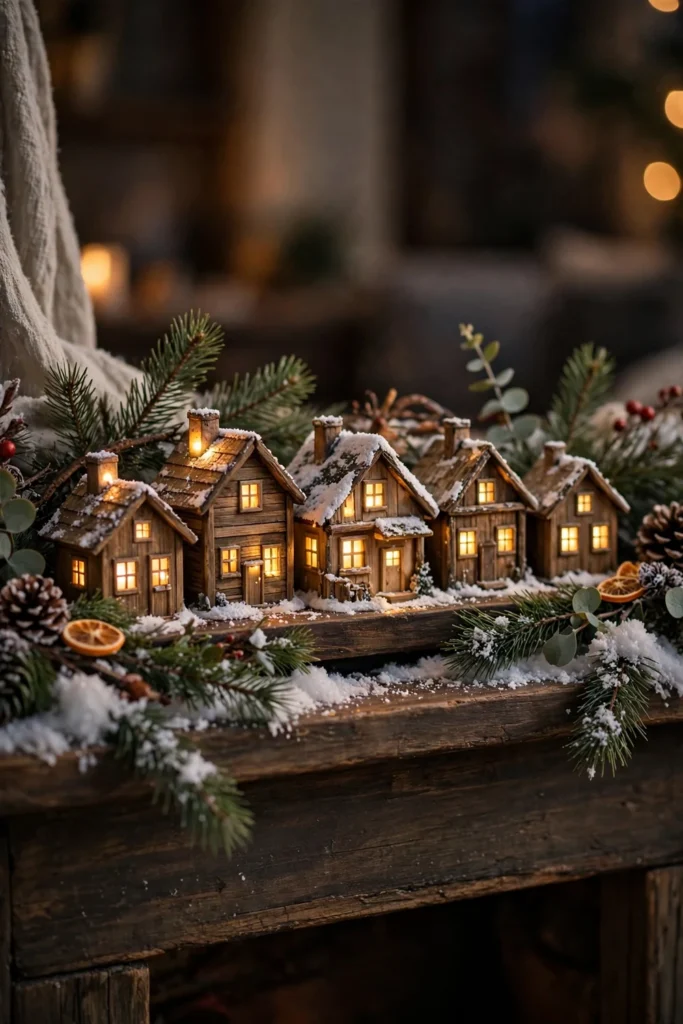
A wooden village is the piece children gather around. Cut simple house shapes from pine boards, paint windows and doors on them, and stand them in a row on the mantel with fairy lights behind them. The lit windows glow in the evening, and the whole village looks like a tiny street. Make three houses for a small mantel, or five for a long one.
You need: pine boards, a saw, paint, tealights or fairy lights, sandpaper.
Time: 3 to 4 hours / Difficulty: medium / Cost: about $15 to $25
14. Wooden Candle Centerpiece
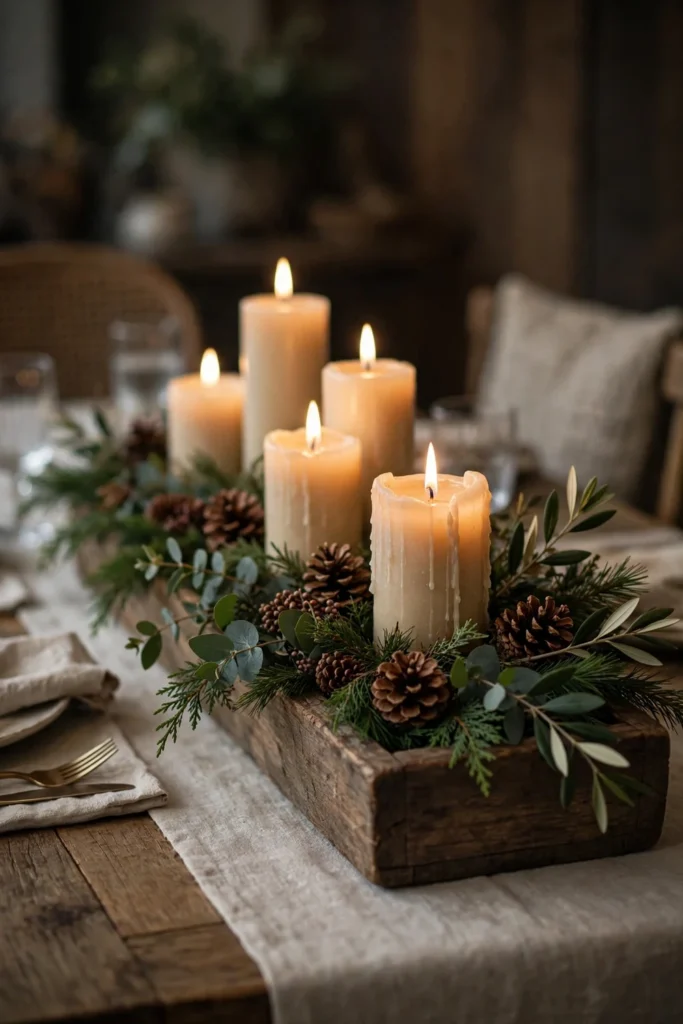
A wooden candle centerpiece is the easiest way to dress a dining table. Lay a long wood board or a halved log down the centre, place pillar candles along it, and fill the gaps with greenery and pinecones. It takes an hour, it costs little, and it looks like you planned it for weeks. Keep candles away from dry greenery, and never leave them burning unattended.
You need: a wood board or log, pillar candles, greenery, pinecones.
Time: 1 hour / Difficulty: easy / Cost: about $10 to $20
15. Engraved Wooden Serving Board
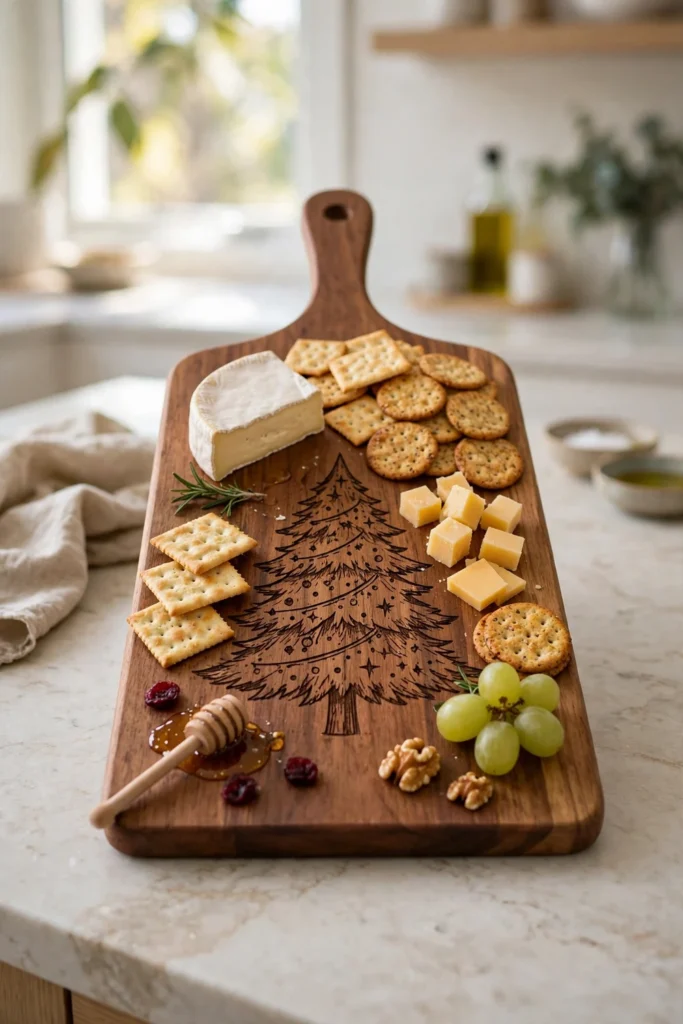
An engraved serving board is a gift that gets used every Christmas. Burn a tree, a star, or a simple message into a hardwood board with a wood burning tool, then seal it with food safe oil. Use it for cheese and crackers on Christmas Eve, and it becomes part of the family table. Hardwood suits this project best, because it holds the burned lines cleanly.
You need: a hardwood board, a wood burning tool, food safe oil, sandpaper.
Time: 2 hours / Difficulty: easy / Cost: about $15 to $25
Trees, Lanterns and Outdoor. Big pieces make the biggest impression, and these five projects suit the porch, the garden, and the living room corner. They take a little longer, but they are the pieces neighbours ask about.
16. Pallet Wood Christmas Tree
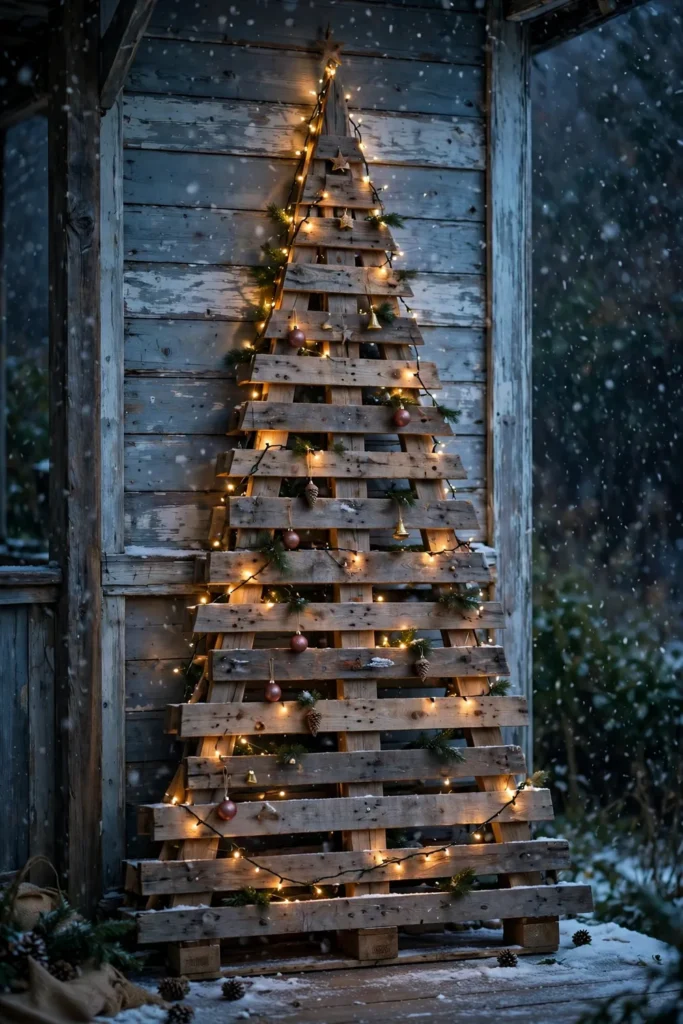
A pallet wood tree is the most popular outdoor wood project, and it is easy to see why. Screw pallet boards into a triangle shape, add a small trunk, and wrap it in fairy lights. Lean it against a porch wall or stand it in the garden, and it becomes a tree that never needs watering. Remember the safety rule: use heat treated pallets only, and never cut a pallet marked MB, because methyl bromide treated wood must never be cut or used indoors.
You need: pallet wood, a saw, screws, paint, fairy lights.
Time: 3 to 4 hours / Difficulty: medium / Cost: under $20
17. Wooden Lantern with Fairy Lights

A wooden lantern glows beautifully on a porch step or a mantel. Build a simple square frame from thin wood boards, add glass or acrylic panels, and fill it with fairy lights or a flameless candle. It suits the front door in December and the garden in summer, so it earns its place all year. Use battery lights if the lantern will sit far from a socket.
You need: thin wood boards, a saw, glass or acrylic panels, fairy lights, wood glue.
Time: 2 to 3 hours / Difficulty: medium / Cost: about $15 to $25
18. Outdoor Wooden Reindeer

A wooden reindeer is the friendliest piece in this guide, and children love it. Cut the shape from plywood with a jigsaw, paint it brown, and add a red nose and a ribbon around its neck. Stand it in the front garden with a stake, and seal it well so it survives rain and frost. If you like decorating the outside of the house, a brown tree inside pairs beautifully with it, and our brown Christmas tree guide shows how the same warm palette works indoors.
You need: plywood, a jigsaw, outdoor paint, screws, a stake, outdoor sealant.
Time: 3 to 4 hours / Difficulty: medium / Cost: about $20 to $30
19. Wooden Porch Welcome Sign

A tall welcome sign is the first thing visitors see, and it sets the tone for the whole house. Paint a tall wood board, stencil the word in white, and add a small Christmas tree or snowflake at the top. Lean it beside the front door, and seal it well so it survives winter weather. It suits every porch, and it stores flat when the season ends.
You need: a tall wood board, paint, a stencil, outdoor sealant.
Time: 2 to 3 hours / Difficulty: easy / Cost: about $15 to $25
20. Scrap Wood Snowman for the Porch
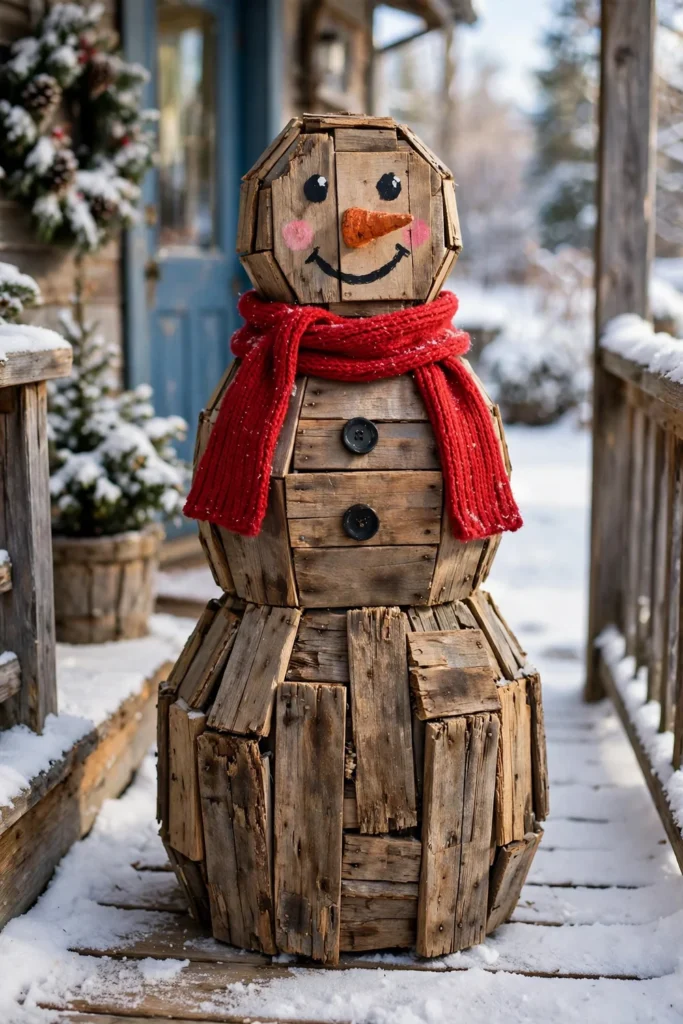
A scrap wood snowman is the cheapest project in this guide, and the most cheerful. Stack three scrap boards in decreasing sizes, paint them white, and add a painted face, buttons, and a real scarf. Stand it on the porch, and it will greet visitors all winter without melting. It is a lovely project to make with children, because the painting is simple and the result is instant.
You need: scrap wood boards, paint, buttons, a scarf, screws.
Time: 2 hours / Difficulty: easy / Cost: under $15
Christmas Wood Crafts FAQ
What is the easiest wooden Christmas gift for a complete beginner?
Wood ornaments or a set of coasters are the easiest gifts for a complete beginner. Both need only a hand saw, sandpaper, and a drill, and both can be finished in an hour or two.
What tools do I need for Christmas wood crafts?
Most projects need a hand saw or a jigsaw, sandpaper, a drill, wood glue, and paint. A wood burning tool and an orbital sander help with the medium projects, but you can start with hand tools only.
What wood is best for Christmas crafts?
Pine is best for beginners, because it is soft, cheap, and easy to cut. Plywood is best for flat projects like signs and silhouettes. Reclaimed wood is best for a rustic look, and hardwood is best for serving boards and keepsakes.
Is pallet wood safe for Christmas crafts?
Heat treated pallets marked HT are safe to cut and use. Pallets marked MB are treated with methyl bromide, and they must never be cut or used indoors. If a pallet has no stamp, or you cannot read it, do not use it.
Can I sell my Christmas wood crafts?
Yes. Small items like ornaments, coasters, tealight holders, and signs sell best, because they cost little to make and are easy to post. Craft fairs and online shops are the best places to sell them, and clear daylight photos matter more than anything online.
Do I need power tools to start?
No. More than half of the projects in this guide can be made with a hand saw, sandpaper, and a drill. Power tools save time, but they are not needed to start, and you can borrow them for the medium projects.
If you are looking for more handmade gift ideas, these DIY Christmas gifts include jar gifts and edible gifts that pair beautifully with a wooden ornament or a handmade sign. And if your budget is tight, these budget friendly DIY home decor ideas show how to stretch simple materials into pieces that look far more expensive than they are.
Pick one project, gather your wood, and start with the saw. A Christmas made from wood feels warmer than one bought from a shelf, and it lasts longer too.