25 DIY Home Decor Ideas on a Budget That Look Stylish
A beautiful home does not require expensive furniture, designer accessories, or a complete renovation. Sometimes, a handmade piece of wall art, a refreshed secondhand table, or a thoughtfully arranged shelf can change the way an entire room feels. The secret is choosing projects that complement your existing decor rather than spending money on decorations that do not serve a purpose.
These 25 DIY home decor ideas on a budget combine simple crafts, creative upcycling, affordable wall treatments, and practical room updates. You will find projects for living rooms, bedrooms, kitchens, and apartments, including options for beginners and renters. Each idea includes practical guidance and a visual direction to help you turn inexpensive materials into decor that feels personal, coordinated, and worth displaying.
How to Make Budget Friendly Home Decor Look Stylish
Before starting a project, look at the room as a whole. Notice the colors of your furniture, the amount of natural light, the available wall space, and the areas that feel unfinished. A small room may benefit from a mirror or lighter textiles, while a blank living room wall may need one larger artwork instead of several tiny decorations.
Check what you already own before purchasing supplies. Old frames, fabric remnants, glass containers, baskets, and small pieces of furniture can often be reused. Choose a consistent color palette, prepare materials properly, and avoid adding too many decorative details. These simple decisions can make affordable projects look much more considered.
25 DIY Home Decor Ideas on a Budget
1. Create a Thrifted Gallery Wall
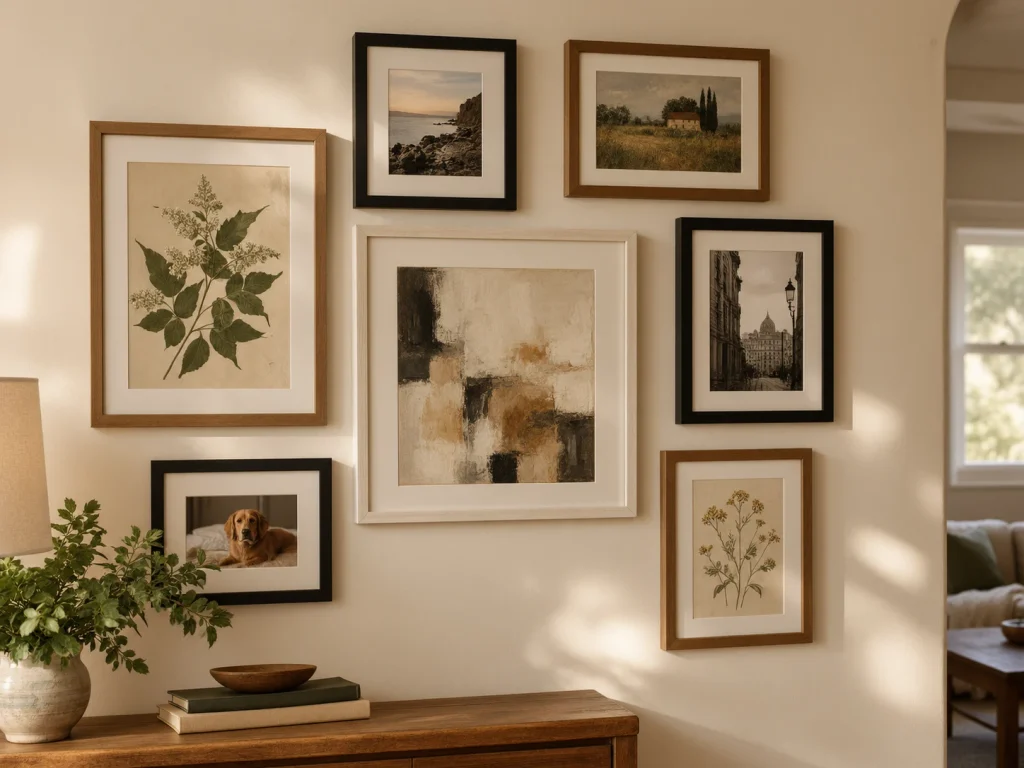
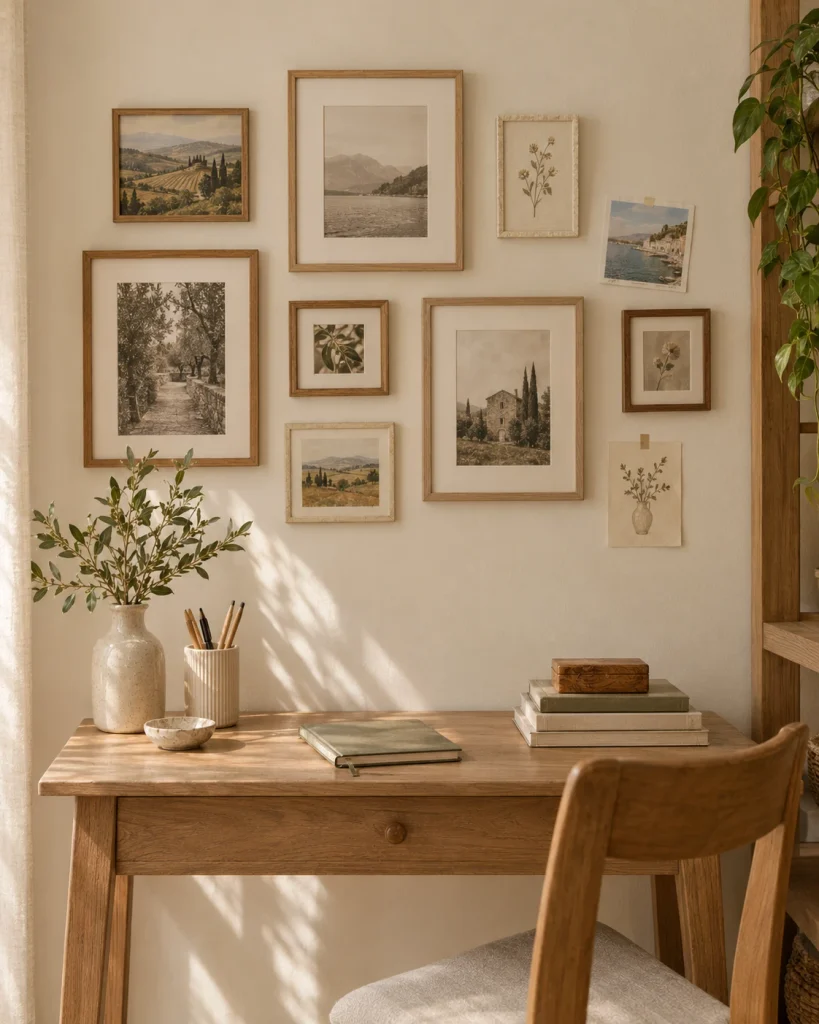
A gallery wall is an effective way to decorate a large, empty wall without purchasing expensive artwork. Look for secondhand frames in different sizes and shapes, then bring them together by painting them in a coordinated finish such as warm white, matte black, natural wood, or muted gold. Fill the frames with your own drawings, personal photographs, botanical illustrations, or printable artwork that you have permission to use. Combining a few larger pieces with smaller frames creates more visual interest than arranging everything in identical sizes.
Before hanging the frames, arrange them on the floor and photograph the layout so you can recreate it on the wall. Keep the spacing consistent if you prefer a structured appearance, or use a looser arrangement for a collected look. For a rental, choose a suitable removable hanging system that supports each frame’s weight and is compatible with the wall surface.
2. Paint Your Own Abstract Wall Art
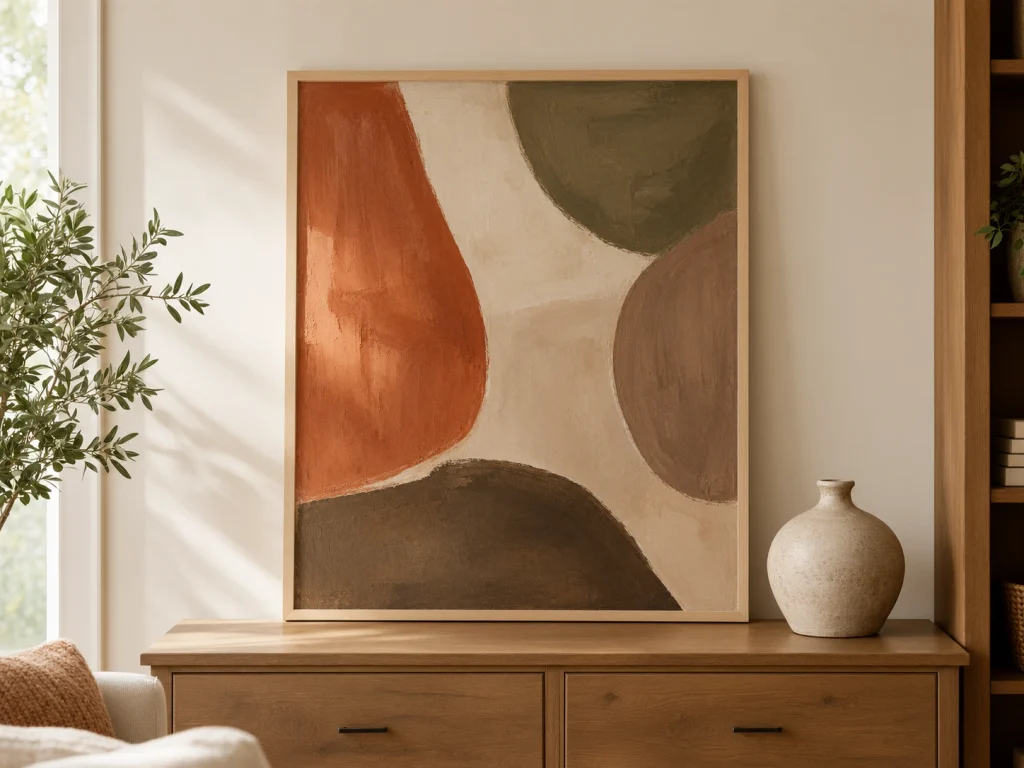
Creating your own abstract artwork lets you fill a wall with colors that suit your home instead of searching for an expensive piece that almost matches. Start with a canvas, heavyweight art paper, or a properly prepared painting board. Choose two or three colors already present in your room, such as cream, terracotta, olive green, or charcoal. Use broad brushstrokes, curved shapes, or simple geometric forms to build a composition that feels balanced without requiring advanced painting skills.
The size of the finished artwork matters just as much as the design. One generously sized piece can anchor a sofa or dining area, while a smaller canvas works well above a bedside table or desk. Allow the paint to dry completely, then frame the work or mount it securely. If you are unsure about the design, test the colors on scrap paper before applying them to the final surface.
3. Transform Glass Jars Into Decorative Vases
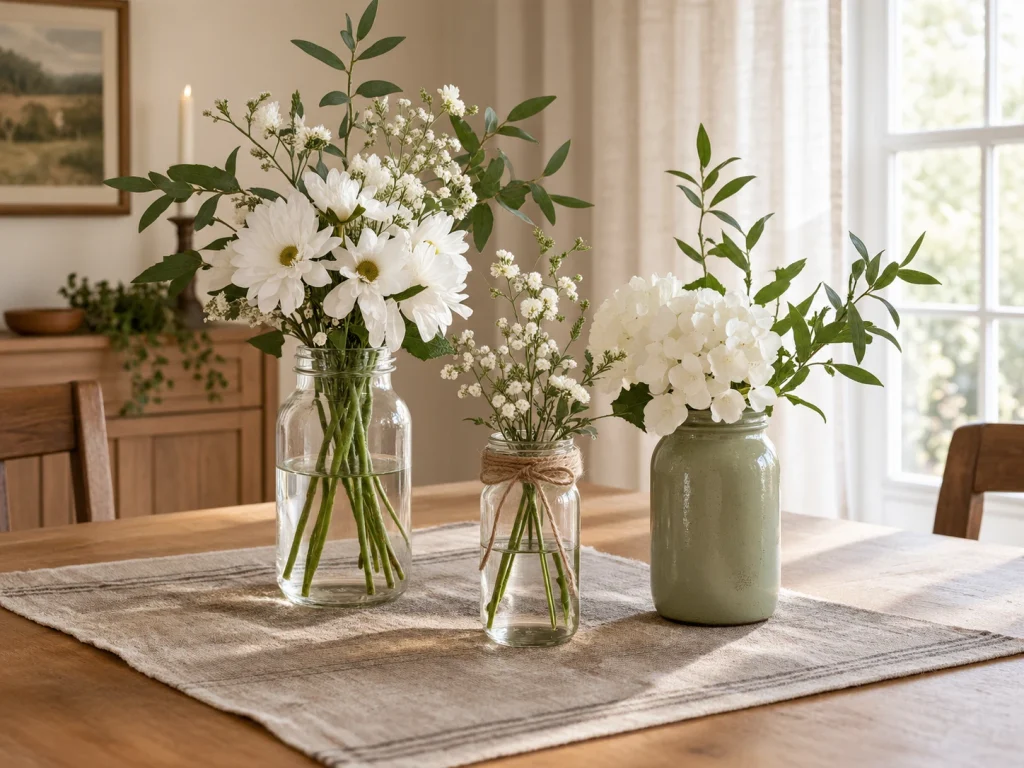
Empty glass jars can become attractive vases for fresh flowers, dried stems, or seasonal branches. Remove the labels, wash the containers thoroughly, and let them dry. You can leave the glass transparent for a clean, minimalist look, wrap a small section with natural twine for rustic texture, or paint the exterior using a product compatible with the glass. Reusing containers you already have keeps the project affordable and allows you to experiment with several shapes and heights.
For a polished display, group two or three jars on a dining table, kitchen shelf, or console. Use flowers with simple stems so the containers remain part of the design rather than disappearing behind a large bouquet. If you paint the glass, follow the manufacturer’s preparation and curing instructions, and keep coatings away from water contact surfaces unless the product is specifically suitable for that use.
4. Refresh Old Picture Frames With Paint
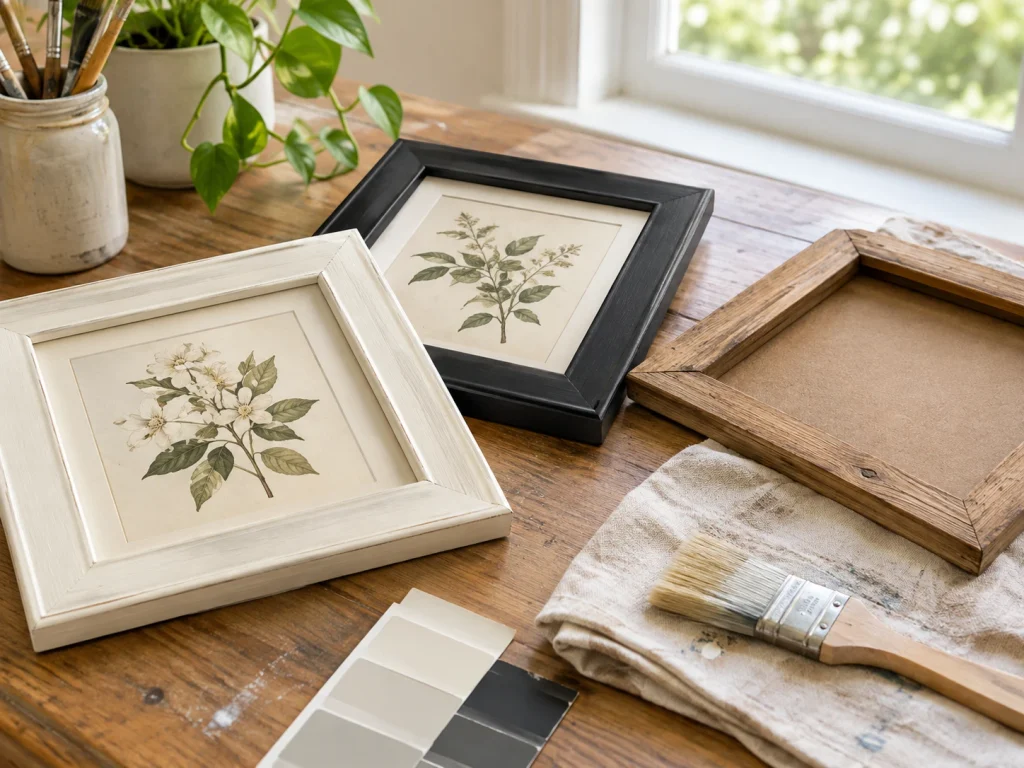
Old frames can look mismatched or dated when their colors compete with the rest of a room. Instead of replacing them, remove the artwork and glass where possible, clean the frame, and prepare the surface according to the material and paint instructions. Apply a compatible primer if required, followed by thin coats of paint. Warm white works well in light interiors, black creates contrast, and a restrained metallic finish can complement a more traditional room.
Use the refreshed frames for photographs, illustrations, fabric samples, or small pieces of original art. You can also group several frames on a shelf rather than hanging them all. Allow the finish to cure as directed before reassembling the frames, and make sure the glass and backing fit securely so the finished pieces are ready for display.
5. Make a No Sew Fabric Wall Hanging
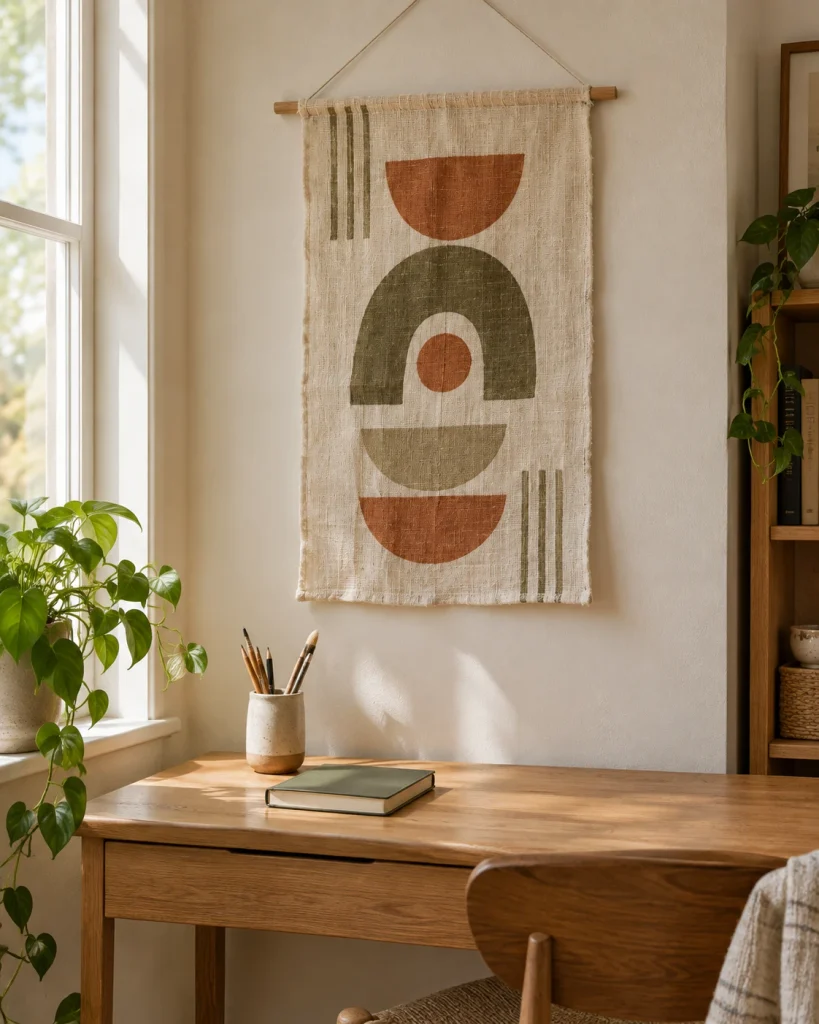
Fabric wall decor adds softness to a room that feels dominated by hard surfaces. Choose cotton, linen look fabric, or a remnant in a color that works with your bedding, curtains, or rug. Fold the top edge around a wooden dowel and secure it with a suitable fabric adhesive or iron on hem tape according to its instructions. Finish the bottom with a straight edge, a gentle curve, or a simple pointed shape.
A fabric hanging works particularly well beside a reading chair, above a compact desk, or in a bedroom with neutral bedding. Keep the pattern simple if the rest of the room already contains several prints. Use a secure hanging cord and a mounting method appropriate for the wall, and check that the finished textile hangs evenly without pulling away from the dowel.
6. Paint Terracotta Pots for a Coordinated Plant Display
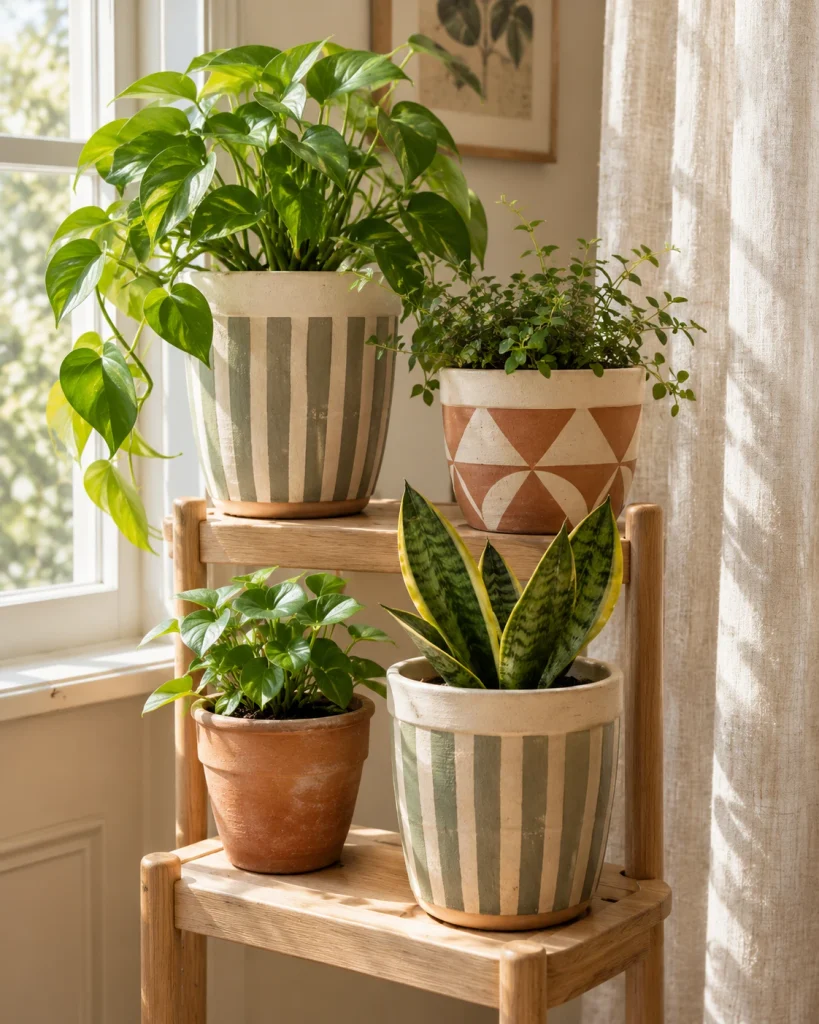
Plain terracotta pots can be transformed into decorative accents with a little paint and a simple design. Clean the outside, let it dry, and choose a paint suitable for porous terracotta. Try a contrasting rim, narrow stripes, color blocked sections, or an understated geometric pattern. Painter’s tape can help create clean lines, while a small brush allows you to add details without covering the entire pot.
Display the pots together on a windowsill, plant stand, or open shelf, varying their heights while keeping their colors connected. A combination of clay, cream, and sage creates a natural look, while black and white feels more contemporary. Preserve the drainage holes for living plants and follow the product instructions for any exterior coating or sealer you use.
7. Give a Thrifted Mirror a Fresh Look
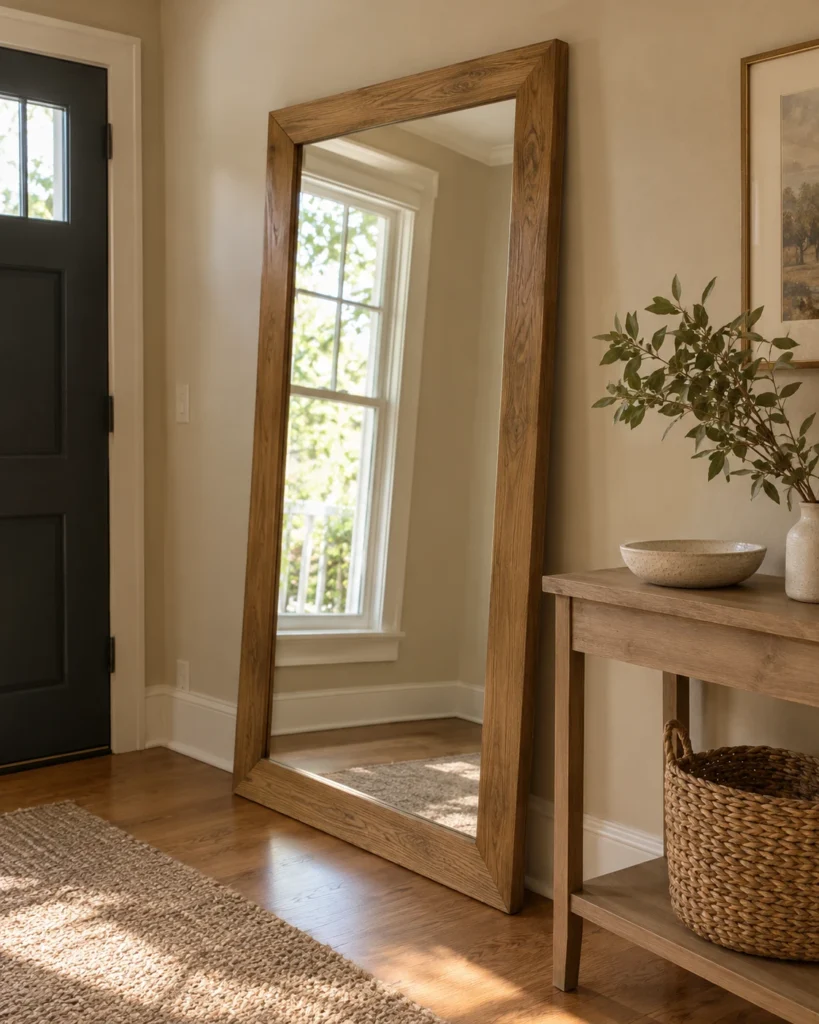
A secondhand mirror can become a striking decorative feature in an entryway, bedroom, or living room. Look for a piece with intact glass and a frame that can be safely refinished. Clean it carefully, prepare the frame material as appropriate, and apply a compatible paint or wood finish. A simple black frame can sharpen a modern interior, while warm white or natural wood works well with relaxed, neutral spaces.
Position the mirror where it reflects a window, a pleasant view, or a visually appealing part of the room. This can help a small space feel brighter without requiring additional furniture. Use appropriate mounting hardware and verify that the wall can support the mirror’s weight. Heavy mirrors should be secured properly rather than attached with an unsuitable adhesive.
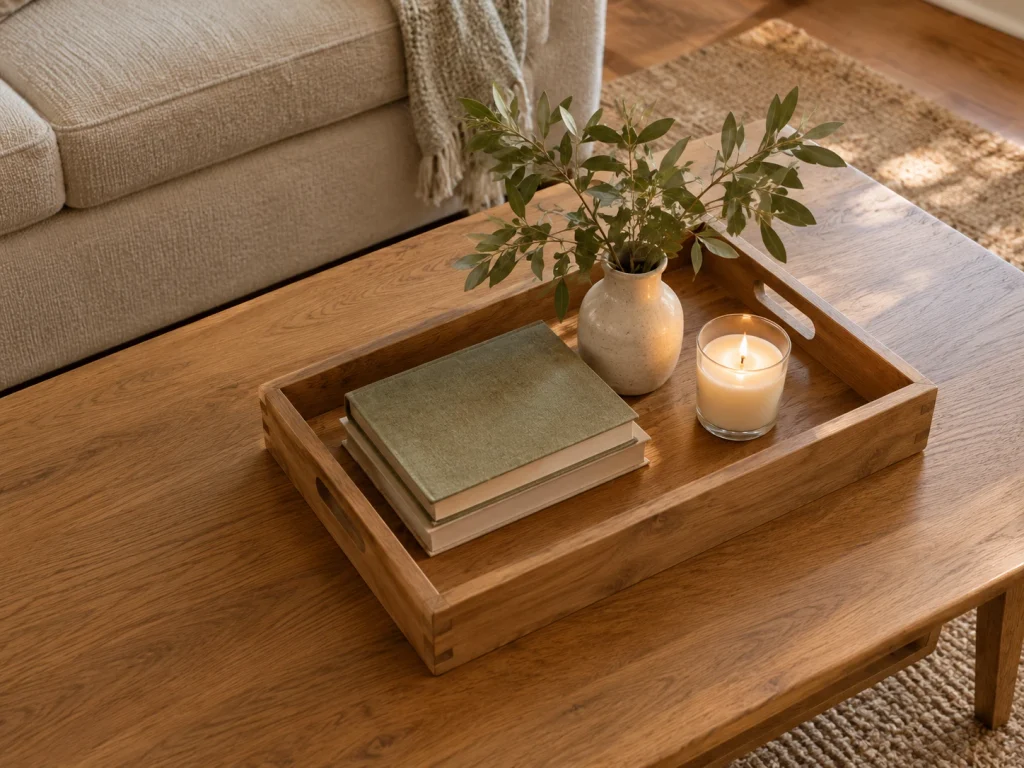
8. Create a DIY Coffee Table Tray
A tray helps organize a coffee table and makes everyday objects feel like a deliberate arrangement. Reuse a tray you already own or find a simple unfinished wooden one to customize. You can paint the base, stain the wood, or line the interior with decorative paper protected by a compatible finish. Keep the design restrained so the tray can work with different seasonal accessories throughout the year.
Arrange a small vase, a couple of books, and one practical accessory inside the tray, leaving enough open space for cups and everyday use. Choose objects with different heights and textures to avoid a flat appearance. The biggest advantage is flexibility: when you need to clear the table, the entire arrangement can be lifted away at once.
9. Give an Old Side Table a Mini Makeover
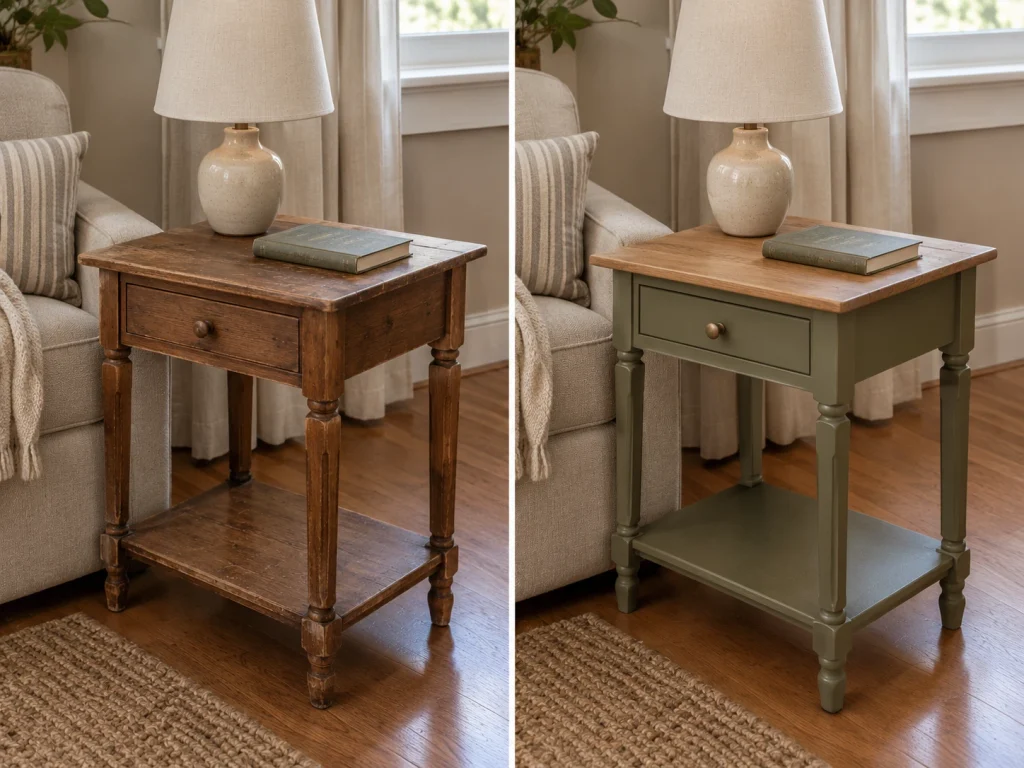
A small side table can look completely different with a careful finish update. First, check that the legs, joints, and top are structurally sound. Clean the piece, repair minor surface damage, and prepare the existing finish as recommended for the material. Use furniture paint for a color change or a compatible wood finish if you want to highlight the natural grain.
Consider painting the body a soft olive or warm white while leaving the top in a natural wood tone. Replace worn knobs if the table has a drawer, and add protective pads beneath the legs. Thin coats and proper drying time will usually produce a better finish than rushing through the project. Let the surface cure fully before placing books, lamps, or other objects on it.
10. Shape a Decorative Bowl From Air Dry Clay
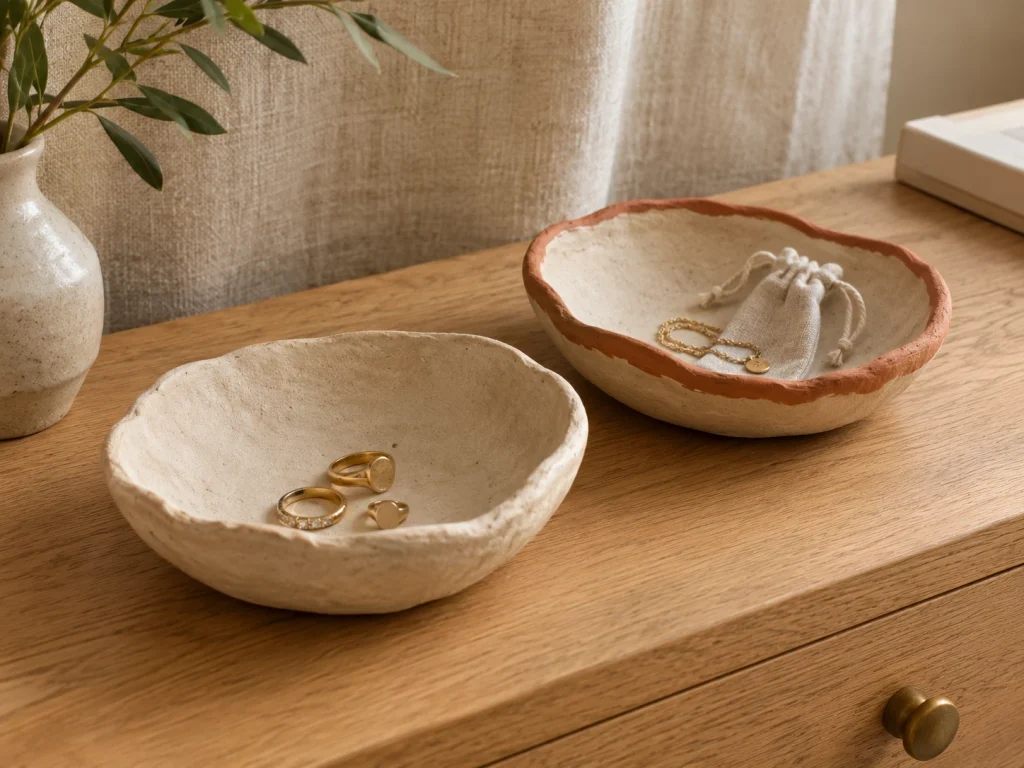
Air dry clay is useful for creating a small decorative bowl for a dresser, desk, or entryway. Knead the clay according to the instructions, roll it to an even thickness, and shape it gently over the outside of a suitable shallow mold. Smooth the edges and allow the piece to dry for the full recommended period, turning it only if the product instructions permit.
After drying, paint a simple rim or add understated lines in a color that complements your room. Use the finished bowl for dry items such as jewelry, keys, or hair accessories. Unless the clay and its finish are specifically approved for food contact and water exposure, do not use the bowl for food or liquids.
11. Sew or Customize Simple Pillow Covers
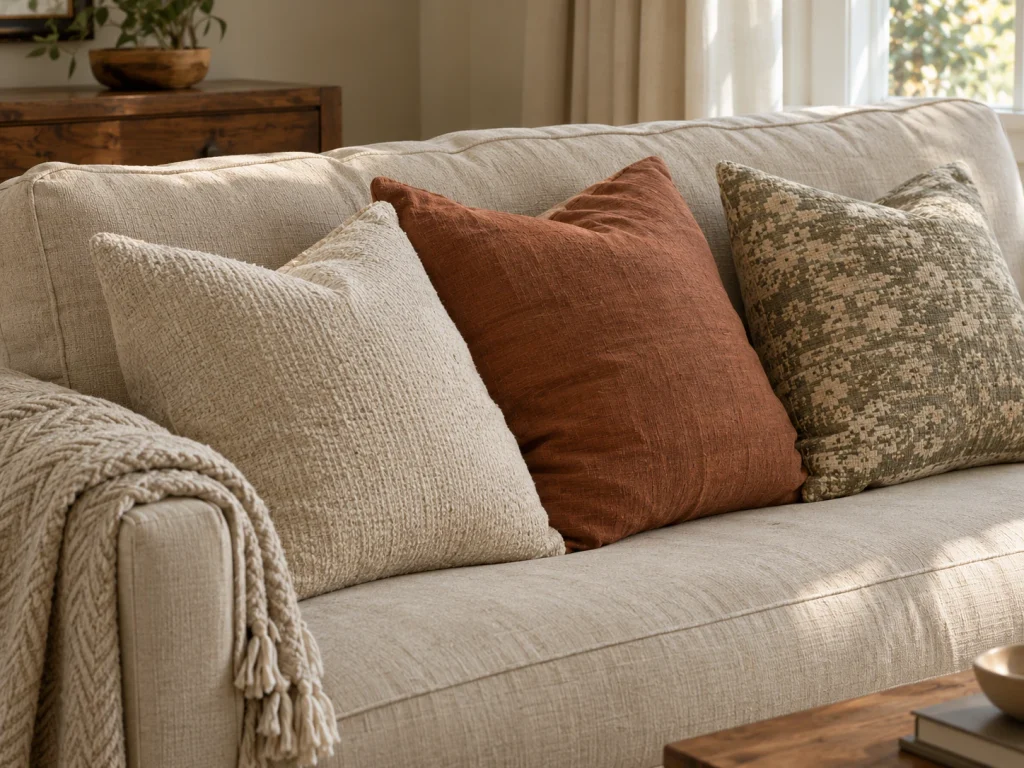
Decorative pillow covers can refresh a sofa or bedroom without replacing the cushions. Choose fabric that complements the existing curtains, bedding, or rug. If you sew, an envelope style cover is a practical beginner project because it does not require a complicated zipper. For a no sew alternative, use a suitable fabric adhesive or iron on hem tape and follow the product’s care instructions.
Combine solid colors with one understated pattern rather than introducing several unrelated prints. A textured cream cover paired with a muted rust or olive accent can make a neutral sofa feel warmer. Measure the existing inserts before cutting fabric, and check that seams are secure and edges are finished neatly.
12. Make a Table Runner From Leftover Fabric
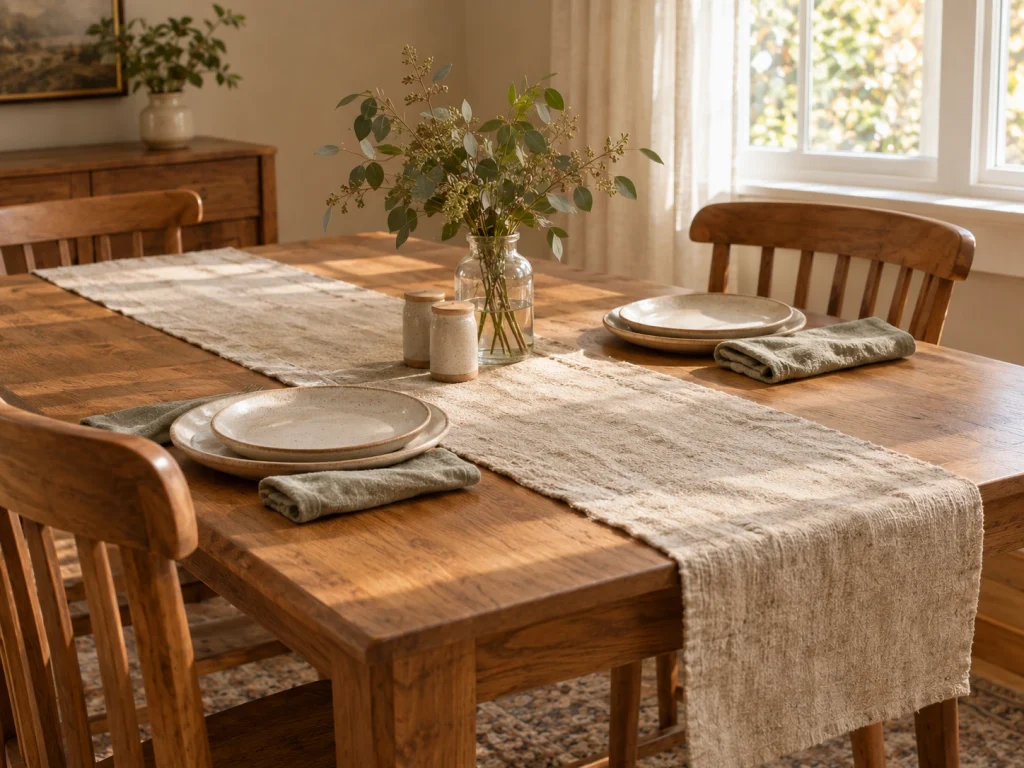
A homemade table runner adds color and texture to a dining table without requiring a full set of new linens. Reuse an appropriate fabric remnant or choose a small length of cotton or linen look fabric. Measure the table, decide how much overhang you prefer, and hem the edges with hand stitching, a sewing machine, or suitable iron on hem tape.
For a casual everyday table, a natural neutral runner works well with wooden furniture and simple ceramics. A muted pattern can bring color into a room without overwhelming the tabletop. Choose washable material if you plan to use the runner regularly, and keep fabric away from open flames and hot cookware.
13. Style a Decorative Stack of Books
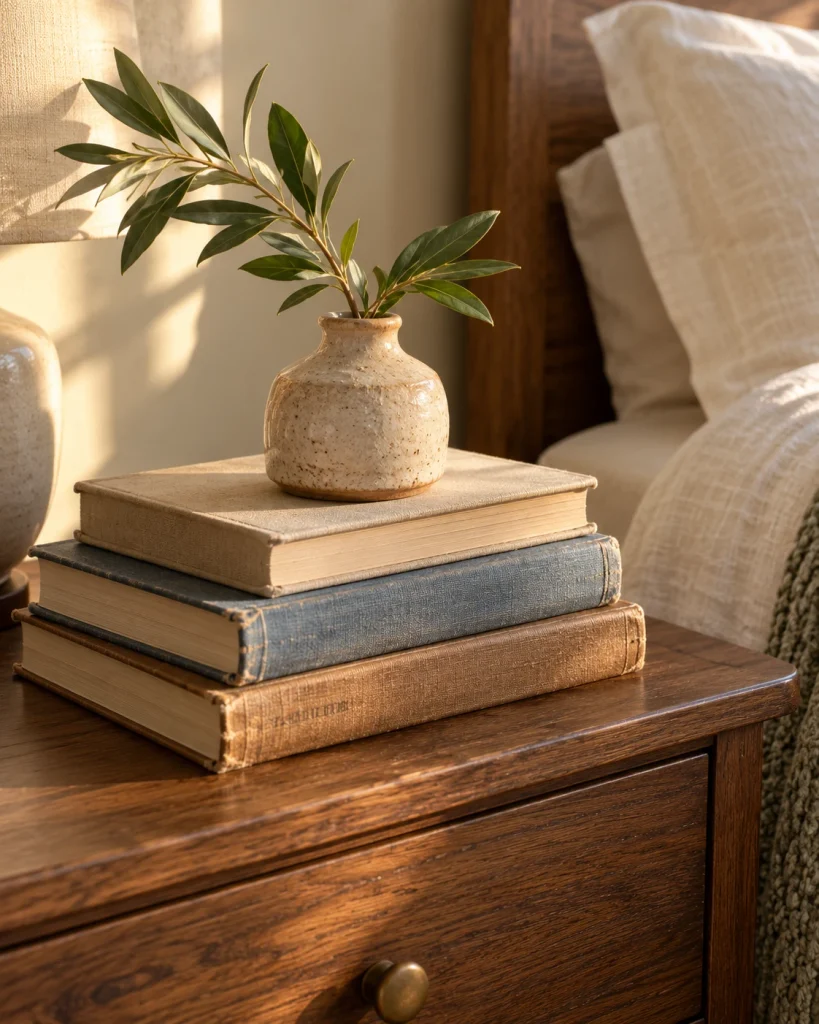
Books can add color, height, and personality to a coffee table or bedside table while remaining useful. Gather books from your existing collection or look for secondhand copies with covers or spines that suit your decor. Stack a few horizontally, placing the largest book at the bottom to create a stable base.
Add one small decorative object, such as a ceramic bowl or a compact vase, but leave enough of the covers visible to keep the arrangement from looking crowded. If your shelves contain many colors, a small group of related tones can create a calmer visual break. There is no need to remove original covers or alter books to make them fit your interior.
14. Frame Pressed Flowers and Leaves
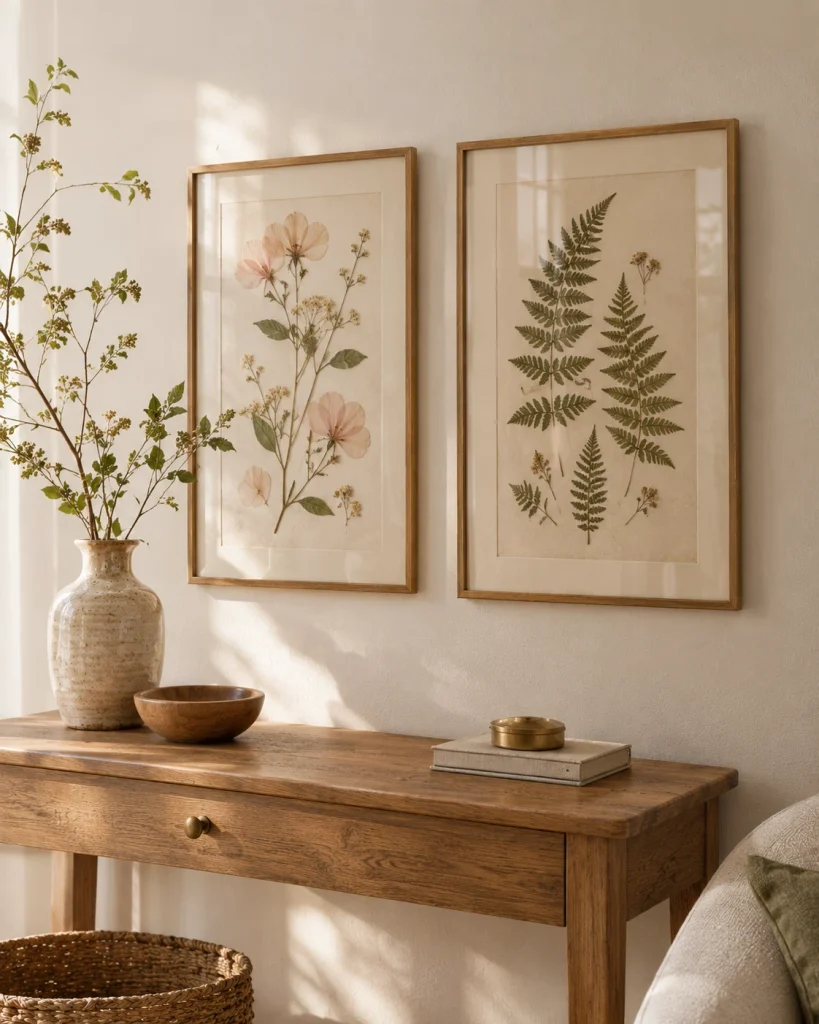
Pressed botanical art creates a delicate connection to nature and works especially well in bedrooms, hallways, and reading corners. Select flowers or leaves that can be pressed relatively flat, then place them between absorbent paper inside a flower press or under a heavy book. Allow the plant material to dry completely before arranging it, as trapped moisture can damage the artwork.
Arrange the dried pieces on a neutral background and secure them with a suitable mounting method. A simple glass frame keeps the focus on the natural shapes and colors. Hang the finished artwork away from damp areas and strong direct sunlight to help preserve the plant material.
15. Refresh a Lampshade With a Subtle Detail
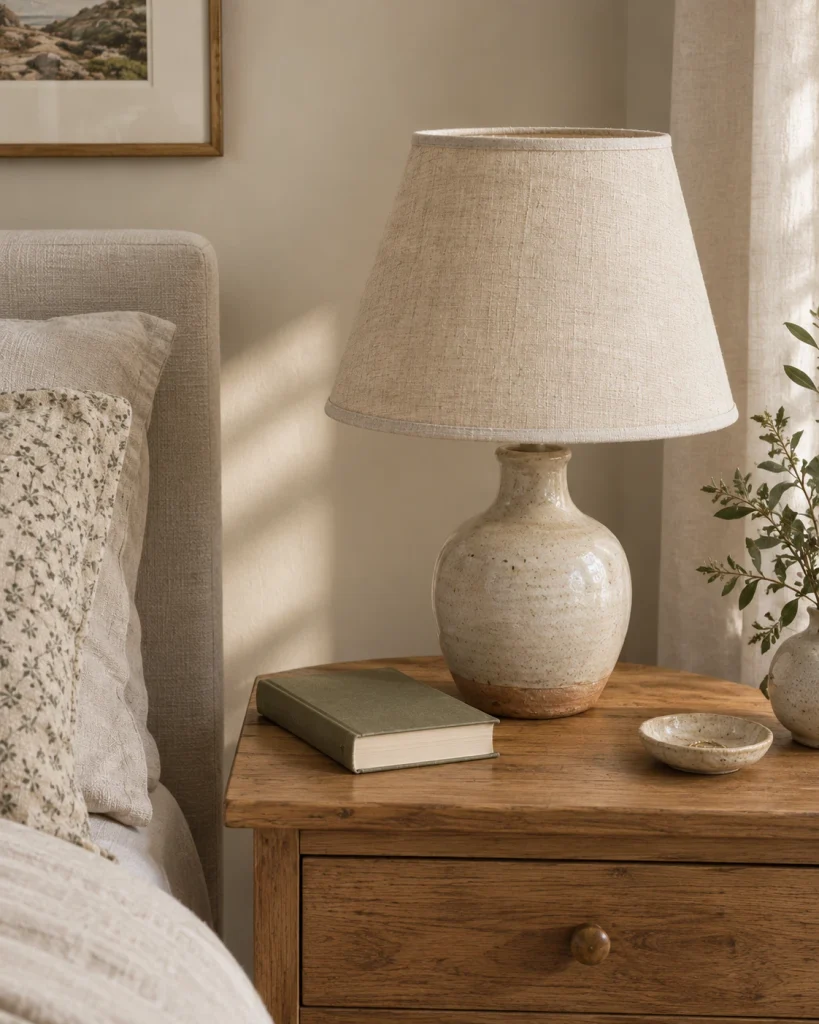
A plain lampshade can sometimes be improved with a suitable fabric covering, a restrained trim, or a new shade in a more flattering shape. Before modifying an existing shade, check the lamp manufacturer’s guidance and the heat requirements for the bulb. Use only materials and adhesives suitable for the specific shade and lighting arrangement.
A natural linen look shade can soften a bedroom, while a crisp white shade suits a clean, contemporary interior. If the existing shade is damaged or its material is unsuitable for modification, replace it with a compatible shade instead. Never cover ventilation openings or allow decorative materials to touch a hot bulb.
16. Add a Small Decorative Wall Shelf
A small wall shelf creates display space for artwork, lightweight accessories, or a small plant. Use a properly finished shelf board with compatible brackets and fasteners, or customize an existing shelf with paint or a suitable wood finish. Prepare the surface carefully, smooth any rough edges, and allow the finish to cure before installation.
Place the shelf where it will not obstruct doors or walkways. Keep the display simple with a small framed print, a lightweight vase, and perhaps one trailing plant suited to the available light. Choose mounting hardware that matches the wall material and expected load. Secure installation is essential, especially when the shelf will be positioned above a bed, desk, or seating area.
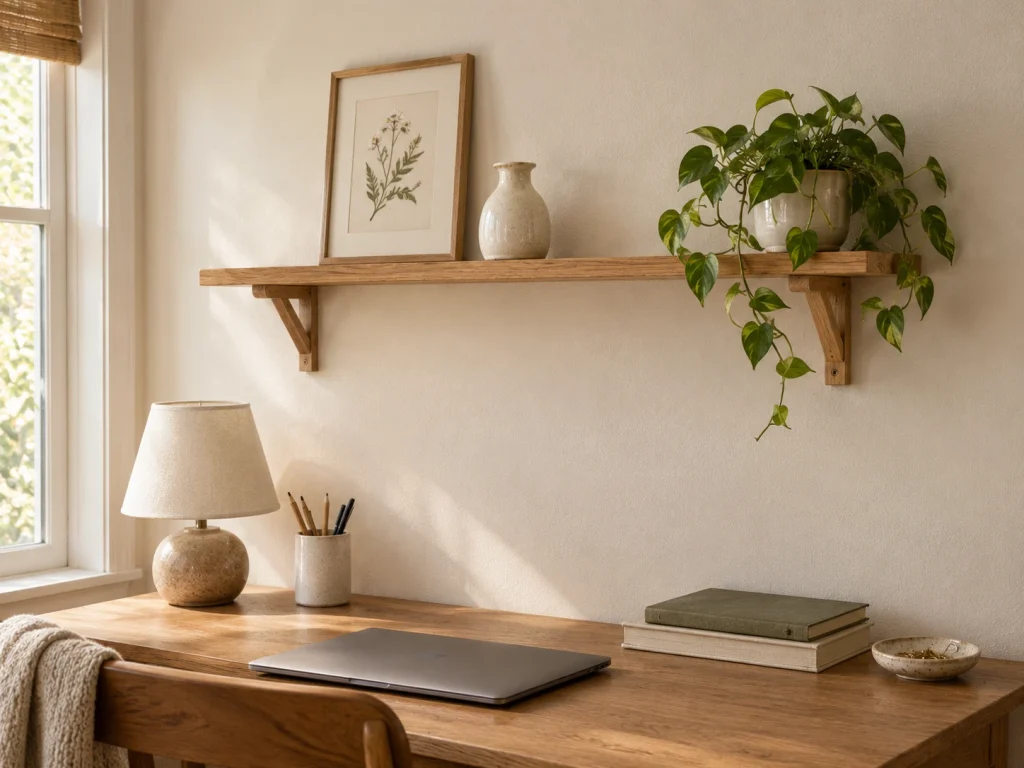
17. Turn a Woven Basket Into Attractive Storage
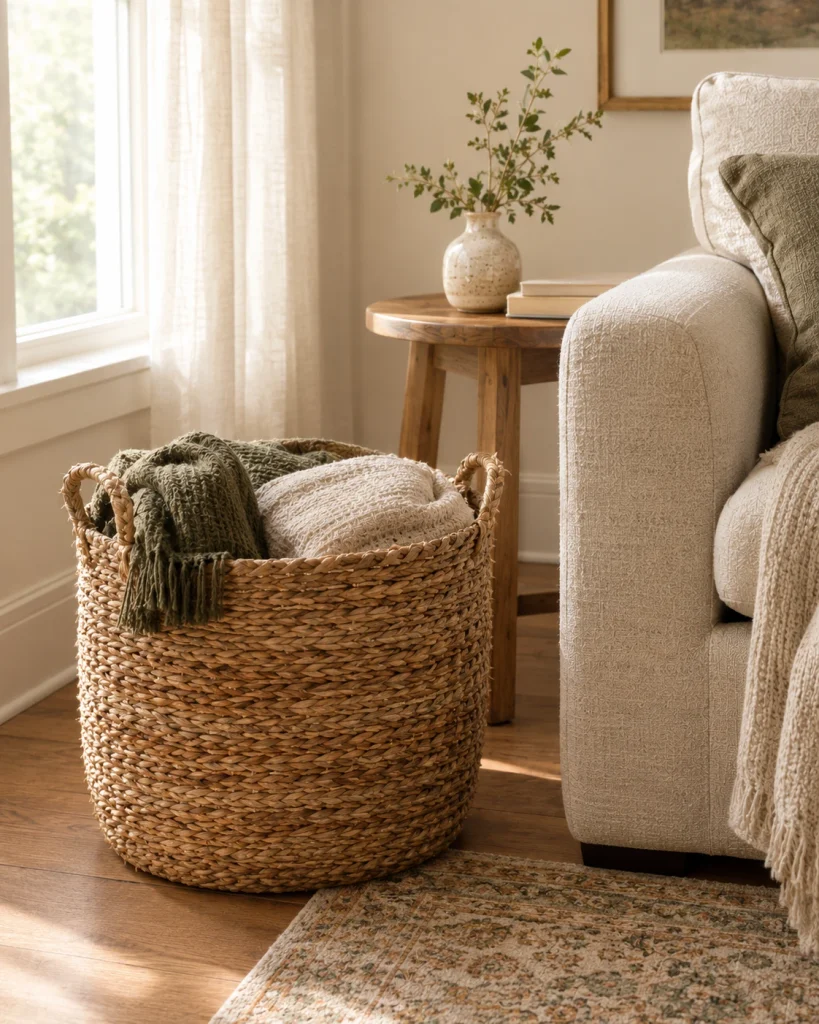
A woven basket can organize blankets, magazines, toys, or everyday supplies while adding natural texture to a room. Reuse one you already have or look for a secondhand basket with sturdy weaving and a stable base. Clean it according to the material, and inspect it for loose strands, sharp edges, or signs of pests before using it indoors.
Choose a size that suits the items you want to store rather than buying the largest basket available. A larger basket beside the sofa can hold folded throws, while smaller baskets can organize open shelves or a desk. Keeping similar objects together makes the room look calmer and reduces the need for additional decorative accessories.
18. Make a Wooden Bead Garland
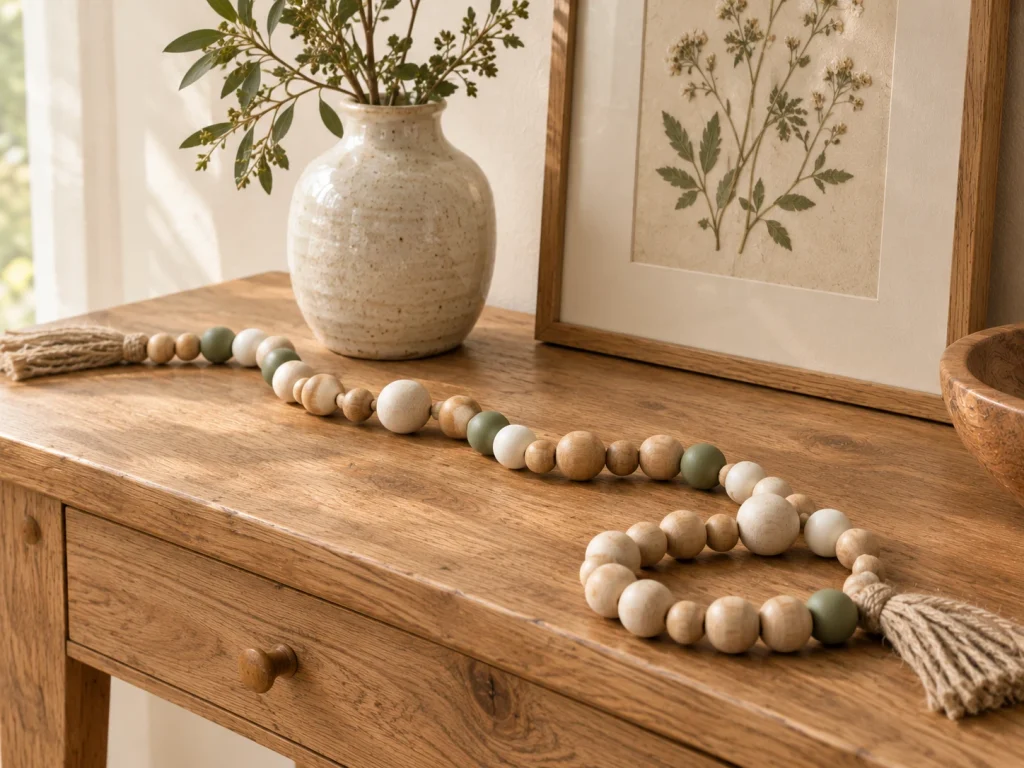
A wooden bead garland is a simple accent for a shelf, console, or coffee table. Thread unfinished wooden beads onto sturdy cord and experiment with a repeating pattern, mixing natural beads with a few painted ones. Tie secure knots at the ends and trim excess cord neatly. The project is easy to customize using a small number of materials.
Keep the color scheme consistent with your other decor, perhaps using natural wood with a few cream or muted sage beads. Drape the garland loosely around a stable decorative object rather than covering an entire surface. Small beads and loose cords can pose choking or entanglement hazards, so keep the finished decoration away from young children and pets.
19. Update Kitchen Cabinets With New Hardware
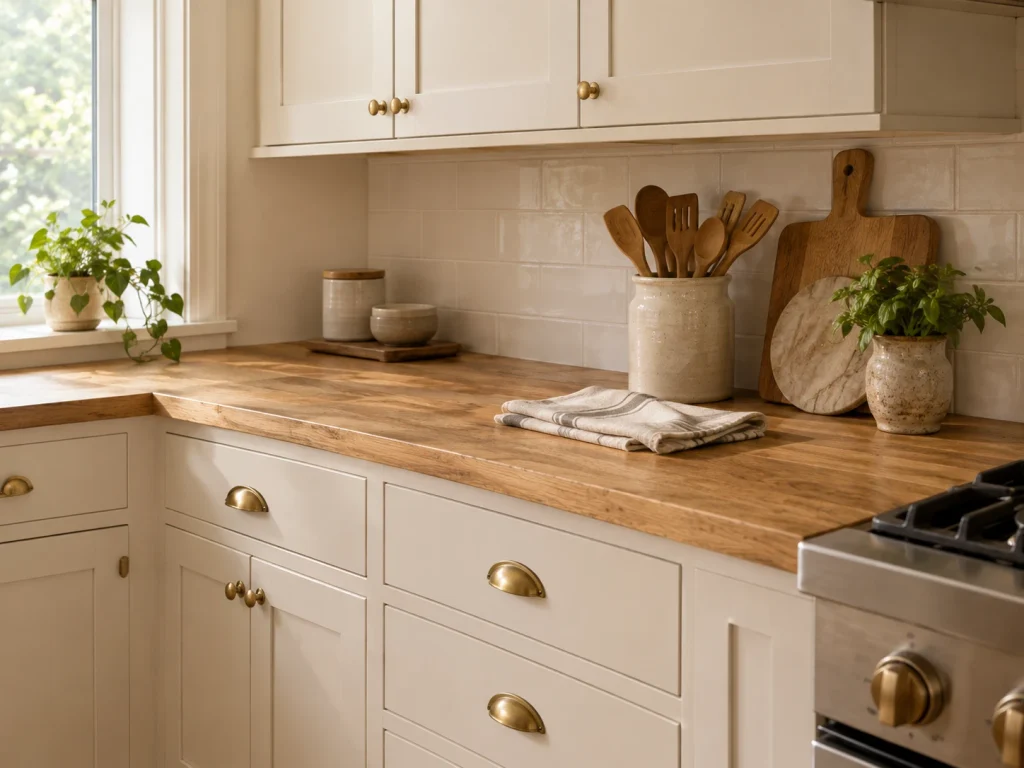
Changing cabinet knobs or pulls can refresh the look of a kitchen without replacing the cabinets. Measure the existing hardware carefully, especially the distance between screw holes on drawer pulls. Choosing replacements that fit the existing holes can reduce extra work and avoid unnecessary drilling or filling.
Matte black hardware creates a strong contrast, while brushed metal or a classic warm finish can complement other kitchen fixtures. Check the dimensions and finish before buying a complete set, and test one replacement if possible. Renters should obtain permission before changing fixtures and keep the original hardware for reinstallation later.
20. Repurpose a Wooden Crate for Storage
A sturdy wooden crate can provide useful storage for books, craft supplies, or folded blankets. Inspect the crate for loose boards, exposed nails, splinters, and instability before using it. Sand rough areas carefully, remove dust, and apply an indoor appropriate finish if you want a more polished appearance.
Use the crate as a freestanding organizer unless it has been properly prepared and secured for another purpose. If you intend to mount it on a wall or stack multiple crates, verify the structure and use appropriate fasteners. A simple natural finish works well with woven baskets, houseplants, and neutral textiles, while a muted painted finish can connect the crate to an existing color palette.
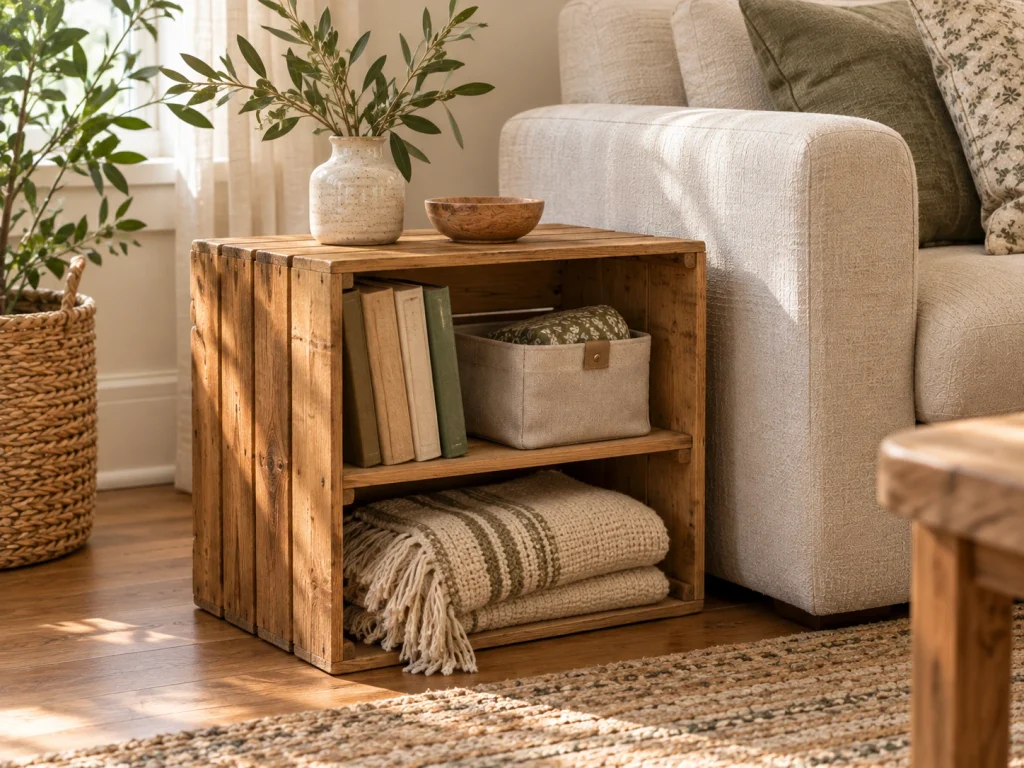
21. Create an Entryway Catchall Station
A small entryway can quickly become crowded with keys, sunglasses, mail, and other everyday objects. Use a shallow tray, a small bowl, or a repurposed container to give frequently used items a consistent place. If the material needs updating, apply a compatible paint or finish and allow it to cure fully before using it.
Keep the arrangement practical by leaving enough room to put items down without knocking other objects over. A tray beside the door can be paired with a small framed print or a basket for incoming mail. The aim is to make the entrance easier to use while giving the first area you see at home a more organized appearance.
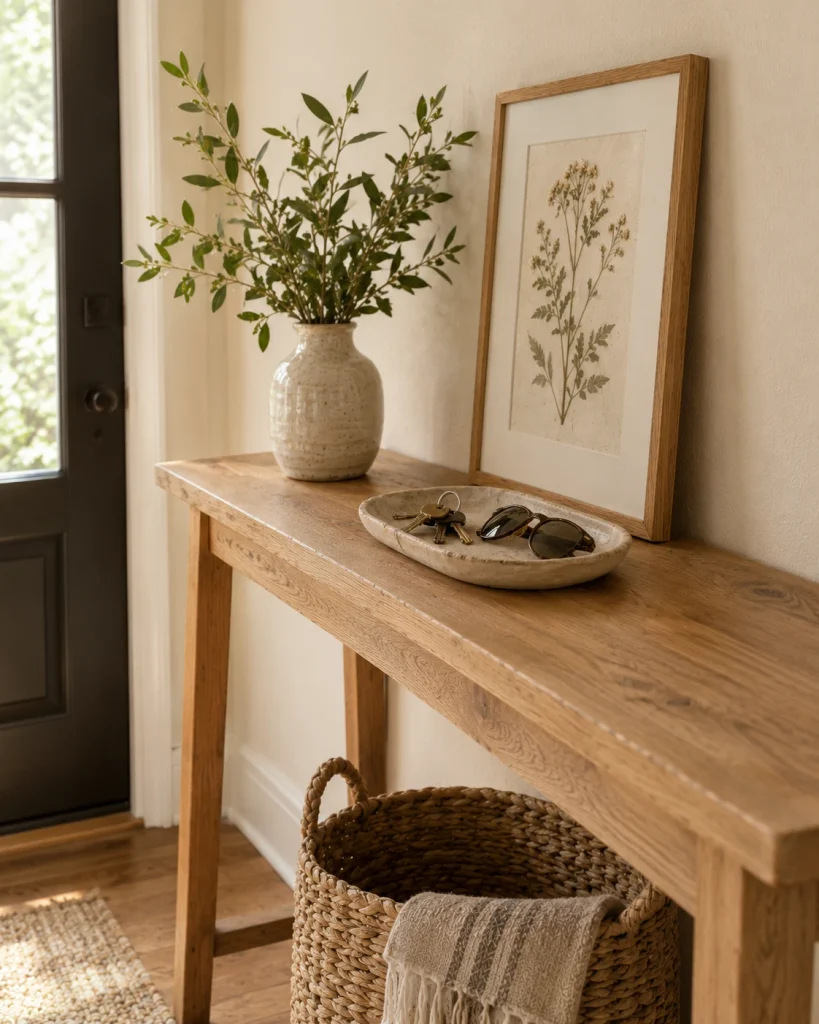
22. Arrange Natural Branches in a Decorative Vase
A branch arrangement can create height and visual interest on a dining table, mantel, or console without requiring a large bouquet. Choose clean, naturally fallen branches from a safe location where collection is permitted, or use suitable purchased branches. Inspect them for insects, damage, and sharp ends before bringing them inside.
Place the branches in a stable vase with enough weight and a wide enough base to support their shape. Trim the lengths gradually and step back to check the overall balance. A restrained arrangement works well because the natural curves become the main decorative feature. You can change the vase or nearby accessories through the year without replacing the entire display.
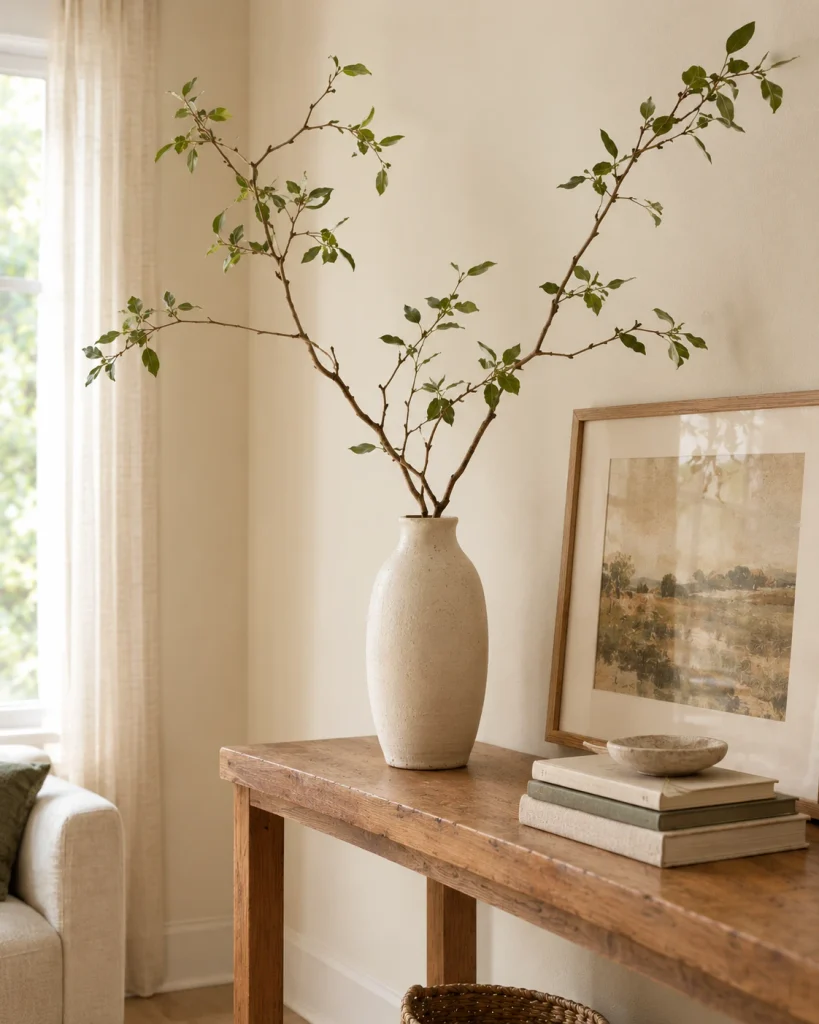
23. Give a Plain Vase a Textured Finish
A plain vase can become a more distinctive accessory with a carefully chosen paint or decorative coating. Start with a clean vase and select a finish compatible with its material. A matte exterior, a simple color block, or a narrow contrasting band can change the overall look without requiring a complicated craft technique.
Test the finish on a small inconspicuous area if possible and follow the product’s preparation and drying instructions. Keep decorative coatings away from the interior if the vase will hold water, unless the product is specifically suitable for that purpose. Pair the finished vase with branches or dried stems to create a coordinated display on a console, dining table, or bedside surface.
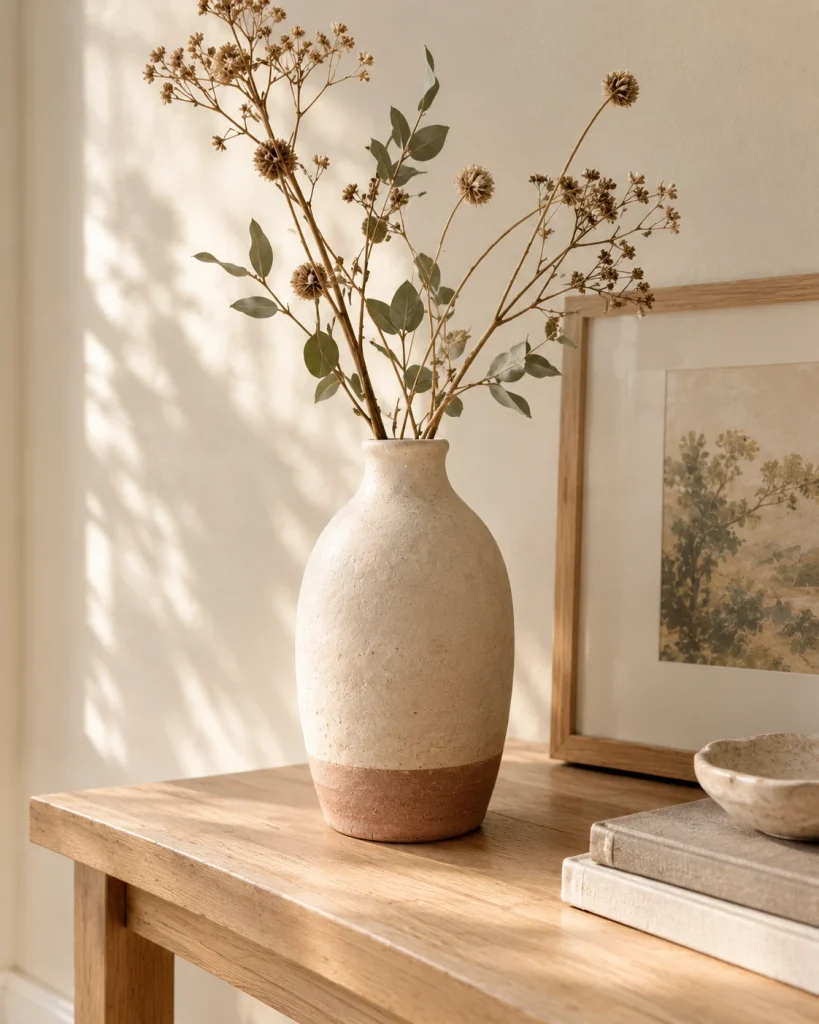
24. Create a Personalized Memory Wall
A memory wall can bring together photographs, postcards, personal illustrations, and meaningful keepsakes without requiring expensive artwork. Choose a handful of items with related colors or themes, then arrange them in a loose grid or a more relaxed composition. Reuse existing frames where possible, or create simple mounts using sturdy card and appropriate display materials.
Lay out the arrangement before hanging anything and keep enough space between items for each piece to remain visible. A consistent frame color creates a structured appearance, while a mixture of frame styles feels more collected. In a rental, consider hanging methods suitable for the wall surface and the weight of each frame, and check the relevant product instructions before installation.
25. Restyle a Bookshelf Using What You Already Own
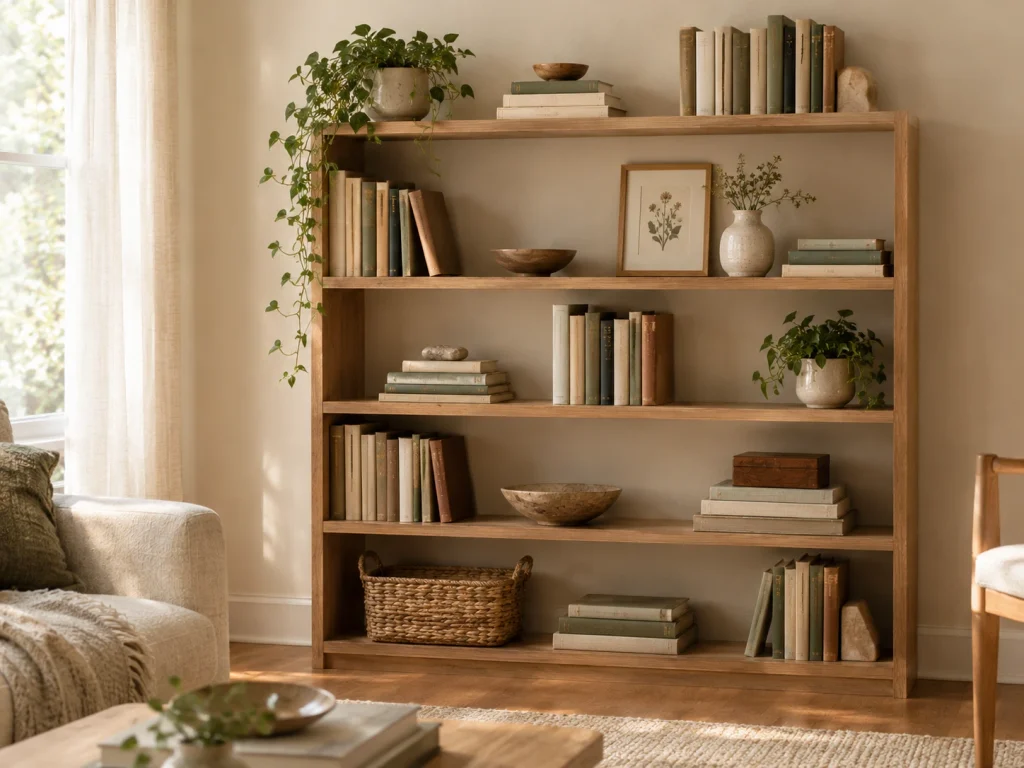
You do not always need new decorations to improve a room. Empty one section of your bookshelf and group books by size, color, or subject. Add a few existing objects with different heights and textures, such as a ceramic vase, a framed photograph, or a small plant that suits the available light. Leave some open space so the arrangement does not look overcrowded.
Repeat a small number of colors across the shelves to connect them with the rest of the room. Keep heavier books and stable objects on secure shelves, and avoid stacking decorations where they could fall. This is one of the easiest budget decorating projects because it costs nothing if you use your existing collection and gives you a chance to rediscover items you already enjoy.
How to Decorate Your Home on a Small Budget
The easiest way to control decorating costs is to work on one area at a time. Decide whether the room needs better storage, more color, a focal point, or softer textures before purchasing supplies. A project that solves a specific problem is more likely to improve the room than a collection of unrelated crafts.
Start by rearranging furniture and styling items you already own. Next, choose one project that makes a visible difference, such as refreshing a gallery wall or repainting a small side table. Reuse materials wherever practical, compare the total supply cost with the price of a ready made alternative, and complete each project properly before moving on to the next.
Common Budget Decorating Mistakes to Avoid
Buying supplies before planning. Craft materials add up quickly when you purchase them without a clear project in mind. Check your storage and write a short materials list before shopping.
Mixing too many unrelated colors. Inexpensive decorations can look disconnected when each introduces a different finish or palette. Repeat a few colors throughout the room to create a more cohesive result.
Ignoring scale. Tiny pictures can look lost on a large wall, while oversized accessories can overwhelm a small table. Measure the available space and consider the finished piece from the usual viewing distance.
Skipping preparation. Paint may peel from an unprepared surface, and unfinished wood can leave splinters. Clean and prepare materials according to the product instructions, and allow finishes to dry and cure as directed.
Filling every empty surface. Open space gives the eye a place to rest and allows favorite pieces to stand out. Choose decorations that add meaning, color, texture, or practical value rather than filling every corner.
Overlooking safety. Secure heavy mirrors and shelves with suitable hardware, use compatible materials around lighting, and check that furniture remains stable after refinishing. A decorative project should improve a space without creating a hazard.
Frequently Asked Questions
How can I decorate my home on a very small budget?
Start by rearranging furniture, clearing crowded surfaces, and reusing items you already own. Painting an existing frame, making abstract art, styling a bookshelf, or repurposing glass jars can refresh a room without buying new furniture.
What DIY home decor projects are easiest for beginners?
Refreshing picture frames, arranging a gallery wall, painting terracotta pots, styling a coffee table tray, and restyling bookshelves are approachable options. Choose a project that uses familiar materials and does not require specialized tools.
How can I make cheap home decor look expensive?
Use a consistent color palette, choose a few interesting textures, and pay attention to scale and finish. Coordinated thrifted frames, natural wood, woven baskets, and simple handmade artwork can look polished when arranged thoughtfully.
What DIY decor ideas work well for renters?
Try lightweight fabric hangings, portable decorative trays, customized vases, cushion covers, and furniture updates that do not permanently alter the property. Check your lease and the manufacturer’s instructions before changing fixtures or using removable wall hanging products.
Is DIY home decor always cheaper than buying decorations?
No. DIY projects can save money when you reuse materials, but tools, supplies, mistakes, and time can increase the total cost. Compare the complete project cost with a ready made alternative before starting.
Final Thoughts
Affordable home decorating works best when each project adds something useful or meaningful to your space. A thrifted frame can bring character to an empty wall, a refreshed side table can make a room feel more considered, and a carefully styled bookshelf can look different without costing anything.
Choose one project that fits your budget, skill level, and available time. Reuse what you can, prepare materials properly, and focus on creating a home that feels personal rather than filling it with decorations simply because they are inexpensive.






7 Comments