10 Last Minute DIY Halloween Decor Ideas Under $10
Halloween is almost here, but you do not need an expensive shopping trip or an entire weekend of crafting to make your home feel festive. A few ordinary supplies, some recycled jars and a little creativity can turn a plain corner into a spooky display before your guests arrive.
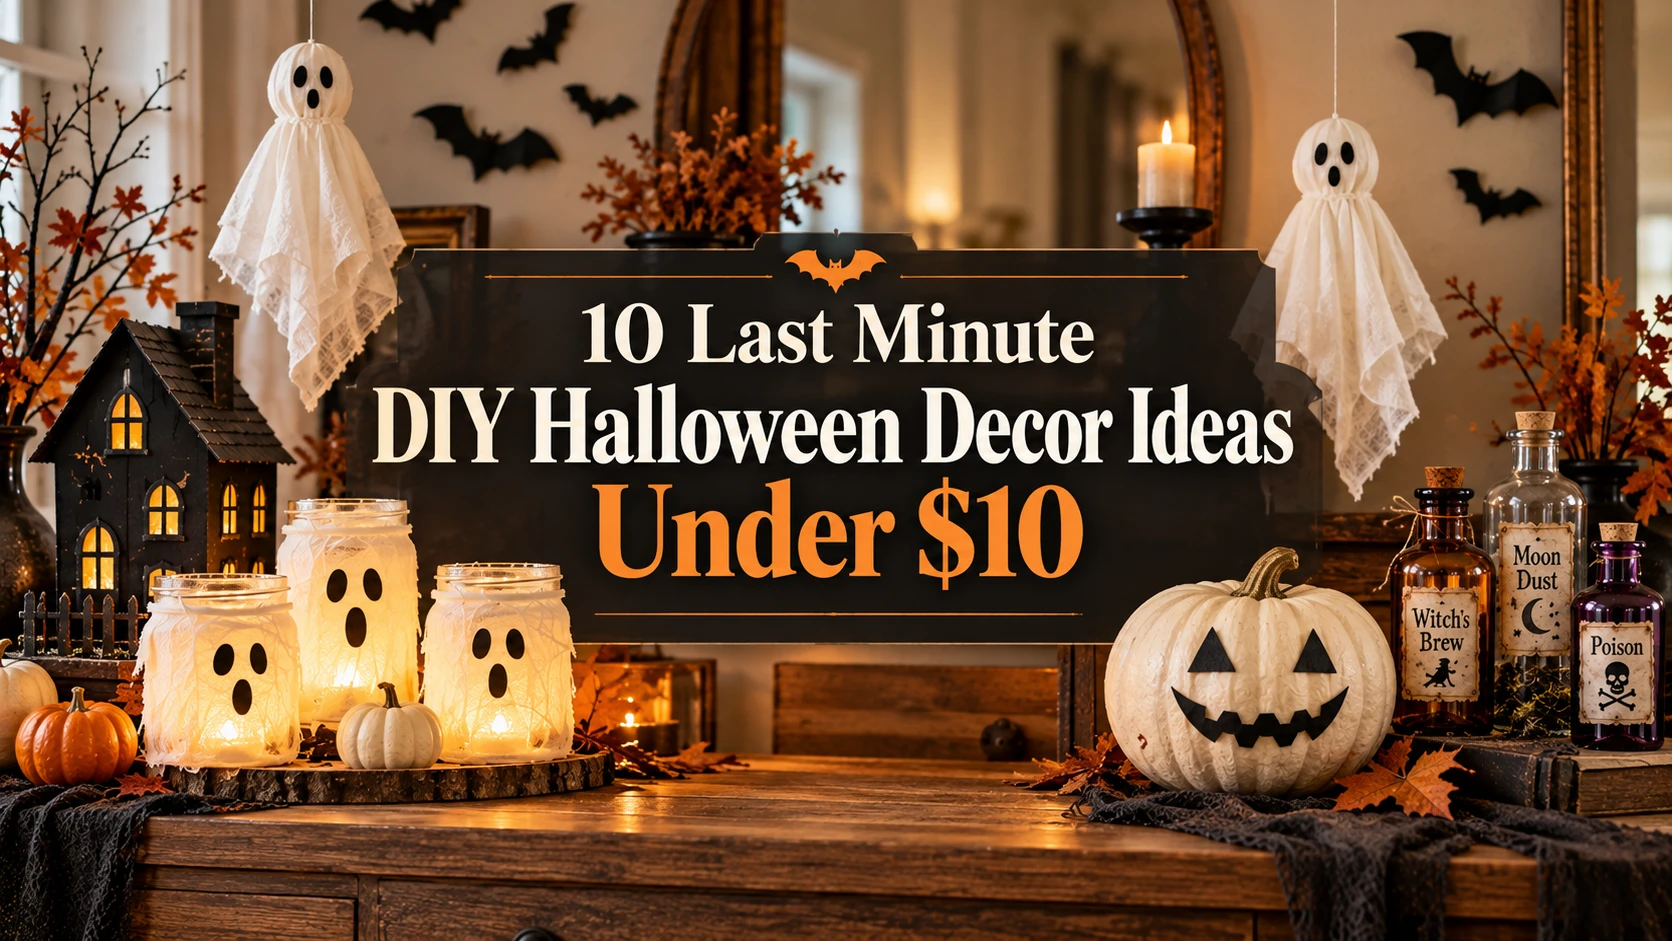
These last minute DIY Halloween decor ideas under $10 are designed for people who want quick results without complicated tools or specialty materials. You will find simple paper decorations, glowing jar lanterns, miniature haunted displays and other projects that work in apartments, living rooms, entryways and Halloween party spaces.
The estimated costs below are for each small project, assuming you already have basic items such as scissors, a marker or tape when needed. Actual prices vary by store, location and package size. If you need to buy every supply from scratch, some projects may cost more than $10.
1. Make a Spooky Bat Wall in 10 Minutes
Estimated project cost: $1 to $4
Time: 10 to 15 minutes
Difficulty: Easy
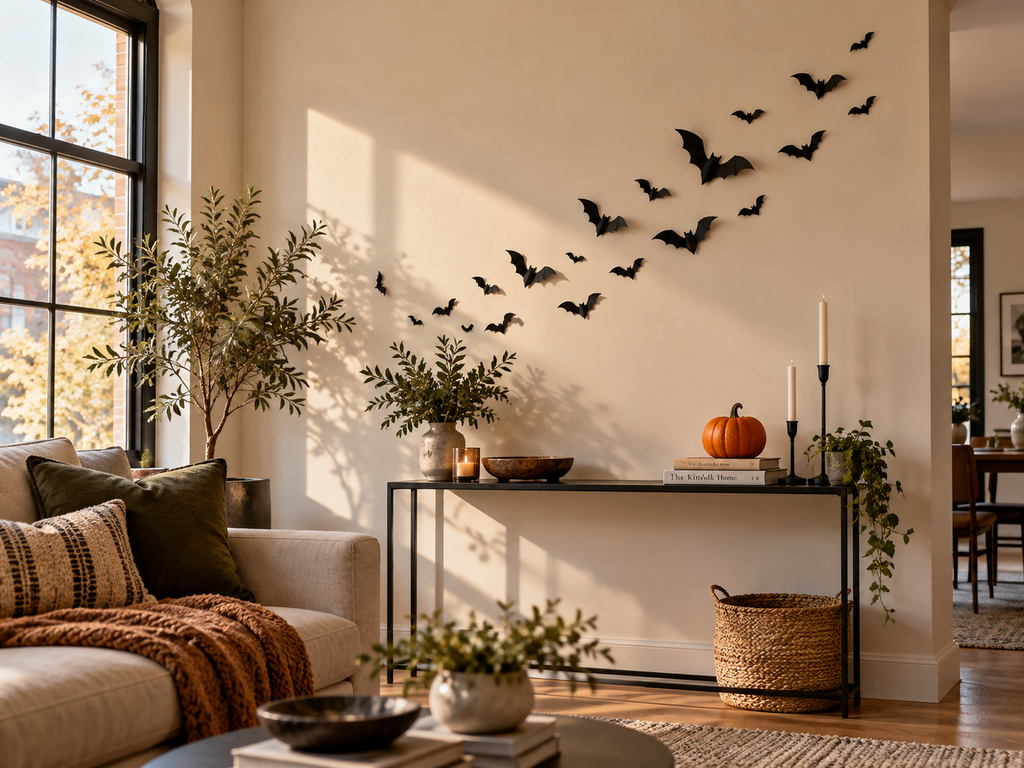
A flock of black paper bats is one of the fastest ways to make an ordinary wall look ready for Halloween. The secret is to arrange the bats as though they are flying across the room rather than placing them in a straight line.
What you need
• Black construction paper or cardstock
• A pencil and scissors
• Removable wall safe tape or adhesive dots
How to make it
- Draw three bat shapes in different sizes on black paper. Use a simple silhouette with pointed wings and two small ears.
- Cut out the shapes and use the first bat as a template for the remaining pieces.
- Fold each bat gently down the middle and lift the wings slightly to create a subtle three dimensional effect.
- Begin with a small group near one corner of the wall. Add more bats in a curved trail that appears to move upward or toward a doorway.
- Leave some open space between the shapes so the display looks intentional rather than crowded.
Styling tip: Use a mixture of small and large silhouettes against a light wall for strong contrast. For a rental home, test the adhesive in an inconspicuous spot first and avoid anything that could pull off paint.
2. Turn Empty Glass Jars Into Ghost Lanterns
Estimated project cost: $0 to $5
Time: 10 minutes
Difficulty: Easy
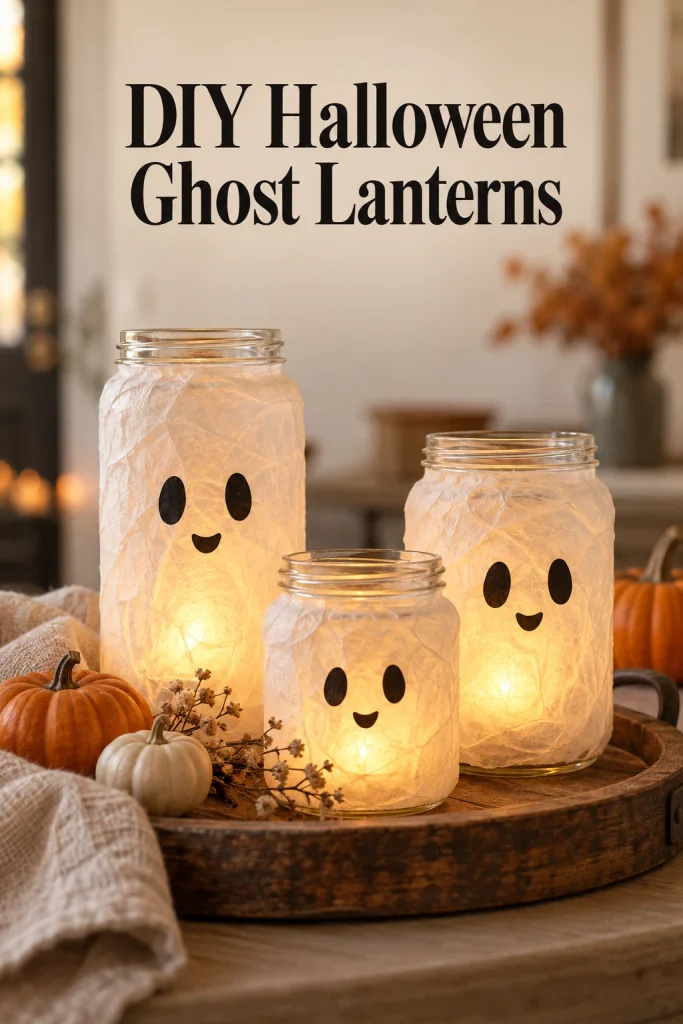
Before recycling empty jam jars or sauce jars, give them a second life as tiny Halloween lanterns. Their transparent surfaces let soft light shine through, while simple ghost faces make them instantly recognizable.
What you need
• Two or three clean, dry glass jars
• White tissue paper or thin white paper
• Black paper or a black marker suitable for the surface
• Battery operated LED tea lights
• Tape or removable adhesive
How to make it
- Remove the labels from your jars and wash away any sticky residue.
- Wrap the outside loosely with white tissue paper. Keep the paper away from the jar opening so it cannot fall inside.
- Cut two small black oval eyes and a little mouth from black paper, or draw the faces directly on the tissue paper with a marker after testing it.
- Attach the faces to the front of each jar.
- Place a battery operated LED tea light inside each jar and switch it on after the paper is secured.
Arrange the lanterns together on a tray, windowsill or entry table. Vary the jar heights if you have different sizes available.
Styling tip: Three jars look more like a coordinated decoration when grouped together than when scattered throughout a room. Never use a real flame inside a paper covered jar.
3. Create a Mini Haunted House From a Cardboard Box
Estimated project cost: $0 to $4
Time: 20 to 30 minutes
Difficulty: Easy
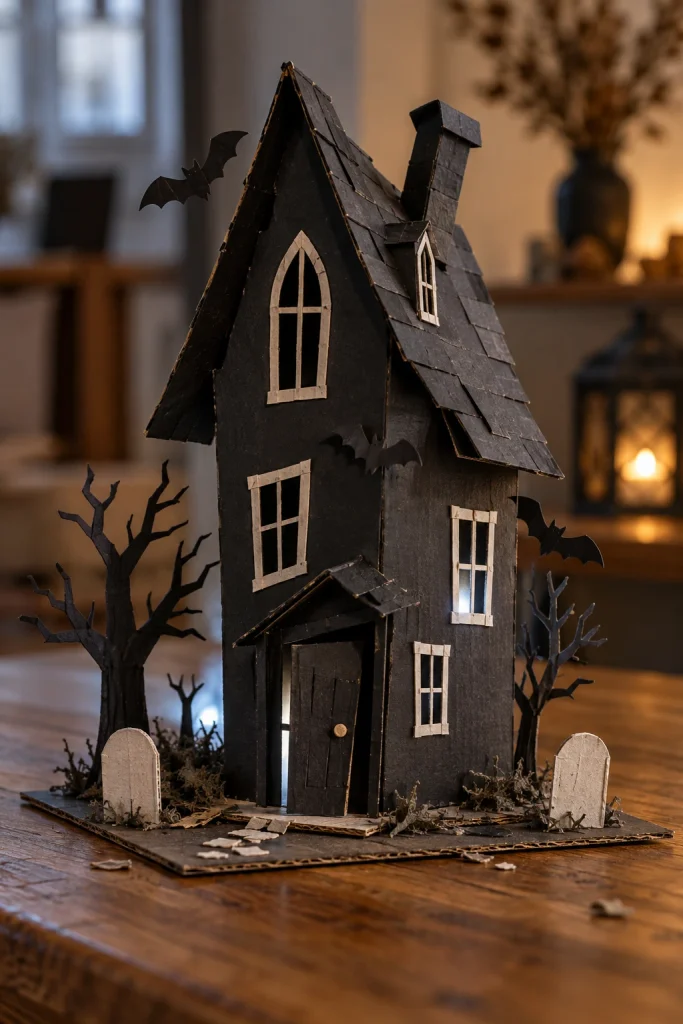
You do not need a miniature village from a seasonal store to create a haunted scene. An empty cereal box or small delivery box can become a little haunted house for a bookshelf, side table or party centerpiece.
What you need
• A small cardboard box
• Black paper or dark paint
• Scissors and a ruler
• White paper scraps
• Glue or tape
How to make it
- Flatten the box if necessary, then cut simple pointed roof shapes and uneven window openings into the cardboard.
- Cover the front and sides with black paper, folding the edges neatly around the corners.
- Cut tiny rectangles from white paper to create window frames, or leave the windows as dark openings for a more mysterious look.
- Add a crooked paper door, a narrow chimney or a few cutout bats.
- Stand the finished house on a small piece of cardboard and surround it with paper scraps shaped like bare trees or tombstones.
For an atmospheric display, place a battery operated light behind the structure, away from loose paper and cardboard. Keep the light source cool to the touch and follow its safety instructions.
Styling tip: A single black house with a few white details can look more polished than a collection of mismatched decorations. Add a second smaller building only if you have enough room to display both comfortably.
4. Make a Floating Ghost From an Old White Sheet
Estimated project cost: $0 to $5
Time: 10 to 15 minutes
Difficulty: Easy
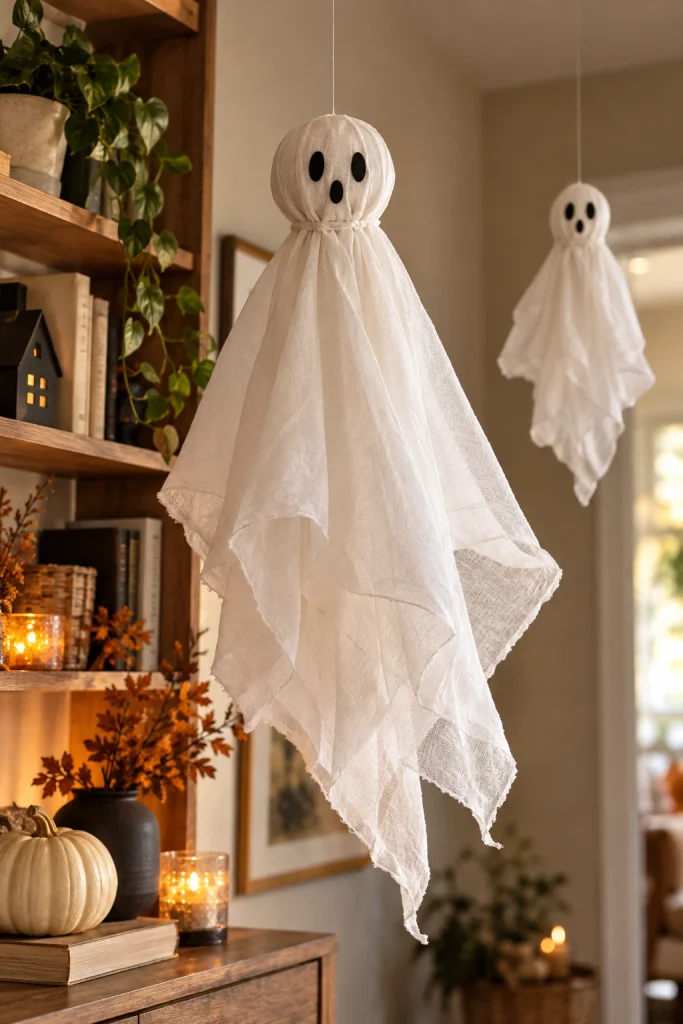
An old white sheet or piece of lightweight fabric can become a simple floating ghost without sewing or special craft equipment. This works especially well in a quiet corner, beside a bookshelf or above a console table.
What you need
• A small piece of white fabric or an old white sheet
• String or ribbon
• A lightweight support, such as a small paper ball
• Black paper for the face
• Tape or glue
How to make it
- Cut a manageable square of white fabric. A lightweight piece is easier to drape than a thick blanket.
- Place a loosely crumpled paper ball in the center to form the ghost’s head.
- Gather the fabric underneath the head and tie a piece of string around it.
- Attach two small black paper eyes and an optional tiny mouth.
- Tie another piece of string to the gathered top and suspend the ghost from a secure indoor support, or place it over a lightweight stand.
For a shelf display, let the fabric fall naturally and trim any excessively long edges. For a hanging decoration, make sure it cannot fall onto a heater, light fixture or walkway.
Styling tip: Two small ghosts at different heights can create a playful scene without requiring a large display.
5. Style a Halloween Potion Bottle Display
Estimated project cost: $0 to $6
Time: 10 to 20 minutes
Difficulty: Easy
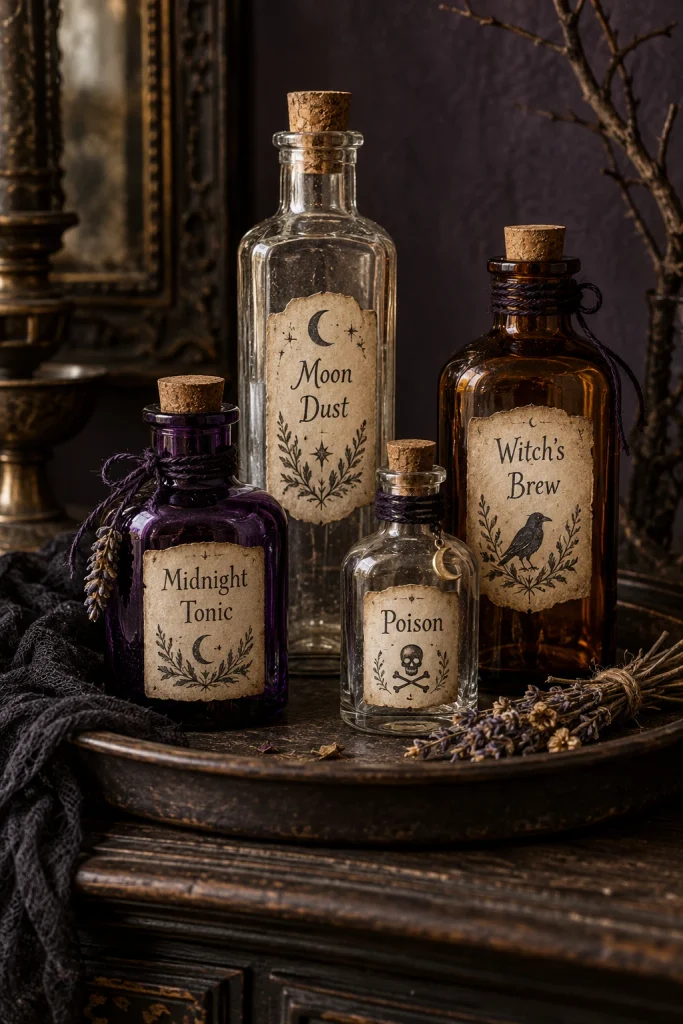
A few empty bottles can become a miniature witch’s apothecary. This idea works particularly well if you prefer moody Halloween decor instead of bright orange plastic decorations.
What you need
• Two to four clean, empty bottles
• Paper scraps or plain labels
• A black marker
• String or ribbon
• Optional black or purple paper for the backdrop
How to make it
- Remove the original labels from your bottles and clean the surfaces.
- Cut small rectangles from plain paper and write imaginative names such as Moon Dust, Midnight Tonic or Witch’s Brew.
- Attach the labels to the bottles with a small amount of glue or tape.
- Tie a narrow piece of string around one or two bottle necks.
- Arrange the bottles by height on a tray or shelf, leaving space around them so the labels remain visible.
You can leave clear bottles empty for a simple vintage look. If you use colored water for visual effect, keep the bottles decorative only, close them securely and place them out of reach of children and pets. Never use a bottle that could be mistaken for a drink.
Styling tip: Use handwritten labels, different bottle shapes and one dark backdrop. You do not need to buy matching bottles for this display to look cohesive.
6. Make a No Carve Pumpkin With a Black Paper Face
Estimated project cost: $0 to $5, excluding the pumpkin
Time: 5 to 10 minutes
Difficulty: Very easy
If you already have a pumpkin on your porch or kitchen counter, you can turn it into a Halloween decoration without carving it. This is a good choice when you want a festive accent but have no time for a messy project.
What you need
• One real or faux pumpkin
• Black paper or removable vinyl
• Scissors
• Removable adhesive suitable for the pumpkin surface
How to make it
- Wipe the pumpkin clean and dry it.
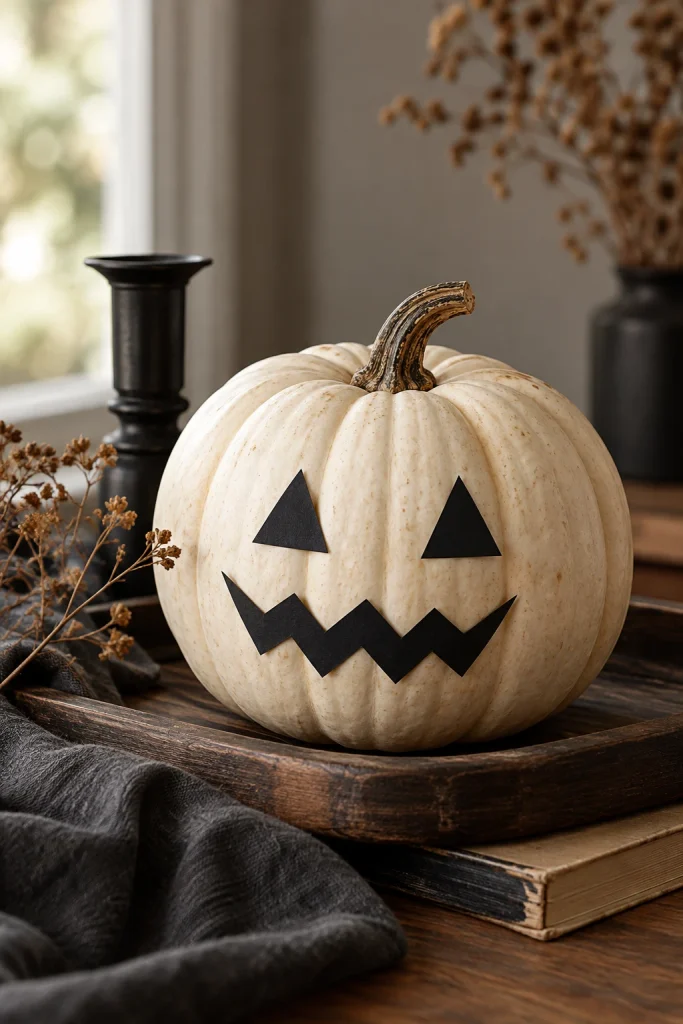
- Cut two triangles or oval shapes for the eyes.
- Make a mouth using a zigzag strip, a simple smile or a row of small square teeth.
- Arrange the pieces on the pumpkin before attaching them.
- Press the shapes into place and adjust their spacing until the face looks balanced.
For a more grown up style, try a small black crescent moon, stars or a minimalist face rather than an oversized jack o’ lantern grin.
Styling tip: A white or pale pumpkin with black details looks especially effective on a dark tray or beside a small stack of books. For a real pumpkin, avoid adhesives that could damage the skin if you intend to keep it for eating or cooking.
7. Make a Last Minute Halloween Table Centerpiece
Estimated project cost: $0 to $8
Time: 10 to 15 minutes
Difficulty: Easy
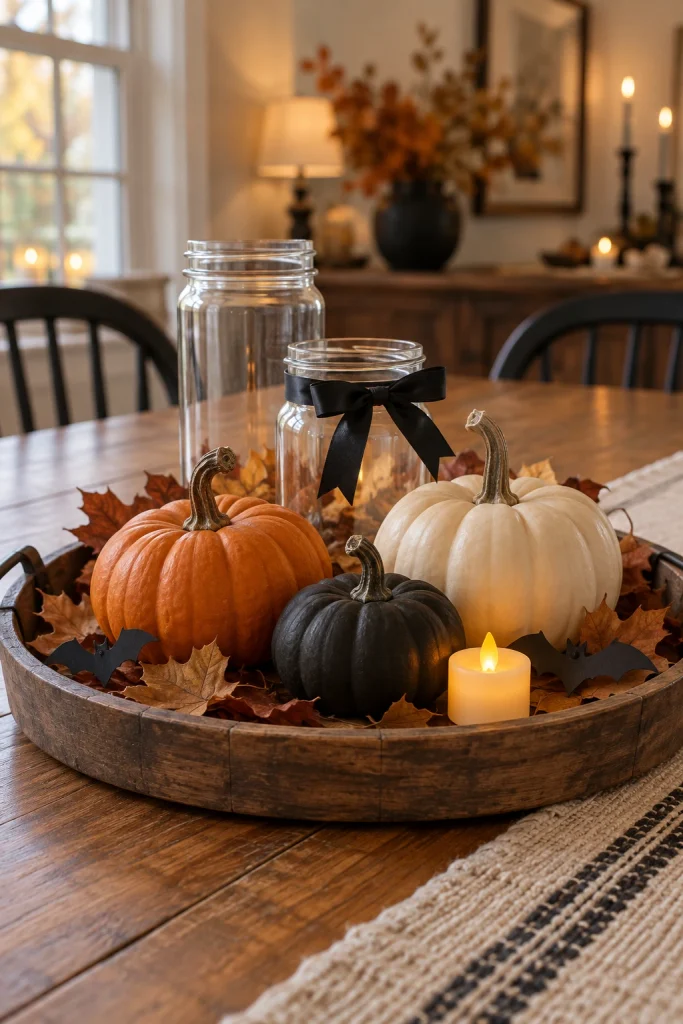
A Halloween table does not need an elaborate centerpiece. A tray, a few small pumpkins and ordinary household objects can create a focal point for a dinner, snack table or last minute party.
What you need
• A serving tray or shallow basket
• One to three small pumpkins, real or faux
• A few clean empty jars or small bottles
• Fallen leaves, paper bats or black ribbon
• Optional battery operated LED tea lights
How to make it
- Place the tray in the center of the table or on a sideboard.
- Put the tallest item toward the back, such as a bottle or a small jar.
- Add pumpkins at different heights by placing one on a short stack of books or a folded piece of fabric.
- Tuck paper bats or a few dry leaves around the base.
- Add LED lights if desired, keeping loose materials clear of the lights and any heat sources.
Keep the center low enough that people can see across the table if you plan to serve dinner. Remove small decorative pieces before using the tray for food.
Styling tip: Choose one color combination, such as black and orange or ivory and black. Repeating two or three colors makes inexpensive objects feel like a planned display.
8. Decorate a Window With Paper Halloween Silhouettes
Estimated project cost: $0 to $3
Time: 10 to 20 minutes
Difficulty: Easy
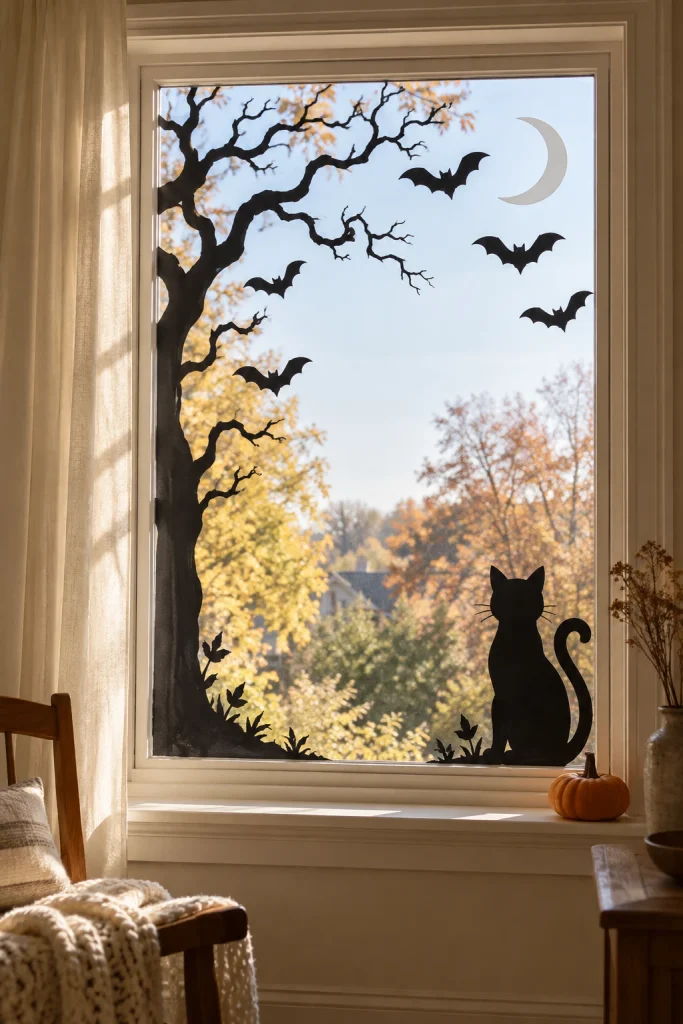
Windows are often overlooked when decorating at the last minute. Paper silhouettes use very little material, but they can be seen from inside and, when positioned well, from outside after dark.
What you need
• Black construction paper
• Pencil and scissors
• Removable window safe adhesive
• Optional white paper for a moon
How to make it
- Draw simple shapes such as bats, cats, crooked trees or a large crescent moon.
- Cut out the silhouettes carefully, keeping the shapes bold enough to be visible from a distance.
- Clean and dry the window glass.
- Position the shapes with the largest silhouette near one corner and smaller details around it.
- Step back and check the design from across the room before attaching everything permanently.
A large cat silhouette with a curved tail can make a striking focal point, while a trail of small bats creates a lighter, more playful look.
Styling tip: Keep the center of the window relatively clear if you want natural light to enter the room. Test your adhesive on a small area and check that the decoration does not interfere with window operation.
9. Turn Toilet Paper Rolls Into Tiny Mummy Decorations
Estimated project cost: $0 to $4
Time: 10 to 15 minutes
Difficulty: Easy
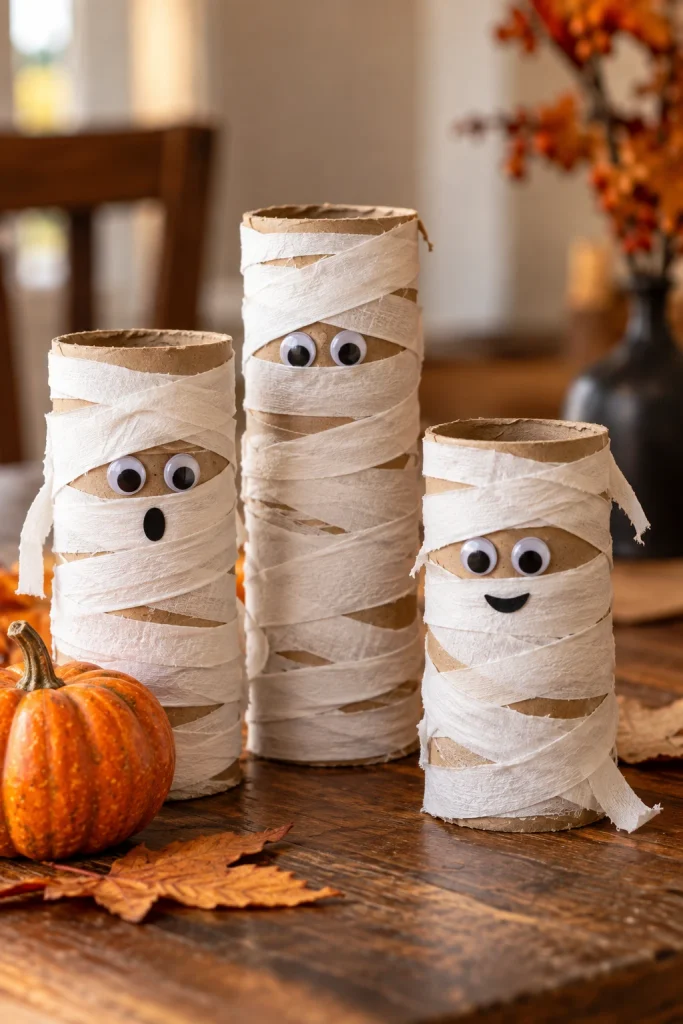
Empty cardboard rolls are useful for a small, nearly free Halloween craft. With a little white paper and a simple face, they become tiny mummies that can sit on a bookshelf, party table or windowsill.
What you need
• Empty cardboard toilet paper rolls
• White paper strips or clean white fabric scraps
• Black paper or a marker
• Glue or tape
• Scissors
How to make it
- Cut the white paper into narrow strips of different lengths.
- Wrap the strips around each cardboard roll, crossing them in different directions to resemble mummy bandages.
- Secure the ends at the back with small pieces of tape or glue.
- Leave a small gap near the upper front for the eyes.
- Add two small black eyes and place the finished mummy upright on a flat surface.
Make a few mummies with slightly different expressions. One can have wide eyes, while another can have a tiny surprised mouth.
Styling tip: Group three mummies of different heights or place one beside a small pumpkin. Keep them away from candles and other heat sources because cardboard and paper are combustible.
10. Create a Quick Halloween Garland From Paper Scraps
Estimated project cost: $0 to $5
Time: 15 to 25 minutes
Difficulty: Easy
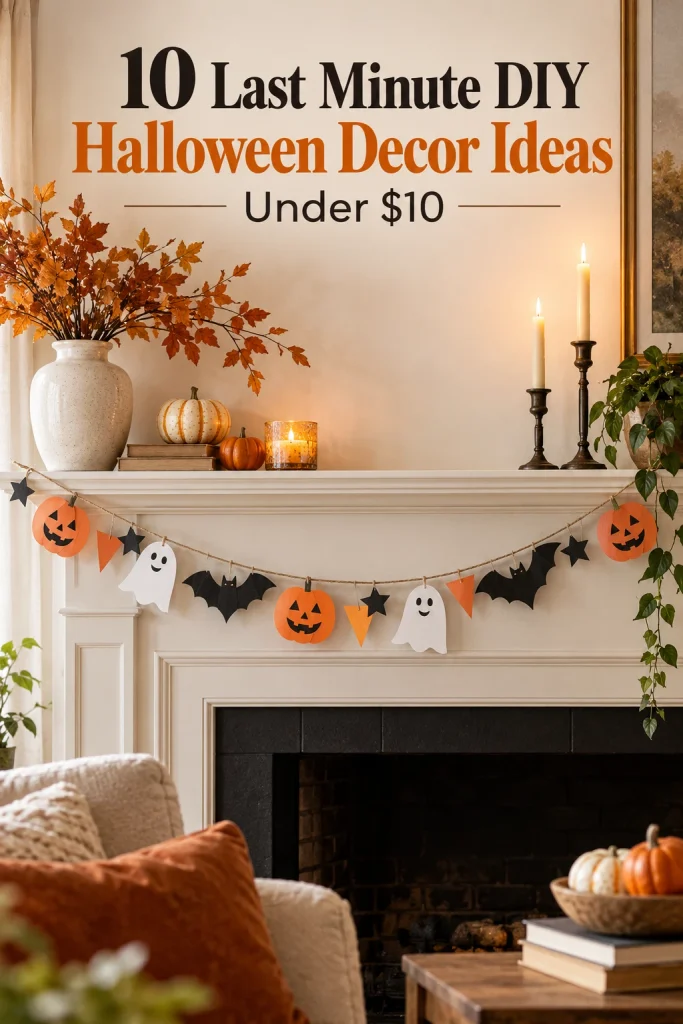
If you have a blank mantel, bookshelf or party wall to decorate, a handmade paper garland can fill the space without taking over the room. It is also an easy way to use leftover construction paper from other Halloween projects.
What you need
• Black, white and orange paper scraps
• String or ribbon
• Scissors
• Tape, glue or small clips
How to make it
- Cut simple shapes from the paper, such as small pumpkins, ghosts, stars, bats or triangles.
- Repeat a few shapes so the garland looks coordinated rather than random.
- Attach the shapes to a piece of string using small clips or tape.
- Alternate the colors and leave enough space between the shapes for each one to be recognizable.
- Hang the garland across a mantel, along a shelf edge or behind a party table, using a removable hanging method suitable for the surface.
If you want a more sophisticated finish, use only black and ivory paper with a few orange accents. For a playful family party, alternate all three colors and add friendly ghost faces.
Styling tip: Hang the garland in a gentle curve rather than pulling it completely straight. Keep it clear of fireplaces, heaters, candles and other heat sources.
How to Decorate for Halloween When You Have Less Than an Hour
You do not have to complete all ten projects. Choose two or three that suit the space you actually have.
| Where you are decorating | Quick combination |
|---|---|
| Living room | Paper bats and a small tray centerpiece |
| Apartment entryway | Ghost lanterns and a potion bottle display |
| Halloween party table | A pumpkin centerpiece and paper garland |
| Bedroom or bookshelf | Cardboard haunted house and tiny mummies |
| Window | Paper silhouettes and one no carve pumpkin nearby |
Start with one focal point, such as a decorated wall or table. Add one smaller detail nearby, then stop before every surface becomes crowded. A consistent color palette and a few well placed decorations often look better than filling the entire room with unrelated objects.
If you still have time for the outside of your home, explore our guide to DIY Halloween decorations for outside for ideas specifically suited to outdoor spaces. If you would rather decorate the entrance with one larger statement piece, our Halloween wreath for the front door guide is a better place to start.
How to Keep Halloween Decor Under $10
A small budget works best when you decide what to reuse before buying anything.
Shop your home first. Check recycling, craft drawers, old sheets, leftover paper, ribbons and empty jars. Many of the projects above require only one or two inexpensive additions.
Choose projects that share materials. One pack of black paper can make bats, window silhouettes, mummy details and garland shapes. Use it across several projects instead of buying separate decorative kits.
Check the full package price. A supply pack may cost more than the amount needed for one decoration. If you have to purchase the whole pack, count that actual checkout cost when deciding whether you can stay within your budget.
Skip specialty tools for simple crafts. Scissors, tape and a marker are enough for many paper decorations. Use materials you already have rather than buying a tool for a single evening.
Make safety part of the budget. Battery operated lights are a sensible choice around paper, cardboard and fabric. Keep decorations clear of heat sources, maintain clear exits and walkways, and secure hanging items properly.
Frequently Asked Questions
What are the easiest last minute Halloween decorations to make?
Paper bats, decorated glass jars, no carve pumpkins and paper garlands are among the easiest options. They use simple supplies, require little preparation and can usually be completed in 5 to 20 minutes.
Can I decorate for Halloween with almost no money?
Yes. Start with materials you already own, including cardboard boxes, empty jars, old white fabric and leftover paper. You may be able to complete several projects without buying anything, depending on the supplies available at home.
How can I make cheap Halloween decorations look more expensive?
Use a limited color palette, group decorations on a tray, vary their heights and leave some empty space around the display. Matte black, ivory and a small amount of orange can create a coordinated look even when the materials are inexpensive.
What Halloween decor works best in a small apartment?
Removable paper bats, window silhouettes, jar lanterns and compact tabletop displays are practical choices. They take up little space and can be removed after Halloween without requiring permanent changes to the room.
Final Thoughts
You can create a festive Halloween atmosphere without a large budget or complicated craft projects. Start with materials you already have, choose two or three decorations that suit your home, and give each piece a clear place to stand out.
Whether you make a wall of paper bats, a few glowing ghost jars or a tiny haunted house, the best last minute DIY Halloween decor is the kind you can finish easily, enjoy throughout the holiday and put away without a major cleanup.