
Easy Christmas Nails at Home: 5 DIY Step by Step Designs
You do not need a salon appointment or a professional nail art kit to create a festive Christmas manicure. With regular nail polish, a toothpick, and a few simple techniques, you can make beautiful holiday nails at home without complicated freehand painting.
These five easy Christmas nails are designed for beginners. You will learn how to paint candy cane stripes, create a tiny Christmas tree, draw a simple snowflake, make festive dot patterns, and add glitter accents. Each design includes step by step instructions and a realistic visual reference to help you recreate the look.
Whether you have short natural nails or a longer manicure, you can adapt these ideas to your preferred shape and colors. Start with one accent nail if you are new to nail art, then add more details as your confidence grows.
For a more subtle and sophisticated holiday manicure, take a look at these nude Christmas nail designs featuring elegant neutral shades and delicate festive details.
What You Need to Do Christmas Nails at Home
You can create all five designs with a small collection of basic supplies.
Essential supplies
- Nail polish remover and cotton pads
- A nail file
- Base coat
- Regular nail polish in red, white, green, and your preferred neutral shade
- Gold or silver glitter polish
- Glossy top coat
- A toothpick or dotting tool
- A thin nail art brush, if available
- A small piece of paper or a disposable mixing palette
You do not need every color for every design. Red and white are enough for candy cane nails, while a neutral base and green polish work well for a tiny Christmas tree.
A toothpick can help create small dots and simple marks. A rounded bobby pin can also work as a dotting tool. For longer, more controlled stripes, a thin nail art brush or nail striping tape is easier to manage.
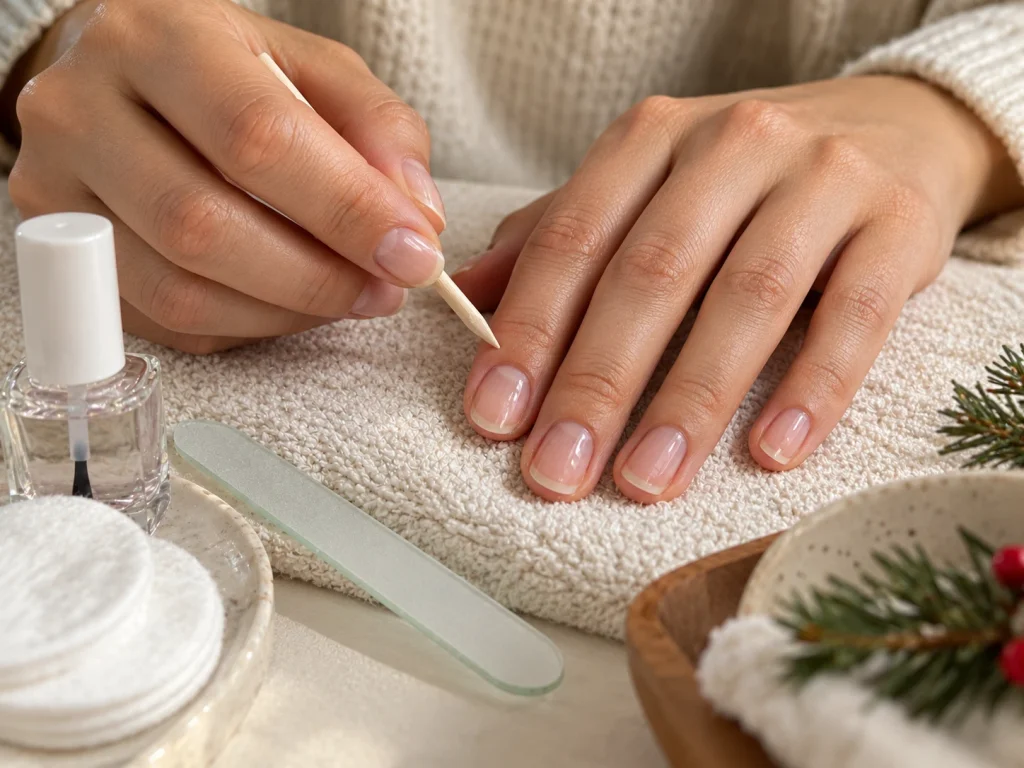
Step 1: Prepare Your Nails
Preparation makes a noticeable difference to the finished manicure. Even a simple design looks cleaner when the nail surface is free of old polish and the surrounding skin is tidy.
- Remove any existing polish.
- Wash your hands and dry them thoroughly.
- File your nails into a consistent shape, such as round, oval, or soft square.
- Gently push back the cuticles if needed, without cutting living cuticle tissue.
- Apply a thin layer of base coat and allow it to dry according to the product instructions.
Avoid aggressively buffing the natural nail. Excessive buffing can thin the nail plate, and a smooth manicure does not require removing layers of your natural nail.
Step 2: Choose Your Christmas Nail Colors
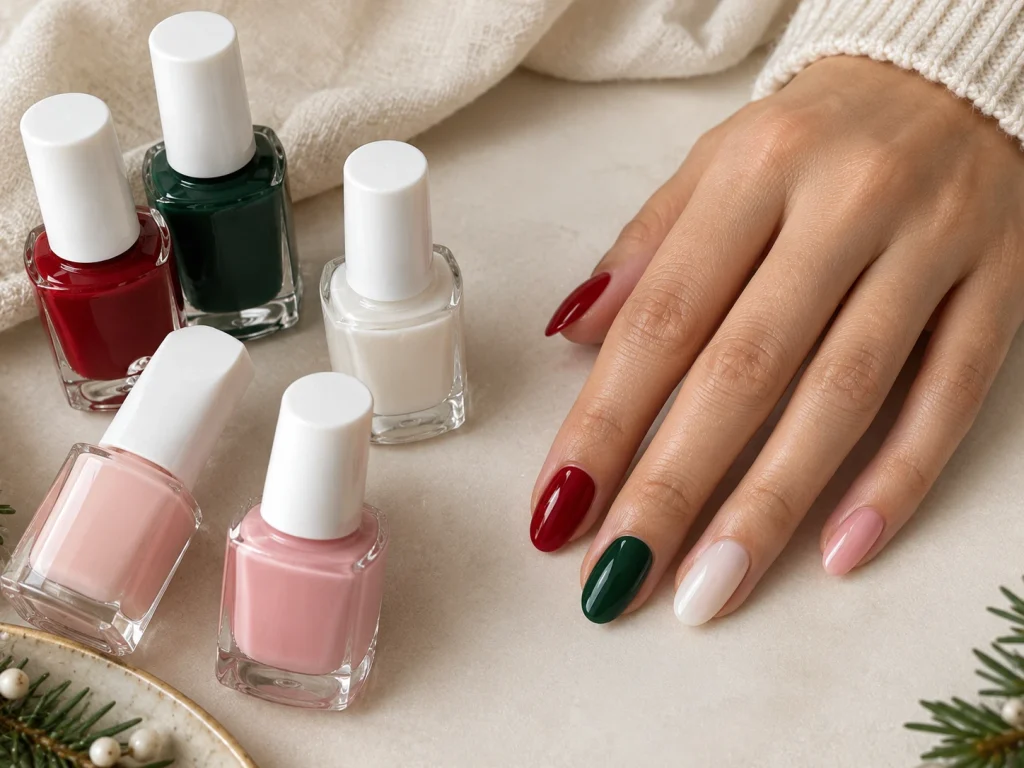
Your base color determines how the finished design will look. Choose a combination that complements the pattern instead of using every festive shade at once.
Sheer pink or nude: Ideal for tiny Christmas trees, delicate snowflakes, and minimalist nail art.
Classic red: A traditional holiday color that looks polished on its own or with one white accent nail. If you want more inspiration for this color, explore our red Christmas nail ideas before choosing your shade.
Milky white: Creates a bright background for red stripes, green trees, and gold details.
Forest green: A rich base for white snowflakes, small dots, or glitter accents.
Soft pink: A delicate alternative to traditional red and green. You can find more color inspiration in our pink Christmas nail ideas.
Apply one thin coat of your chosen base color, followed by a second coat if needed. Let the polish dry sufficiently before adding nail art. Thick layers are more likely to smudge because the polish underneath may remain soft.
5 Easy Christmas Nails at Home: Step by Step
1. Easy Candy Cane Nails
Difficulty: Beginner
Best for: A classic red and white Christmas manicure.
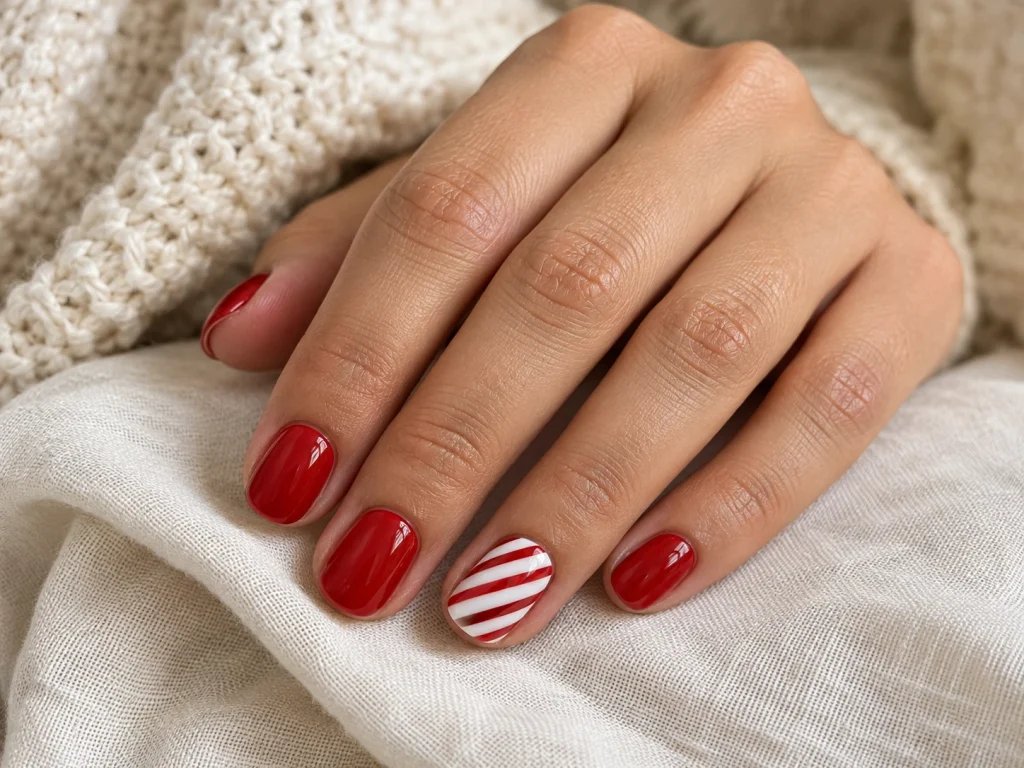
Candy cane nails use simple diagonal stripes to recreate the familiar look of Christmas candy. You can paint the pattern on one accent nail or repeat it across several nails for a more noticeable design.
What you need: White polish, red polish, a thin nail art brush or striping tape, base coat, and top coat.
How to create the design
- Apply white polish to the nail you want to decorate.
- Let the base dry completely before adding stripes.
- Use a thin brush to draw short diagonal red lines across the nail.
- Leave a similar amount of white space between each stripe.
- Keep the lines narrow, especially if your nails are short.
- Let the pattern dry before applying a thin layer of top coat.
If freehand stripes are difficult, use striping tape as a guide. Place the tape on a completely dry base, apply a thin layer of red polish, and carefully remove the tape before the new polish dries completely. Test this technique on one nail first, because tape can lift an insufficiently dry base.
Beginner tip: Start with a single candy cane accent nail and paint the remaining nails solid red or white. The result looks coordinated without requiring perfect stripes on every finger.
2. Minimalist Christmas Tree Nails
Difficulty: Beginner to intermediate
Best for: A small festive accent on nude, pink, or milky white nails.
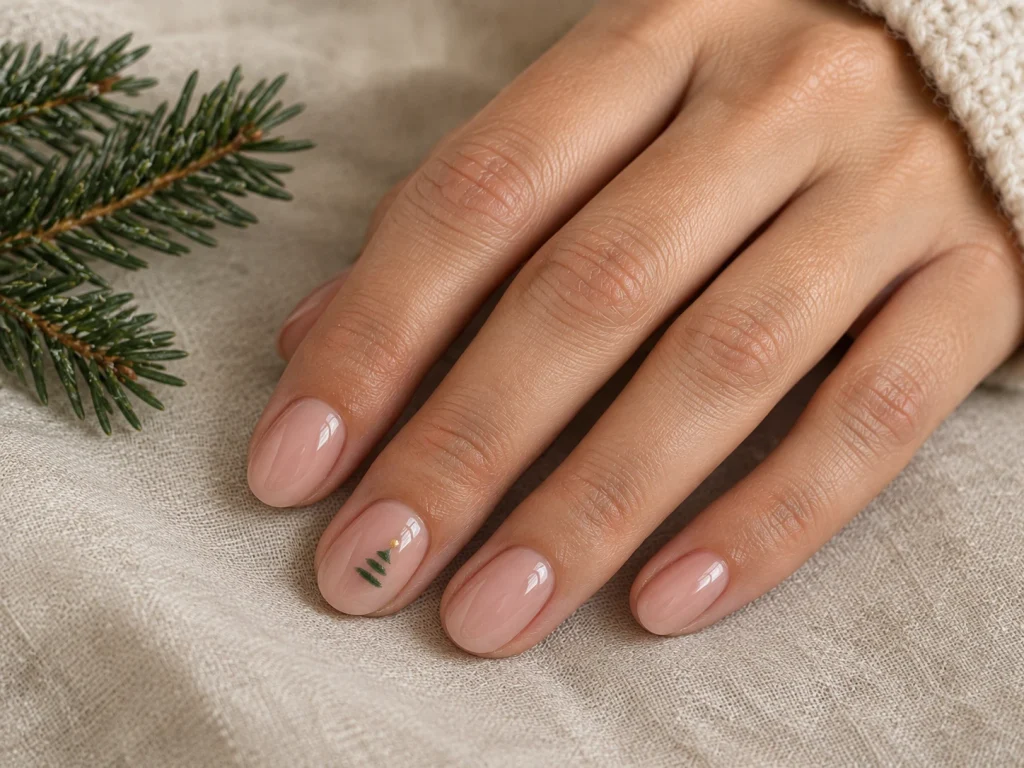
A tiny Christmas tree gives your manicure a seasonal detail without covering the entire nail with artwork. The easiest version uses a few green marks arranged in a triangle, finished with a tiny gold dot.
What you need: Nude or milky white polish, green polish, a toothpick or thin brush, and optional gold polish.
How to create the design
- Apply your base color and let it dry.
- Place a small green dot near the upper part of the nail to mark the tree’s tip.
- Add a slightly wider green mark underneath.
- Continue with two or three wider marks to form a simple triangular tree.
- Use the tip of a toothpick or a fine brush to connect the marks gently if needed.
- Add a tiny gold dot at the top to represent a star.
- Let the artwork dry before applying top coat.
Keep the tree small on short nails. On longer nails, you can add a few tiny gold dots as ornaments, but leave enough space between them to prevent the design from looking crowded.
Beginner tip: You do not need to paint individual branches. A recognizable triangular shape with a small gold star is enough.
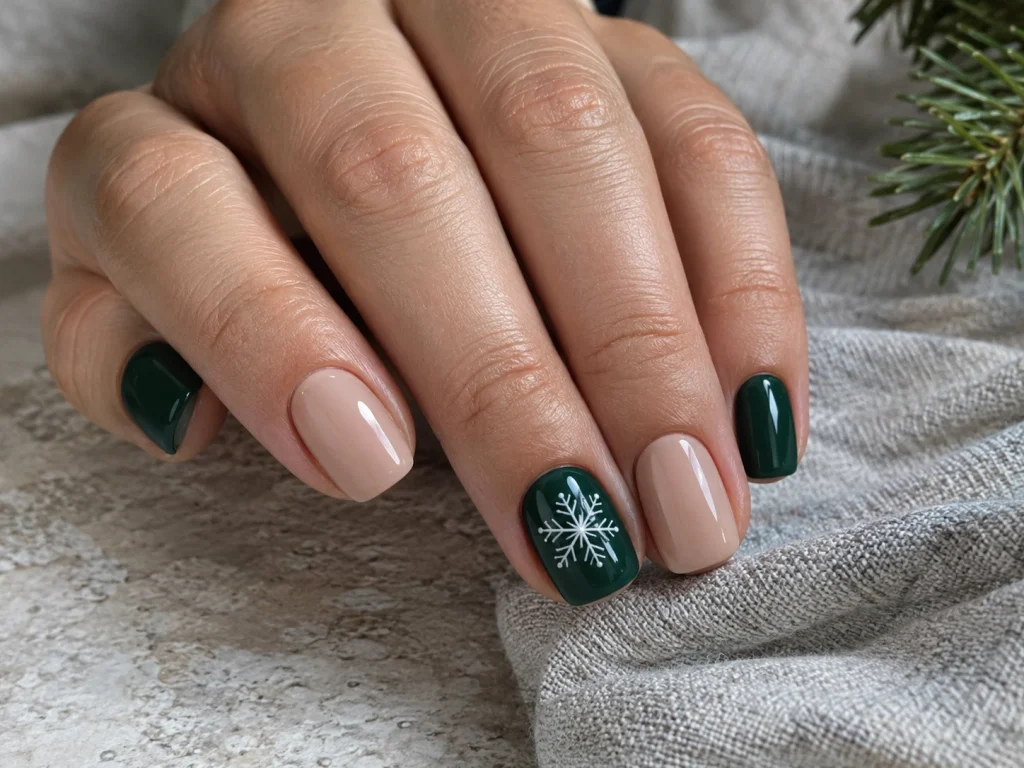
3. Simple Snowflake Christmas Nails
Difficulty: Beginner to intermediate
Best for: A winter inspired manicure with delicate white details.
Snowflakes can look complicated in inspiration photographs, but a simple version needs only a few intersecting lines. Use a dark green, burgundy, navy, or nude base to make the white design stand out.
What you need: Your preferred base polish, white polish, a fine brush or toothpick, and top coat.
How to create the design
- Apply your base color and allow it to dry.
- Draw one short vertical white line on an accent nail.
- Add a horizontal line through the center.
- Draw two shorter diagonal lines through the same point to create a simple six arm snowflake.
- Add tiny marks or dots near the ends of the arms if desired.
- Allow the design to dry before sealing it with top coat.
If drawing six arms feels difficult, use a simple four point starburst instead. It gives a similar winter effect without requiring precise line work.
Beginner tip: Place the snowflake slightly off center and keep it small. A little empty space around the design makes the manicure look more balanced.
4. Easy Christmas Dot Nails
Difficulty: Very easy
Best for: First time nail artists who want a festive pattern without detailed drawing.
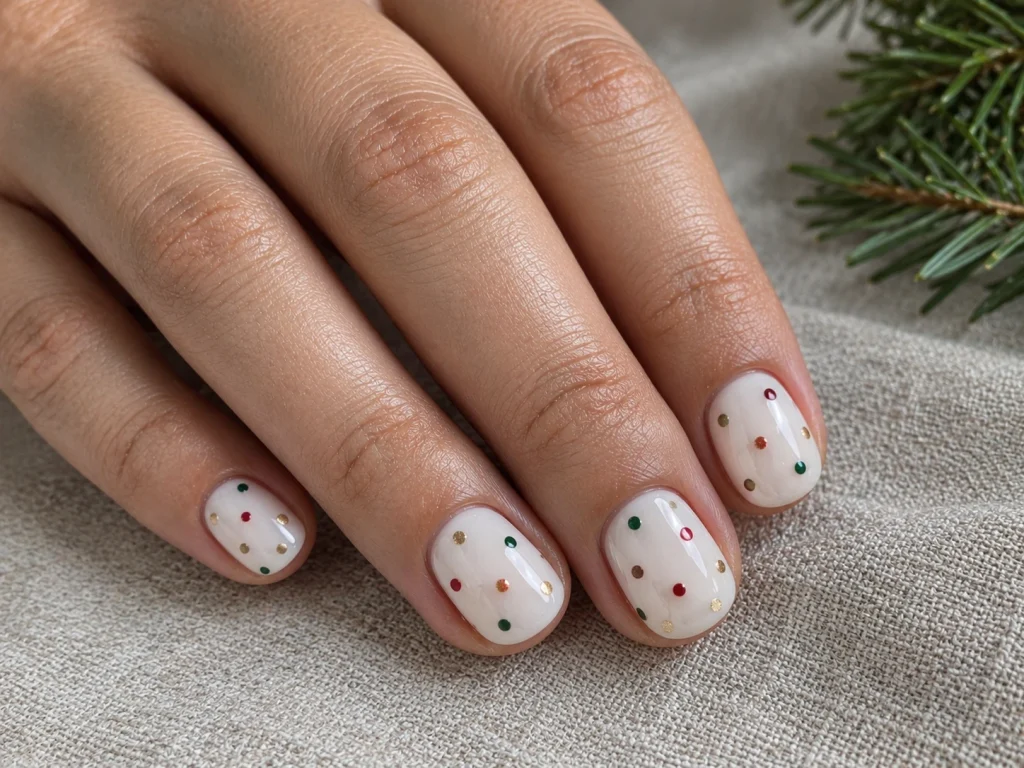
Dots are one of the simplest ways to create Christmas nail art because you do not need to draw straight lines or complicated shapes. A few red, green, and gold dots can resemble tiny ornaments or festive confetti.
What you need: A nude, white, red, or green base color, two accent polishes, and a dotting tool or rounded bobby pin.
How to create the design
- Apply your base color and allow it to dry.
- Place a small amount of accent polish on a mixing palette.
- Dip the rounded end of your tool into the polish.
- Touch the tool lightly against the nail to create a small dot.
- Repeat with a second color, leaving visible space between the dots.
- Add a few gold dots if you want extra sparkle.
- Allow all the dots to dry before applying top coat.
For a simple ornament effect, arrange three or four dots in a loose vertical pattern. For a minimalist manicure, concentrate the dots near the tips of the nails instead.
Beginner tip: Test the dot size on paper first. Too much polish on the tool can create bulky dots that take longer to dry and are more likely to smear.
5. Easy Glitter Christmas Nails
Difficulty: Very easy
Best for: A festive manicure when you do not want to paint detailed artwork.
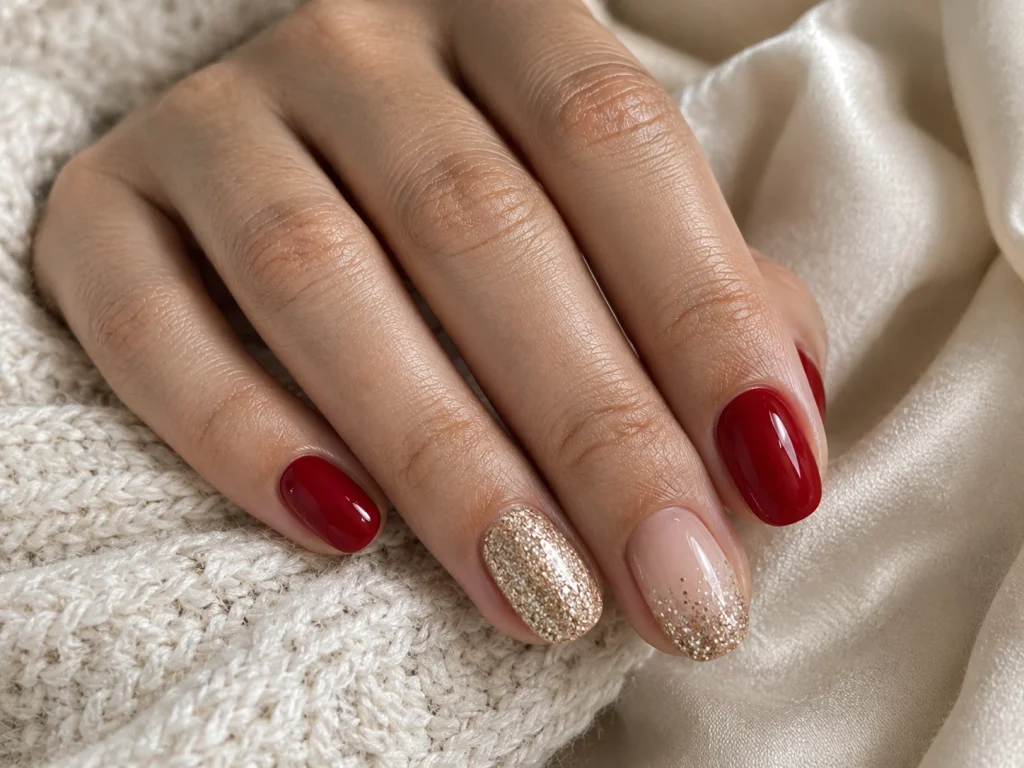
Glitter creates an instant holiday finish without requiring freehand drawing. You can use a full glitter accent nail, add sparkle to the tips, or combine a single glitter nail with a classic red or green manicure.
What you need: A base color, glitter nail polish, and glossy top coat.
How to create the design
- Apply a sheer pink, nude, white, red, or green base.
- Allow the base color to dry.
- For an accent nail, apply one thin layer of glitter polish over the entire nail.
- For glitter tips, dab a small amount near the tip and gently move the brush toward the center.
- Let the first layer dry before adding more sparkle.
- Concentrate the second layer where you want the glitter to appear most noticeable.
- Finish with top coat once the design has dried sufficiently.
You can keep the other nails a solid color for a more understated look. If you prefer a traditional holiday manicure, pair gold glitter with red polish or silver glitter with deep green.
Beginner tip: Apply glitter in thin layers instead of one thick coat. This gives you better control over the placement and helps avoid a bulky finish.
How to Make Your DIY Christmas Nails Look Neater
Small adjustments can make a simple manicure look more polished without adding complicated details.
Use thin coats. Too much polish makes designs harder to control and increases the chance of smudging.
Keep the cuticle line clean. Leave a small margin between the polish and surrounding skin rather than flooding the cuticles.
Practice the pattern first. Try the lines, dots, or tree shape on paper before working on your non dominant hand.
Decorate fewer nails. One or two detailed accent nails can look more intentional than several crowded patterns.
Allow enough drying time. Follow the polish manufacturer’s instructions and make sure the base is sufficiently dry before adding artwork.
Apply top coat gently. Use light strokes and avoid pressing the brush into the design, which can drag wet artwork across the nail.
Common Christmas Nail Art Mistakes and How to Fix Them
| Problem | Practical fix |
|---|---|
| Candy cane stripes look uneven | Make shorter strokes and practice the spacing first |
| Dots look too large | Remove excess polish from the dotting tool before touching the nail |
| Christmas tree looks bulky | Use fewer, smaller green marks and leave space around the shape |
| Snowflake lines look messy | Use a finer tool and draw fewer, shorter lines |
| Tape lifts the base color | Let the base dry fully and test the tape on one nail |
| Glitter looks thick | Apply a thin layer, let it dry, then add more only where needed |
| Top coat smears the artwork | Allow the design to dry longer and use light strokes |
| Polish collects around the cuticles | Use less product and clean the edges carefully before the manicure sets |
If polish touches the surrounding skin, remove it carefully with a small cleanup brush and nail polish remover. Avoid letting remover run over your finished design.
How to Make Christmas Nails Last Longer
A neat home manicure can still chip if the preparation is rushed. These habits help reduce avoidable wear.
- Begin with clean, dry nails.
- Apply base coat and polish in thin layers.
- Avoid painting over the cuticles or surrounding skin.
- Lightly seal the free edge with top coat when appropriate for the product.
- Wear gloves when washing dishes or using cleaning products.
- Avoid picking at lifted polish, which can damage the natural nail surface.
- Remove regular polish with a suitable remover rather than peeling it away.
This tutorial uses regular nail polish. Gel polish has different curing and removal requirements, so follow the instructions for the specific gel system rather than treating it like ordinary lacquer.
Which Christmas Nail Design Is Easiest for Beginners?
Choose a design based on the amount of detail you feel comfortable painting.
| If you want | Try |
|---|---|
| The simplest possible pattern | Christmas dots |
| A traditional holiday look | Candy cane stripes |
| A small decorative accent | Minimalist Christmas tree |
| A delicate winter manicure | Snowflake accent nail |
| Festive sparkle without drawing | Glitter accent nails |
| A design for short natural nails | Small dots, glitter tips, or one tiny tree |
You can also combine two techniques. For example, paint most nails red, add a candy cane accent, and finish one nail with gold glitter. Keeping the colors consistent helps the manicure look coordinated.
For more general inspiration before choosing a different design, browse our simple Christmas nail ideas. That collection complements this tutorial by helping you explore additional styles, while this guide focuses on creating nail art yourself.
Frequently Asked Questions
Can I do Christmas nails at home without professional tools?
Yes. A toothpick or rounded bobby pin can create simple dots and small decorative marks. Regular nail polish, a base coat, and a top coat are enough to get started. A thin nail art brush helps with finer lines but is not essential for every design.
What is the easiest Christmas nail design for beginners?
Glitter accent nails and simple dot patterns are good starting points because they require little freehand drawing. Candy cane stripes are also manageable if you use striping tape and let the base color dry thoroughly.
Can I create Christmas nail art on short natural nails?
Absolutely. Short nails work well with dots, narrow stripes, glitter tips, and small Christmas trees. Keep each design compact and avoid adding too many details to one nail.
How long should I wait between nail polish coats?
Follow the drying instructions on the product label. Thin coats generally set more evenly than thick coats, but drying time depends on the formula, application thickness, and room conditions. Allow enough time before painting details or applying tape.
How do I remove regular Christmas nail polish?
Use a suitable nail polish remover according to its instructions. Wash your hands afterward and apply moisturizer or cuticle oil. Avoid peeling or scraping polish off your natural nails.
Final Thoughts
You can create easy Christmas nails at home without buying a professional kit or mastering complicated nail art. Candy cane stripes, tiny Christmas trees, simple snowflakes, festive dots, and glitter accents all offer approachable ways to make your manicure feel seasonal.
Start with one accent nail, keep your polish layers thin, and allow enough drying time between steps. Once you find a technique you enjoy, you can repeat it across more nails or combine it with a classic red, green, or nude manicure.




3 Comments