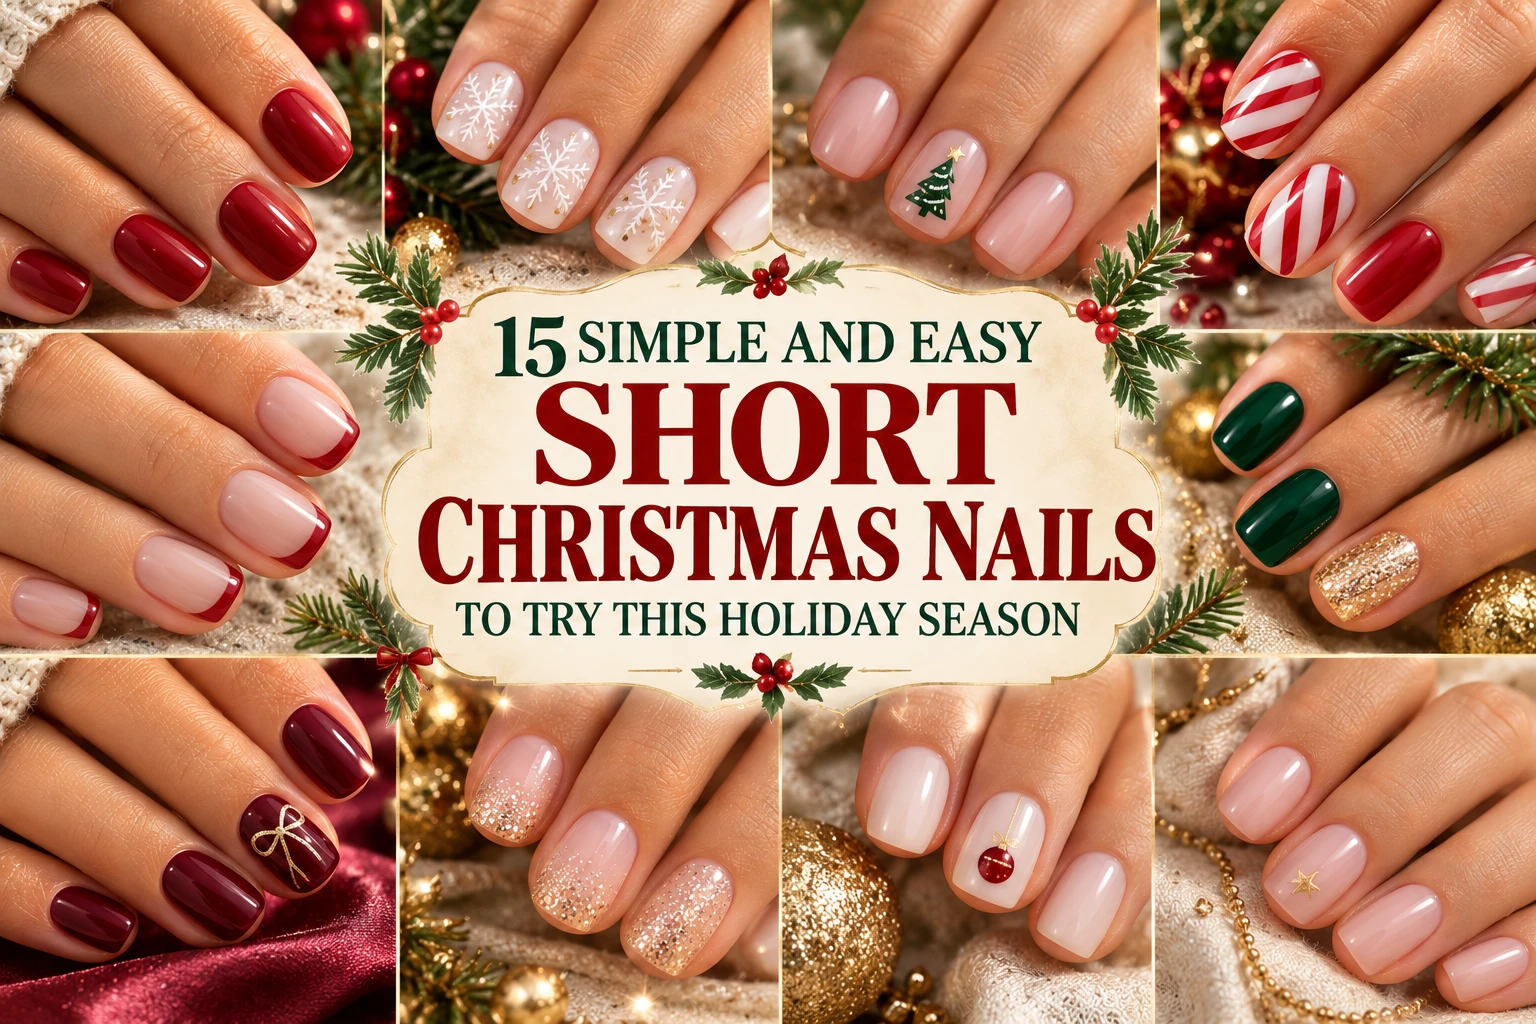
15 Simple and Easy Short Christmas Nails to Try This Holiday Season
Short Christmas nails can look just as festive as longer manicures without complicated artwork or acrylic extensions. A glossy cherry-red polish, a tiny snowflake, a delicate gold French tip or a sheer pink base with miniature Christmas details can give short nails a beautiful holiday look.
If you prefer practical nail lengths but still want something special for Christmas 2026, these 15 short Christmas nail designs offer a mix of classic colors, minimalist details, cozy neutrals and playful holiday art. Many are beginner-friendly enough to recreate at home with regular nail polish and a dotting tool, while a few make excellent inspiration for your next salon appointment.
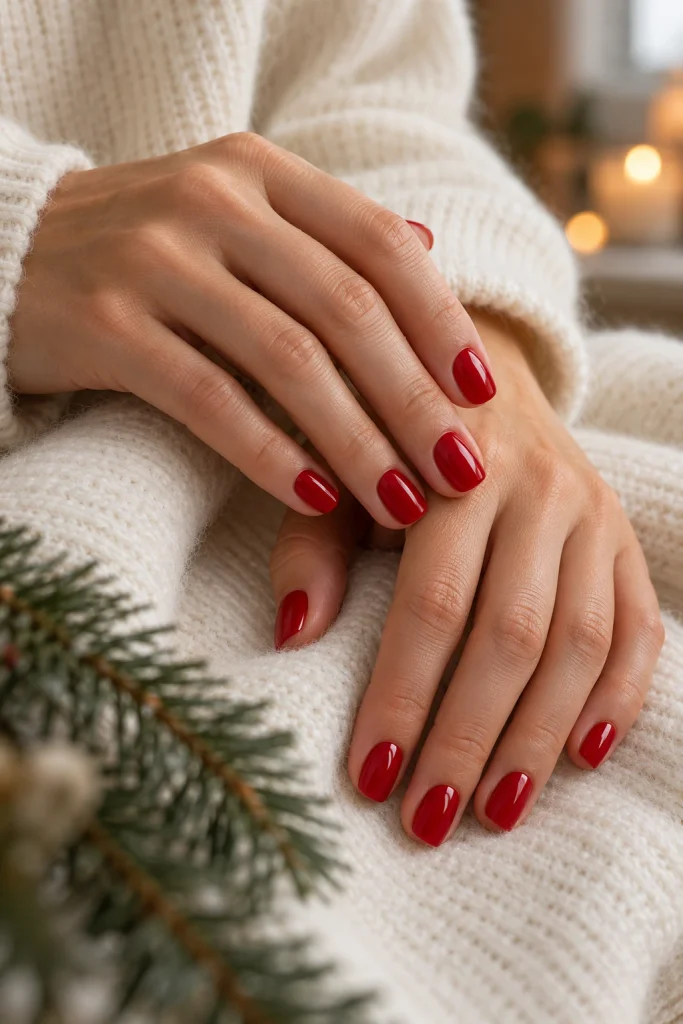
1. Classic Cherry Red Short Christmas Nails
Best for: A timeless Christmas manicure that looks polished with almost any outfit.
Cherry-red nails are an easy way to make short nails feel festive without adding any artwork. The saturated color provides enough holiday character on its own, while a glossy top coat gives the manicure a smooth, freshly finished appearance. Choose a rounded-square or softly oval shape to keep the look neat and wearable.
For an at-home version, apply a base coat, followed by two thin layers of red polish. Allow each layer to dry before applying the next. If you want a slightly softer look, choose a cranberry shade instead of a bright, vivid red.
Easy tip: Keep the color consistent across all ten nails. The simplicity is what makes this design look intentional.
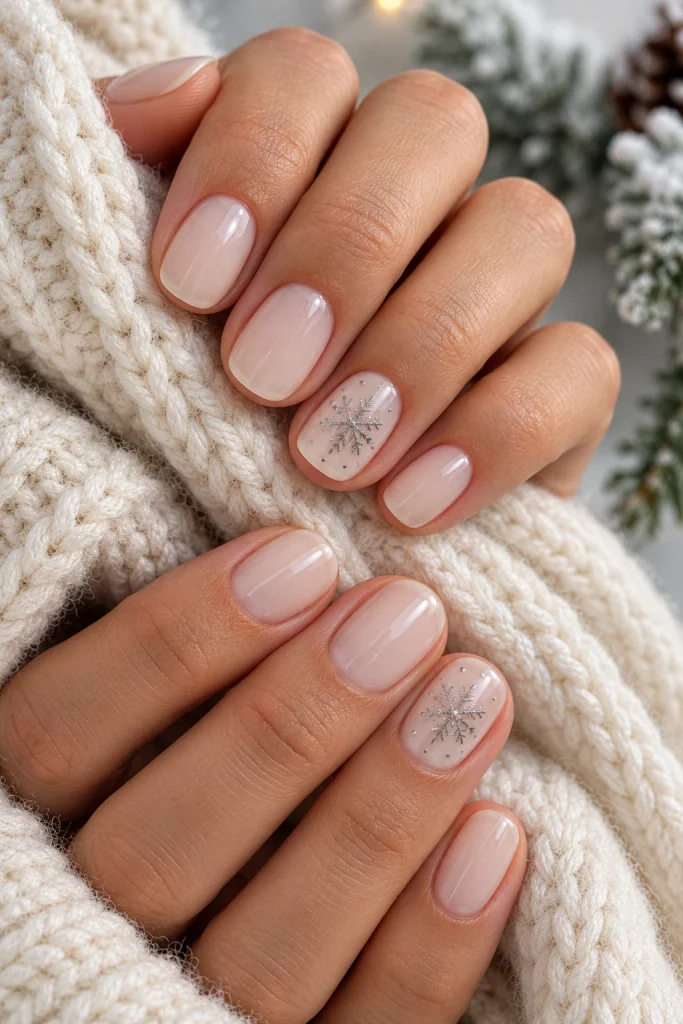
2. Milky White Nails With Tiny Snowflakes
Best for: A delicate winter manicure with subtle Christmas charm.
Milky white polish creates a soft, snowy appearance without looking as stark as an opaque white manicure. On short oval or squoval nails, it feels clean and understated. A tiny silver or white snowflake on one or two accent nails adds a seasonal detail without crowding the available nail space.
Apply two thin coats of milky white polish and let them dry. Use a fine nail-art brush or a snowflake decal for the accent. If drawing by hand, start with a small cross and add two short diagonal branches rather than attempting an elaborate snowflake.
Easy tip: Keep the snowflake small and leave plenty of open space around it.
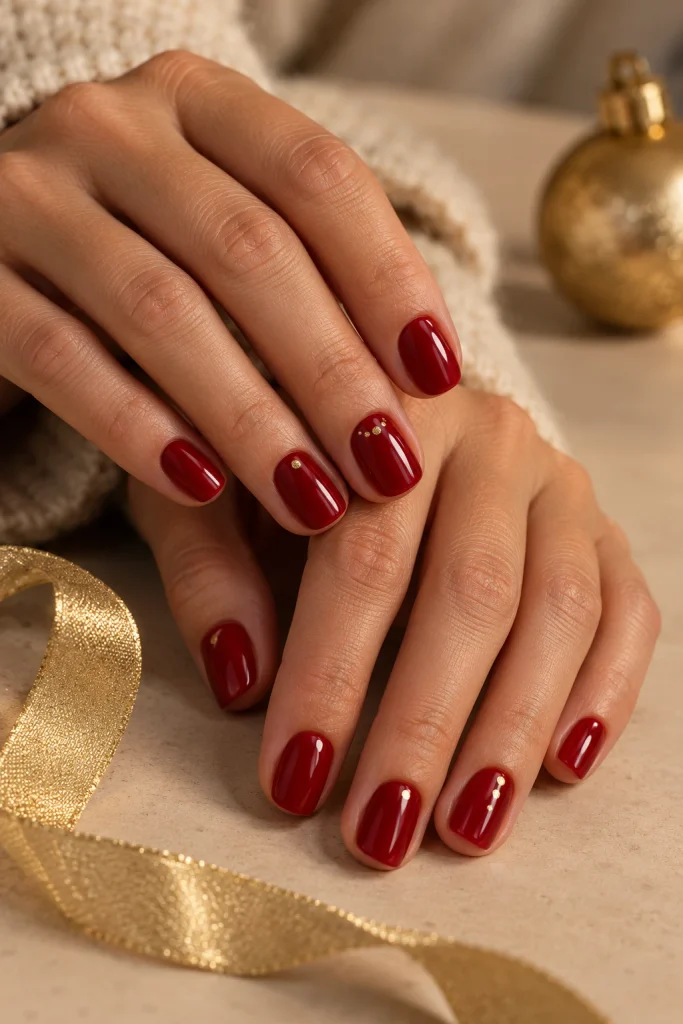
3. Short Red Nails With Gold Accent Dots
Best for: A simple festive manicure that looks elegant rather than busy.
Red and gold make a classic holiday combination, but you do not need glitter on every nail to create the effect. A rich red base with one or two tiny gold dots near the cuticle gives the manicure a subtle ornament-inspired finish.
Paint the nails red and allow the polish to dry thoroughly. Dip a dotting tool or the rounded end of a clean bobby pin into gold polish, remove the excess and gently place one dot on each chosen accent nail. Finish with a clear top coat.
Easy tip: Use fewer, smaller dots. On short nails, a little metallic detail often looks more refined than a large pattern.
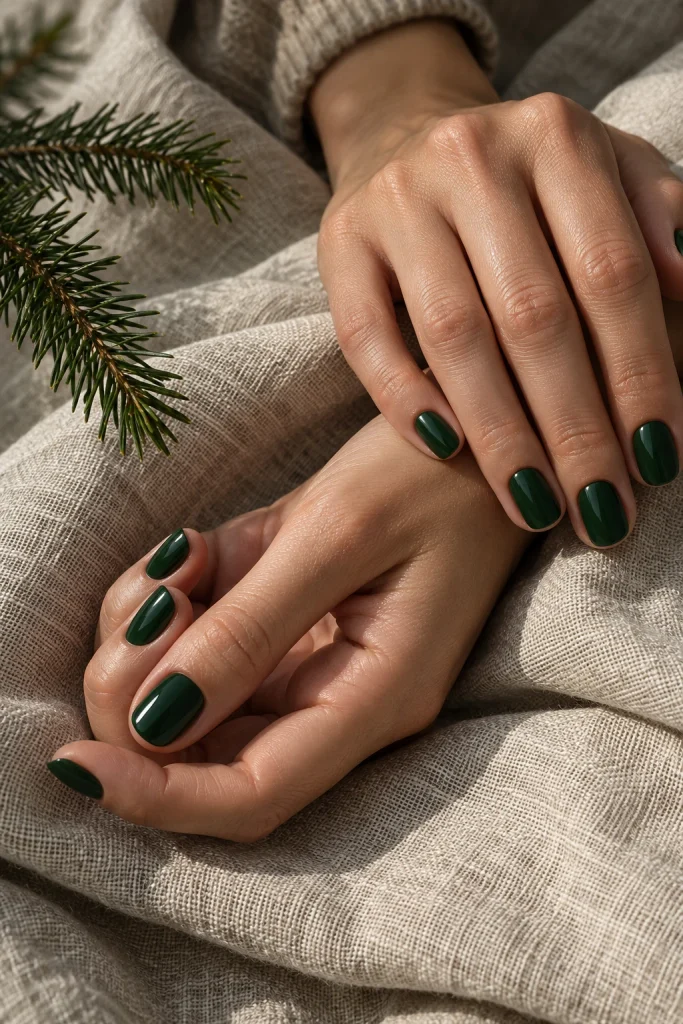
4. Forest Green Short Christmas Nails
Best for: A rich, sophisticated manicure with a traditional holiday color.
Forest green gives short nails a deeper, moodier alternative to bright Christmas red. It looks particularly beautiful in a glossy cream finish, where the color remains the focus without requiring glitter or decorative art.
Choose a deep evergreen shade rather than an overly neon green. Apply a base coat and two thin coats of color, keeping the edges neat. A rounded-square shape works well for a practical everyday manicure, while a short oval shape creates a softer effect.
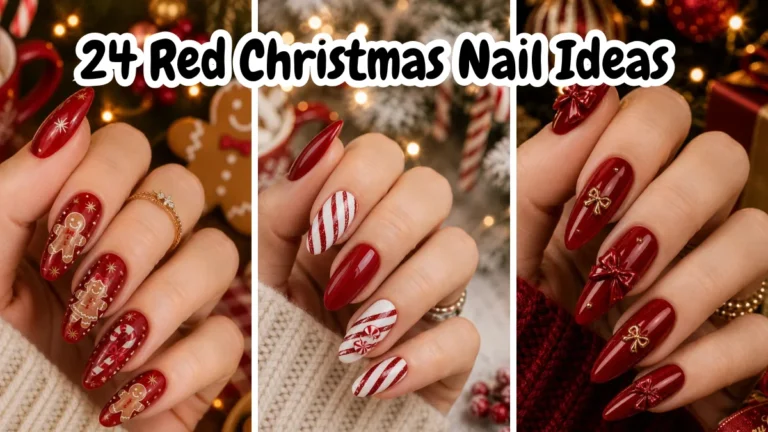
If you enjoy experimenting with holiday colors, you can also explore the red-focused inspiration in GlofyRobs’ red Christmas nail ideas.
Easy tip: A glossy top coat helps bring depth to dark green polish.
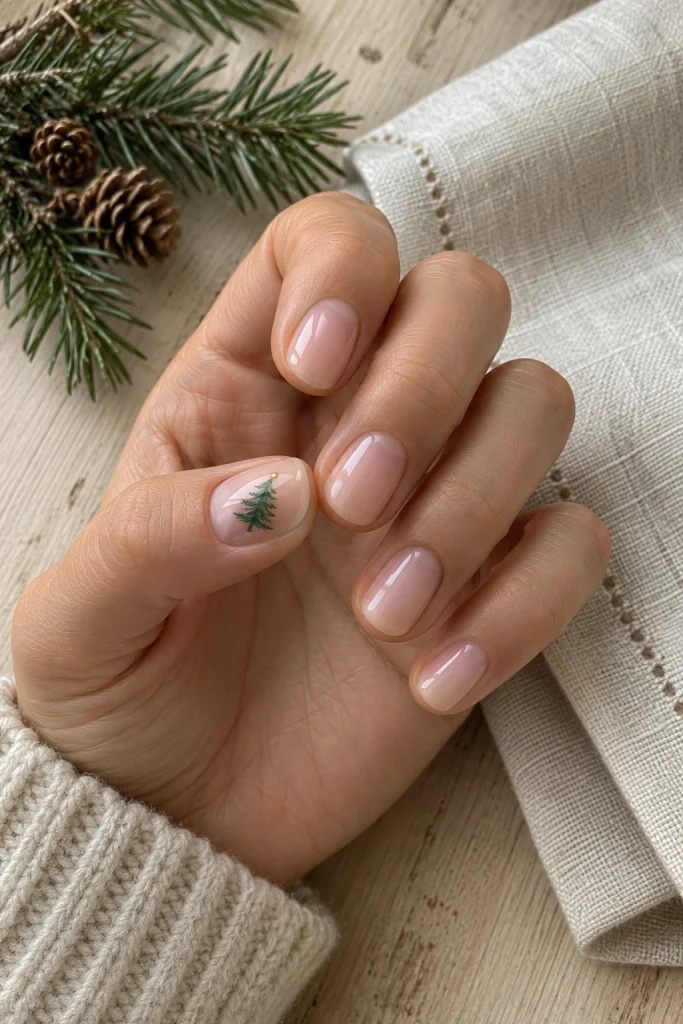
5. Nude Nails With Tiny Christmas Trees
Best for: Minimalist nail art that still looks unmistakably festive.
A sheer nude or blush base creates a quiet background for a miniature Christmas tree. The design works especially well on short nails because the tree can be reduced to a simple green triangle with a tiny gold dot at the top.
Apply your neutral base and let it dry. Use a fine brush to create three short green strokes that form a narrow tree shape. Add a tiny gold dot above it if desired. Place the tree on just one accent nail and keep the remaining nails nude or softly pink.
Easy tip: If freehand painting feels difficult, use a small Christmas tree decal instead.
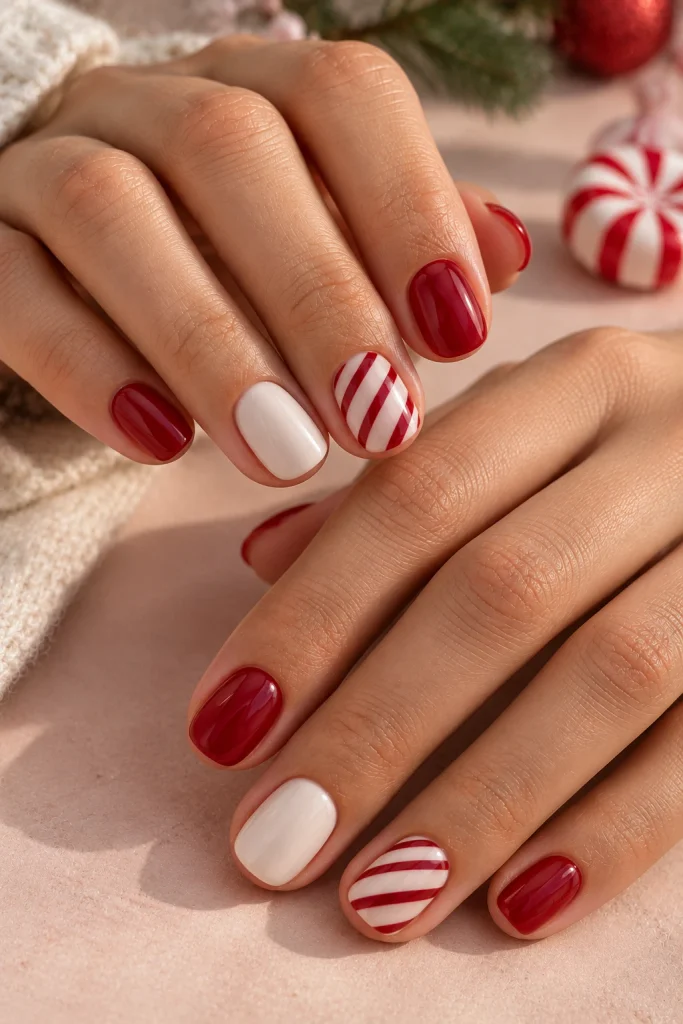
6. Simple Candy Cane Accent Nails
Best for: A playful Christmas manicure that does not require decorating every nail.
Candy-cane stripes bring an instantly recognizable holiday touch. Instead of painting stripes on every finger, keep most nails a glossy white or cherry red and decorate just one accent nail on each hand. This makes the design easier to create and prevents the manicure from looking overcrowded.
Start with an opaque white base on the accent nail. Once dry, use a fine brush to paint two or three thin diagonal red stripes. A striping sticker or nail decal is another practical option for beginners.
Easy tip: Leave enough white space between stripes so the pattern remains clear on a small nail.
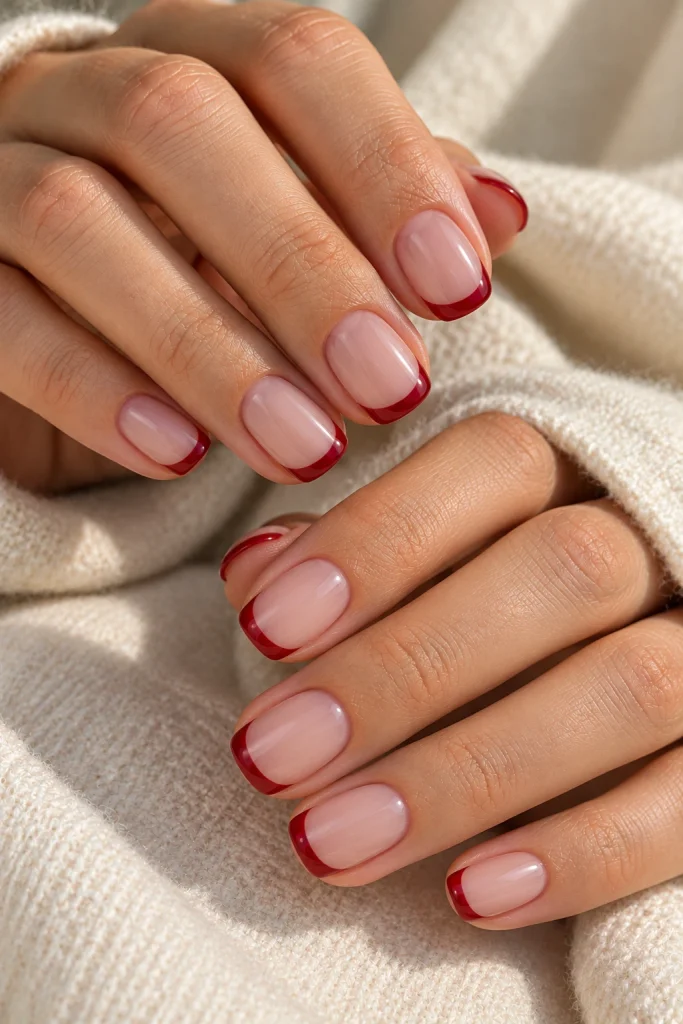
7. Short Christmas French Tips in Red
Best for: Anyone who loves a classic manicure with a seasonal update.
A red French tip gives a traditional French manicure a festive twist without covering the entire nail in color. A sheer pink or nude base keeps the design light, while a narrow red line along the free edge adds just enough contrast.
Apply your base color and let it dry. Use a fine brush to draw a slim red line across each tip. If your nails are extremely short, a tiny curved accent at the edge can create a similar effect without requiring a thick white or red tip.
Easy tip: Keep the tip narrow. A wide band can take up too much of the visible nail on a short manicure.
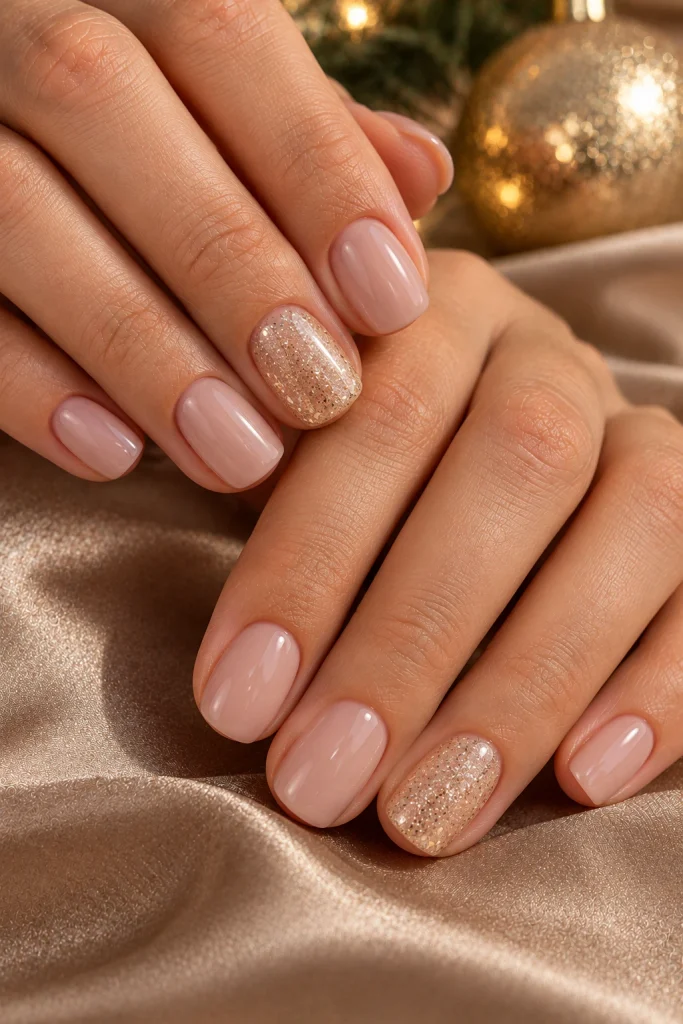
8. Champagne Glitter Accent Nails
Best for: A little Christmas sparkle without a complicated design.
Champagne glitter can make a simple short manicure feel ready for a holiday dinner or Christmas party. Pair it with nude, beige or milky white polish for a softer effect, or use a deeper red base if you prefer more contrast.
The easiest approach is to paint one or two nails with a fine champagne glitter polish and keep the others in a coordinating solid color. A fine shimmer is often easier to apply evenly than large glitter pieces, especially on shorter nail beds.
Easy tip: Apply glitter in thin layers and seal the edges with a top coat to help create a smooth finish.
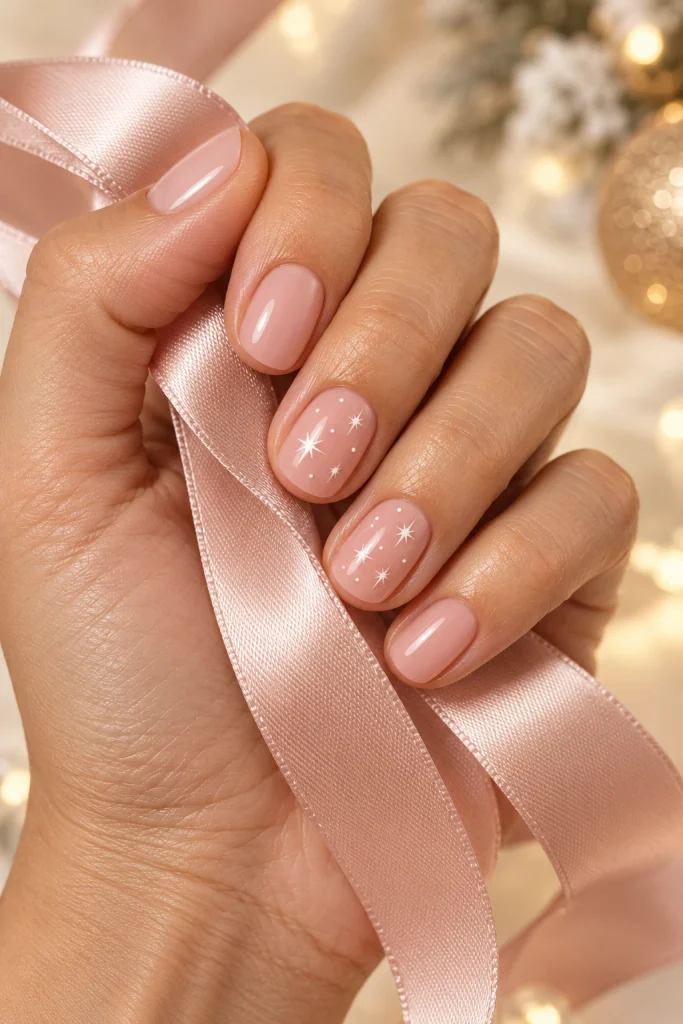
9. Pink Christmas Nails With Tiny White Stars
Best for: A soft, feminine holiday manicure.
Blush pink offers a gentle alternative to traditional red and green. A few miniature white stars make it feel seasonal without turning the manicure into an elaborate illustration. This design is especially suitable for readers who want festive nails that still work with everyday outfits.
Use a soft pink cream polish or a translucent pink base. Once dry, add a few small white stars with a nail-art pen, a fine brush or ready-made decals. Keep the stars on one or two nails rather than spreading them across every finger.
For more color inspiration, see GlofyRobs’ pink Christmas nail ideas.
Easy tip: Choose a pale, slightly muted pink for a subtle look, or a brighter rose pink for a more playful finish.
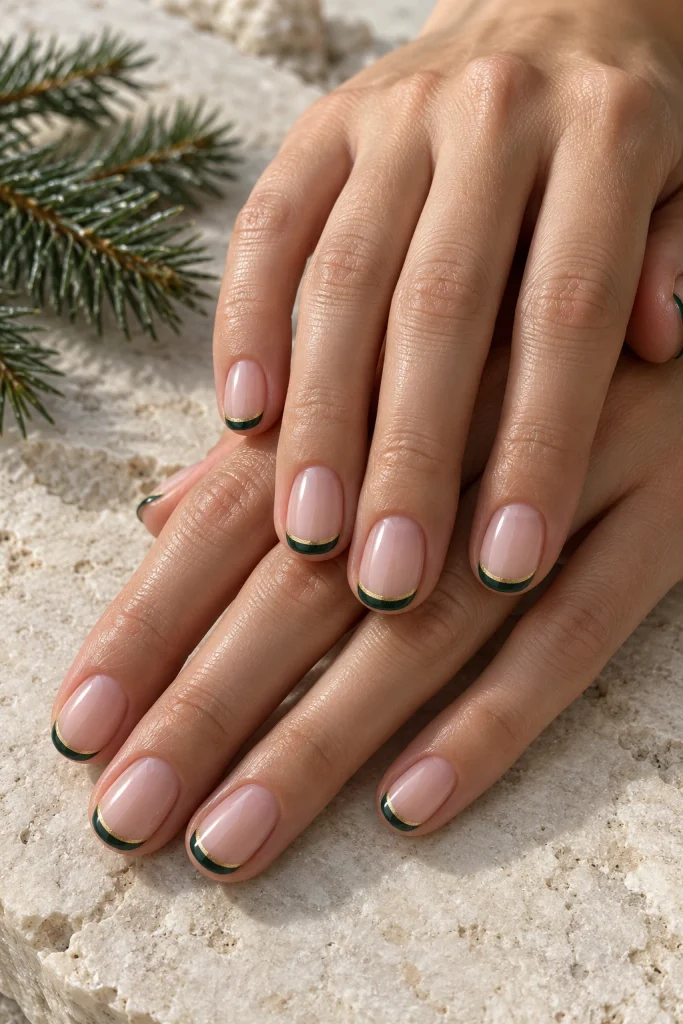
10. Minimalist Green French Tips With a Gold Line
Best for: A modern, understated Christmas manicure.
For a slightly more distinctive French manicure, combine deep green tips with an ultra-thin gold line. The neutral base keeps the design delicate, while the metallic detail adds a holiday accent. Because the artwork sits at the edge of the nail, it works well on short squoval or oval shapes.
Apply a sheer nude base first. Add a thin green tip using a fine brush, then carefully place a narrow gold line just beneath the edge of the green. If working with metallic polish is difficult, leave out the gold and keep the green tip alone.
Easy tip: Use the same base color on every nail to keep the design cohesive.
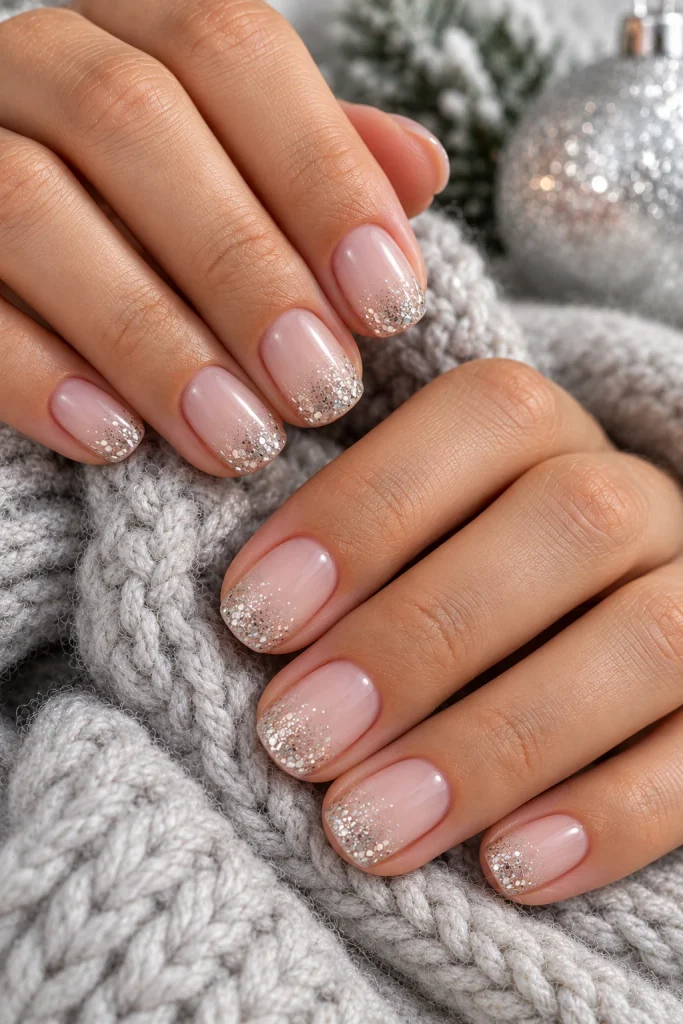
11. Icy Silver Glitter Tips
Best for: A frosty winter manicure with a subtle festive finish.
Silver glitter tips look like a light dusting of frost and can feel just as appropriate for winter parties as for Christmas Day. A sheer pink or translucent milky base helps the glitter stand out without making the manicure feel heavy.
Apply the base color and allow it to dry. Use a fine glitter polish at the tips, concentrating most of the sparkle along the edge and letting it fade slightly toward the middle of the nail. This soft gradient can be easier to achieve than a perfectly straight glitter line.
Easy tip: Fine glitter is generally easier to control on short nails than large reflective flakes.
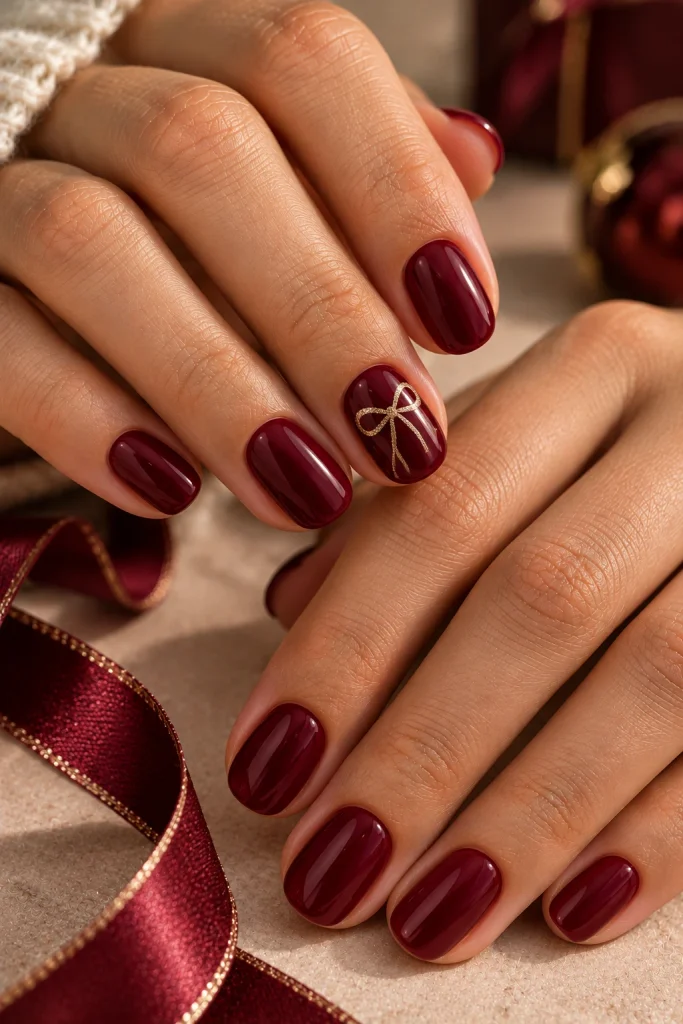
12. Burgundy Nails With a Tiny Gold Bow
Best for: A rich holiday manicure with one delicate decorative detail.
Burgundy offers a deeper, more dramatic alternative to bright Christmas red. A miniature gold bow on one accent nail adds a gift-inspired touch without overwhelming the manicure.
Paint the nails in a glossy wine or burgundy shade. On one accent nail, create a tiny bow using two small loops and a short center line in metallic gold. A nail sticker is an easier alternative if freehand details are challenging.
Easy tip: Keep the bow small enough to leave some of the burgundy base visible around it.
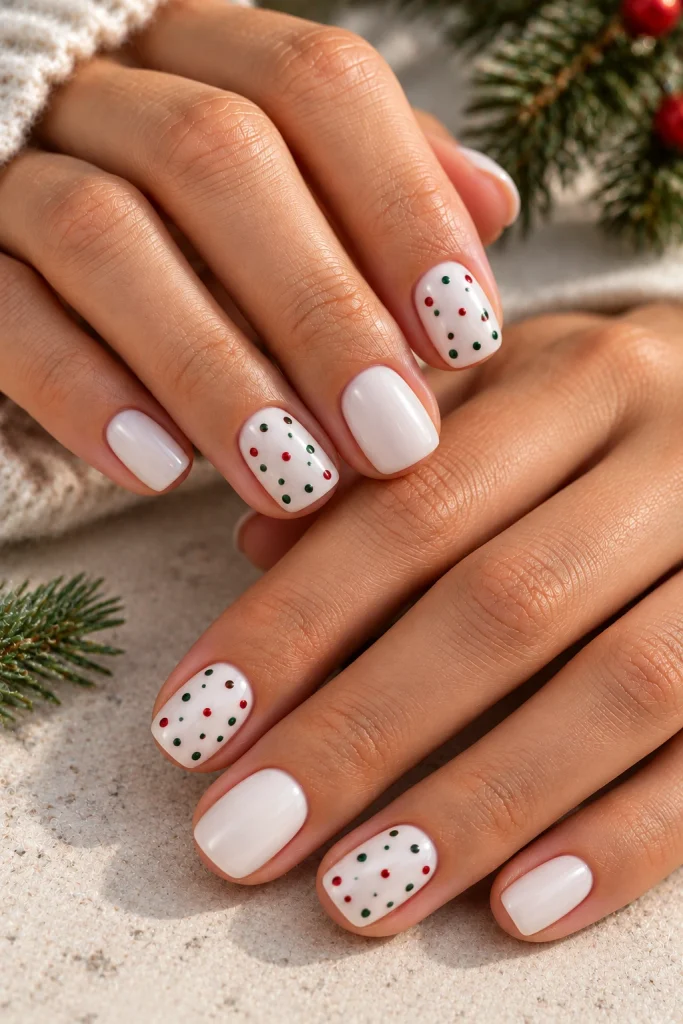
13. White Nails With Tiny Red and Green Dots
Best for: Beginner-friendly nail art that looks cheerful and neat.
A white manicure with miniature red and green dots is one of the easiest ways to create a festive pattern on short nails. The dots can resemble little Christmas ornaments or scattered holiday confetti, depending on how you arrange them.
Start with a white or milky base. Once completely dry, use a dotting tool to add small red and green dots to one or two accent nails. Vary the spacing slightly so the pattern looks natural rather than like a rigid grid.
Easy tip: Wipe the dotting tool between colors and use very little polish to keep each dot crisp.
14. Simple Christmas Ornament Accent Nail
Best for: A festive design that looks detailed without requiring elaborate artwork.
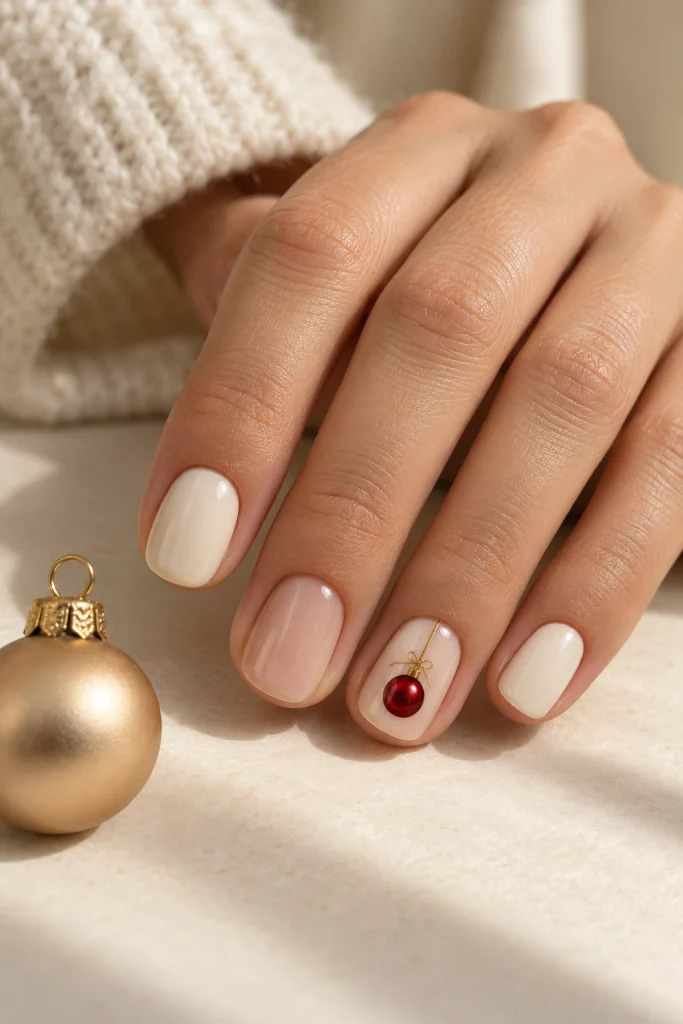
A tiny Christmas ornament on a neutral or white accent nail creates a recognizable holiday theme while allowing the rest of the manicure to stay simple. Use a small red or gold circle with a short metallic line above it to suggest an ornament hanging from a branch.
Paint the nails in a neutral shade, then choose just one accent nail for the ornament. Use a dotting tool for the round shape and a fine brush for the small hanging line. A metallic sticker can replace the hand-painted detail.
Easy tip: Choose a single ornament rather than several tiny decorations on the same nail.
15. Glossy Nude Nails With a Single Gold Star
Best for: A minimalist manicure that can be worn throughout the holiday season.
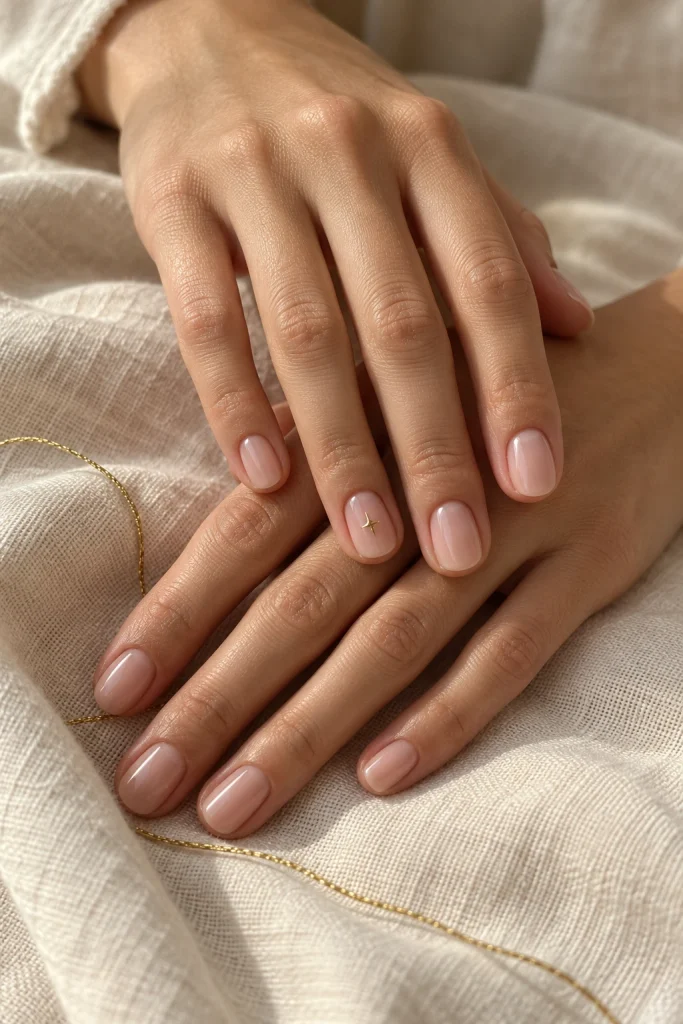
If you prefer understated nails, a sheer nude manicure with one tiny gold star can feel festive without looking overly themed. The neutral base complements a wide range of outfits, while the metallic accent catches the light in a subtle way.
Apply one or two coats of sheer nude or pink polish. Place a small gold star sticker on one accent nail, or paint a simple star using a fine brush. Finish with a clear top coat, following the product’s instructions for applying it over the decoration.
Easy tip: A single well-placed star is enough. Keep the remaining nails clean and glossy.
How to Make Simple Christmas Nails Look Neat on Short Nails
You do not need a large collection of nail-art tools to create an attractive holiday manicure. A few small adjustments can make a simple design look much more polished.
1. Choose a shape that suits your natural nails. Rounded, oval and squoval shapes are practical choices for short lengths. File gently in one direction rather than aggressively sawing back and forth.
2. Prepare the nail surface. Remove old polish, clean the nails and gently push back the cuticles only if comfortable. Avoid cutting living cuticle tissue. Follow with a base coat appropriate for your polish.
3. Keep the artwork small. A miniature star, a single stripe or a couple of dots usually works better than a detailed scene squeezed onto a small nail.
4. Use thin layers. Several thin coats generally dry more evenly than one thick coat. Allow sufficient drying time between layers.
5. Finish with a top coat. Seal the polish and decorative details according to the product directions. Avoid getting polish on the surrounding skin.
If you want to recreate more involved designs at home, explore Easy Christmas Nails at Home for additional DIY inspiration. For a broader collection of festive styles, Simple Christmas Nail Ideas is another useful next step.
Which Short Christmas Nail Design Should You Choose?
| Your preference | Design to try |
|---|---|
| Classic and timeless | Cherry red |
| Soft and elegant | Milky white snowflakes |
| Festive but understated | Red with gold dots |
| Rich and sophisticated | Forest green |
| Minimalist Christmas art | Nude with a tiny tree |
| Playful holiday style | Candy-cane accent |
| Modern and polished | Red French tips |
| Party-ready sparkle | Champagne glitter |
| Soft and feminine | Pink with white stars |
| Subtle metallic detail | Green and gold French tips |
| Frosty winter finish | Silver glitter tips |
| Deep, dramatic color | Burgundy with a gold bow |
| Easiest DIY pattern | Red and green dots |
| Traditional holiday detail | Ornament accent |
| Barely-there festive style | Nude with a gold star |
Frequently Asked Questions
What are the easiest Christmas nails for short nails?
A solid red or forest-green manicure, a sheer nude base with a gold star, and white nails with tiny colored dots are among the simplest options. They require little or no freehand drawing and work well without extending the nail length.
Can Christmas nail art look good on very short nails?
Yes. Keep the design proportionate to the nail bed and choose small details, narrow French tips or a single accent nail. A clean base color with one recognizable holiday feature can look more balanced than a crowded design.
What colors look best for short Christmas nails?
Classic red, forest green, milky white, burgundy, blush pink, nude and champagne gold are versatile choices. Select a combination that suits your personal style rather than feeling limited to traditional Christmas colors.
How can I do simple Christmas nails at home?
Begin with a base coat and a solid polish color. Add dots with a dotting tool, use a fine brush for simple lines, or apply nail decals for more intricate motifs. Let the layers dry properly and finish with a compatible top coat.
Final Thoughts
Short Christmas nails can be festive, elegant and easy to maintain without complicated nail art. Whether you prefer glossy red polish, delicate snowflakes, green French tips or a barely-there nude manicure, the best design is one that fits your nail length and feels comfortable for everyday wear.
Choose one look that suits your style, save its reference image and simplify the details if you are doing it yourself. Sometimes a single festive accent is all you need for a beautiful Christmas manicure.