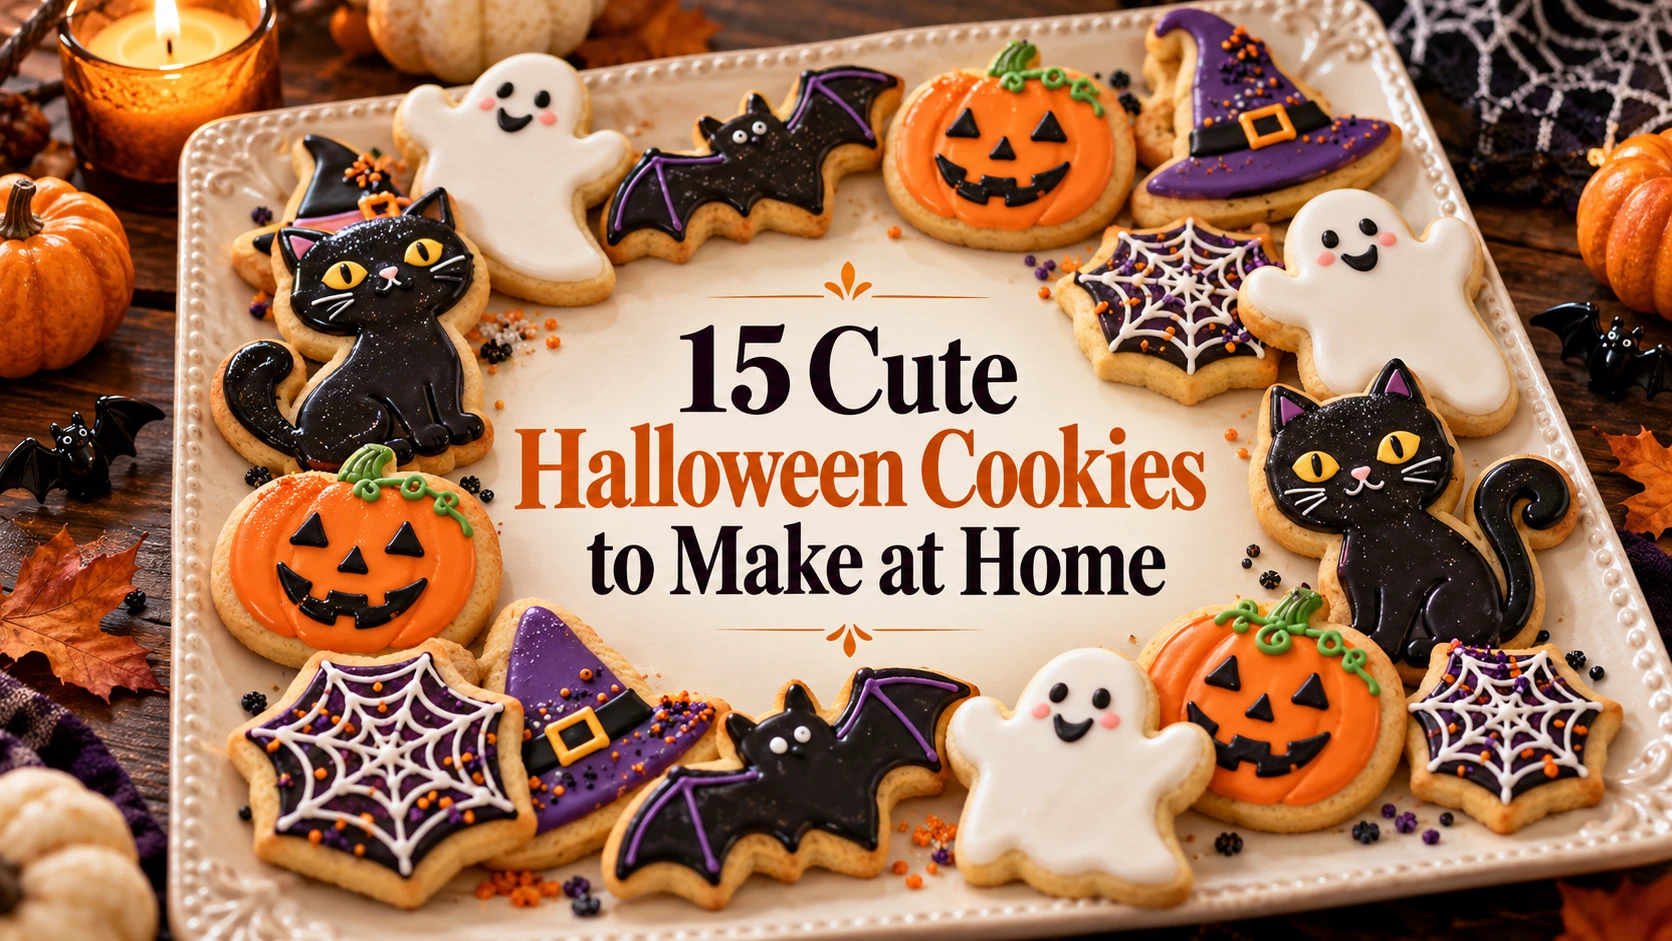
15 Cute Halloween Cookies to Make at Home in 2026
Halloween baking does not have to mean complicated royal icing, dozens of decorating tools, or spending an entire afternoon trying to make every cookie look perfect. Some of the cutest Halloween cookies start with a simple sugar cookie, chocolate cookie, or even a store bought sandwich cookie and a few easy decorations.
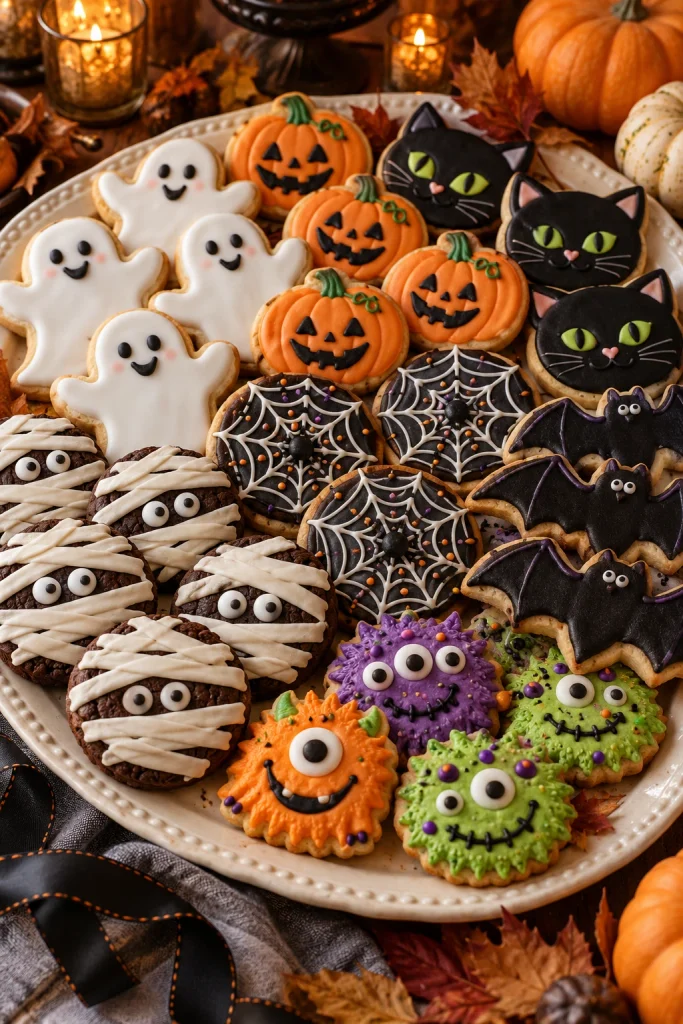
If you are looking for 15 cute Halloween cookies to make at home, this collection gives you a mix of homemade, beginner friendly, kid friendly, and shortcut ideas. You will find smiling ghosts, little pumpkins, mummies, black cats, colorful monsters, chocolate spiders, witch inspired cookies, and a few designs that look special without requiring professional cookie decorating skills.
The easiest way to make a Halloween cookie assortment look impressive is to mix different shapes, colors, textures, and decorating techniques. You do not need to make every design. Pick three or four favorites and combine them on one platter for a homemade Halloween dessert spread.
Baking Basics for Cute Halloween Cookies
Before you start decorating, a little preparation can make the whole process easier. You do not need a large collection of specialty tools, but having the basics ready will help your cookies bake evenly and make decorating much less frustrating.
What You’ll Need
For most homemade Halloween cookies, keep these basics on hand:
- Mixing bowls and measuring cups for preparing the dough and icing
- A rolling pin for cut-out sugar cookies
- Halloween cookie cutters such as ghosts, pumpkins, bats, cats, and witches
- Baking sheets lined with parchment paper or silicone baking mats
- A cooling rack so cookies can cool completely before decorating
- Piping bags or small food-safe storage bags for icing details
- Small decorating tips if you want cleaner lines
- Candy eyes and Halloween sprinkles for quick decorations
- Food coloring in a few seasonal shades such as orange, black, purple, and green
- Melted chocolate or candy melts for drizzles, spiderwebs, and no-bake cookies
You can make many of the designs in this article without every item on the list. For example, a small zip-top bag with the corner snipped off can work as a basic piping bag.
Let Cookies Cool Completely Before Decorating
This is one of the simplest ways to avoid messy Halloween cookies.
Warm cookies can soften icing, melt chocolate decorations, and cause detailed designs to spread. Transfer freshly baked cookies to a cooling rack and wait until they are completely cool before decorating.
If you are making several batches, bake everything first and start decorating only after the last batch has cooled. This creates a much smoother workflow.
Keep Cut-Out Cookies the Same Thickness
When making ghosts, pumpkins, bats, or other shaped cookies, try to roll the dough to an even thickness. Cookies that are significantly different in thickness can finish baking at different times.
An even dough thickness also makes decorating easier because the icing has a more consistent surface.
If your dough becomes too soft while you are working with it, chill it briefly before cutting the shapes. This can make the dough easier to handle and help the cut-out shapes hold their definition.
Do Not Overcrowd the Baking Sheet
Leave enough space between cookies for air to circulate and for the dough to spread slightly during baking. Overcrowding can make cookies bake unevenly and makes it harder to move them without breaking delicate shapes.
Bake similar sized cookies together whenever possible. Small cookies may finish before larger ones, so mixing very different sizes on one baking sheet can make timing more difficult.
Make Decorating Easier With a Limited Color Palette
You do not need ten different icing colors to make Halloween cookies look interesting.
A simple palette of white, orange, black, purple, and green can create dozens of combinations. White works for ghosts and mummies, orange for pumpkins, black for bats and cats, while purple and green add variety to monsters and witch inspired designs.
Using a limited palette also makes a mixed cookie platter look more cohesive.
Use Shortcuts When They Actually Help
Homemade dough is not mandatory for every cookie on the tray. Store bought sandwich cookies, prepared cookie dough, candy melts, sprinkles, and candy eyes can save considerable time.
The best shortcut is one that still gives you the finished look you want. For example, sandwich cookies are excellent for quick monster designs, while homemade cut-out dough gives you much more control over ghosts, pumpkins, bats, and cats.
A combination of homemade and shortcut cookies can make a large Halloween spread much easier to prepare.
Plan the Baking Around Your Time
If you are making cookies for a party, do not leave baking, cooling, decorating, and packaging for the same afternoon.
A simple schedule works well:
Day 1: Bake the cookies and let them cool completely.
Day 2: Decorate the cookies and allow the icing or chocolate to set.
Before serving: Arrange the cookies on a platter or package them individually.
This approach is especially useful when making several of the designs from this list. You can also prepare the dough in advance and bake it closer to the day you plan to decorate.
Store Decorated Cookies Carefully
Once the cookies are fully decorated and the icing has set, keep them in an airtight container at room temperature unless the particular recipe requires refrigeration.
Place parchment paper between layers if the decorations are delicate. Avoid stacking cookies before soft icing or chocolate has completely hardened.
For gift bags or party favors, choose sturdy designs with decorations that have fully set. Ghosts, pumpkins, bats, and simple chocolate decorated cookies are generally easier to package than cookies with tall or fragile decorations.
The goal is simple: bake evenly, cool completely, decorate without rushing, and give the finished decorations enough time to set before storing or serving.
1. Cute Ghost Sugar Cookies
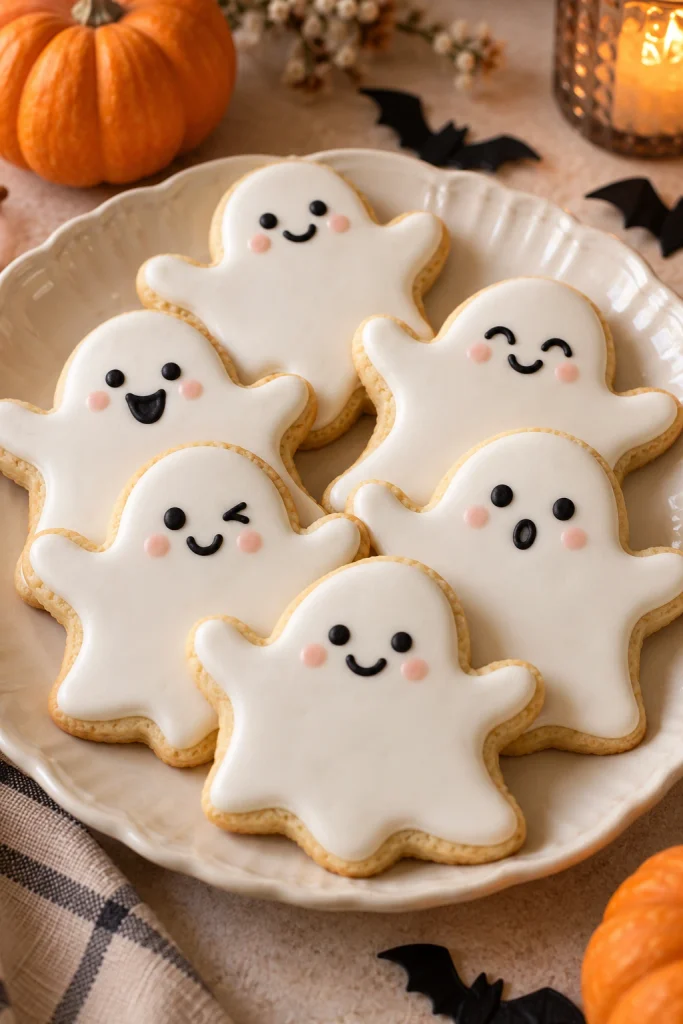
Ghost cookies are one of the easiest Halloween designs to make because the shape itself already communicates the theme. Roll out your favorite sugar cookie dough, cut out simple ghost shapes, and bake until the edges are lightly golden. Once the cookies have cooled completely, cover them with white icing and add two small black eyes and a tiny mouth.
The fun part is giving every ghost a slightly different expression. One can look surprised, another can have sleepy eyes, and another can have a tiny smile. If you do not want to work with royal icing, use a simple powdered sugar glaze and add the faces with melted chocolate or an edible food marker once the surface has set.
2. Mini Jack O Lantern Cookies
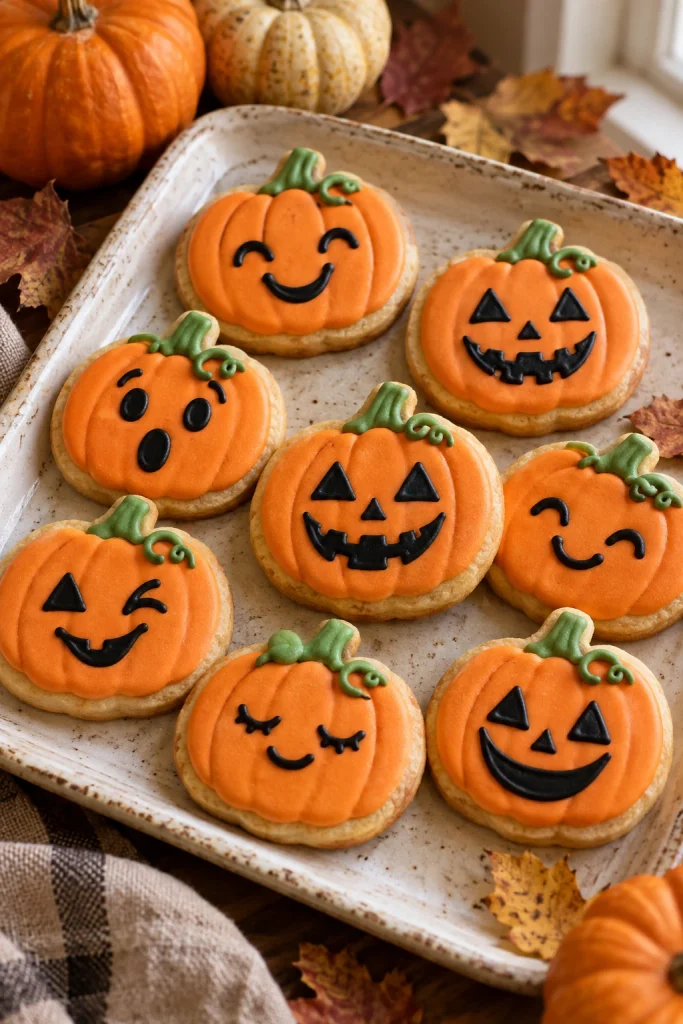
Small pumpkin cookies are perfect when you want a classic Halloween look without complicated decoration. Cut the dough into pumpkin shapes, bake them, and use orange icing as the base. Simple black eyes, a triangle nose, and a little smiling mouth are enough to turn each cookie into a jack o lantern.
For a more playful cookie tray, change the expressions instead of making every pumpkin identical. You can also use a slightly muted pumpkin orange instead of an extremely bright shade. A small green stem completes the design and makes these cookies instantly recognizable. If children are helping, this is one of the designs where imperfect faces actually make the cookies more charming.
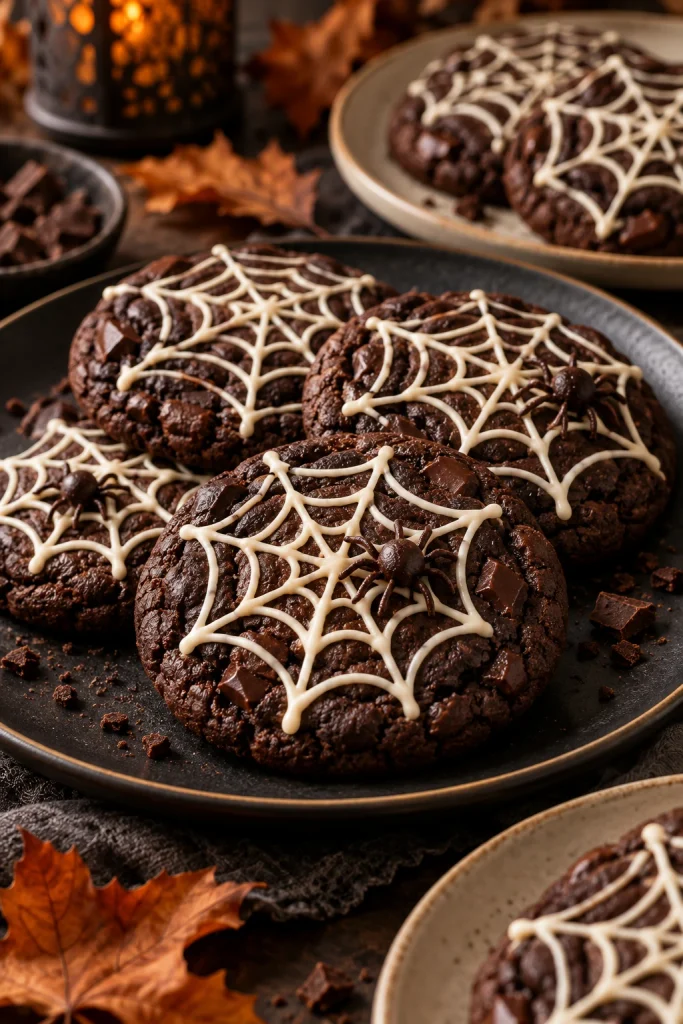
3. Chocolate Spiderweb Cookies
Chocolate cookies are a natural choice for Halloween because the dark base creates instant contrast with pale decorations. Bake soft chocolate cookies and let them cool before adding thin white icing or melted white chocolate in several circles. Drag a toothpick gently from the center toward the edge to create the spiderweb effect.
This design looks more complicated than it actually is. The web does not need to be perfectly symmetrical, and slightly uneven lines can make the cookies look handmade. Add a tiny edible spider to only a few cookies so the platter has some variation. The rich chocolate base also makes these a good option when you want something that feels more dessert focused than heavily decorated.
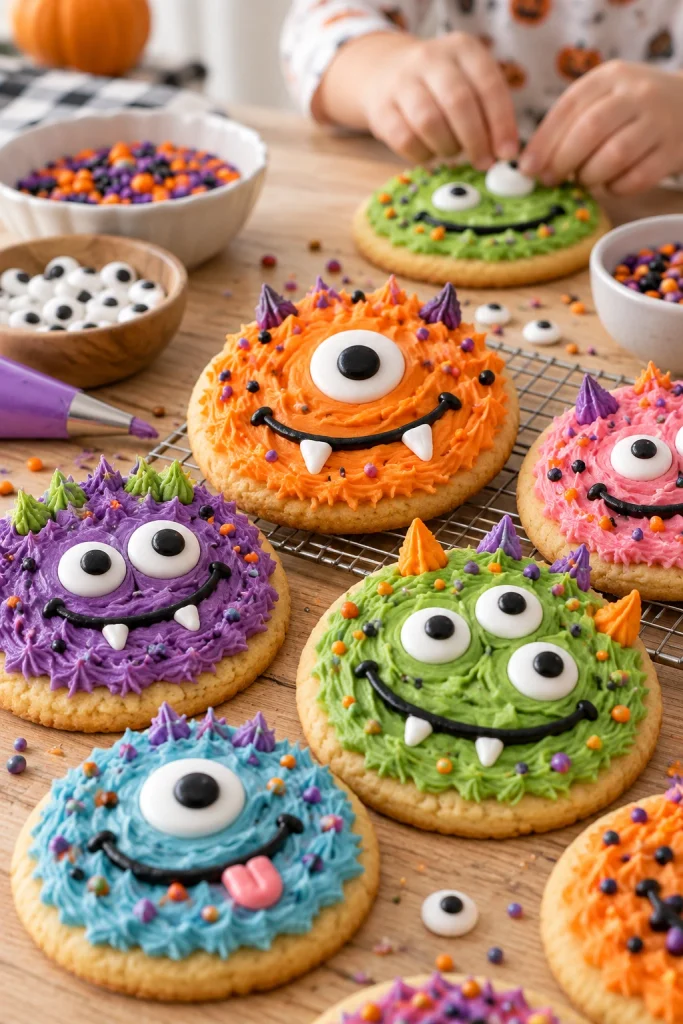
4. Friendly Monster Cookies
Monster cookies are especially good for baking with kids because there is no need for perfect decorating. Use round sugar cookies or chocolate cookies as your base, then cover them with colorful icing in shades such as green, purple, orange, blue, or pink. Finish with candy eyes in different sizes.
Let every monster have its own personality. One cookie might have a single large eye while another has three tiny eyes and a silly mouth. You can also use sprinkles for hair, eyebrows, or tiny teeth. Because the design is intentionally playful, children can participate without worrying about making straight lines or perfectly matching decorations.
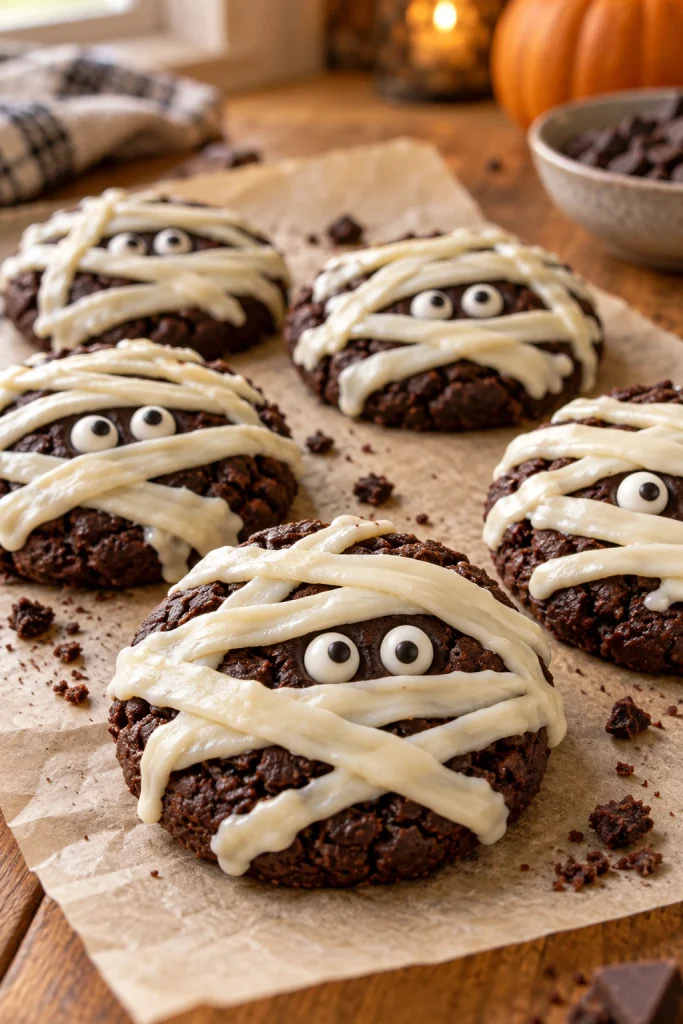
5. Easy Mummy Chocolate Cookies
Mummy cookies are ideal when you want a spooky design without detailed piping. Start with chocolate cookies and drizzle white icing across the surface in loose overlapping lines. Leave a small space for two candy eyes, then let the icing set.
Do not worry about keeping the white lines perfectly straight. Mummy bandages are supposed to look irregular, which makes this one of the most forgiving Halloween cookie designs. For a quick batch, place the cooled cookies on parchment paper and use a piping bag or a small spoon to add the icing to several cookies at once.
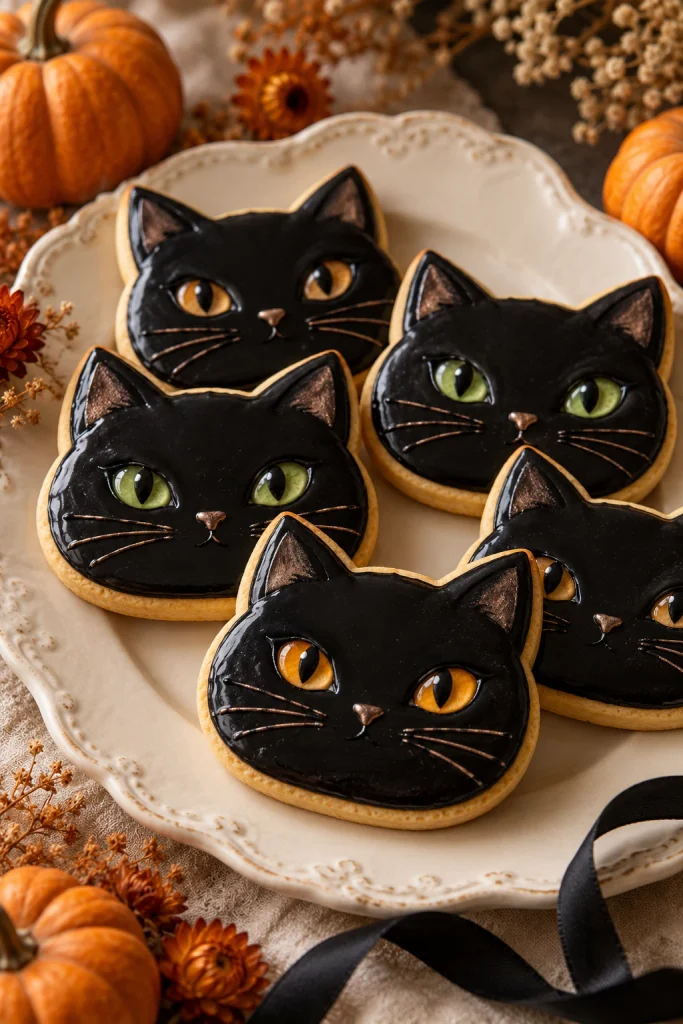
6. Cute Black Cat Cookies
Black cat cookies bring a slightly more sophisticated Halloween character to the dessert table. Cut sugar cookie dough into simple cat silhouettes and cover them with black icing. Keep the decoration minimal with tiny amber, green, or yellow eyes and a few delicate whiskers.
If you do not have a cat shaped cutter, use round cookies and turn them into cat faces instead. Two small triangular ears, simple eyes, and a few whiskers can completely change the appearance of an ordinary cookie. For an elegant Halloween party, black icing with tiny gold details can make these feel more polished than traditional bright Halloween cookies.
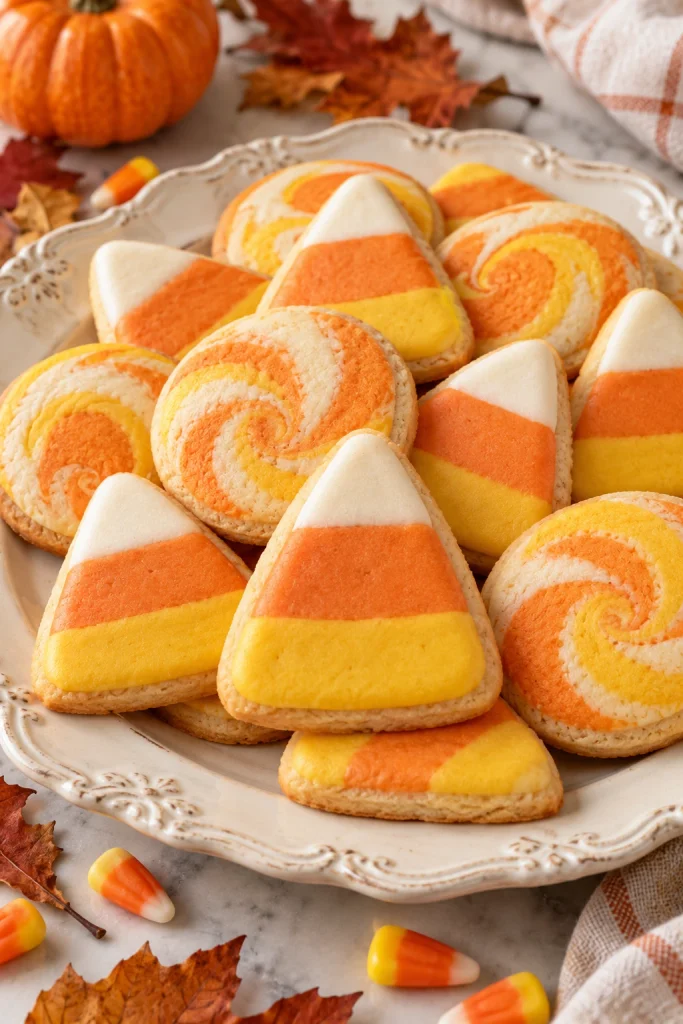
7. Candy Corn Inspired Cookies
You can create a Halloween cookie that looks festive without drawing any Halloween characters at all. Use the familiar white, orange, and yellow candy corn color combination in a sugar cookie design. You can layer the colors into a triangular shape or gently swirl them together for a softer marbled effect.
These cookies are particularly useful for a mixed Halloween platter because their bright colors provide contrast against chocolate cookies and darker decorations. They also work well when you want something that feels seasonal but not overly spooky. Keep the colors slightly warm and muted if you prefer a more grown up dessert table.
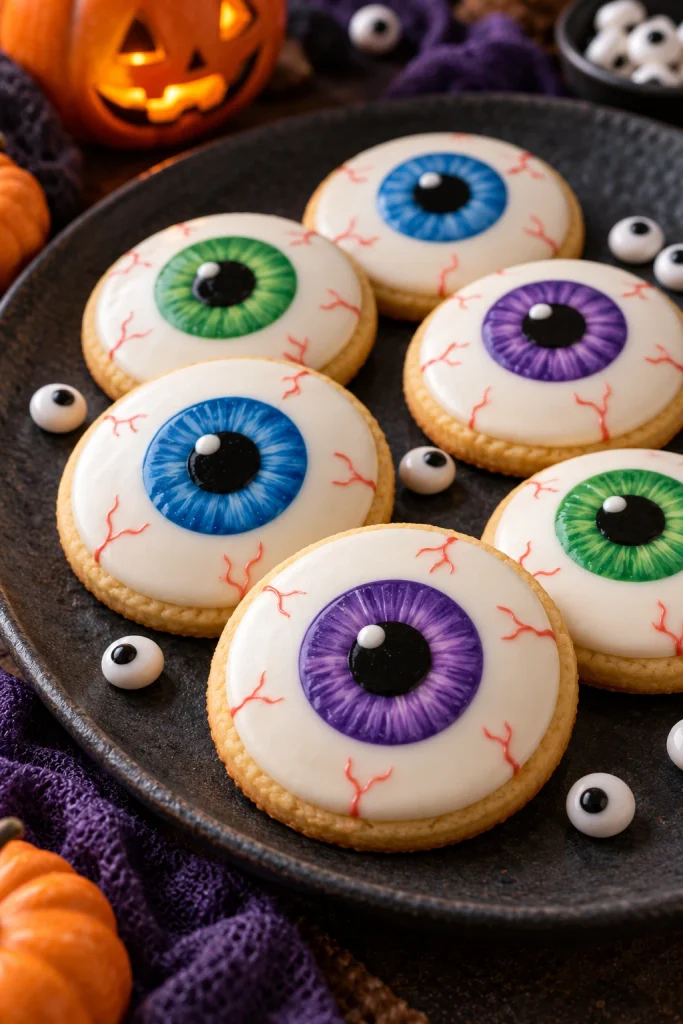
8. Playful Halloween Eyeball Cookies
Eyeball cookies can look funny rather than frightening when you use bright colors and oversized cartoon style details. Start with round cookies and a white icing base. Add a blue, green, purple, or brown iris, followed by a black pupil. A few thin red lines around the outside can add a spooky touch if you want them.
For a children’s Halloween party, keep the eyes exaggerated and colorful. If you are short on time, large candy eyeballs can replace most of the decorating. Arrange cookies with different iris colors together so the platter looks like a collection of silly characters rather than identical treats.
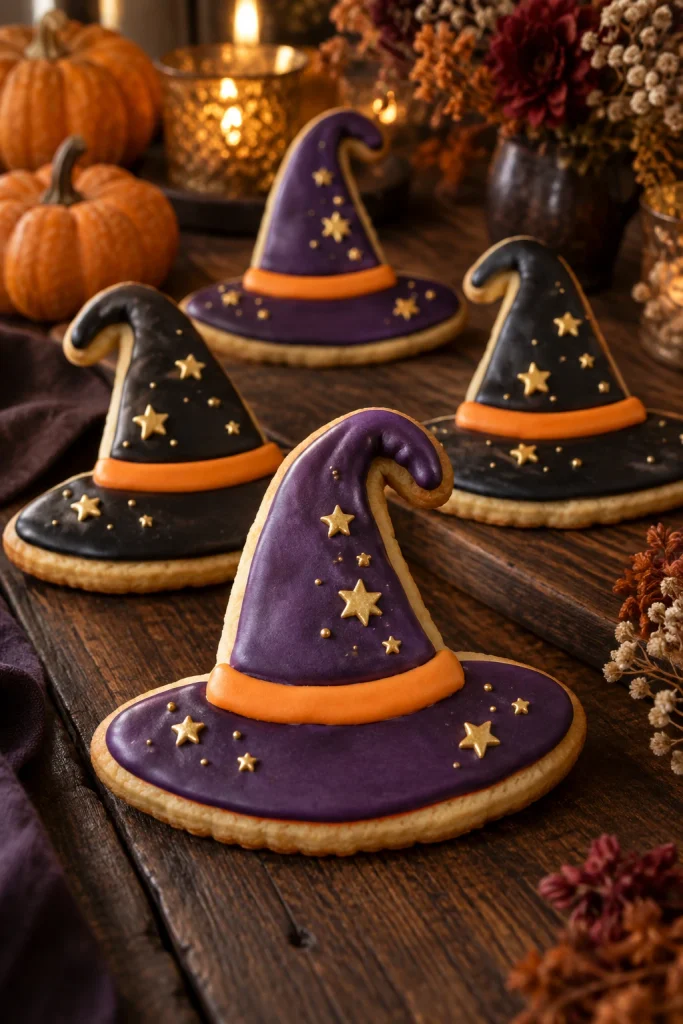
9. Little Witch Hat Cookies
Witch hat cookies are a fun choice when you want something a little different from ghosts and pumpkins. Use triangle or cone shaped cookies and decorate them with black, purple, or deep plum icing. A narrow orange, lavender, or gold band can make the shape instantly recognizable.
You can keep these very simple for children by using sprinkles around the hat band. For an adult Halloween gathering, use dark icing and a few tiny edible stars or metallic sugar pearls instead. A small collection of witch hat cookies looks especially pretty beside other witch inspired Halloween treats.
If you are creating a complete Halloween atmosphere at home, the cookies can also sit naturally alongside seasonal pieces from GlofyRobs’ vintage and retro Halloween decor ideas, especially if you are styling a nostalgic dessert table.
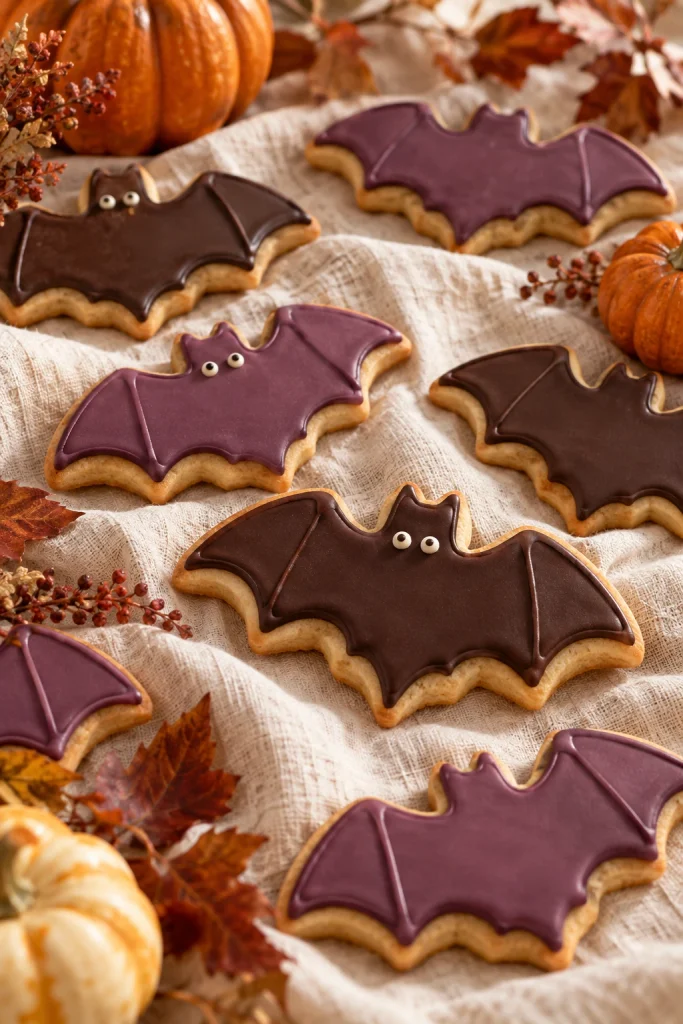
10. Cute Bat Sugar Cookies
Bat cookies can look surprisingly sweet when the shapes are small and the decorating is kept simple. Use a bat shaped cutter with sugar cookie dough, then decorate the baked cookies with dark chocolate or black icing. Tiny white eyes can give them a friendly expression, while leaving the wings plain creates a cleaner look.
For a beginner friendly version, skip the detailed icing altogether and use chocolate cookie dough with a bat cutter. The darker dough already gives you most of the Halloween effect. This is also a practical option for treat bags because the cookies are relatively simple and do not depend on elaborate icing details.
11. Friendly Frankenstein Cookies
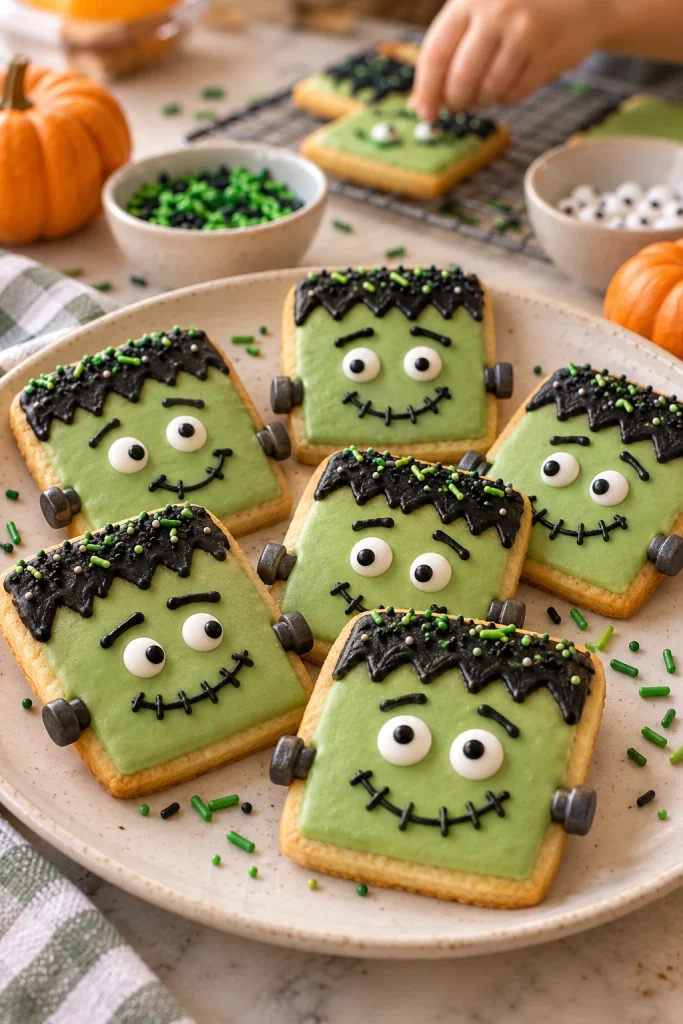
Frankenstein cookies are another design that works well with a simple round or rectangular cookie base. Cover the cookie with green icing, then add dark hair, simple eyes, a stitched smile, and small details suggesting the classic Frankenstein character.
The easiest approach is to think of the face as a simple graphic rather than a realistic character. Uneven hair and slightly mismatched eyes can make the cookies more playful. This design is especially suitable for children because most of the details can be added with candy pieces or simple lines rather than intricate royal icing work.
12. No Bake Halloween Sandwich Cookie Monsters
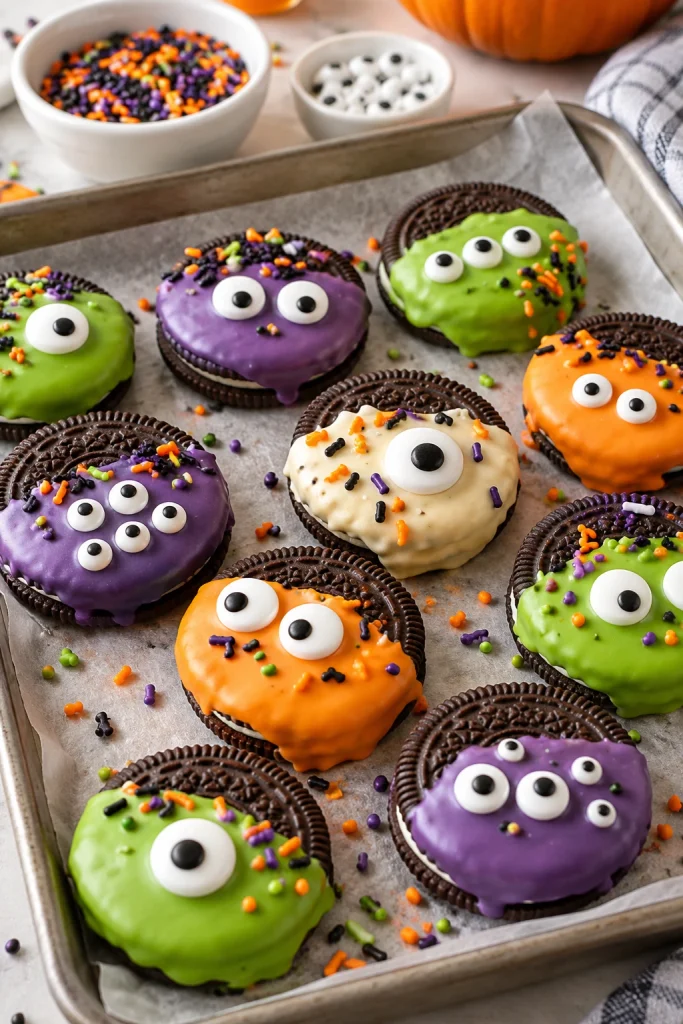
Not every Halloween cookie needs to start with homemade dough. Chocolate sandwich cookies are an excellent shortcut when you want something that children can help make without turning on the oven.
Dip or partially coat the cookies in colorful melted candy coating, then add candy eyes before the coating sets. Use different colors to create a little group of monsters. Green, purple, orange, and white work particularly well together, and sprinkles can add texture without requiring detailed decorating.
This kind of shortcut is especially useful when Halloween arrives quickly or when you are already preparing several other treats. Current Halloween baking coverage continues to highlight simple no bake cookie ideas as an accessible option for families and parties.
13. Chocolate Chip Spider Cookies
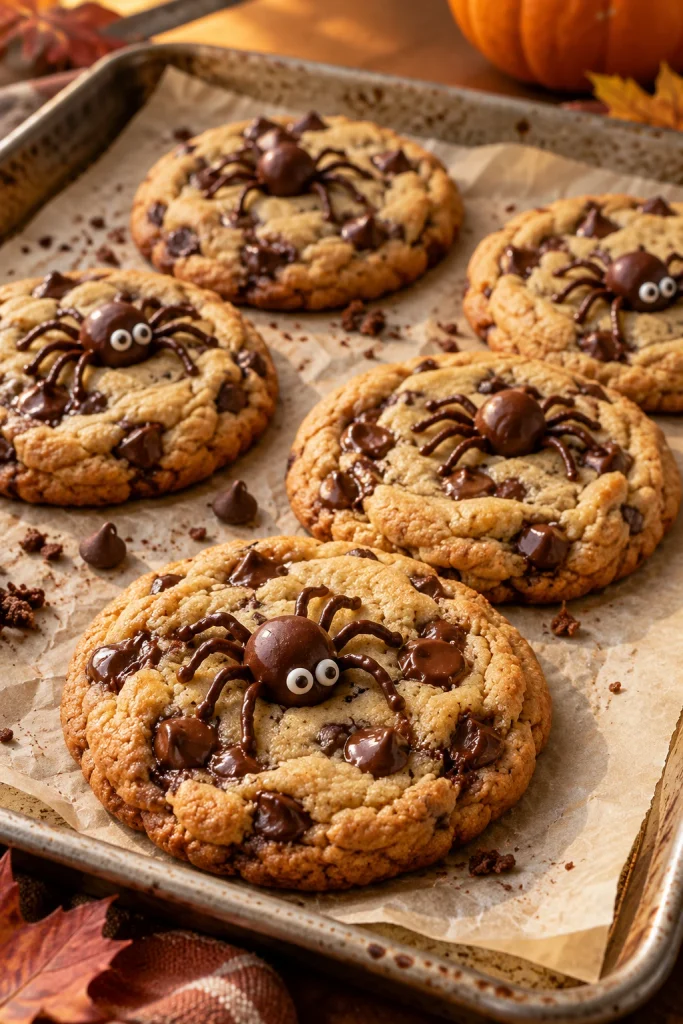
If you would rather make a cookie that tastes familiar than cover it with lots of icing, turn classic chocolate chip cookies into Halloween spiders. Bake your favorite soft chocolate chip cookie recipe and add a simple chocolate spider decoration after the cookies have cooled.
You can use melted chocolate to draw small legs around a chocolate candy or another round chocolate piece. Candy eyes can make the spiders look more playful. The familiar cookie base makes this a particularly good choice for guests who prefer classic flavors and for people who want a Halloween treat that does not taste overly sweet from layers of icing.
14. Magical Potion Cookies
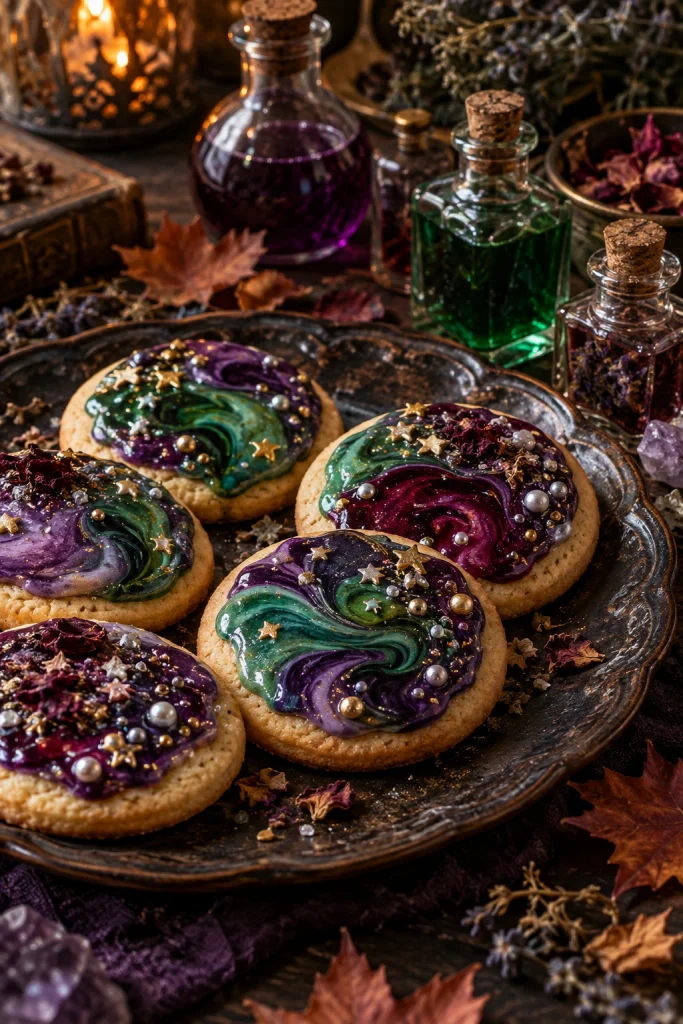
Potion cookies are a more unusual Halloween option and give you an opportunity to move beyond the traditional orange and black color palette. Use round cookies decorated with deep purple, emerald green, berry, or midnight blue icing. Add tiny bubbles, stars, sprinkles, or sugar pearls to create a magical potion effect.
The easiest way to make these look polished is to let the colors do most of the work. A glossy purple icing with a few contrasting green bubbles can look much more impressive than a cookie covered with complicated illustrations. These are particularly suitable for a witch themed Halloween party or an adult dessert table.
15. A Mixed Cute Halloween Cookie Platter
When you cannot choose just one design, combine several into one Halloween cookie platter. Ghosts, pumpkins, black cats, mummies, bats, monsters, and spiderweb cookies can all work together as long as the color palette stays coordinated.
Choose three or four main colors instead of decorating every cookie with a different shade. White, orange, chocolate brown, black, and muted purple create a cohesive Halloween palette. Vary the shapes and finishes so the platter feels abundant without looking chaotic.
For the surrounding table, keep the decorations simple. A few pumpkins, warm lighting, autumn foliage, or vintage inspired Halloween pieces can frame the cookies without competing with them. If you are decorating the front door or entry area for a Halloween gathering, GlofyRobs also has a practical guide to making a Halloween wreath for your front door that can help carry the theme from the entrance into the dessert table.
How to Make Cute Halloween Cookies Without Fancy Decorating Skills
You do not need a professional cookie decorating setup to make most of these designs. A rolling pin, a few cookie cutters, parchment paper, a basic piping bag or food storage bag, candy eyes, sprinkles, and a few icing colors can take you surprisingly far.
If you are new to decorated cookies, begin with designs where imperfect lines will not matter. Mummies, monsters, ghosts, spiderwebs, and pumpkins are much more forgiving than detailed character portraits. The goal is to create a cookie that looks festive and inviting, not to make every decoration identical.
Another useful shortcut is to let the shape do the work. A bat cutter already creates a Halloween silhouette. A pumpkin cutter already gives you the basic jack o lantern shape. That means you can spend less time decorating and still get a strong visual result.
Easy Halloween Cookies to Make With Kids
When children are helping, choose cookies that allow creativity rather than requiring precision.
Monster cookies are probably the easiest because there is no correct number of eyes. Mummies are also forgiving because the icing lines can be uneven. Pumpkin cookies work well because children can create different facial expressions, while ghosts can be decorated with simple eyes and smiles.
Set candy eyes, sprinkles, colored sugars, and small decorations into separate bowls before starting. This makes decorating feel like a little Halloween activity and keeps children from having to handle hot trays or melted ingredients.
Always keep hot baking trays, ovens, and melted chocolate away from young children and handle those parts yourself.
How to Make a Halloween Cookie Platter Look Better
A good cookie platter depends as much on contrast as it does on the cookies themselves.
Combine light and dark designs. White ghosts look better beside chocolate mummies or black cats. Orange pumpkins provide a bright accent, while purple or green monster cookies can add another layer of color.
Vary the shapes and sizes instead of placing all the cookies in identical rows. A few stacked cookies, several laid flat, and a handful arranged at different angles can make a platter feel more abundant.
You can also create a cozy Halloween atmosphere around the food rather than putting decorations directly on top of the cookies. Warm lighting, pumpkins, dried foliage, vintage inspired paper decorations, or a seasonal simmer pot nearby can make the whole kitchen or dining area feel more intentional. GlofyRobs’ guide to a cozy Halloween simmer pot is useful if you want to add a seasonal scent while you bake.
Which Halloween Cookies Are Easiest?
If you want the simplest options, start with mummy cookies, monster cookies, ghost cookies, or no bake sandwich cookie monsters.
For children, monsters and pumpkins are particularly easy because the decorating does not have to be precise.
For a Halloween party, a mixed platter gives you the greatest visual variety.
For gifting, choose sturdy shapes such as ghosts, pumpkins, and bats and allow the icing to dry completely before packing them.
For adults, chocolate spiderweb cookies, black cats, and potion cookies can create a more polished dessert table without losing the Halloween theme.
Can You Use Store Bought Cookies?
Yes. Store bought sandwich cookies can be transformed into Halloween treats with melted chocolate, candy coating, sprinkles, and candy eyes.
This is especially helpful when you want a quick activity for children or when you are already preparing several other Halloween foods. Ready made cookies also remove the need to roll, cut, chill, and bake dough.
The key is to work with the shape you already have. Round sandwich cookies are perfect for monsters, eyeballs, spiders, and simple faces. Longer cookies can become ghosts, mummies, or witch inspired designs.
How Far Ahead Can You Make Halloween Cookies?
Most decorated cookies are easiest to manage when you separate baking from decorating. Bake the cookies ahead of time, allow them to cool completely, and store them in an airtight container. Decorate closer to the event when possible, then allow the icing to set fully before stacking or packaging.
If you are preparing cookies for a Halloween party, avoid leaving the entire project until the same day. Baking and decorating in separate stages gives you much more control and leaves time to fix a broken cookie or make another small batch if needed.
For a large dessert table, choose a mixture of simple and detailed cookies. That way you can spend your decorating time on the designs that will be most visible while keeping the rest of the tray easy.
Final Thoughts
Cute Halloween cookies do not need to be complicated to make an impression. Friendly ghosts, little pumpkins, chocolate spiderwebs, colorful monsters, mummies, black cats, and bats can all be created with simple techniques that work well in a home kitchen.
The easiest approach is to choose a few designs with different levels of decorating effort. Make one detailed cookie such as a black cat or potion design, add a couple of easy shapes such as ghosts and pumpkins, then fill out the platter with simple chocolate or no bake cookies.
That balance gives you a Halloween dessert table that looks thoughtfully made without requiring every cookie to be perfect. Whether you are baking with children, preparing treats for a party, or simply spending a cozy October afternoon in the kitchen, these cute Halloween cookies to make at home give you plenty of ways to make Halloween a little sweeter.