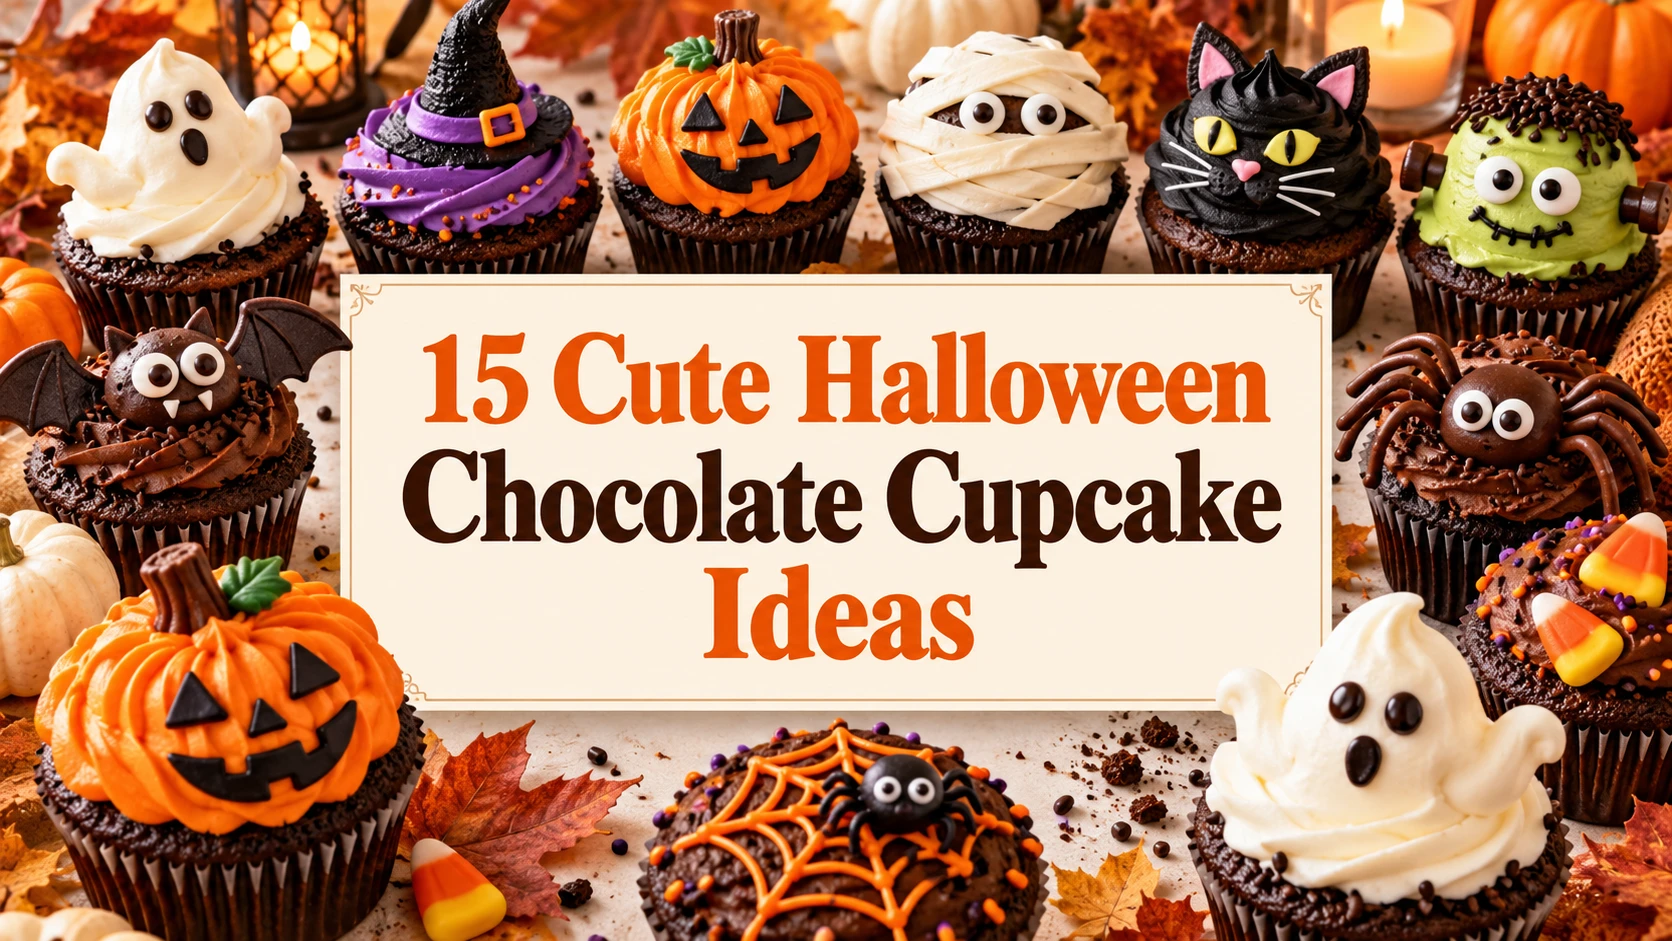
15 Cute Halloween Chocolate Cupcake Ideas to Try This October
Chocolate cupcakes are an easy starting point for Halloween baking because their rich chocolate flavor pairs beautifully with vanilla buttercream, orange frosting, crushed chocolate cookies, candy eyes, and colorful edible decorations. With a few simple ingredients, you can turn an ordinary batch of cupcakes into friendly ghosts, little mummies, black cats, spooky spiders, and miniature haunted houses.
If you are looking for Halloween chocolate cupcake ideas for a school party, family gathering, bake sale, or October dessert table, this guide includes everything you need to get started. You will find a complete chocolate cupcake recipe, homemade buttercream instructions, ingredient lists for decorating, and 15 step by step design ideas. Each design uses the same cupcake base, so you can make a variety of Halloween treats without preparing 15 different recipes.
Quick Recipe Overview
Recipe: Easy Chocolate Halloween Cupcakes
Yield: 12 standard cupcakes
Prep time: 20 minutes
Bake time: 18 to 22 minutes
Cooling time: 30 minutes
Decorating time: 30 to 45 minutes for a mixed selection
Total time: Approximately 1 hour 40 minutes to 2 hours
Difficulty: Easy
Best for: Halloween parties, school celebrations, family baking, and dessert tables
Ingredients for Chocolate Halloween Cupcakes
This recipe makes 12 moist chocolate cupcakes. You can use the same batch for all 15 designs, or prepare a double batch if you are serving a larger group.
For the chocolate cupcakes
1 cup all purpose flour
1 cup granulated sugar
1/3 cup unsweetened cocoa powder
1 teaspoon baking soda
1/2 teaspoon baking powder
1/2 teaspoon salt
1 large egg at room temperature
1/2 cup milk
1/4 cup vegetable oil
1 teaspoon vanilla extract
1/2 cup hot water
For the vanilla buttercream frosting
1 cup unsalted butter, softened
3 1/2 cups powdered sugar
1 teaspoon vanilla extract
2 to 3 tablespoons milk or heavy cream
A small pinch of salt
For the Halloween decorations
White, orange, black, green, purple, and yellow gel food coloring
Candy eyes
Chocolate chips
Chocolate sandwich cookies
Chocolate sprinkles
White and dark chocolate chips
Orange and green sprinkles
Black decorating icing
Small candies or edible decorations for faces
Licorice laces or other suitable edible decorations for spider legs
You do not need every decoration on this list. Choose the supplies that match the designs you want to make. For example, ghosts and mummies need white frosting, while pumpkins and spiderwebs use orange frosting and dark decorating icing.
Equipment You Will Need
- A standard 12 cup muffin pan
- Twelve paper cupcake liners
- Two mixing bowls
- A whisk or electric mixer
- Measuring cups and spoons
- A rubber spatula
- A wire cooling rack
- Piping bags or resealable food safe bags
- A round piping tip and a small star tip, if available
- A toothpick for testing the cupcakes and drawing spiderwebs
You can still decorate attractive cupcakes without professional piping tips. A resealable bag with a tiny corner cut off works for simple lines, faces, and mummy bandages.
How to Make Chocolate Halloween Cupcakes
Step 1: Prepare the oven and pan
Preheat your oven to 350°F, or 175°C. Line a standard muffin pan with 12 cupcake liners. Measure all the ingredients before you begin so the batter comes together smoothly.
Step 2: Mix the dry ingredients
In a large bowl, whisk together the flour, sugar, cocoa powder, baking soda, baking powder, and salt. Break up any cocoa lumps so the mixture is evenly combined.
Step 3: Add the wet ingredients
Add the egg, milk, vegetable oil, and vanilla extract. Whisk until the batter is smooth. Slowly add the hot water and mix again. The batter will be thinner than some cake batters, which helps produce a moist chocolate cupcake.
Step 4: Fill the cupcake liners
Divide the batter evenly among the 12 liners, filling each approximately two thirds full. Avoid filling them to the top because the cupcakes need room to rise.
Step 5: Bake the cupcakes
Bake for 18 to 22 minutes. Insert a toothpick into the center of a cupcake. If it comes out clean or with a few moist crumbs, the cupcakes are ready. If wet batter remains, bake for another two minutes and check again.
Step 6: Cool completely
Leave the cupcakes in the pan for about five minutes, then transfer them to a wire rack. Allow them to cool completely before frosting. Decorating warm cupcakes can melt the buttercream and cause candy decorations to slide.
How to Make Vanilla Buttercream
Place the softened butter in a mixing bowl and beat for two to three minutes until creamy. Add the powdered sugar gradually, mixing on low speed at first to prevent it from scattering. Add the vanilla extract, salt, and two tablespoons of milk or cream.
Beat until the frosting looks light and smooth. If it is too thick to pipe, add the remaining milk a teaspoon at a time. If it becomes too soft, mix in a little more powdered sugar.
Divide the frosting into separate bowls according to the designs you plan to make. Leave some white for ghosts and mummies, tint a portion orange for pumpkins and spiderwebs, and prepare smaller portions in green, purple, and black for monsters, cats, and other decorations.
For a darker chocolate design, you can use chocolate buttercream or ganache instead of vanilla frosting.
15 Cute Halloween Chocolate Cupcake Ideas
1. Cute Chocolate Ghost Cupcakes
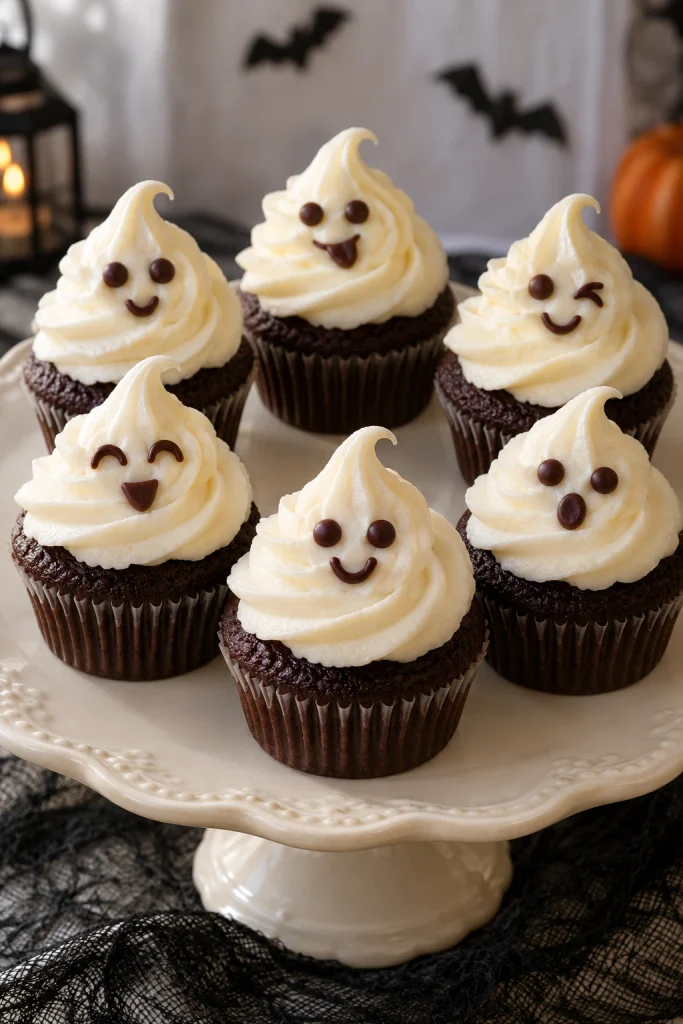
Ghost cupcakes are one of the easiest Halloween designs for beginners. You will need white buttercream, a large round piping tip, and black decorating icing or small chocolate chips. Pipe a tall mound of white frosting onto the center of each cooled chocolate cupcake. Slowly lift the piping bag as you finish to create a rounded ghost shape with a slightly pointed top.
Add two small eyes and a tiny mouth to give each ghost its own expression. You can make some ghosts smile, others look surprised, and a few close their eyes for a sleepy appearance. These cupcakes look lovely on a white or pale ceramic platter, where the contrast between the white frosting and dark chocolate cake is easy to see.
Difficulty: Easy
Decorating time: Approximately 5 to 10 minutes for 6 cupcakes
2. Orange and Black Spiderweb Cupcakes
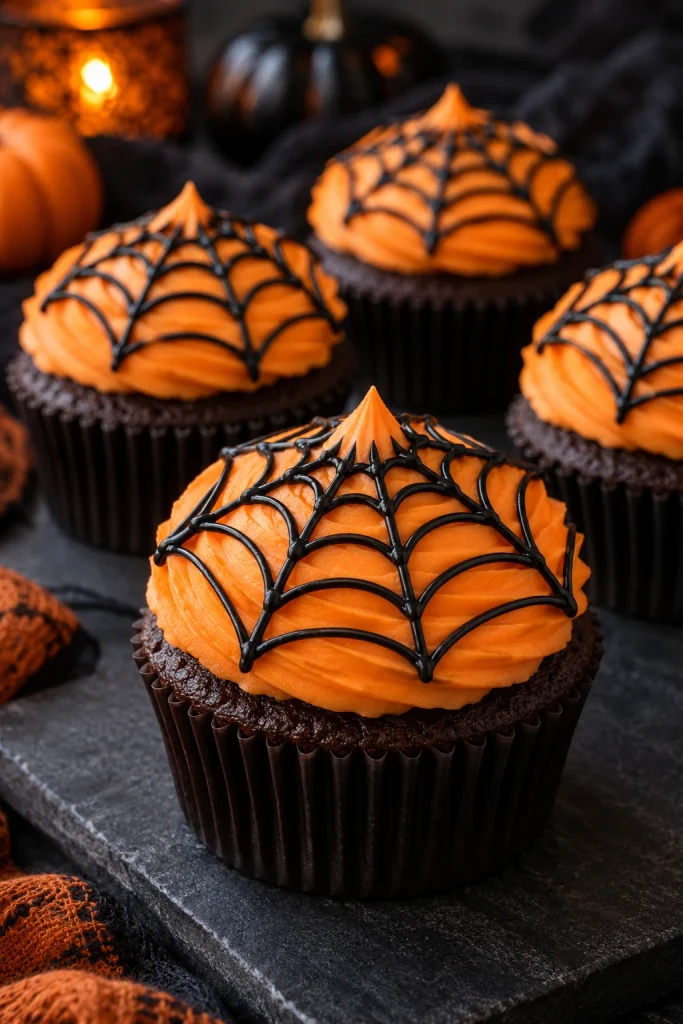
Spiderweb cupcakes are a great option when you want traditional Halloween colors and a recognizable design. You will need orange buttercream, black decorating icing, and a toothpick. Spread a smooth layer of orange frosting across each cupcake, then pipe three or four thin black circles on top, starting near the center and working outward.
While the icing is still soft, drag a toothpick from the center toward the edge at several evenly spaced points. Wipe the toothpick between strokes to keep the lines neat. The circles will turn into a web pattern without requiring complicated piping skills. For a party tray, combine these cupcakes with white ghosts and dark chocolate spiders to create variety.
Difficulty: Easy
Decorating time: Approximately 5 minutes per cupcake
3. White Chocolate Mummy Cupcakes
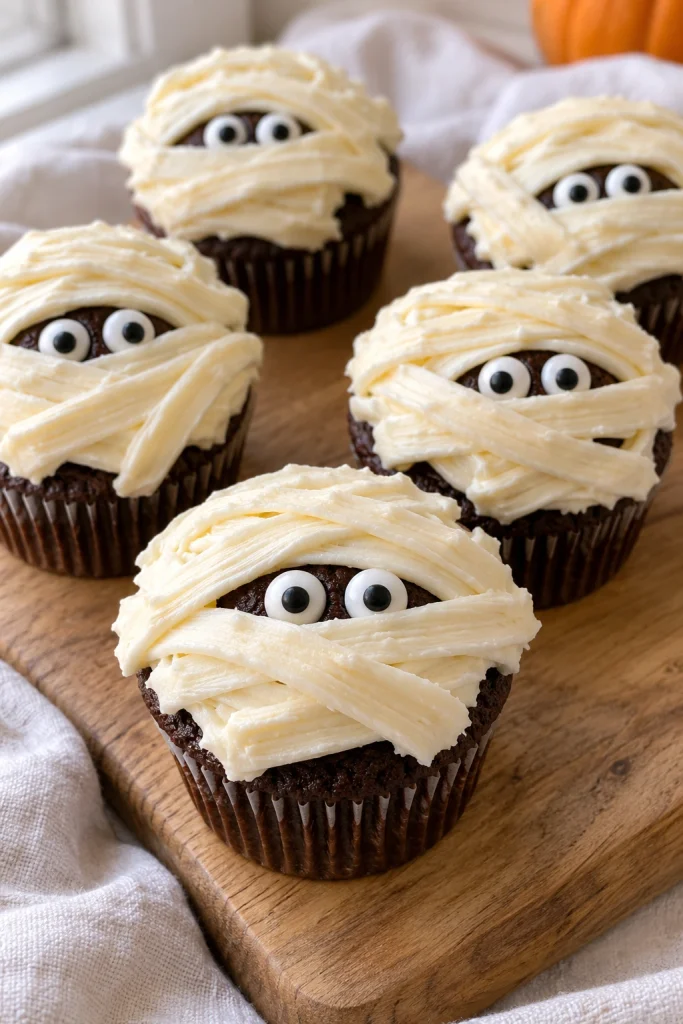
Mummy cupcakes are particularly useful for beginner bakers because the bandages do not need to look perfectly straight. Prepare white buttercream and candy eyes. Pipe two candy eyes near the upper center of each cupcake, securing them with a tiny dot of frosting if necessary.
Use a flat piping tip or a resealable bag with a small opening to pipe white frosting strips across the cupcake. Overlap the strips slightly and leave small gaps around the eyes so the mummy can see. Vary the direction of the lines to create a wrapped appearance. A few visible areas of dark chocolate cake make the design more interesting.
Difficulty: Easy
Decorating time: Approximately 5 to 8 minutes per cupcake
4. Orange Pumpkin Face Cupcakes
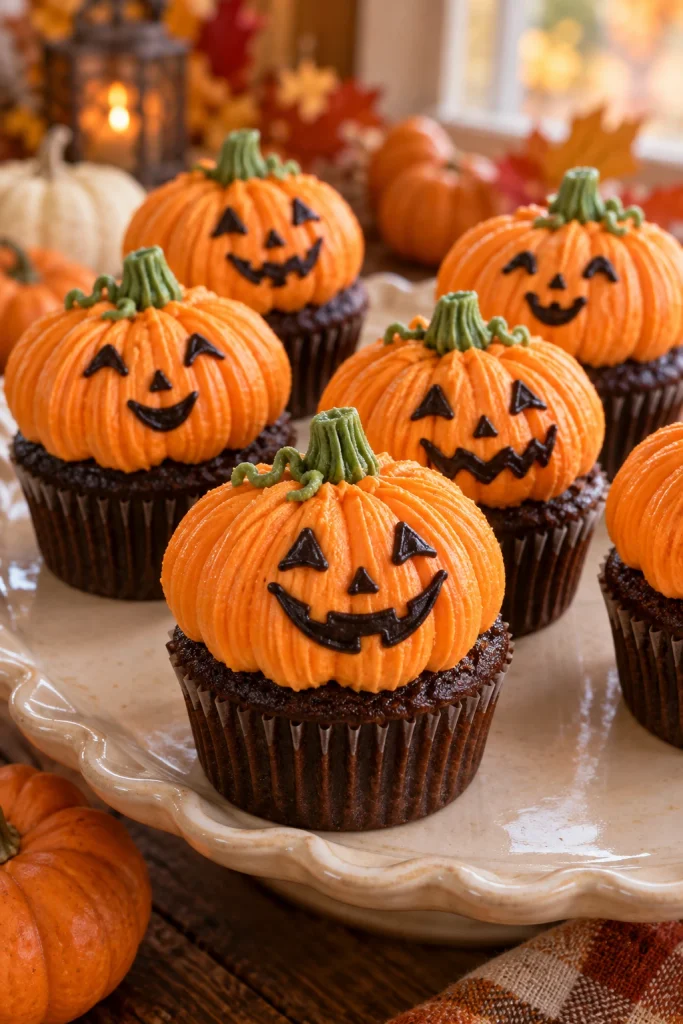
Pumpkin cupcakes bring a classic autumn look to a Halloween dessert table. You will need orange buttercream, green frosting or a small green candy, and black decorating icing. Pipe a rounded mound of orange frosting onto each cupcake, then use a small spatula or the back of a spoon to create gentle vertical grooves resembling pumpkin sections.
Add a small green stem at the top. Use black icing to draw two eyes and a friendly smile, or make a traditional jack o lantern face with triangular eyes and a zigzag mouth. If you are decorating with children, prepare the orange frosting first and let everyone create their own pumpkin expressions.
Difficulty: Easy
Decorating time: Approximately 5 to 8 minutes per cupcake
5. Colorful Chocolate Monster Cupcakes
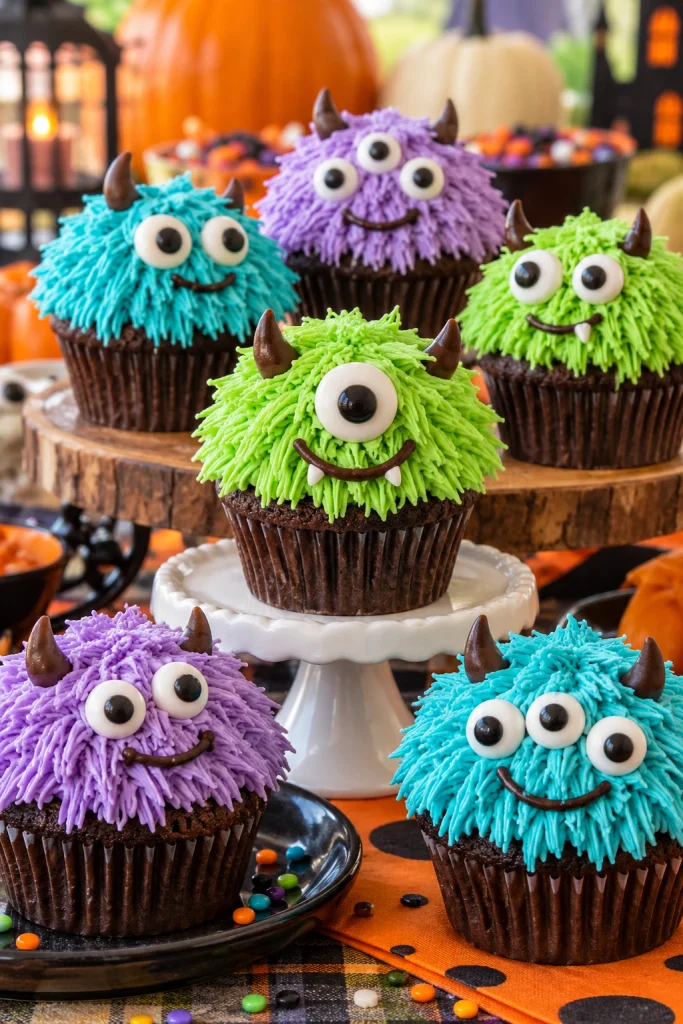
Monster cupcakes are ideal when you want a colorful, playful dessert rather than a traditionally spooky one. Divide the buttercream into green, purple, and turquoise portions. Pipe short spikes or textured swirls over each cupcake using a star tip, or spread the frosting with a small spatula for a smoother monster face.
Add one large candy eye, two smaller eyes, chocolate eyebrows, or a little crooked mouth. Chocolate sprinkles can create a fuzzy appearance, while small candy pieces can suggest teeth or horns. Use two or three frosting colors across the batch rather than every color on every cupcake. This creates a coordinated dessert table while allowing each monster to have a different personality.
Difficulty: Easy
Decorating time: Approximately 5 to 10 minutes per cupcake
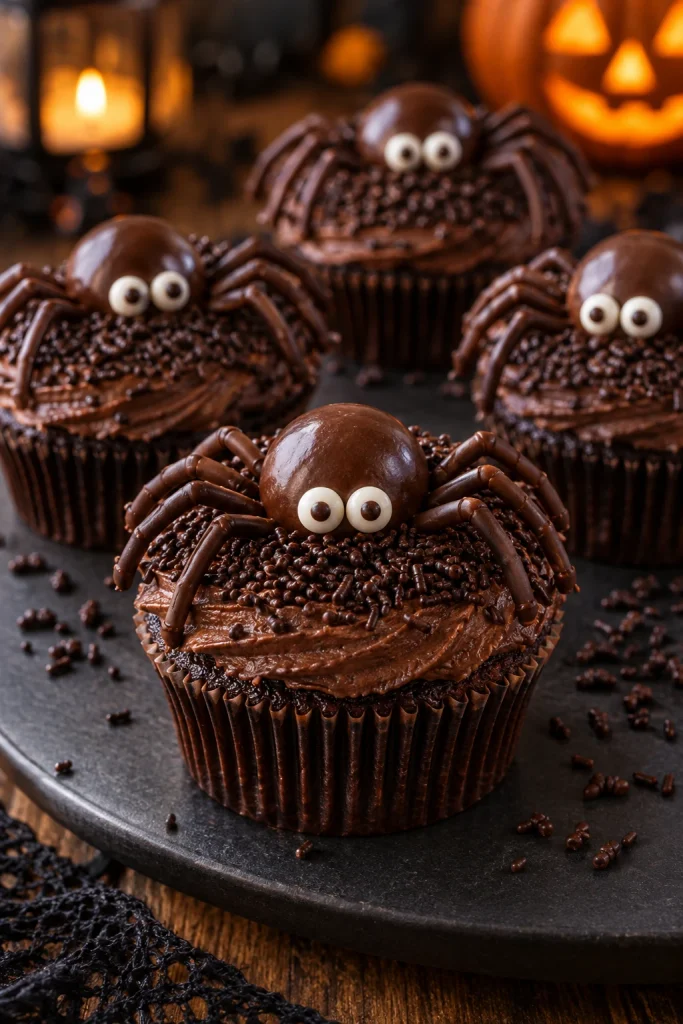
6. Chocolate Spider Cupcakes
Chocolate spider cupcakes look impressive but can be assembled using simple edible decorations. You will need chocolate frosting, chocolate sprinkles, round chocolate candies or sandwich cookies, and thin licorice laces for the legs. Frost the cupcake with chocolate buttercream, then sprinkle chocolate crumbs over the surface to create a dark, textured finish.
Place a round chocolate candy or a small cookie in the center to form the spider’s body. Attach edible legs around the sides and finish with two tiny candy eyes. Keep the legs short enough to stay in place when the cupcakes are moved. If licorice is not available, pipe thin chocolate lines onto parchment paper, chill them until firm, and use them as legs.
Difficulty: Easy to moderate
Decorating time: Approximately 8 to 12 minutes per cupcake
7. Cookie Crumb Graveyard Cupcakes
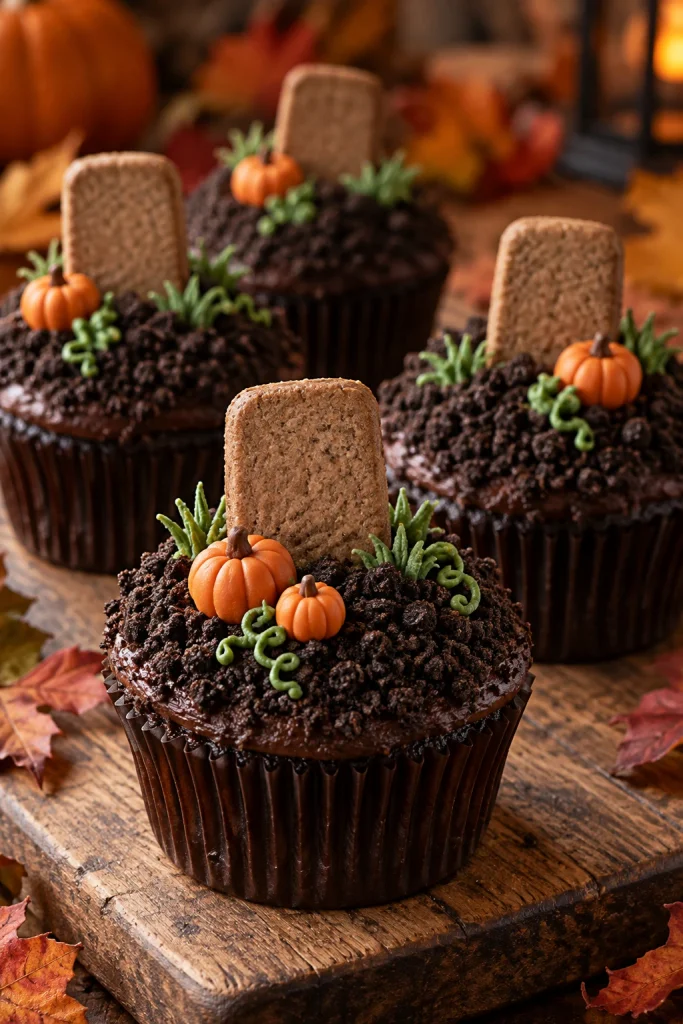
Graveyard cupcakes create a miniature Halloween scene using crushed chocolate sandwich cookies and simple edible toppers. You will need chocolate frosting, finely crushed chocolate cookies, rectangular chocolate cookies or fondant pieces, and a little white decorating icing. Spread chocolate frosting over each cupcake and dip the top into the cookie crumbs to create a soil like surface.
Insert a small cookie tombstone into the frosting and write RIP with white icing if desired. Add a tiny candy pumpkin or a small patch of green frosting to suggest grass. The cookie crumbs hide uneven frosting, so this is one of the most forgiving designs when you are preparing a large batch. Keep the tombstones lightweight so they remain upright.
Difficulty: Easy
Decorating time: Approximately 5 to 8 minutes per cupcake
8. Purple Witch Hat Cupcakes
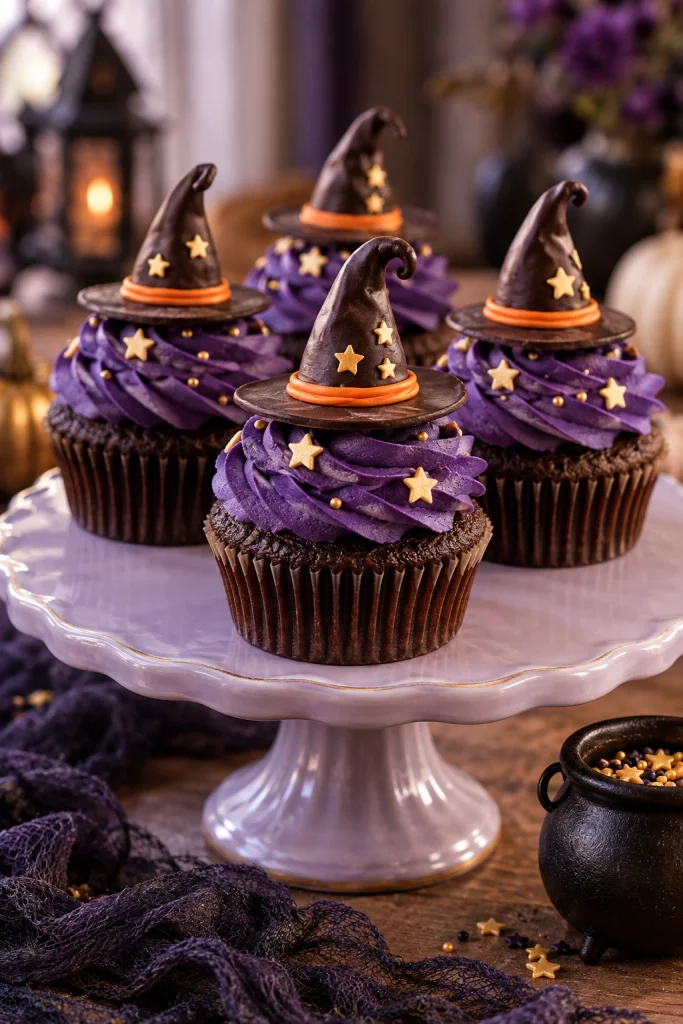
Witch hat cupcakes add a magical look to a Halloween dessert table. You will need purple buttercream, chocolate cones or pointed edible chocolate decorations, orange icing, and optional star sprinkles. Pipe or spread deep purple frosting across the cupcake, then position a pointed chocolate decoration in the center to form the hat.
Add a narrow orange band around the hat and a tiny square buckle using yellow or gold icing. If you prefer a simpler method, use a chocolate cookie with a small chocolate triangle attached on top. A few edible stars around the base provide extra detail without making the cupcakes look crowded. These designs work especially well alongside black cats and bat cupcakes.
Difficulty: Easy to moderate
Decorating time: Approximately 8 to 12 minutes per cupcake
9. Spooky Eyeball Chocolate Cupcakes
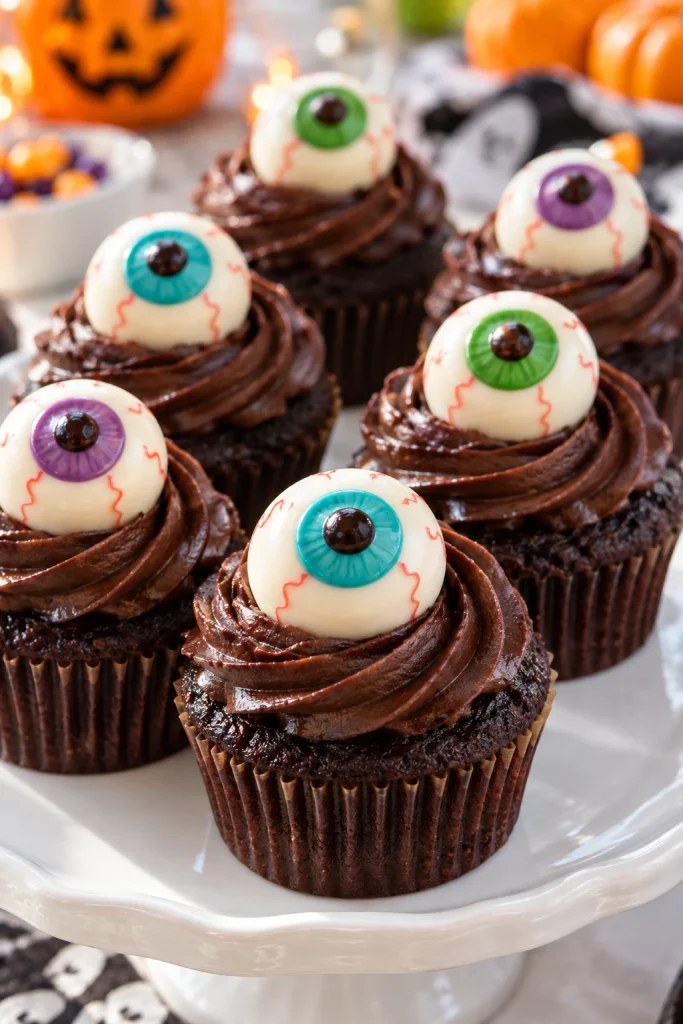
Eyeball cupcakes offer a simple design with plenty of visual impact. You will need chocolate frosting, white chocolate discs or large white candies, colored icing for the irises, and black decorating icing for the pupils. Spread smooth chocolate frosting over the cupcakes, then place a white chocolate disc in the center of each one.
Pipe a colored circle onto the disc and add a dark pupil in the middle. A few thin red icing lines around the white area create a spooky appearance. For younger children, leave out the red details and use bright blue, green, or purple eyes instead. Keep the decorations flat enough that the cupcakes can be packed and transported without damaging the design.
Difficulty: Easy
Decorating time: Approximately 5 to 8 minutes per cupcake
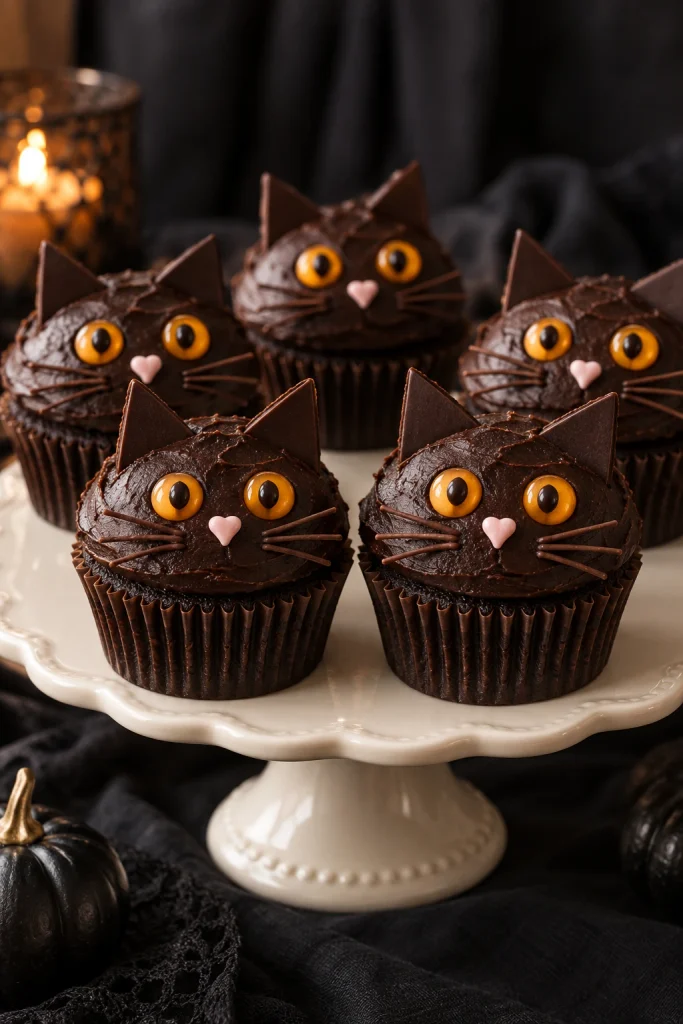
10. Black Cat Chocolate Cupcakes
Black cat cupcakes are perfect for anyone who enjoys classic Halloween symbols. Prepare dark chocolate buttercream, small triangular chocolate pieces, yellow or green candy eyes, and a little pink or black fondant for the nose. Spread or pipe dark frosting onto each cupcake, creating a smooth rounded face.
Position two chocolate triangles at the top to form pointed ears. Add the eyes, a small nose, and thin piped chocolate whiskers. You can also use white chocolate lines for more contrast. Place the finished cupcakes on a pale serving tray so the dark cat faces remain visible. Keep the ears small and secure them gently into the frosting to prevent them from sliding out.
Difficulty: Easy
Decorating time: Approximately 8 to 10 minutes per cupcake
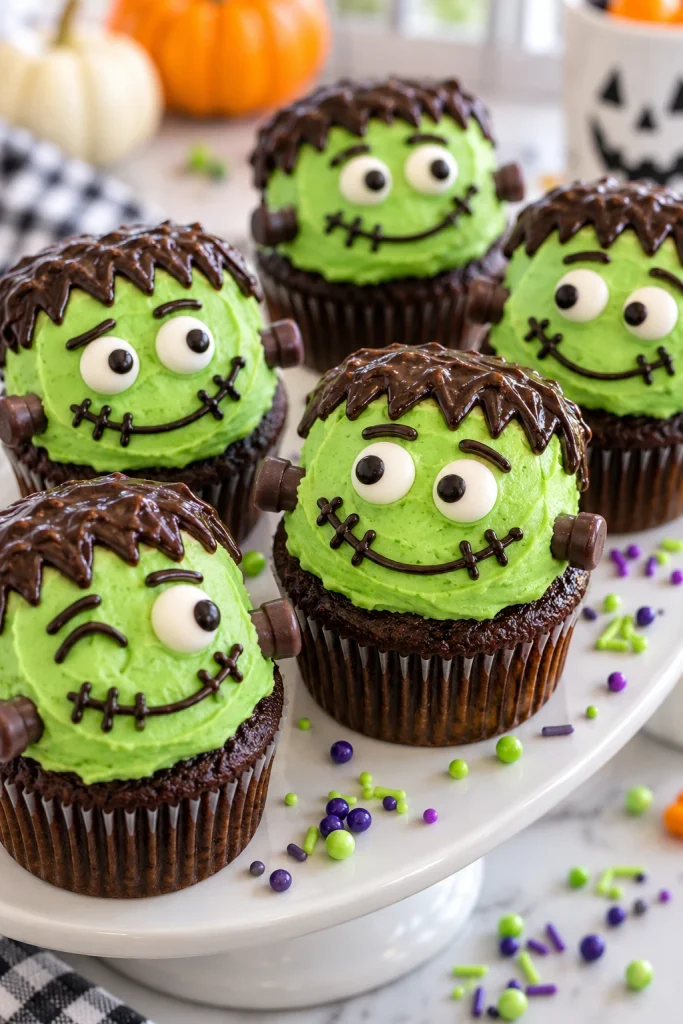
11. Green Frankenstein Cupcakes
Frankenstein cupcakes use bright green frosting and simple chocolate details to create recognizable monster faces. Divide the buttercream and tint it green. Spread a thick, slightly rectangular layer over each cupcake, or pipe a rounded green mound and smooth the sides with a small spatula.
Use dark chocolate icing to create short hair, thick eyebrows, and a stitched mouth. Add two candy eyes and small chocolate pieces on the sides to represent bolts. A friendly smile makes the design suitable for younger children, while angled eyebrows create a more mischievous expression. Green Frankenstein cupcakes pair nicely with purple monsters because both designs use bright frosting colors but have different facial details.
Difficulty: Easy
Decorating time: Approximately 8 to 12 minutes per cupcake
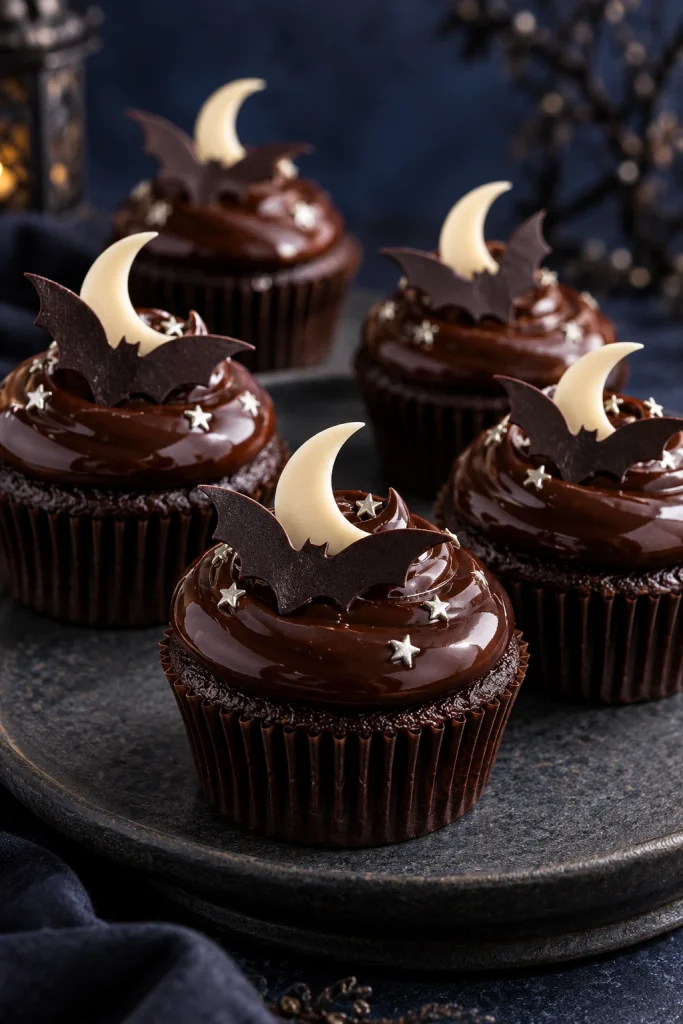
12. Chocolate Bats and Crescent Moon Cupcakes
Bats and crescent moons create a more elegant Halloween design that works well for adult parties and evening gatherings. You will need chocolate ganache or dark chocolate frosting, dark chocolate bat decorations, white chocolate crescent moons, and optional edible silver sprinkles. Spread the ganache smoothly over each cupcake and allow it to settle before adding the decorations.
Position a bat silhouette on one side and a small white chocolate moon on the other. Add only a few tiny star sprinkles so the design remains clean and easy to recognize. Prepare the chocolate shapes on parchment paper in advance and let them set completely before placing them on the cupcakes. This makes assembly faster when you are decorating a large batch.
Difficulty: Moderate
Decorating time: Approximately 8 to 12 minutes per cupcake, excluding topper setting time
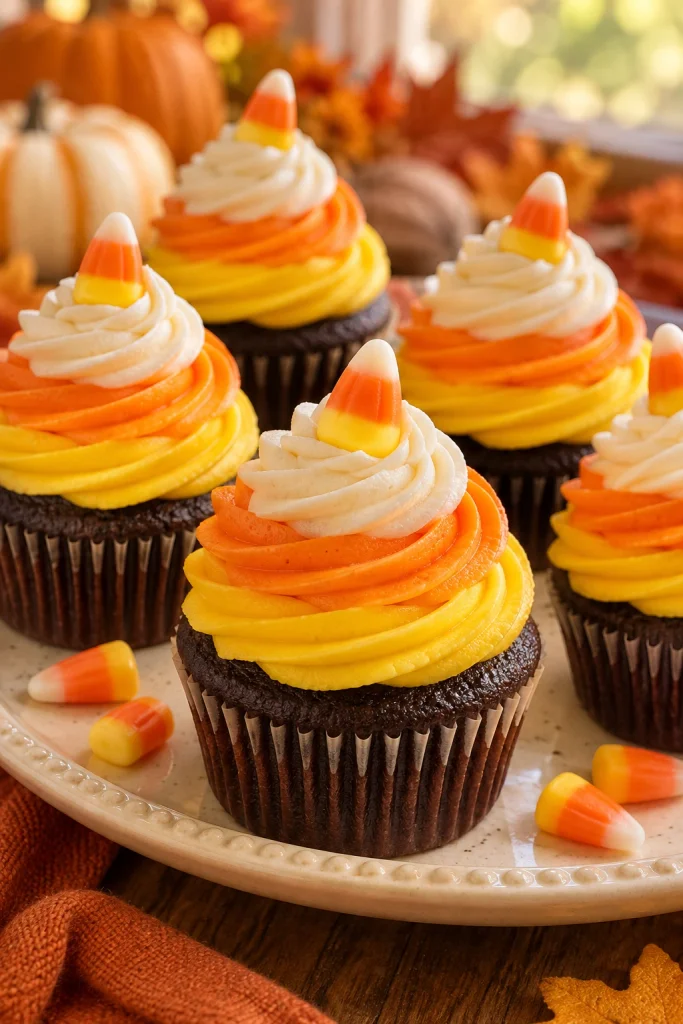
13. Candy Corn Buttercream Cupcakes
Candy corn cupcakes use the familiar white, orange, and yellow color combination of a classic Halloween sweet. Divide your buttercream into three portions and color one golden yellow, another orange, and leave the third white. Fit a piping bag with a large star tip and layer the colors carefully, starting with yellow near the base and finishing with white at the top.
Pipe a rounded swirl that shows all three colors clearly. Add one small piece of candy corn as a finishing accent if desired. The layered frosting creates a festive look without needing detailed drawing or additional decorations. These cupcakes are especially effective when arranged beside dark spiders, black cats, and white ghosts because the bright colors provide contrast.
Difficulty: Moderate
Decorating time: Approximately 6 to 10 minutes per cupcake
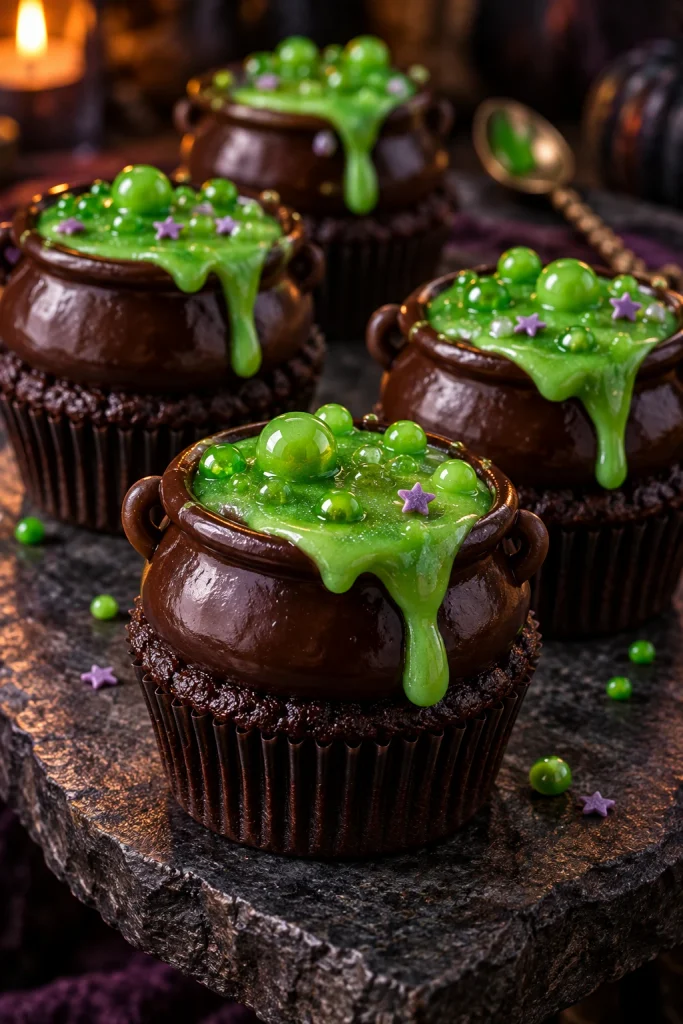
14. Chocolate Cauldron Cupcakes
Cauldron cupcakes bring a witchcraft inspired theme to your dessert table. You will need dark chocolate frosting, green tinted ganache or buttercream, and small green candies or edible sprinkles. Frost each cupcake with a rounded layer of dark chocolate buttercream. Add a spoonful of green frosting or ganache to the center to resemble a bubbling potion.
Use a piping bag to create small green bubbles around the edge, then add a few tiny purple or green sprinkles. You can also use a rounded chocolate candy to create a more pronounced cauldron shape. Keep the green decoration thick enough to remain visible against the dark frosting. These cupcakes look especially effective beside witch hat cupcakes and other purple decorations.
Difficulty: Easy to moderate
Decorating time: Approximately 8 to 12 minutes per cupcake
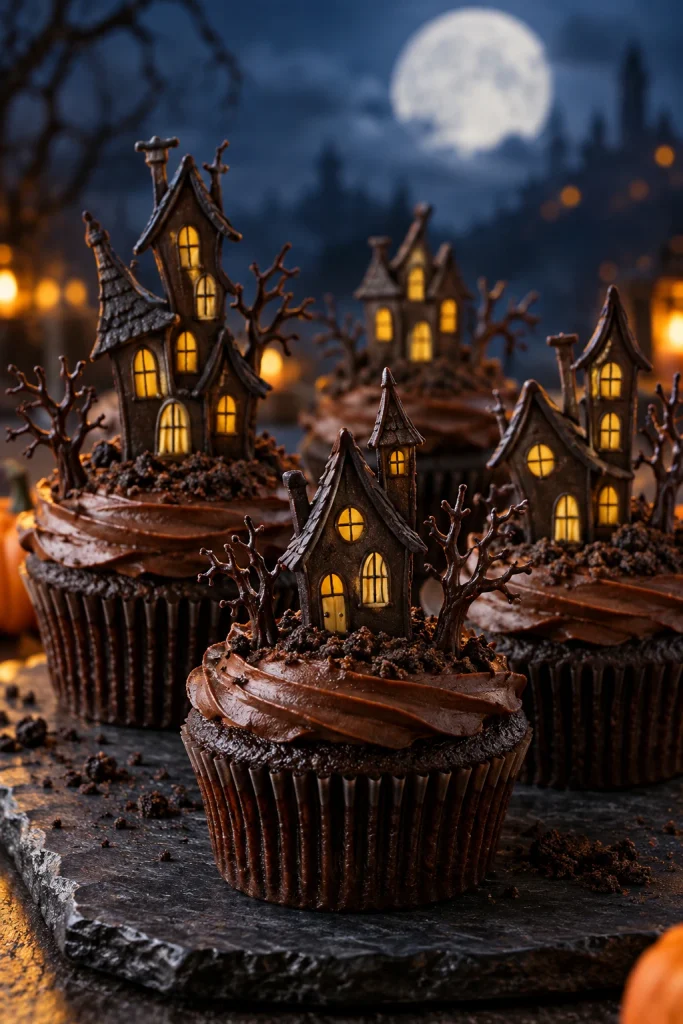
15. Mini Haunted House Cupcakes
Haunted house cupcakes make a striking centerpiece for a Halloween dessert table. You will need dark chocolate frosting, rectangular chocolate cookies or fondant pieces, yellow decorating icing, and optional chocolate trees or bat decorations. Cover the cupcake with smooth dark frosting, then position a small edible house silhouette in the center.
Use yellow icing to add tiny windows and white or dark icing to outline the roof. Add a small chocolate tree or bat if you want a more detailed scene. Prepare the toppers ahead of time and allow any melted chocolate to set completely before assembly. Keep them lightweight and insert them gently into the frosting so they remain upright during serving.
Difficulty: Moderate
Decorating time: Approximately 10 to 15 minutes per cupcake, excluding topper preparation
How to Choose the Best Halloween Cupcake Designs
If you are new to decorating, start with ghost cupcakes, pumpkin faces, mummy cupcakes, or cookie crumb graveyards. These designs use simple shapes and forgiving textures, so small imperfections will not spoil the finished look.
For a children’s party, colorful monsters, Frankenstein faces, candy corn frosting, and friendly ghosts are good choices. If you prefer a darker Halloween theme, choose spiders, black cats, eyeballs, bats, or haunted houses. Three or four different designs are usually enough to create a varied dessert table without making decorating an all day project.
If you are baking for a school event, check the school’s food and allergy policies before choosing candy decorations. Consider labeling common allergens and keeping small hard decorations away from very young children.
How to Make Halloween Cupcakes Ahead of Time
Planning ahead makes Halloween baking much easier, especially if you are preparing several dozen cupcakes for a party.
One day before serving: Bake the chocolate cupcakes, let them cool completely, and store them in an airtight container. Prepare chocolate toppers that need time to set.
Several hours before serving: Make the buttercream, divide it into bowls, and prepare the different colors. Organize candy eyes, cookies, sprinkles, and other decorations in small containers.
Two to four hours before serving: Decorate the cupcakes and arrange them on serving trays. Allow chocolate decorations to set before stacking or transporting the cupcakes.
For longer storage: Undecorated cupcakes can be frozen in a suitable airtight container. Thaw them completely before frosting. Finished cupcakes should be stored according to the frosting and filling used, particularly if they contain dairy based ingredients.
Avoid leaving perishable frosting in a warm room for extended periods. If your kitchen is hot, work in small batches and refrigerate the finished cupcakes when appropriate.
How to Store Halloween Chocolate Cupcakes
Store plain, unfrosted cupcakes in an airtight container at room temperature for up to two days, provided they are fully cooled and the room is reasonably cool. For longer storage, freeze the unfrosted cupcakes in a freezer safe container for up to two months for best quality.
Buttercream storage depends on the ingredients and the temperature of your kitchen. If your frosting contains ingredients that require refrigeration, keep the finished cupcakes covered in the refrigerator. Allow them to come closer to room temperature before serving for a softer cake texture, while following safe food handling guidance for the frosting used.
For cupcakes decorated with delicate chocolate toppers, store them in a single layer where possible. Avoid sealing them while they are warm, as trapped moisture can make decorations slippery and soften cookie crumbs.
Tips for Decorating Halloween Cupcakes Successfully
Cool the cupcakes completely. Warm cake can melt buttercream and cause the decorations to slide.
Use gel food coloring. Gel colors usually provide stronger shades without adding as much liquid to the frosting.
Prepare toppers first. Chocolate bats, moons, ears, and haunted houses are easier to handle when they have set properly.
Keep the frosting consistent. If it is too soft to hold its shape, add a little more powdered sugar. If it is too stiff, add milk a teaspoon at a time.
Decorate in batches. Finish all the orange cupcakes first, then move to white, green, purple, and dark frosting. This reduces cleanup and saves time.
Keep the designs simple. A clear face, a recognizable shape, or a contrasting color combination often looks better than too many small decorations.
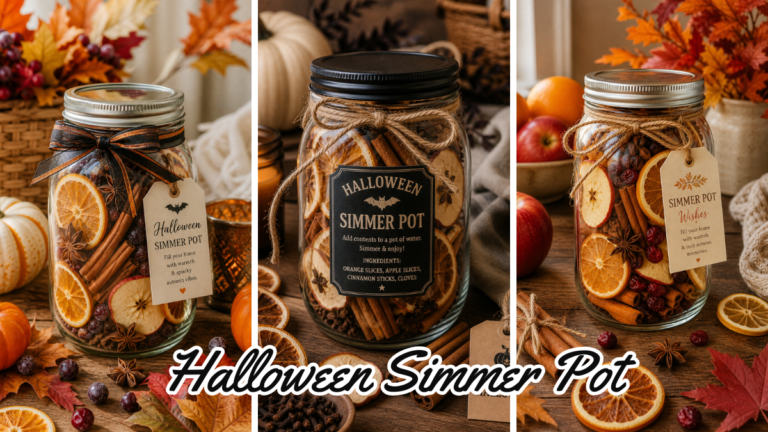
If you are hosting a full Halloween gathering, you can coordinate your cupcakes with other seasonal touches. Our Halloween simmer pot ideas can help you create a welcoming autumn atmosphere while you prepare the dessert table.
Frequently Asked Questions
How long does it take to make Halloween chocolate cupcakes?
For this recipe, allow approximately 20 minutes for preparation, 18 to 22 minutes for baking, and around 30 minutes for cooling. Decorating time depends on the design. A simple ghost or pumpkin can take five to eight minutes per cupcake, while a detailed haunted house may take longer. Plan for approximately 1 hour 40 minutes to 2 hours for a mixed batch of 12 cupcakes.
Can I use a boxed chocolate cake mix?
Yes. A boxed chocolate cake mix is a convenient alternative when you want to spend more time decorating. Prepare the mix according to its package instructions, bake the cupcakes, and allow them to cool completely before applying the frosting. The decorating methods in this guide work with homemade cupcakes and boxed mixes.
What frosting is best for Halloween cupcakes?
Vanilla buttercream is versatile for ghosts, mummies, pumpkins, and colorful monsters. Chocolate buttercream or ganache works well for spiders, cats, bats, and graveyard designs. Choose a frosting that holds its shape for piping, and adjust its consistency before decorating.
How many cupcakes should I make for a Halloween party?
For a small family gathering, 12 cupcakes may be enough alongside other desserts. For a party, estimate one cupcake per guest if several treats are available, and consider making extras for children or guests who want a second serving. If cupcakes are the main dessert, prepare additional portions.
Can children help decorate Halloween cupcakes?
Yes. Children can add candy eyes, sprinkle cookie crumbs, place chocolate toppers, and draw simple faces with edible icing. An adult should handle the oven, hot melted chocolate, and any sharp decorating tools. Choose age appropriate edible decorations and supervise young children around small candies.
How do I keep cupcake decorations from falling off?
Use a small amount of buttercream as edible glue to attach candy eyes, ears, and other lightweight decorations. Allow chocolate toppers to set before inserting them into the frosting. If the buttercream becomes too soft, chill the cupcakes briefly before moving them.
Can I make these cupcakes without piping bags?
Yes. Spread frosting with a spoon or small spatula, then create simple textures using the back of a spoon. For lines and faces, place icing in a resealable food safe bag and snip a very small corner. Cookie crumbs, candy eyes, and chocolate pieces can create many Halloween designs without professional decorating tools.
Final Thoughts
Halloween chocolate cupcakes are a fun way to combine a simple homemade recipe with creative seasonal decorations. Once you have a reliable chocolate cupcake base and a batch of vanilla buttercream, you can create ghosts, mummies, pumpkins, spiders, monsters, black cats, and miniature haunted houses without making a separate cake recipe for every design.
Choose a few styles that suit your available time, prepare your decorations before you begin, and keep the process manageable by working in batches. Whether you are baking for children, friends, a school event, or a Halloween party, these 15 ideas give you plenty of ways to make chocolate cupcakes look festive, inviting, and memorable.