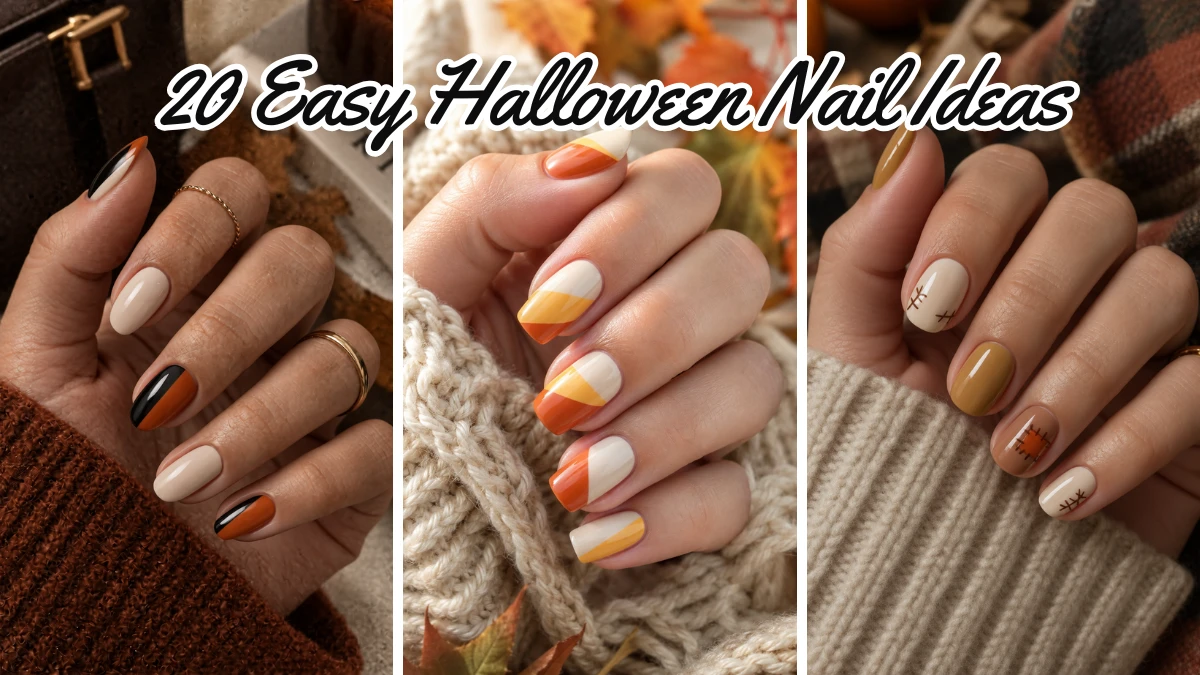
20 Easy Halloween Nail Ideas You Can Actually Recreate
Halloween nails do not have to involve complicated characters or detailed scenes to feel special. If you want something you can actually recreate at home, the easiest approach is to use simple lines, color blocks, tiny accents, or one strong seasonal detail instead of covering every nail with artwork.
These 20 easy Halloween nail ideas take a different route from the usual ghost, pumpkin, bat, and spiderweb manicure. You will find graphic designs, creepy little details, playful colors, and wearable October styles that can work on short, medium, or longer nails. Some are cute, some are eerie, and others are subtle enough to wear beyond Halloween.
1. Candy Corn Diagonal Blocks
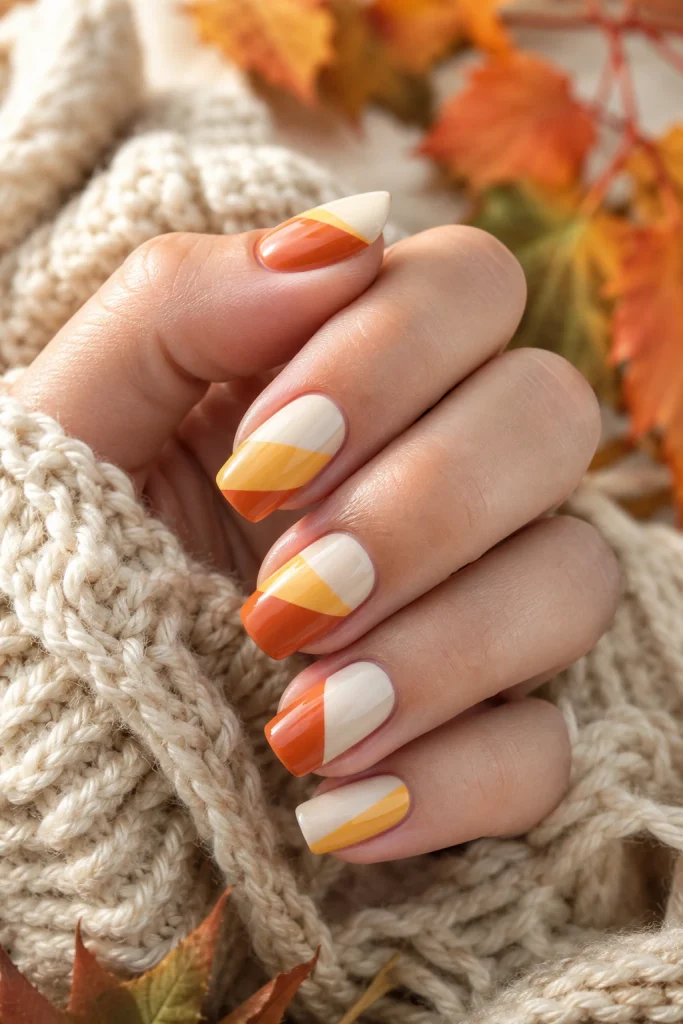
Candy corn colors become much more modern when they are used as diagonal color blocks instead of traditional horizontal stripes. Start with a soft cream base, then divide the nail diagonally with warm yellow and orange sections. You can use striping tape to keep the edges clean, or embrace slightly imperfect lines for a handmade look. Keep the blocks larger on short nails so the colors remain easy to see.
This design feels festive without relying on a Halloween character. Try the pattern on two or three accent nails and leave the others in glossy cream or warm orange. Medium squoval and almond shapes both work well because the diagonal placement creates movement across the nail. A high-shine top coat brings the three colors together and makes the manicure look polished rather than overly themed.
2. Frankenstein Stitch Lines
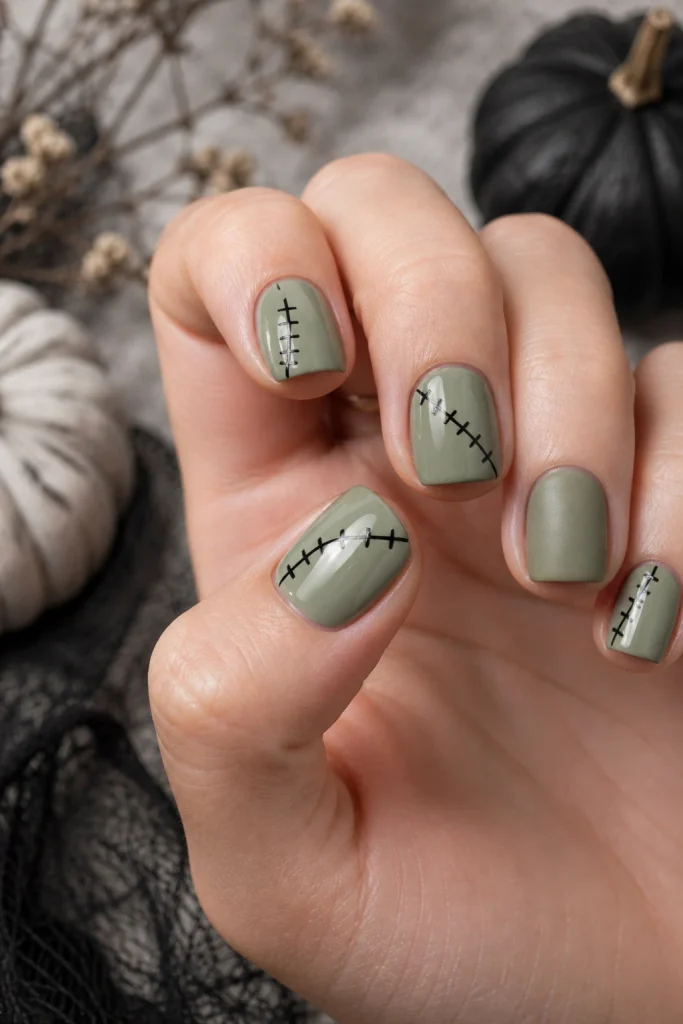
For an easy Frankenstein-inspired manicure, skip the character face and use the monster’s signature stitches as the entire design. Paint the nails muted green, gray-green, or dusty olive, then add short black stitch marks across one side of selected nails. The lines can be slightly uneven, which makes this design much easier for beginners because precision is not essential.
Keep the remaining nails solid green or use one matte accent nail for contrast. Short square and squoval nails are especially suitable because straight stitch lines sit naturally across their surface. You can also change the base to pale mint if you want a softer version. The finished manicure clearly references Halloween without repeating the character artwork found in many traditional Frankenstein sets.
3. Creepy Eyeball Accent
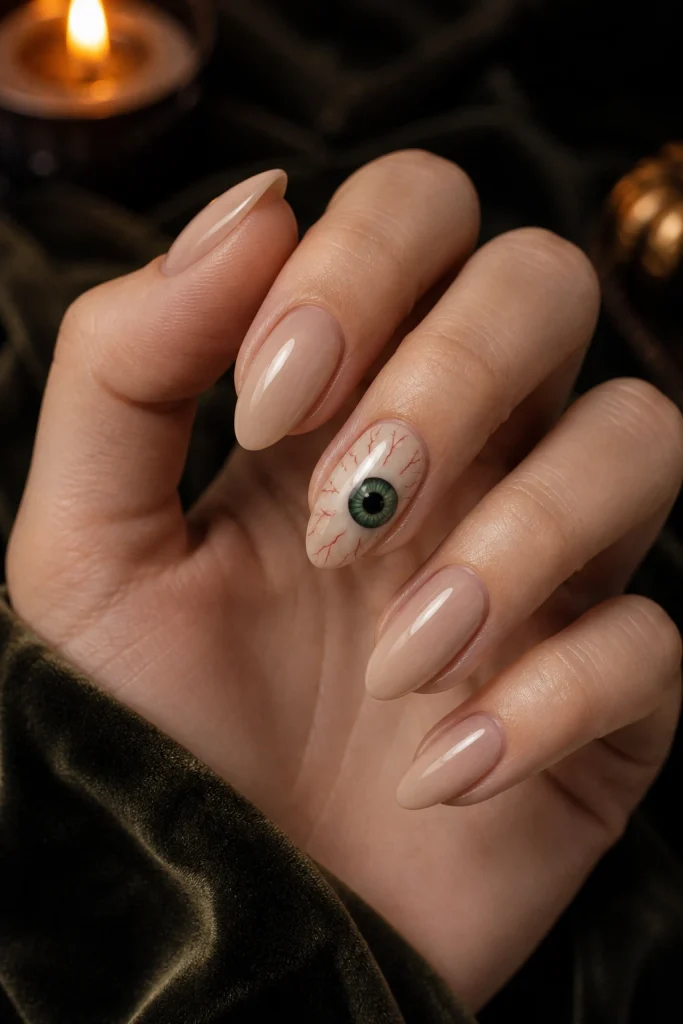
An eyeball accent gives you a creepy Halloween detail without requiring an entire illustrated manicure. Keep most nails sheer nude, pale gray, or soft beige, then create one oversized eye on an accent nail. Use a simple white circle, colored iris, black pupil, and a few very thin red lines around the edges. You do not need to make it perfectly realistic for the idea to work.
For an easier version, skip the veins and use only the iris and pupil. One eye is usually enough to create the strange, slightly unsettling effect. A glossy finish makes the eyeball look dimensional and gives the surrounding neutral nails a clean contrast. Medium almond nails provide enough space for the accent, while short nails can use a smaller eye placed toward the center.
4. Vampire Fang Negative Space
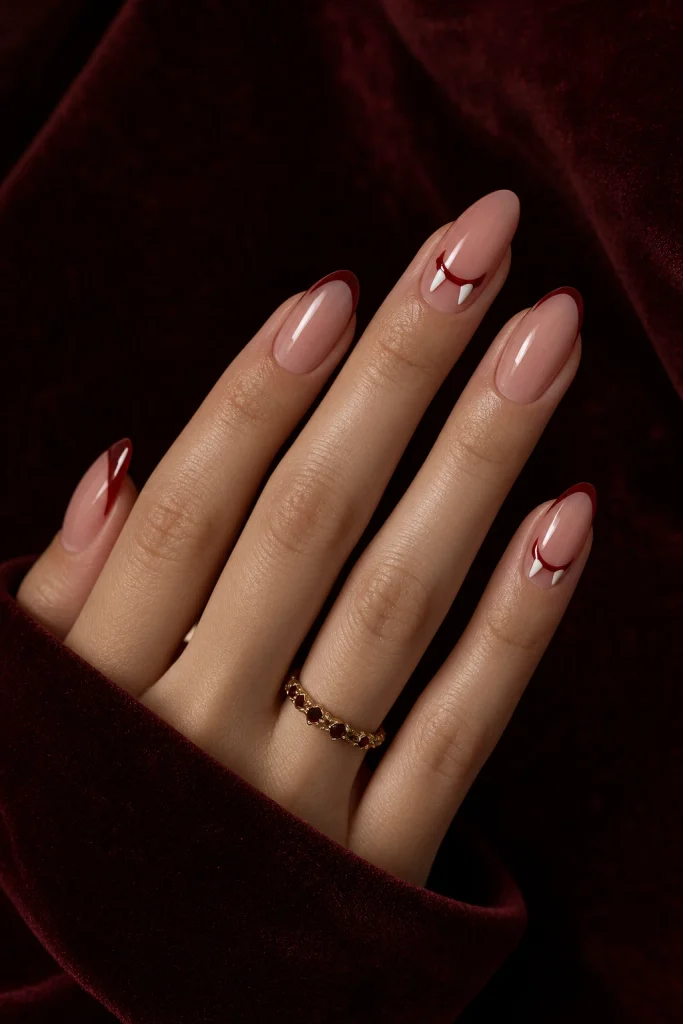
Instead of painting an entire vampire-themed manicure, create tiny white fang shapes emerging from a deep red or black negative-space design. Start with a sheer nude base and place two small pointed white triangles near the tip of one or two nails. Add a thin dark-red line beneath them to suggest a subtle vampire bite without turning the manicure into a full illustration.
This design looks particularly sharp on almond nails because the natural pointed silhouette echoes the fang shape. For short nails, make the fangs very small and keep them on only one accent nail. A glossy top coat makes the nude base look clean while allowing the tiny white details to stand out. The result feels spooky but much more refined than a full vampire character manicure.
5. Toxic Slime Tips
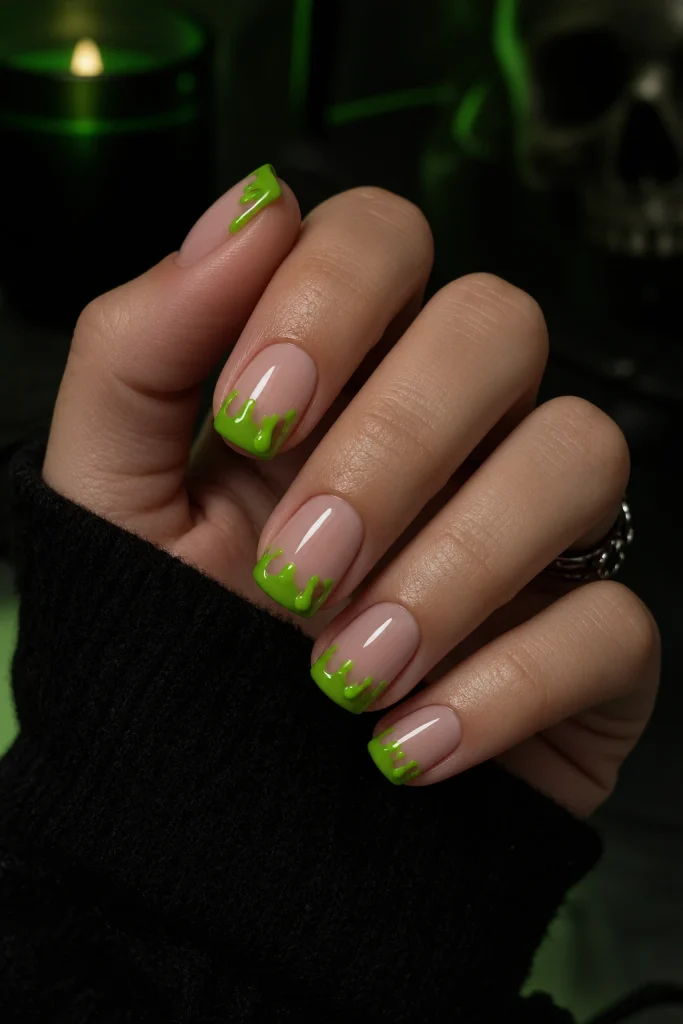
Bright slime green can make Halloween nails feel playful without using traditional orange or black. Start with a sheer nude or pale gray base and create irregular neon green tips that appear to melt slightly downward. The drips should have different lengths so the manicure feels organic rather than perfectly repeated. One or two nails can carry the full slime effect while the others remain simple.
This design is especially fun for parties or anyone who likes a brighter Halloween palette. Short squoval nails can use small rounded drips, while longer almond nails allow the green shapes to stretch farther down the nail. A glossy finish makes the slime look wet and dimensional. If neon green feels too intense, replace it with acidic chartreuse or muted green for a more wearable interpretation.
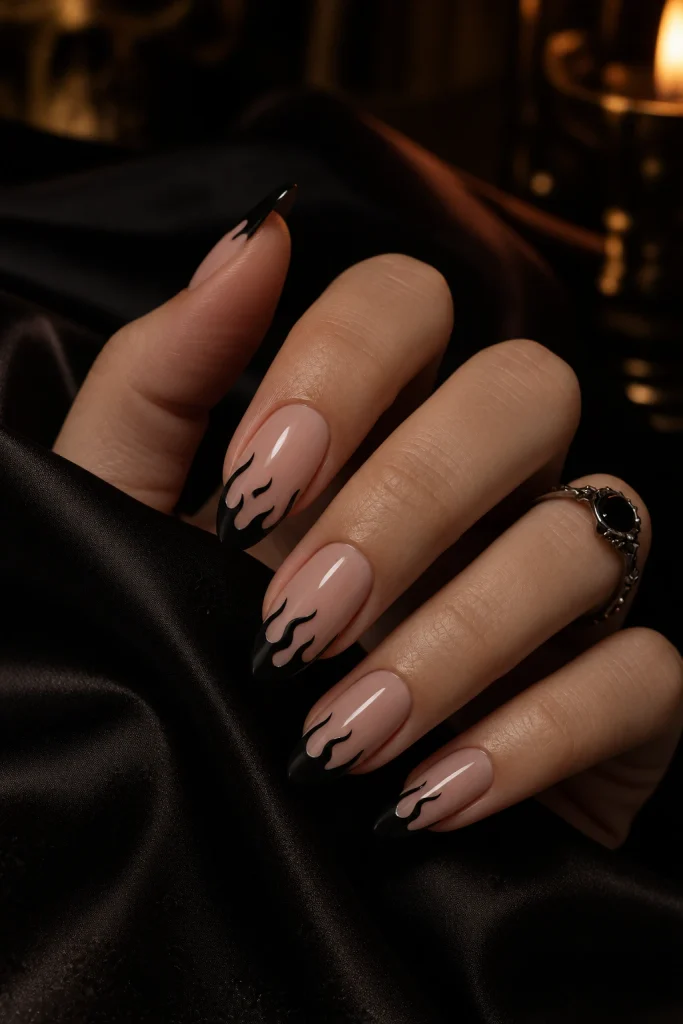
6. Black Flame Tips
Black flames give a Halloween manicure an edgy shape without needing detailed characters. Use a sheer beige or smoky nude base and paint small black flames along the tips of selected nails. Keep the flames narrow and curved so they follow the natural shape of the nail. You can use a fine brush, but even slightly uneven flames can look intentional because the design is naturally irregular.
For a softer version, combine black flames with a transparent nude base on every nail. For something bolder, alternate black and deep orange flames across two accent nails. Medium almond nails make the flame tips especially striking, while short nails can use only two or three small curves. A glossy finish keeps the manicure sleek and makes the dark artwork stand out.
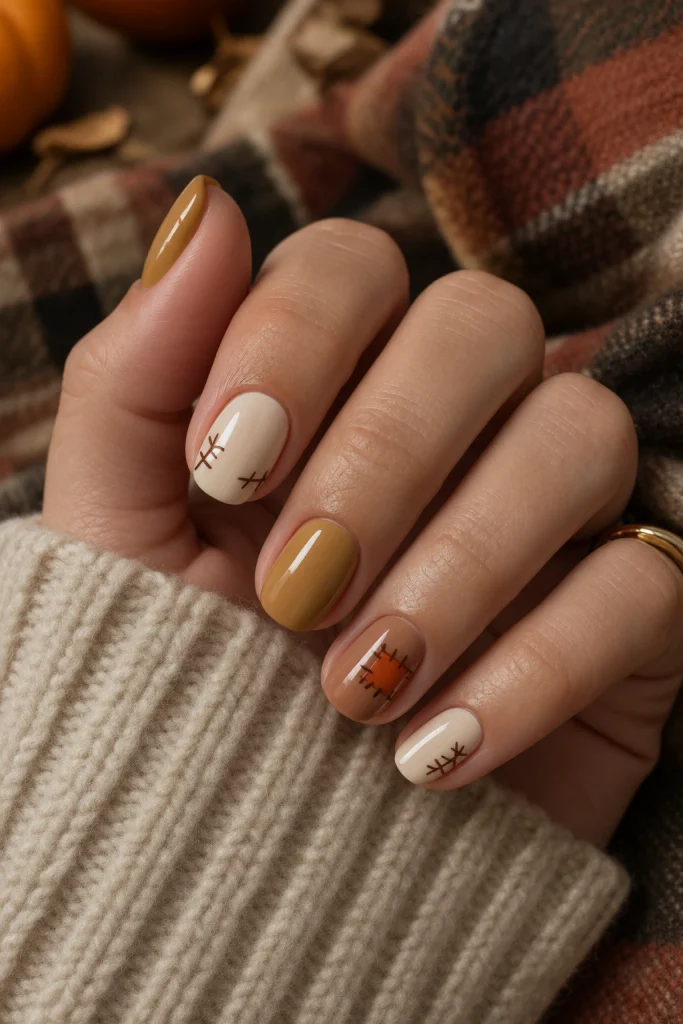
7. Scarecrow Stitch Manicure
A scarecrow-inspired manicure can feel autumnal and Halloween-ready without using the usual spooky characters. Start with warm beige or muted mustard nails, then add tiny crossed stitch marks in dark brown on one or two accent nails. On another nail, use a small triangular patch shape in burnt orange or rust to suggest patched fabric.
The combination looks especially cozy when paired with matte and glossy finishes. Keep the rest of the nails in cream, caramel, or muted brown so the tiny stitched accents remain the focus. Short rounded nails work well because the design does not require much surface area. This is a good option if you want something seasonal but slightly different from conventional Halloween nail art.
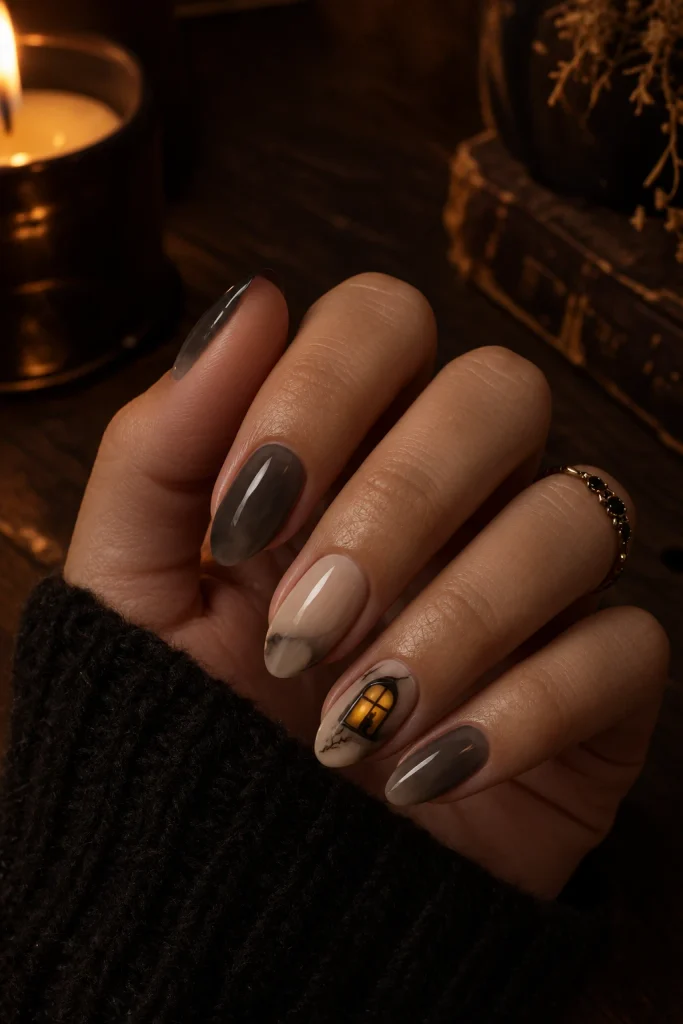
8. Haunted Window Panes
Turn one or two nails into tiny haunted windows using simple lines rather than a detailed scene. Start with a smoky gray, muted purple, or sheer cream base and draw a small four-pane window near the center of an accent nail. Add a tiny black silhouette behind the glass or a warm yellow square to suggest an eerie light.
The design works because the window itself creates the Halloween story. You do not need to paint a full haunted house around it. Medium oval or almond nails provide enough room for the little architectural shape, while short nails can use a simple two-pane version. Keep the other nails plain so the miniature window remains easy to see.
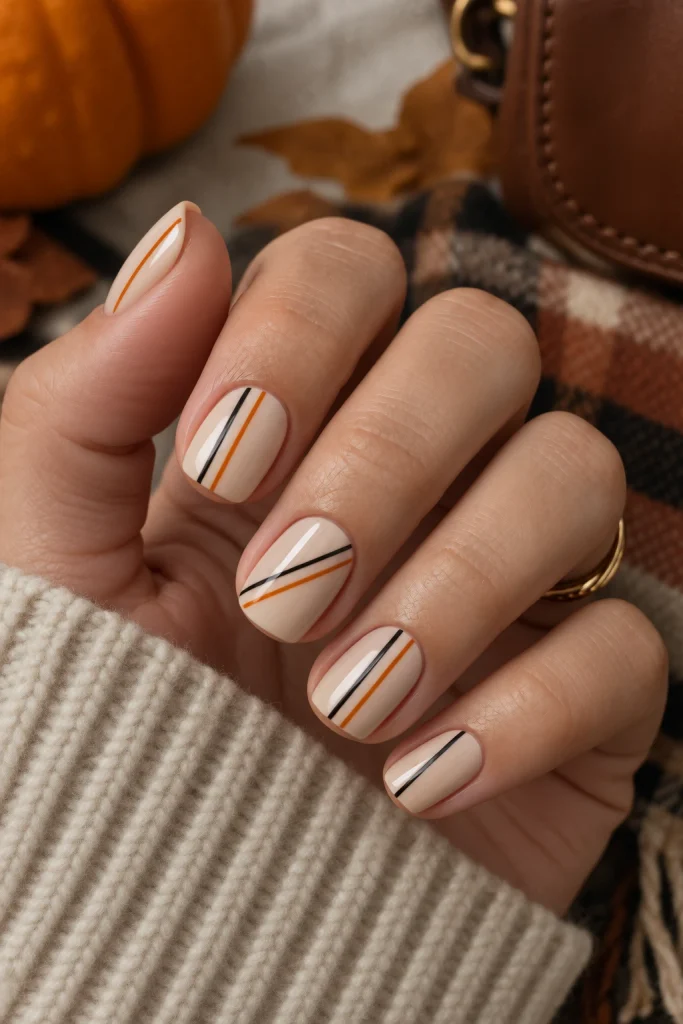
9. Black-and-Orange Pinstripes
For a graphic Halloween manicure, combine narrow black and burnt-orange pinstripes over a warm cream base. The lines can run vertically, diagonally, or slightly curved, with each nail using a different arrangement. Because the design depends on simple lines rather than detailed artwork, it is much easier to recreate than illustrated Halloween scenes.
Use striping tape if you want perfectly crisp lines, or draw them freehand for a softer appearance. Keep the stripes thin so the base color remains visible. Short square nails work especially well for vertical lines, while almond nails can use diagonal arrangements. A glossy top coat pulls the colors together and gives the manicure a clean fashion-editorial finish.
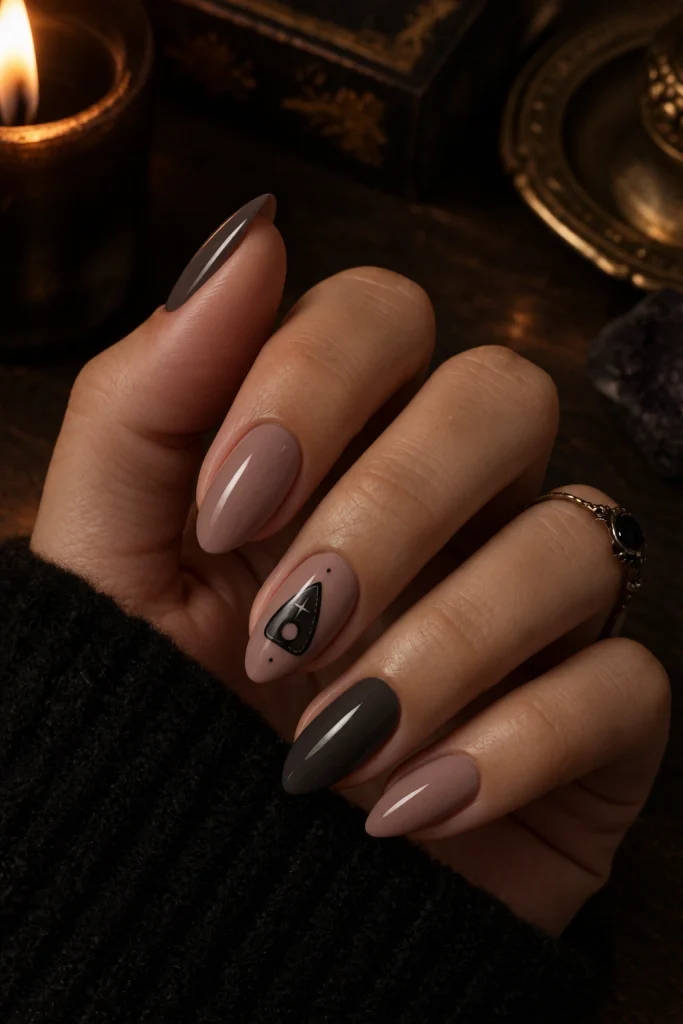
10. Ouija-Inspired Planchette Accent
For a slightly mysterious manicure, use a tiny planchette-inspired shape as the accent rather than covering the nails with a full Ouija board. Paint the nails sheer beige, charcoal, or dusty mauve, then create one small black planchette silhouette on an accent nail. Add a tiny star or dot inside the shape instead of trying to reproduce lettering.
The idea is much easier when treated as a simple silhouette. Keep the remaining nails solid and glossy so the accent remains readable. Medium almond nails offer enough room for the shape, while shorter nails can use an even simpler triangular outline. The finished manicure has a mysterious Halloween mood without becoming overly graphic or complicated.
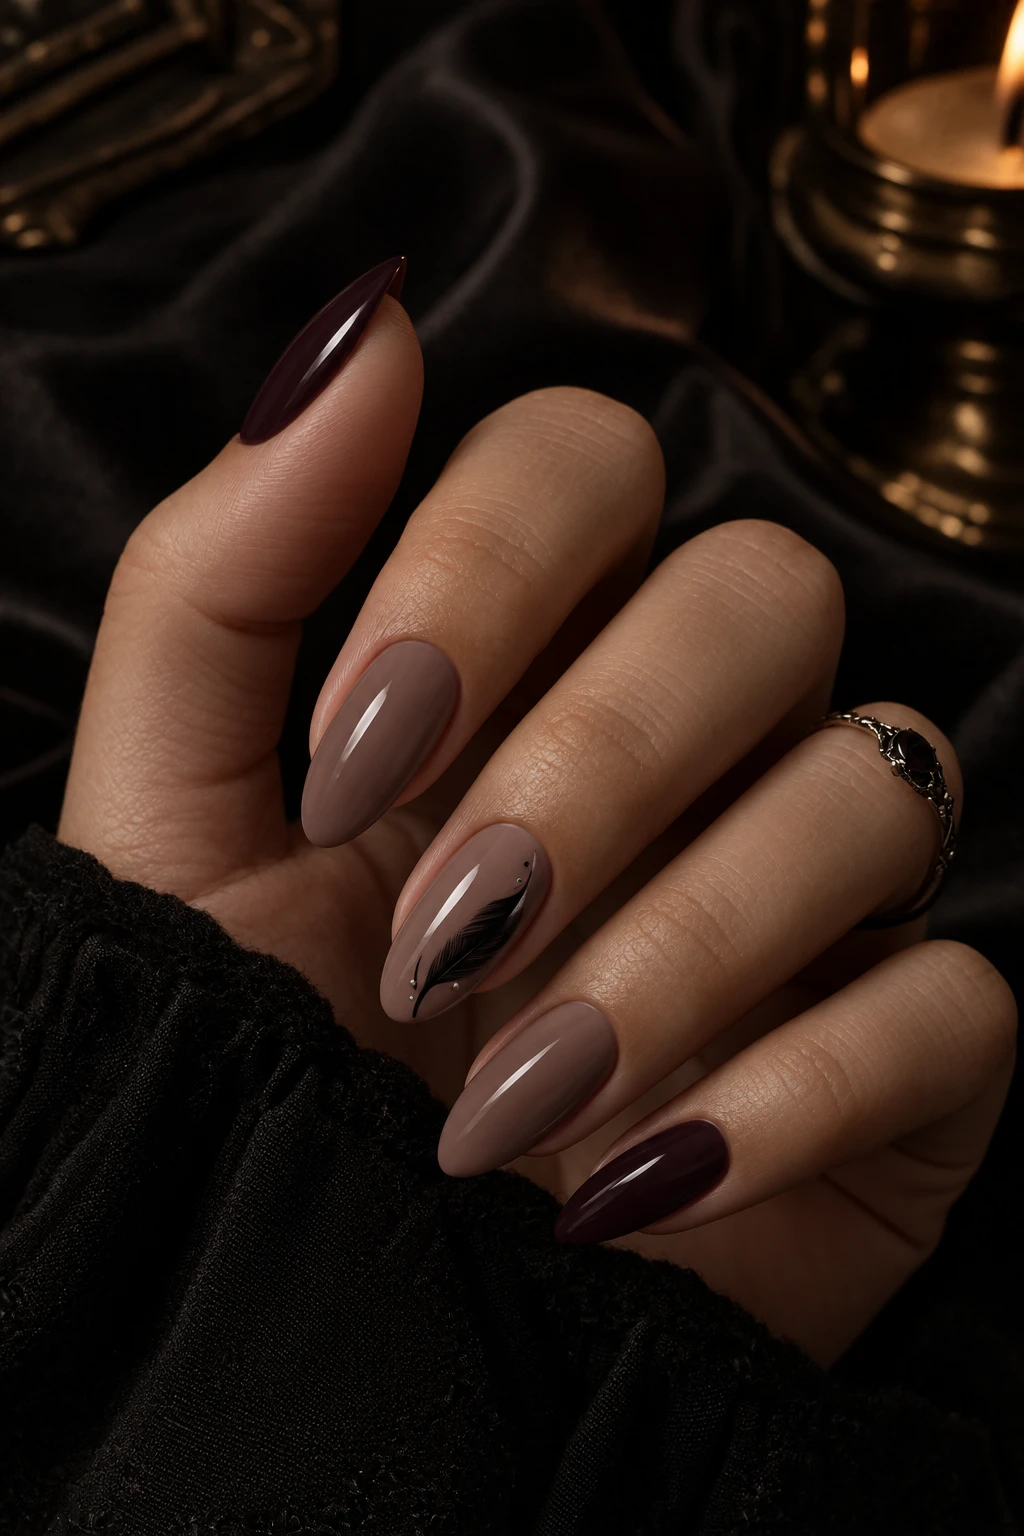
11. Raven Feather Accents
A raven-inspired manicure gives Halloween style a darker, more elegant direction. Use a smoky nude, charcoal, or deep plum base and paint one delicate black feather on an accent nail. Keep the feather simple, using one central line with short angled strokes instead of attempting a highly detailed bird illustration.
The feather works especially well with almond and oval nails because the long curved shape follows the nail naturally. Add a tiny silver dot or muted metallic accent if you want a little contrast. This design is suitable for readers who like gothic fashion but do not want obvious pumpkins, ghosts, or cartoon characters. A satin or glossy finish both work beautifully.
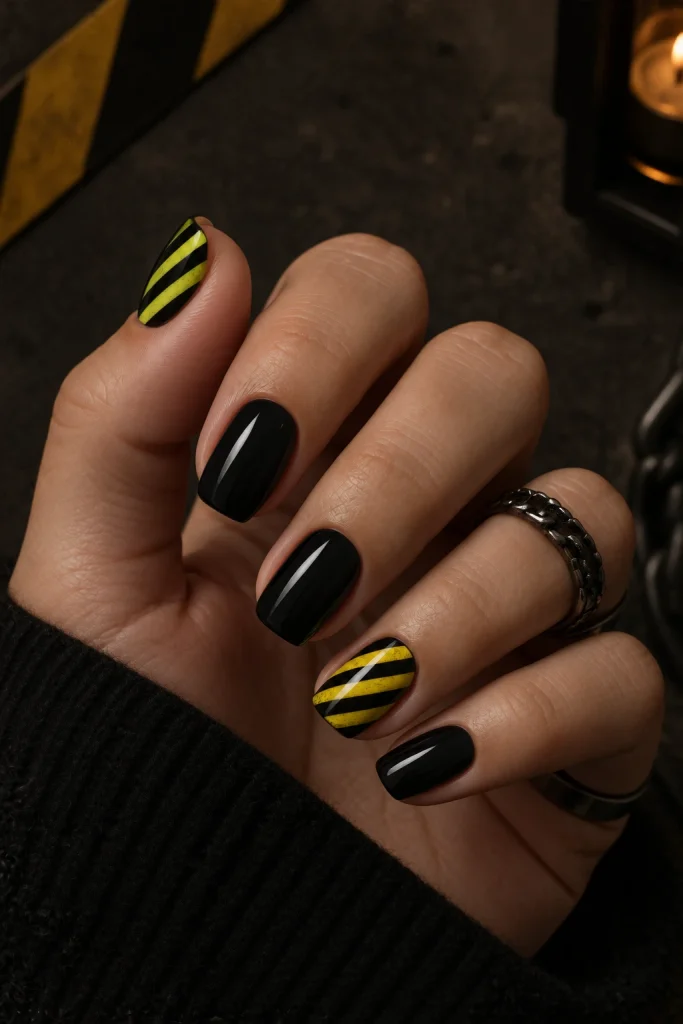
12. Toxic Hazard Stripe Nails
Take inspiration from warning labels and turn them into a playful Halloween manicure. Use a black base on selected nails and create thin neon-green or yellow diagonal hazard stripes. Keep the stripes narrow and evenly spaced, while leaving the remaining nails solid black or translucent nude for balance.
This design feels Halloween-ready because of its toxic, industrial color palette rather than a literal character. Short square nails are particularly good for the straight diagonal lines, but the design can also work on medium coffin or almond nails. If neon is too bold, replace it with muted chartreuse or warm yellow. A glossy top coat gives the graphic pattern a crisp finish.
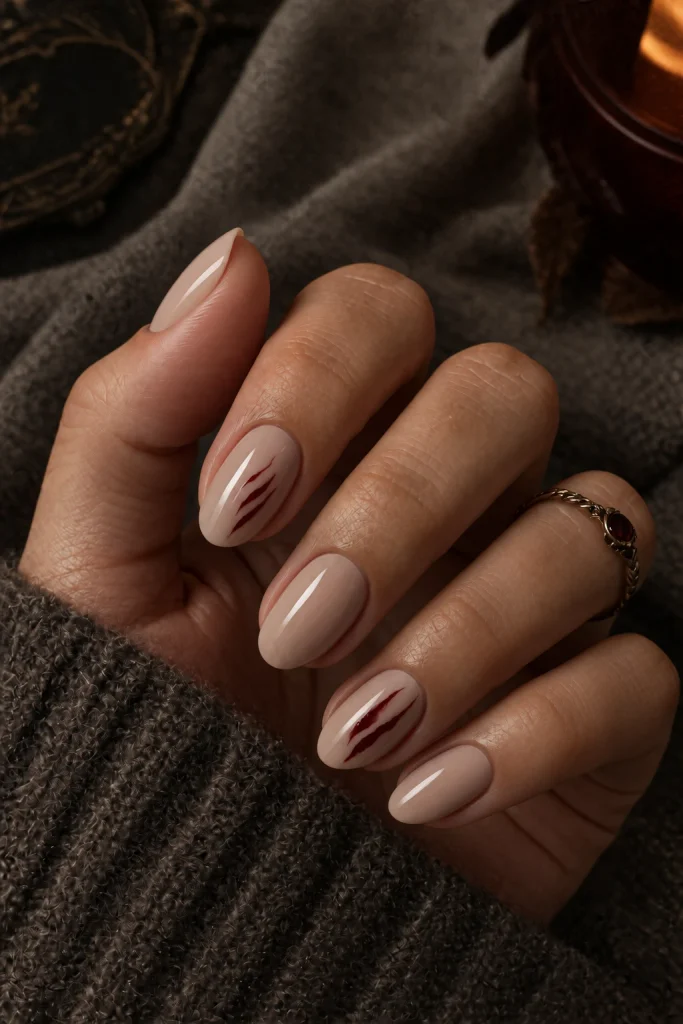
13. Creepy Claw Scratch Marks
Create the impression of claw marks without painting an entire monster. Begin with a pale gray, nude, or muted beige base and add three or four thin dark-red scratches on one or two nails. Make each line slightly curved and vary the lengths so they look naturally dragged across the surface.
For a less graphic version, replace the dark red with charcoal or black. The design is particularly easy because the lines do not have to be perfectly straight. Keep the surrounding nails clean and glossy so the scratch accent has plenty of negative space. Short nails can use three small marks, while longer nails can extend the scratches toward the center.
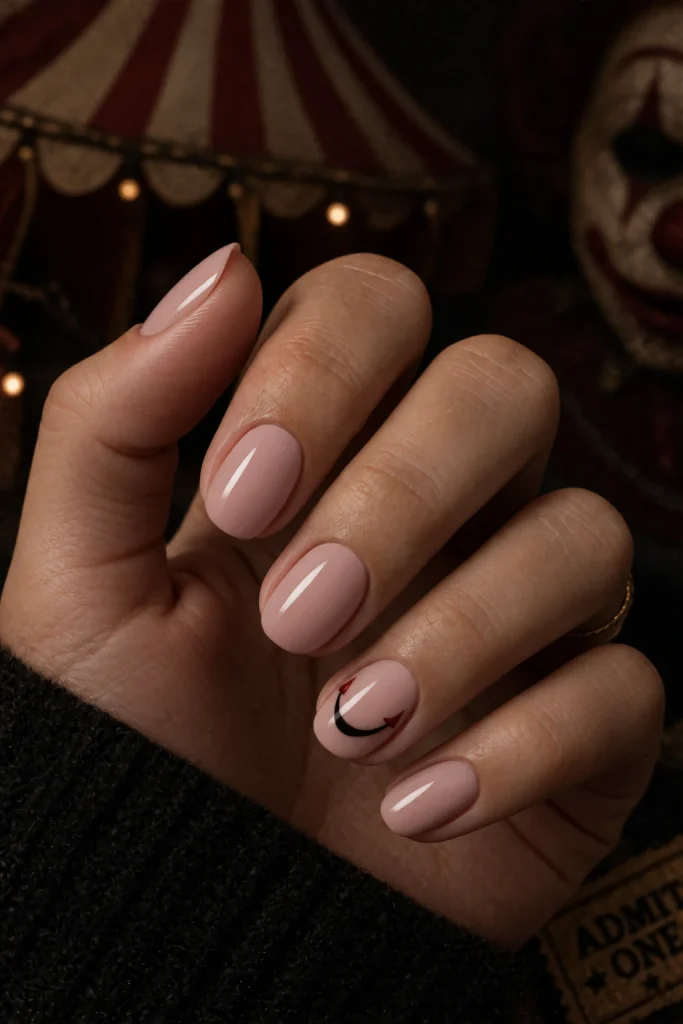
14. Creepy Clown Smile Accent
A tiny clown smile can create an unsettling Halloween manicure without requiring a full clown face. Use a soft cream, pale pink, or muted gray base and paint one exaggerated curved black smile on an accent nail. Add two tiny red corner details to make the expression slightly eerie while keeping the artwork simple.
Because the design uses one strong shape, it can work on short nails as well as longer ones. Keep the remaining nails plain or use a muted red accent finger. The result is playful at first glance but has a creepy undertone that makes it distinctly Halloween. A glossy finish makes the minimal artwork look cleaner and more deliberate.
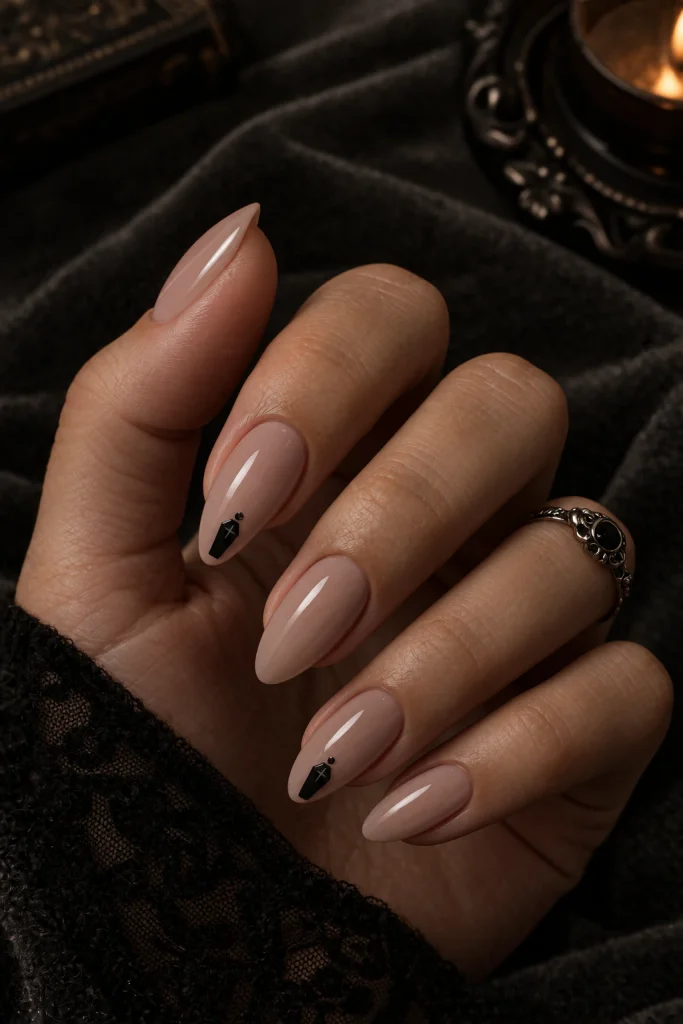
15. Coffin Silhouette Tips
Instead of painting a haunted graveyard, use simple coffin silhouettes as tiny geometric accents. Start with a sheer nude or gray base and place a small black coffin shape at the tip of one or two nails. Keep the shape flat and graphic with no internal details, making it easy to create using a fine brush or nail-art sticker.
The simplicity makes this design surprisingly wearable. Medium almond nails can carry slightly larger silhouettes, while short squoval nails should use very small shapes near the free edge. Add one tiny metallic dot inside a coffin if you want a subtle decorative detail. Leave all other nails glossy and neutral so the unusual silhouette remains the focal point.
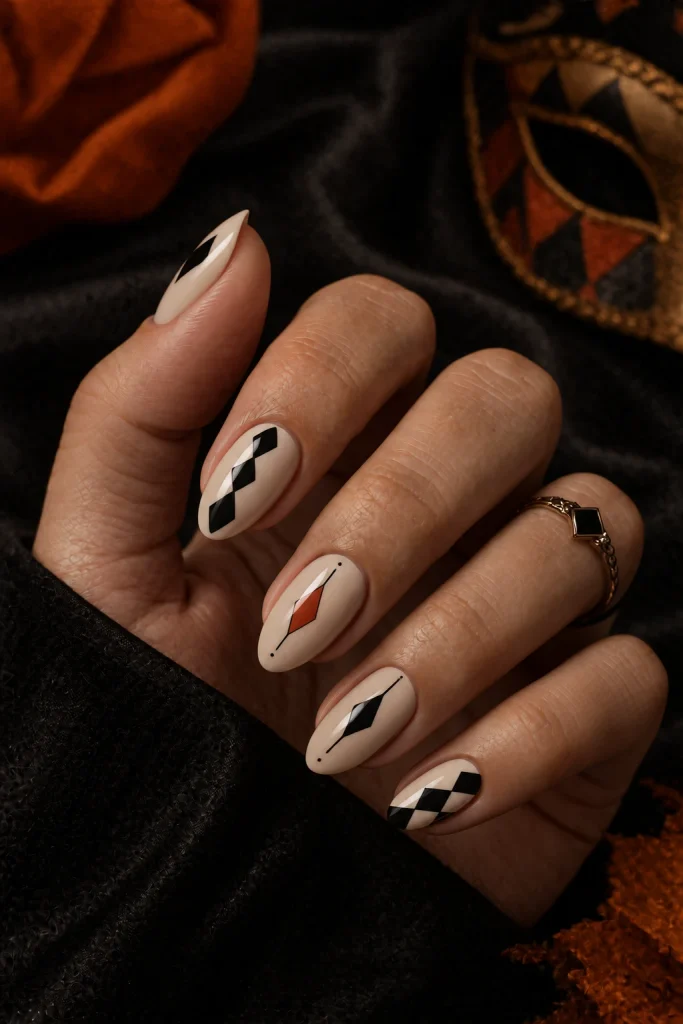
16. Black-and-Cream Harlequin Diamonds
A harlequin-inspired manicure can feel theatrical and Halloween-ready without using traditional Halloween imagery. Use a warm cream base and create a few black diamond shapes across selected nails. Keep the diamonds large enough to remain readable and vary their placement instead of creating a perfectly repetitive pattern.
For an extra seasonal touch, add one tiny burnt-orange diamond among the black ones. Short square nails can use two or three diamonds, while medium almond nails can carry a longer diagonal arrangement. A glossy top coat gives the geometric pattern a polished finish. The result feels playful and slightly mysterious while remaining distinct from the usual spooky motifs.
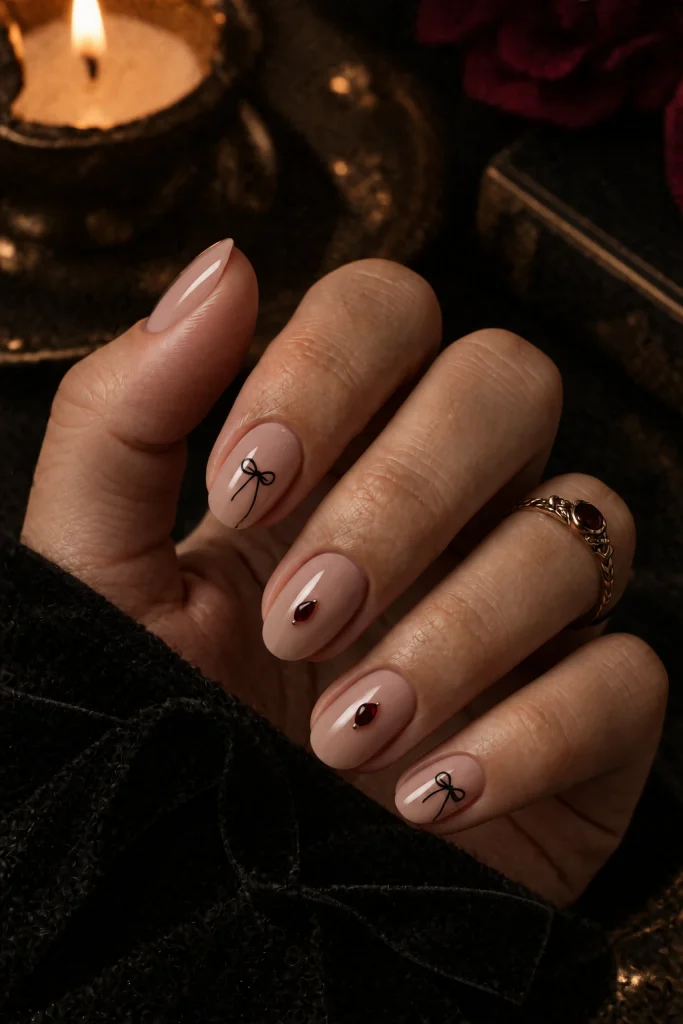
17. Black Bow and Crimson Jewel Nails
For a Halloween manicure with a fashion-focused mood, combine sheer nude nails with tiny black bow accents and one deep crimson jewel detail. Place a miniature black bow on one or two nails rather than covering the entire set. The tiny decorative shape gives the manicure a gothic-romantic feeling without requiring complicated artwork.
Use a translucent beige or blush base so the black bows remain delicate. One small dark-red rhinestone can provide the only strong color accent. Short oval nails work particularly well because the curved shape keeps the bows looking soft. This design is ideal if you want something Halloween-adjacent that could easily transition into an evening event after October.
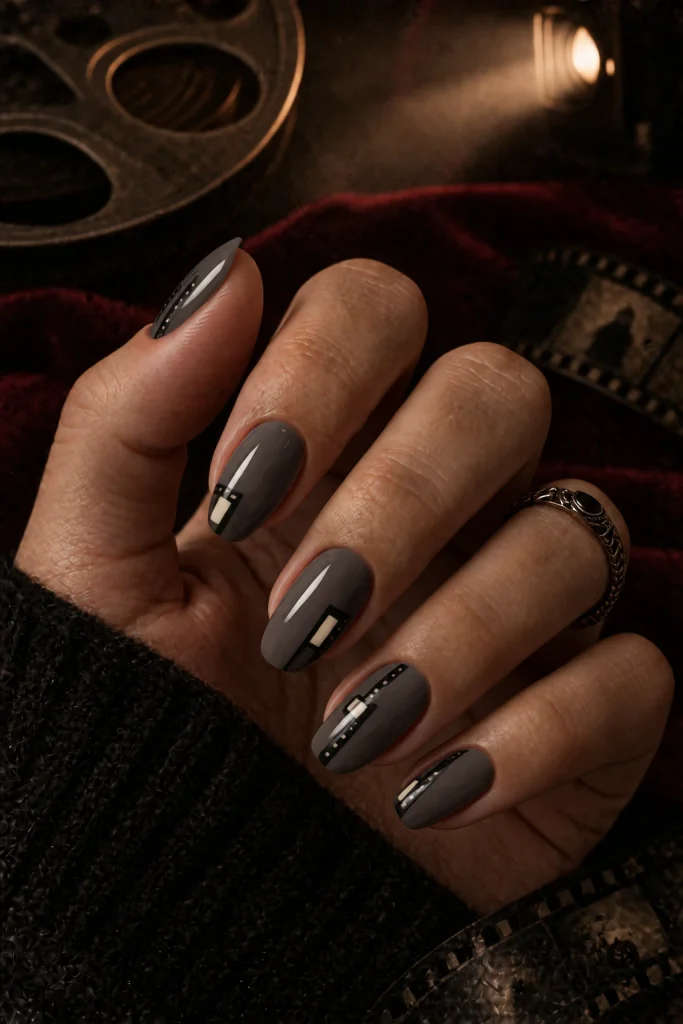
18. Spooky Film Strip Nails
Create a miniature movie-strip effect using black rectangles and tiny cream squares instead of trying to paint a recognizable horror character. Start with a smoky nude or gray base and add a narrow black strip along one side of selected nails. Place small cream squares along the strip to imitate film frames.
The concept works particularly well for Halloween because it suggests horror movies without copying a specific film. Keep the design abstract enough that it remains easy to paint. Medium square and coffin shapes offer plenty of room for the repeating rectangles, while short nails can use just two or three frames. A matte top coat gives the design a cinematic feel.
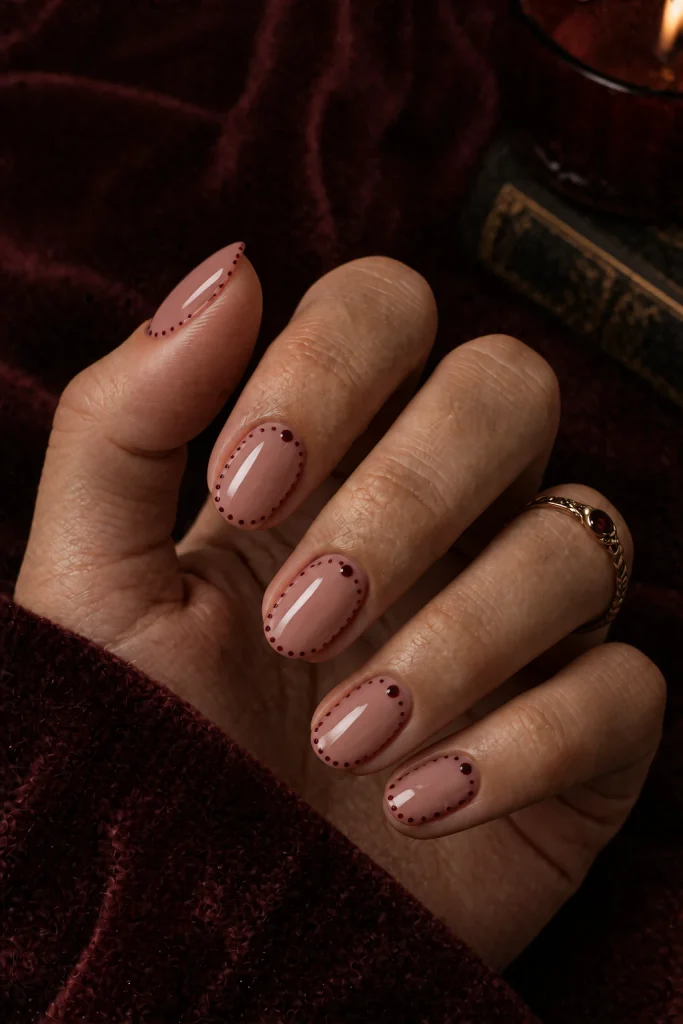
19. Midnight Red Pin-Dot Border
For something much simpler, create a fine border of deep-red dots around the outer edge of selected nails. Use a sheer beige or smoky pink base, then place tiny burgundy dots following the curve of the nail. The design creates a subtle Halloween mood through its dark color without relying on a recognizable symbol.
Keep the dots slightly uneven instead of making them perfectly mechanical. A dotting tool makes the application easier, and you can use fewer dots on short nails. Add one slightly larger dot near the center of the cuticle for a jewelry-like finish. The result is delicate enough for everyday wear while still feeling darker and more seasonal than a standard nude manicure.
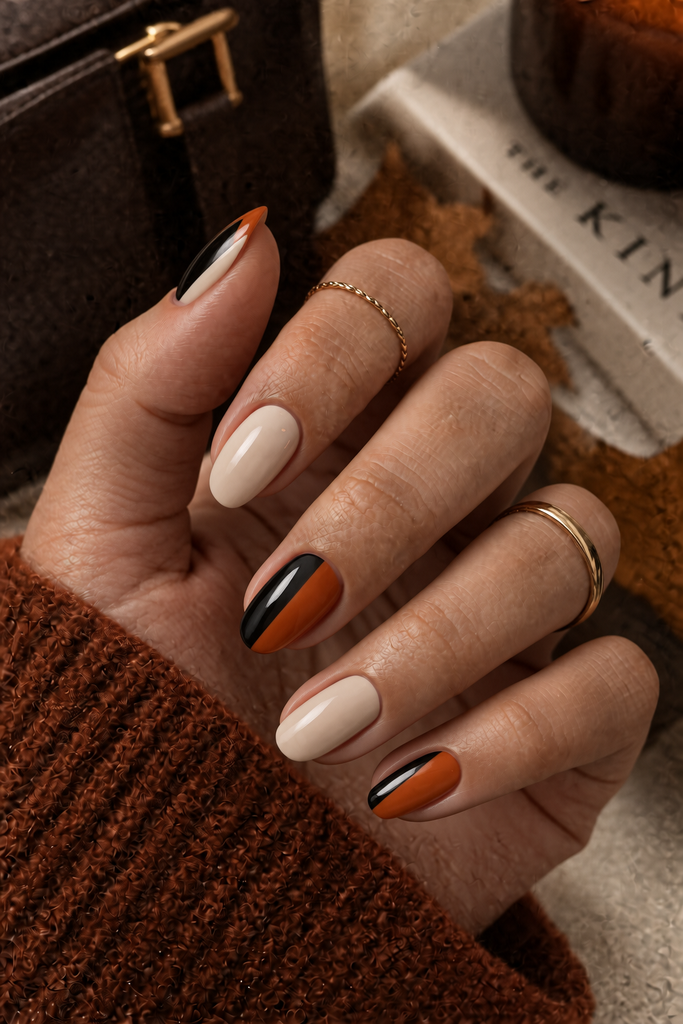
20. Black-and-Orange Split-Face Nails
Finish with a bold but surprisingly easy color-block manicure. Divide selected nails vertically into black and burnt-orange halves, keeping the dividing line straight and clean. Use a warm cream or nude shade on the remaining nails so the two strong colors do not overwhelm the whole set.
The design is simple enough for beginners because it relies entirely on color blocking rather than detailed artwork. Use nail tape for a crisp center line, or allow a tiny amount of softness for a more handmade effect. Short square nails make the split design particularly graphic, while medium almond nails soften the contrast. A glossy top coat gives the two-color manicure a smooth finish.
How to Make Easy Halloween Nails Look More Professional
The easiest way to improve simple Halloween nail art is to give every design enough breathing room. A small accent on one or two nails often looks more intentional than trying to decorate all ten fingers. Clean edges also make a major difference, so take a moment to remove polish from the skin before applying your final top coat.
If you are doing the manicure yourself, work with thin layers and let the base color dry before adding artwork. For designs made from straight lines, tape can help with color blocking, while a small dotting tool is useful for eyes, borders, and tiny decorative details. If you want a complete beginner walkthrough before choosing a design, you can follow GlofyRobs’ guide to doing easy Halloween nails at home.
Which Easy Halloween Nails Work Best for Short Nails?
Short nails do not need complicated artwork. Designs based on color blocking, tiny lines, dots, small silhouettes, and negative space can actually look cleaner because the composition has less room to become crowded.
For very short nails, choose ideas such as the Frankenstein stitch lines, toxic slime tips, black flames, pinstripes, or tiny borders. If you have a little more length, the haunted window, raven feather, coffin silhouette, or film-strip designs give you more space for visual detail.
How Can You Make Halloween Nails Less Traditional?
You do not have to use orange pumpkins, white ghosts, or black spiderwebs to make a manicure feel Halloween-inspired. Dark colors, unusual textures, theatrical shapes, mysterious silhouettes, and small graphic details can create the same seasonal mood in a much less predictable way.
For even more seasonal color combinations and transitional October inspiration, explore GlofyRobs’ October nail ideas for fall. That collection can also help if you want a manicure that moves naturally from Halloween into the rest of autumn.
Final Thoughts
The easiest Halloween manicure is not necessarily the one with the fewest details. It is the one where the design itself is simple enough to control. Straight lines, tiny shapes, color blocks, negative space, and one strong accent can create a surprisingly memorable set without requiring professional nail-art skills.
These ideas also give you room to personalize the manicure. Change black to charcoal, orange to rust, green to olive, or cream to blush. Move an accent from the ring finger to the thumb. Make the lines thinner or the shapes smaller. The goal is not to reproduce every design perfectly; it is to find a Halloween detail that fits your own nail shape and style.