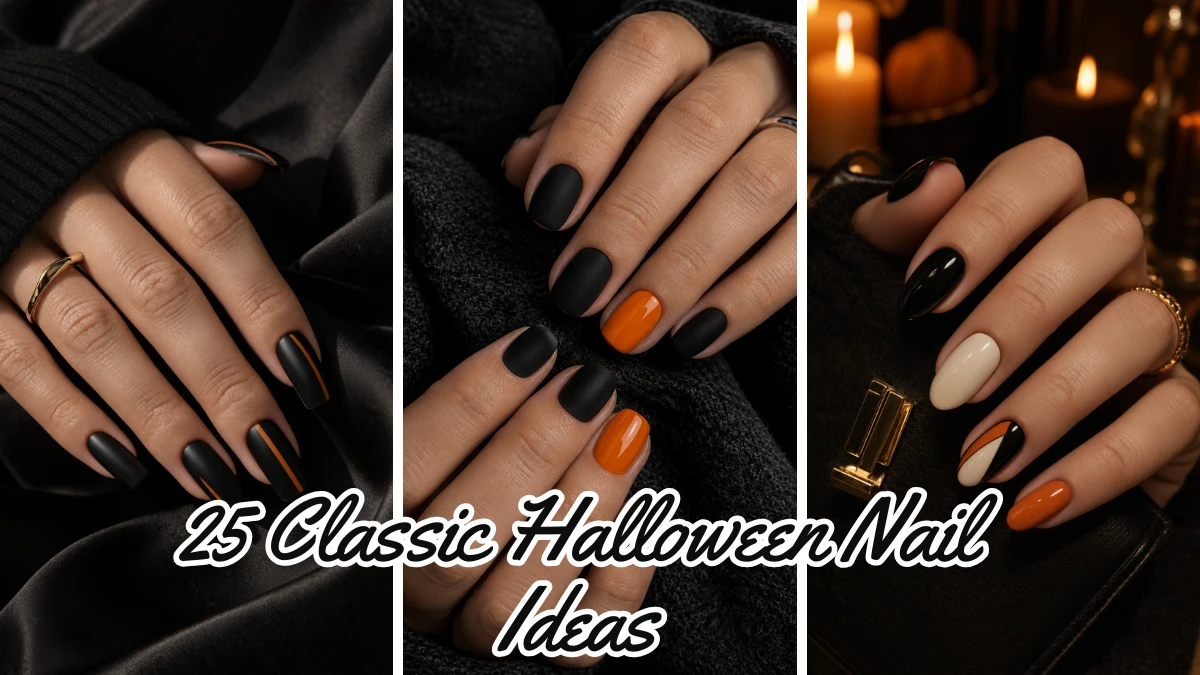
25 Classic Halloween Nail Ideas for a Timeless Spooky Manicure
Some Halloween manicures are built around whatever trend is having a moment, but classic Halloween nails work for a different reason: you can recognize them instantly. Black, orange, cream, deep red, clean French tips, simple lines and retro-inspired details can create a festive manicure without covering every nail in complicated artwork.
This collection focuses on classic Halloween nail ideas that feel timeless rather than trend-dependent. You will find traditional color combinations, vintage-inspired shapes, understated accents and polished designs that work across short, medium and longer nails. If you want your manicure to feel unmistakably Halloween without looking like a copy of every other October set, start here.
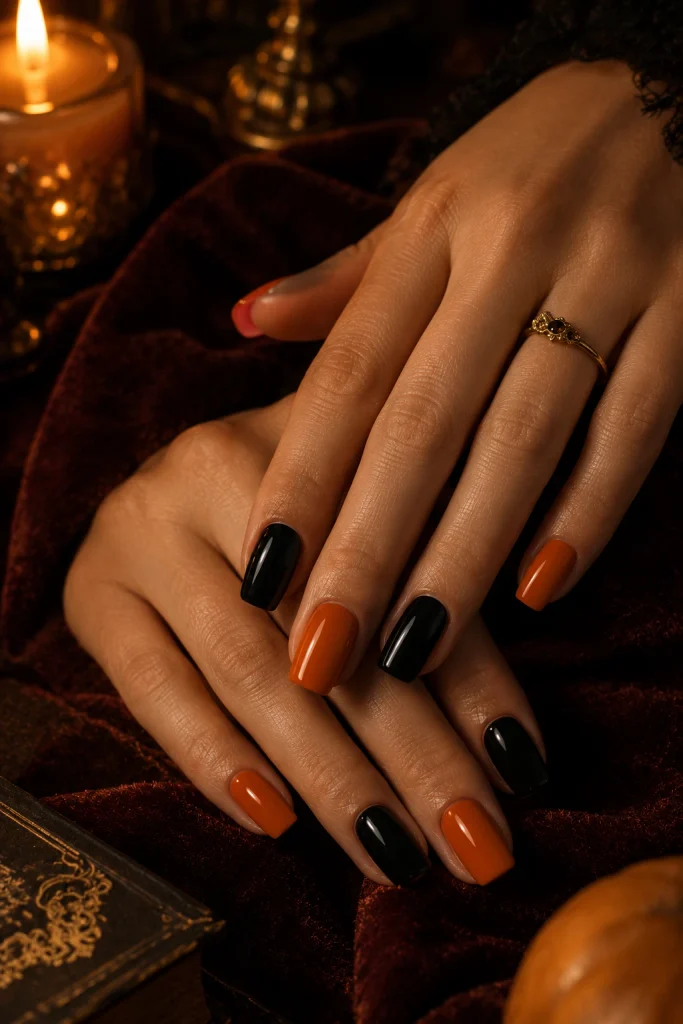
1. Classic Black and Orange Alternating Nails
Few combinations communicate Halloween as quickly as black and orange. Instead of adding artwork to the color pairing, let the two shades carry the entire manicure. Paint the nails alternately in glossy black and rich pumpkin orange for a clean, traditional look that feels almost like the original Halloween manicure.
This is one of the easiest classic Halloween nail designs to adapt to different shapes. Short squoval nails make the colors look neat and graphic, while almond or coffin nails create a longer, more dramatic appearance. Keep both shades glossy for a timeless finish, or use a soft matte top coat if you want a quieter autumn effect.
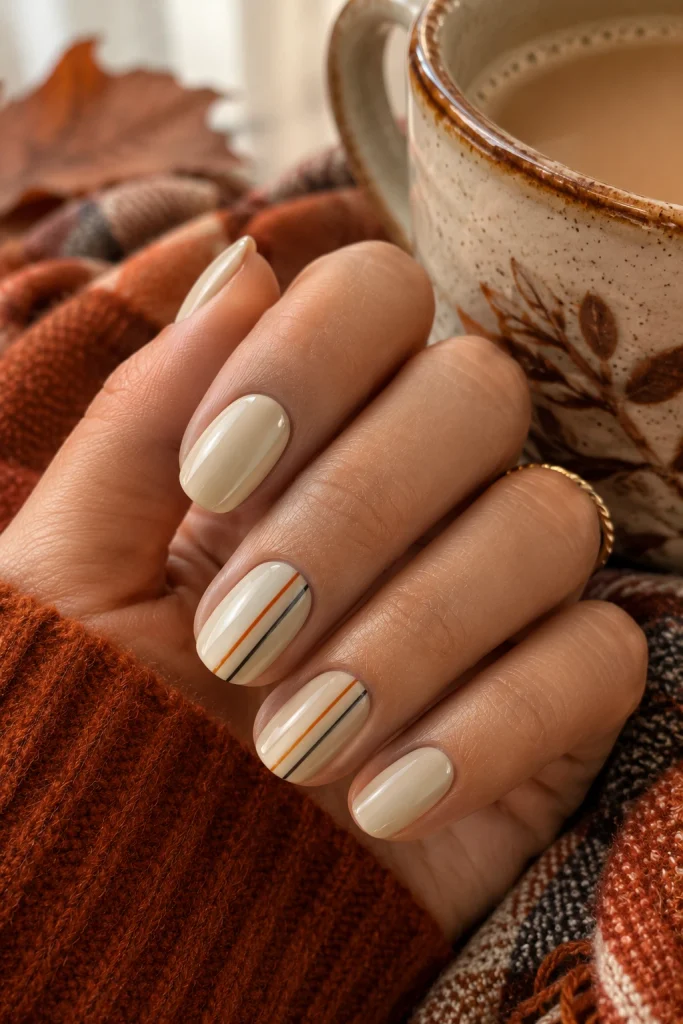
2. Cream and Pumpkin Pinstripe Nails
For a softer interpretation of traditional Halloween colors, use warm cream as the base and add very thin pumpkin-orange and black pinstripes. The narrow lines create a vintage feel without turning the manicure into a detailed nail-art project.
Keep the stripes concentrated on two or three accent nails and leave the others cream or orange. This gives the manicure more breathing room and makes it easier to wear with neutral fall clothing. Medium square or squoval nails provide a particularly clean canvas for the straight lines.
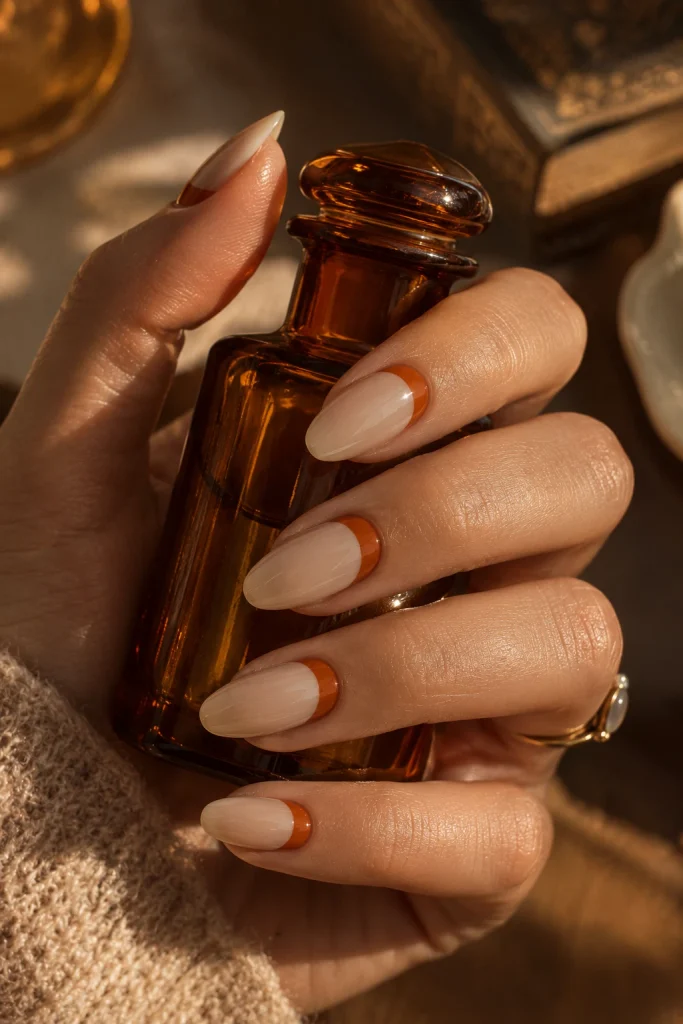
3. Burnt Orange Half-Moon Nails
A half-moon manicure gives traditional Halloween orange a more polished shape. Start with a sheer beige or cream base and place a curved burnt-orange section around the lower part of the nail near the cuticle.
The design works particularly well when the orange is slightly muted rather than neon-bright. Almond and oval nails emphasize the curve, while short squoval nails give it a more graphic, retro appearance. Keep the rest of the nail bare-looking and glossy so the half-moon remains the main detail.
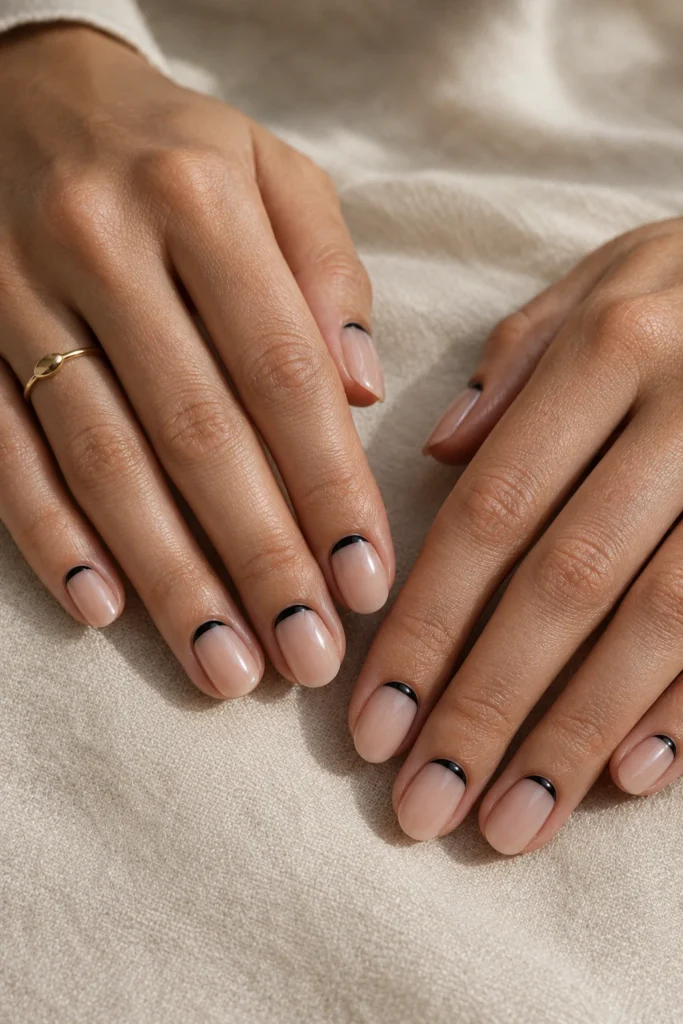
4. Black Reverse Half-Moons
Black can look surprisingly elegant when it is concentrated around the cuticle instead of covering the entire nail. Use a warm nude base and create a slim black reverse French or half-moon shape at the bottom of each nail.
For a stronger Halloween palette, add a very narrow orange line beneath the black curve. The result feels traditional without using a single character or spooky illustration. This design is particularly flattering on short-to-medium oval and almond nails because the curved shape follows the natural nail outline.
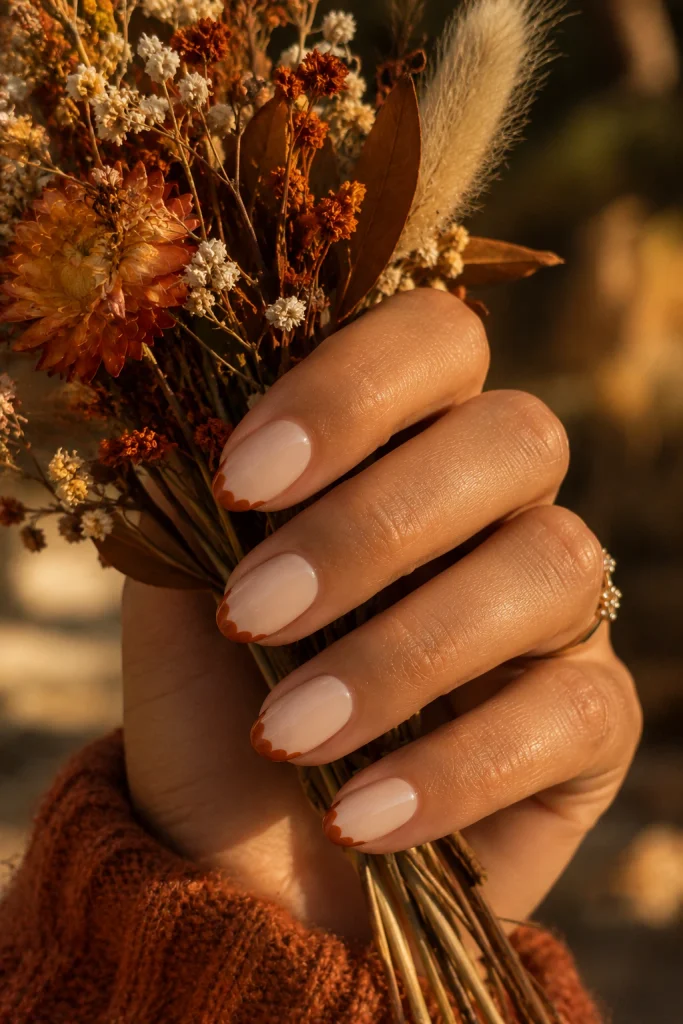
5. Burnt Orange Scalloped French Tips
Replace the ordinary straight French line with a series of tiny rounded scallops in burnt orange. The color immediately connects the manicure to Halloween, while the curved edge gives it a slightly retro personality.
A creamy nude base keeps the design from becoming too loud. You can use the scallops on every nail for a coordinated set or put them on three nails and keep the remaining nails solid orange. Short rounded or squoval nails work especially well because the scalloped edge follows their softer shape.
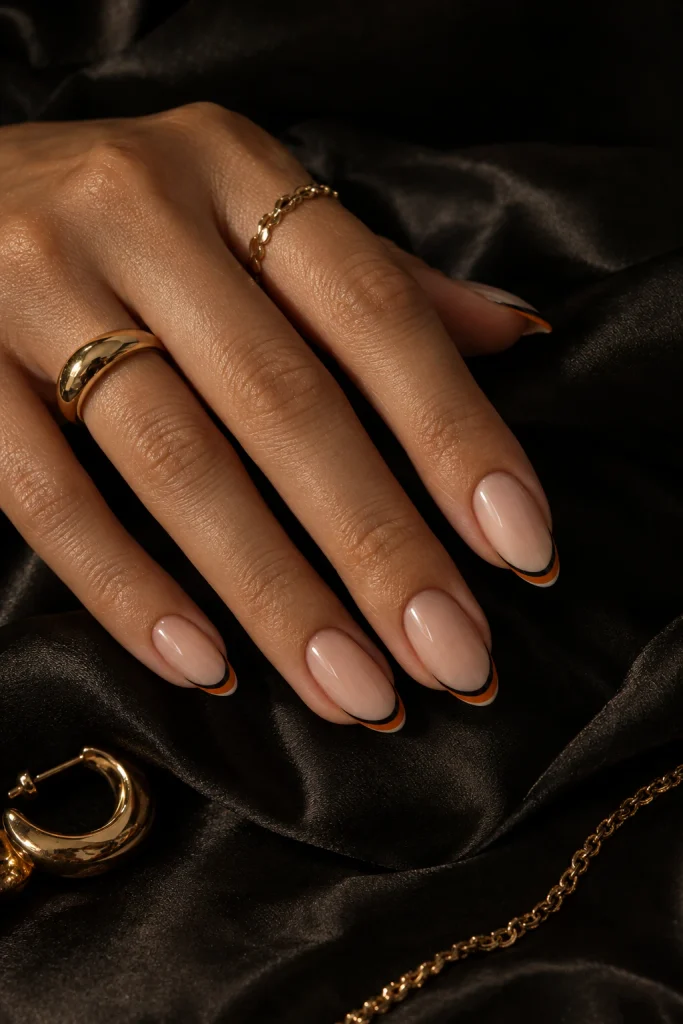
6. Black and Orange Double French
For a more graphic classic Halloween manicure, layer two very thin French lines instead of using one thick tip. Start with a sheer nude base, add a black line first and place a narrow orange line directly beside it.
The double border creates definition without needing additional artwork. Keep the lines extremely thin if your nails are short; longer almond or coffin nails can handle slightly wider bands. A glossy top coat brings the two traditional colors together and keeps the manicure looking crisp.
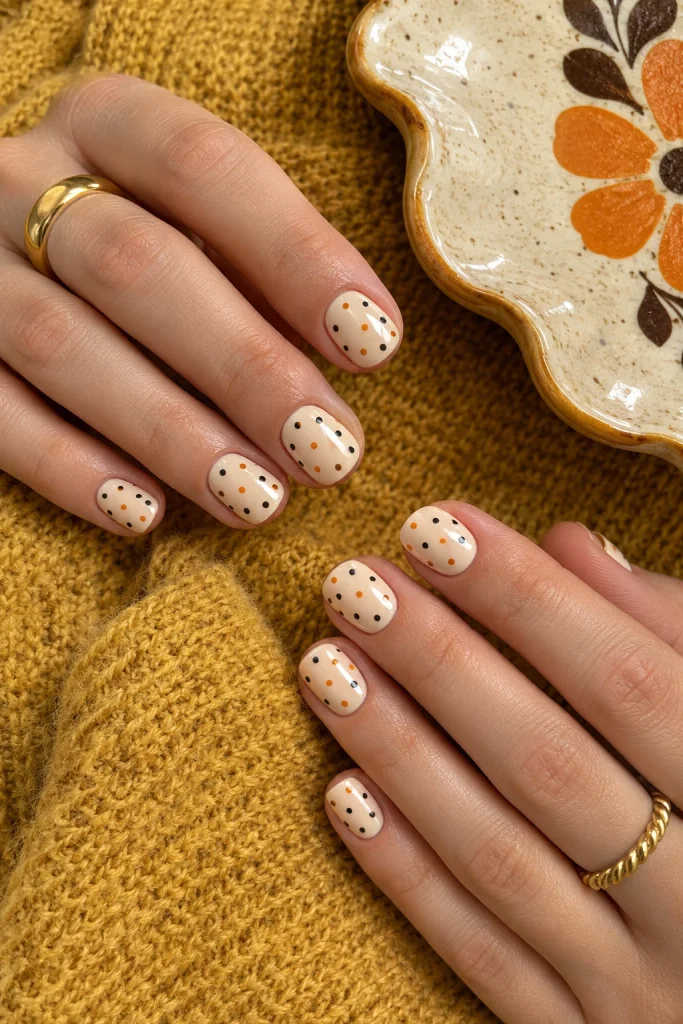
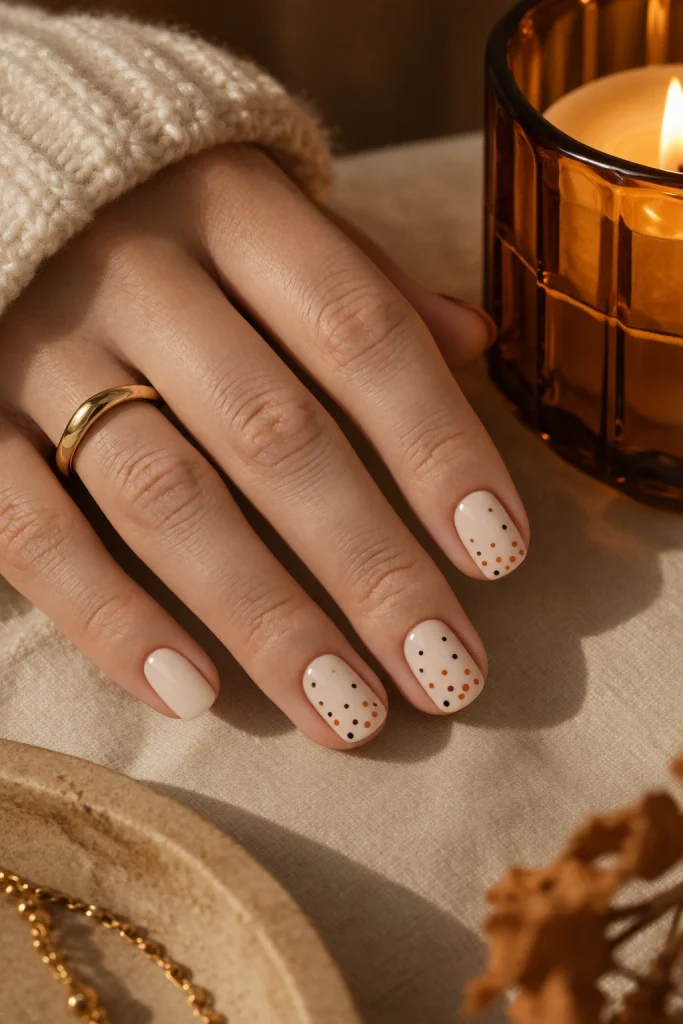
7. Retro Halloween Polka Dots
Polka dots are an easy way to make traditional Halloween colors feel playful without relying on ghosts or pumpkins. Use a cream base and alternate tiny black and orange dots across selected nails.
Avoid making every dot identical in size. A mixture of very small and medium dots creates a more natural retro pattern. Keep two or three nails plain so the manicure does not become visually heavy. Short round and squoval nails are especially good for this design because the dots do not depend on a long nail bed.
8. Vintage Fan-Tip Nails
Give a classic French manicure a Halloween color palette by creating fan-shaped sections of cream, orange and black from the tip. Each color should spread slightly outward rather than forming perfectly straight blocks.
The finished manicure has a vintage salon-poster quality while still feeling seasonal. It is more detailed than a standard French tip but much less dependent on character artwork. Medium almond nails provide the most space for the fan shape, although a simplified two-color version can work beautifully on shorter nails.
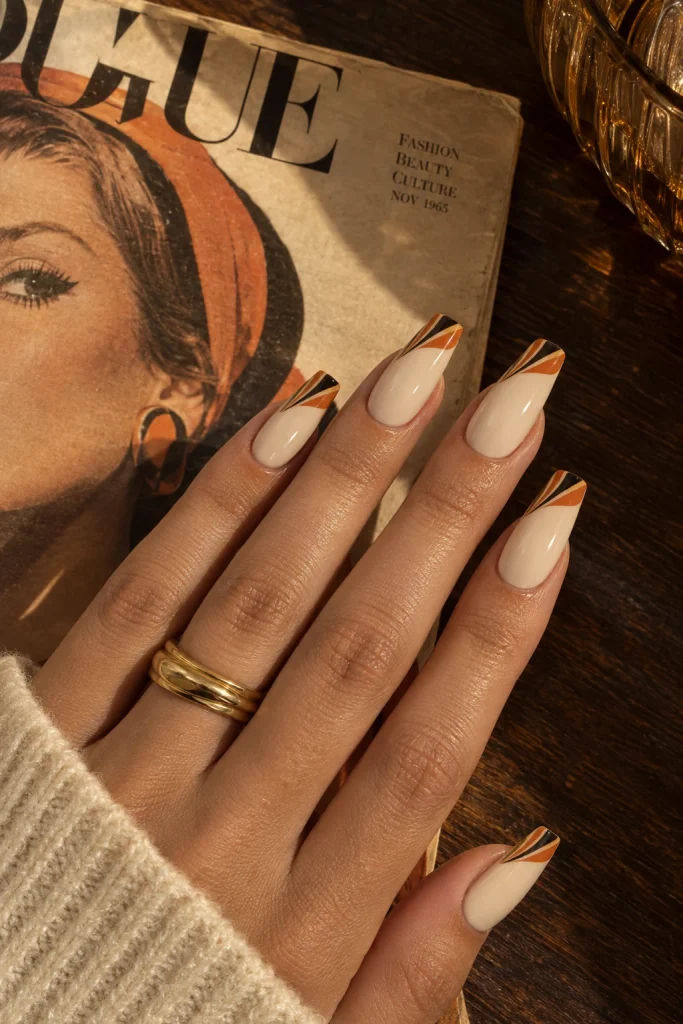
9. Black and Cream Vertical Color Blocks
Black and orange are not the only classic Halloween combination. Black paired with warm cream gives a quieter, almost vintage Halloween effect. Divide selected nails vertically between the two shades, using a clean straight line down the center.
Keep the remaining nails solid black or cream to prevent the set from feeling too busy. The graphic structure looks particularly good on square and squoval nails because their straight sides reinforce the vertical division. A glossy finish keeps the colors looking rich and polished.
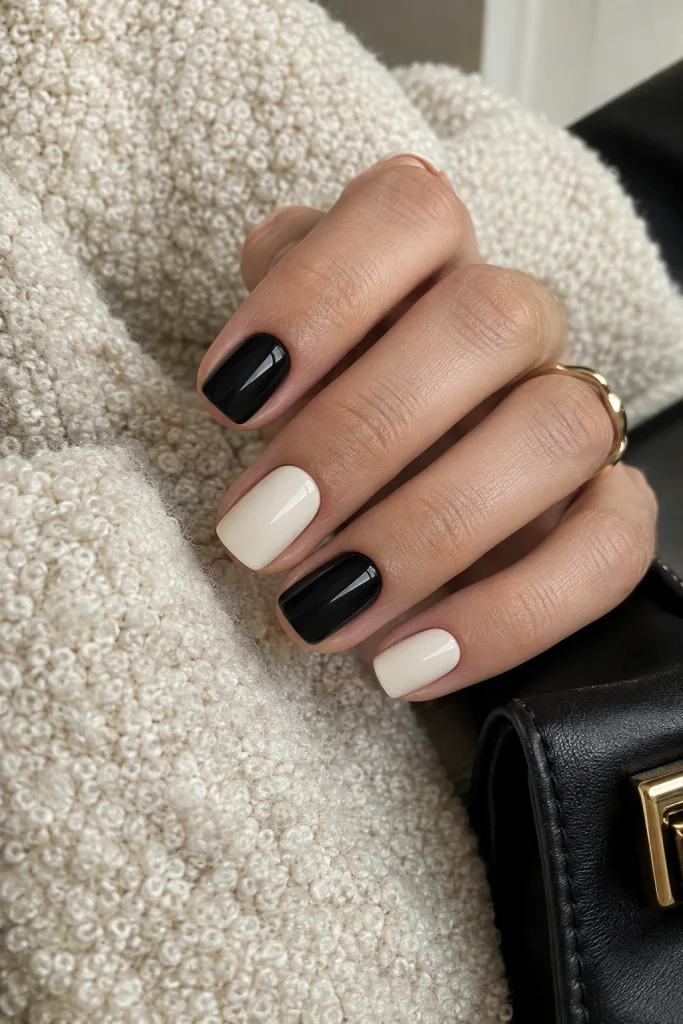
10. Orange Side-French Nails
Instead of placing orange directly across the free edge, sweep a narrow orange French line down one side of the nail. Leave the center mostly sheer or nude so the manicure has plenty of negative space.
This is a useful choice when you want classic Halloween color but do not want an obvious holiday manicure. Almond nails make the side sweep look elongated, while short oval nails keep it soft and delicate. Add black to only one accent nail if you want a stronger contrast.
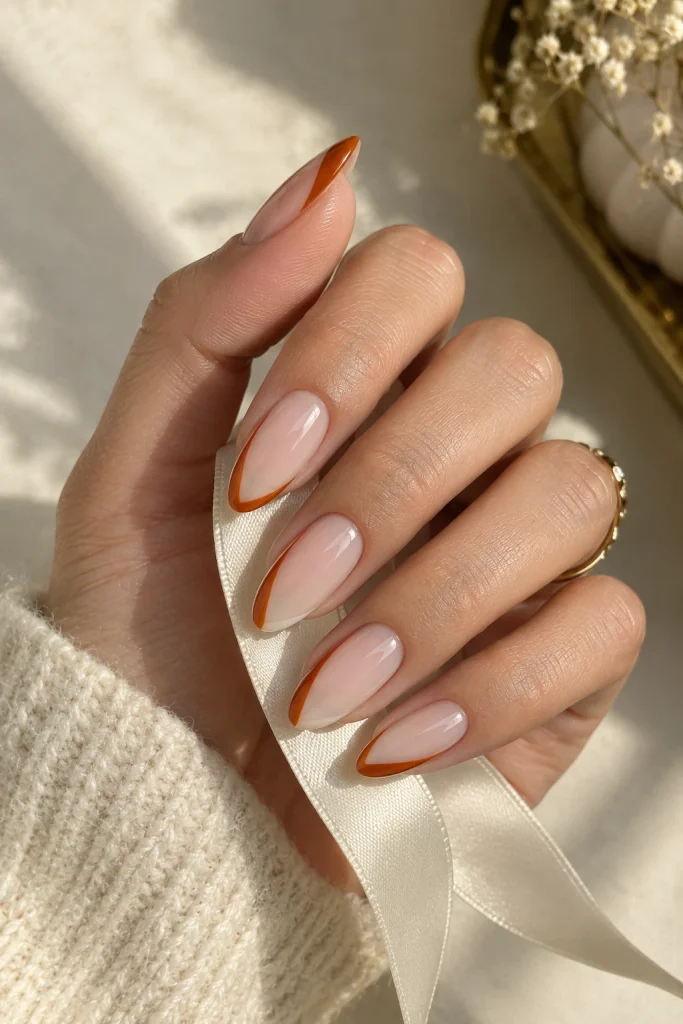
11. Matte Black With Glossy Orange Accents
Matte black creates an instant Halloween mood, but adding glossy orange accents makes the manicure feel more considered. Paint most nails matte black and use glossy orange on one or two accent nails.
You can also reverse the finish on a single nail by painting a matte orange base and adding one glossy black detail. The appeal comes from the difference in texture rather than complicated artwork. This design is especially effective for short square or squoval nails because the finish itself provides the visual interest.
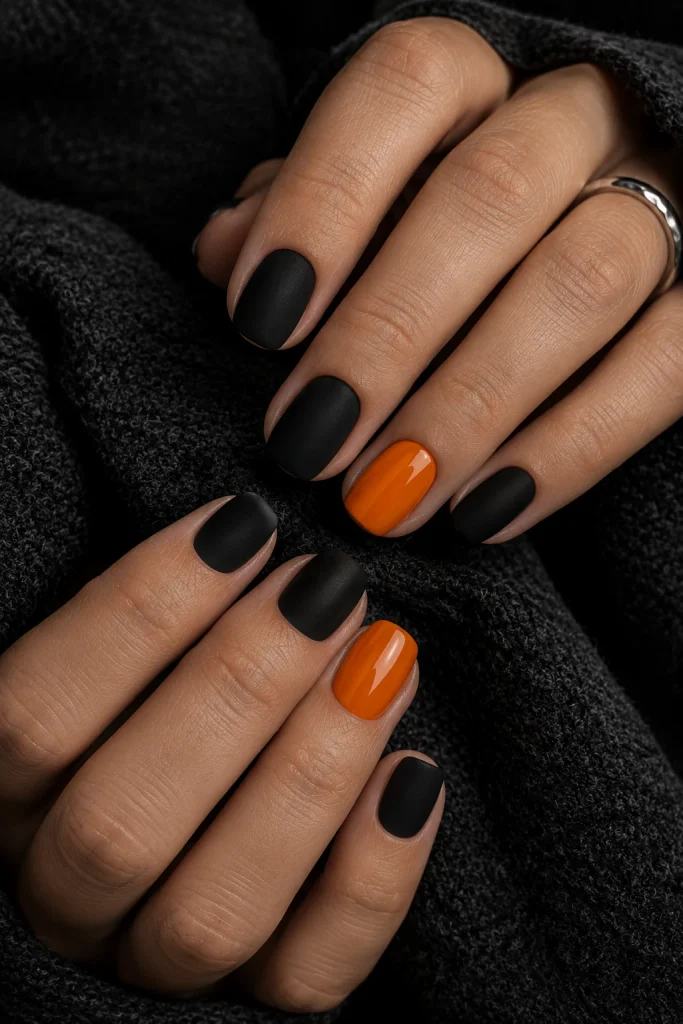
12. Terracotta and Black Negative-Space Arches
Terracotta offers a softer alternative to bright Halloween orange. Use a sheer nude base and paint curved terracotta arches across two or three nails, then add a very thin black line beside each arch.
The design feels seasonal without looking costume-like. Because much of the natural-looking base remains visible, it is also easy to adapt to shorter nails. Almond and oval shapes make the curves feel graceful, while square nails create a more modern graphic result.
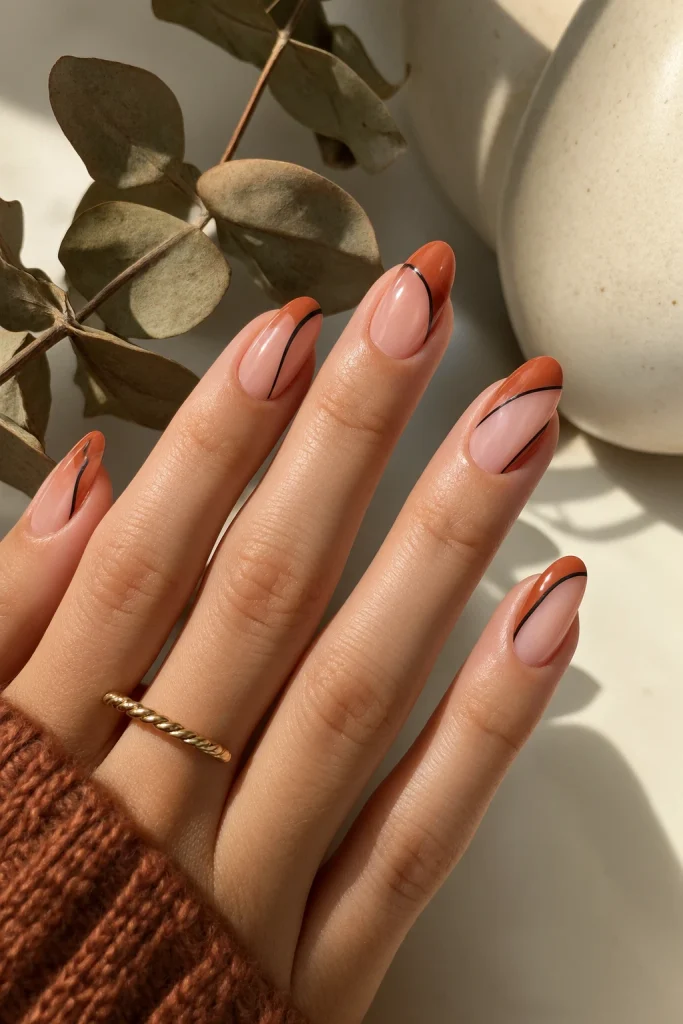
13. Cream, Orange and Yellow Color-Block Tips
For a classic candy-inspired Halloween palette without detailed candy-corn artwork, divide the tips into three clean sections of cream, warm yellow and orange.
Keep the sections narrow and place them only at the free edge rather than covering the entire nail. A sheer nude base makes the colors look lighter and more wearable. Short squoval nails provide a particularly stable canvas, while almond nails can use slightly curved sections that follow the tip.
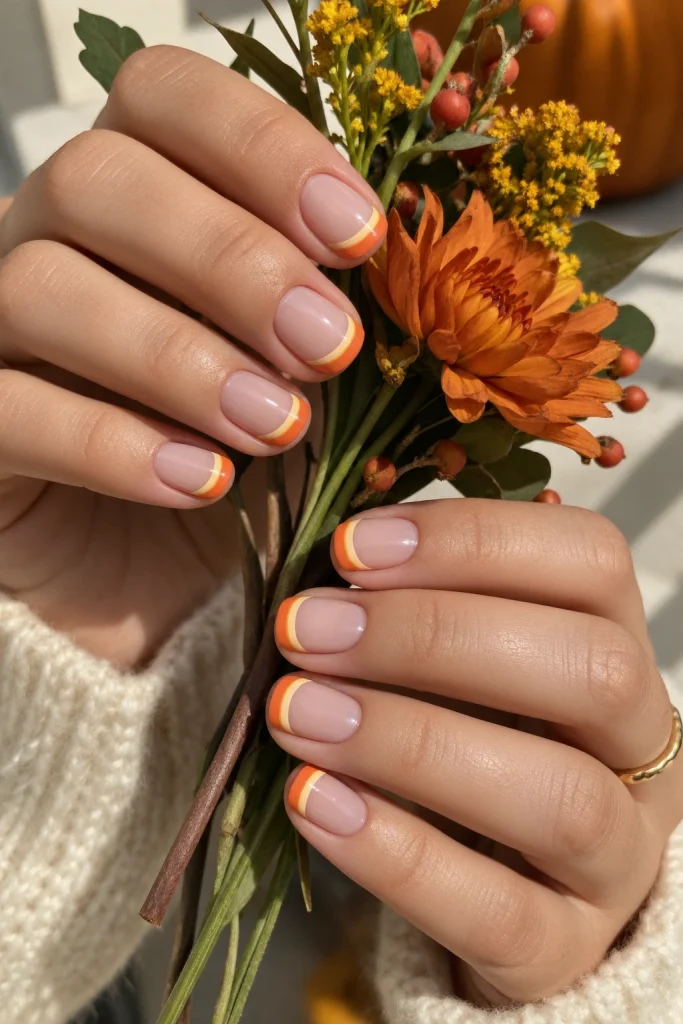
14. Juicy Orange Jelly Tips
Instead of covering the entire nail in orange, use a translucent orange jelly only across the tips. Keep the base sheer and allow the natural nail to remain visible underneath.
The transparent orange creates depth while preserving the classic Halloween color story. This is a good choice for anyone who wants something more polished than a traditional orange manicure but does not want chrome or elaborate art. Short oval and almond nails both work well with the translucent finish.
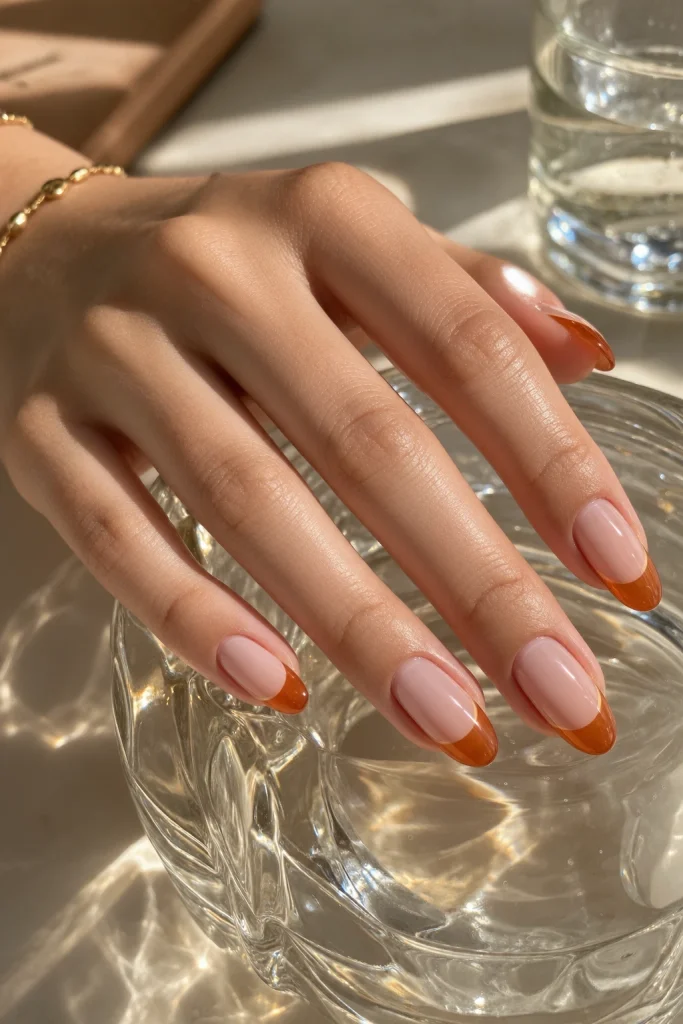
15. Espresso and Orange Micro Lines
Dark brown gives Halloween orange a more sophisticated partner. Begin with a warm nude base and draw extremely fine espresso-brown and burnt-orange lines diagonally across selected nails.
The lines should remain irregular enough to feel hand-drawn rather than perfectly geometric. Use the design on two or three nails and keep the rest in solid espresso or nude. The palette works beautifully with fall clothing and makes the manicure feel seasonal without relying on obvious Halloween imagery.
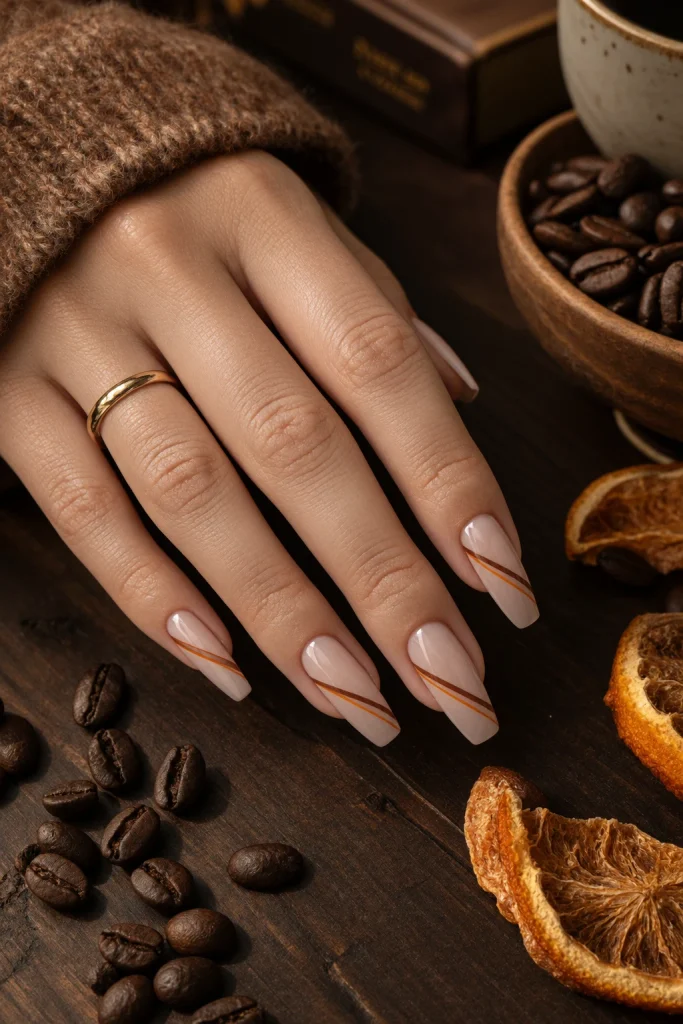
16. Cream Base With Retro Black Arches
Use creamy ivory polish as the foundation and add rounded black arches near the tips. The shapes should resemble vintage graphic nail art rather than a standard French manicure.
Add a narrow orange accent inside one or two arches if you want more Halloween color. This design is particularly flattering on short square nails because the flat edge gives the arches a strong graphic foundation. A high-shine top coat keeps the cream looking clean and the black lines sharp.
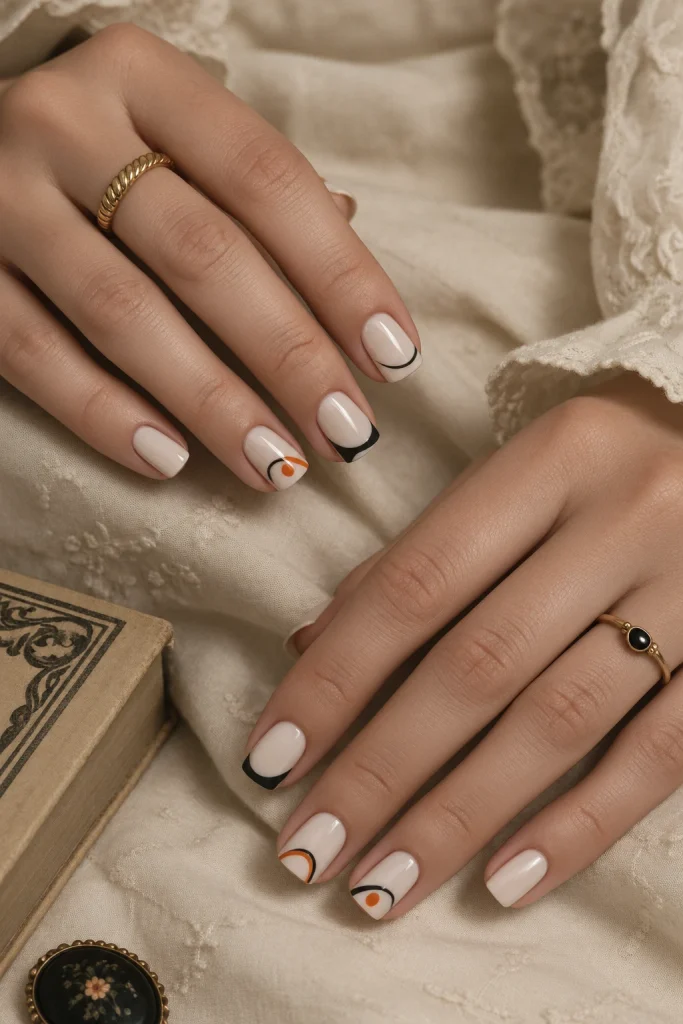
17. Pumpkin-Orange Matte Nails With Glossy Tips
For a manicure that uses one traditional Halloween color in two different finishes, paint the entire nail pumpkin orange and finish most of it matte. Add a narrow glossy orange tip so the color changes only through texture.
The result is subtle from a distance but surprisingly noticeable when light hits the nails. It works well on short nails because there is no artwork competing for space. If you want more contrast, use a slightly darker burnt orange for the glossy tips.
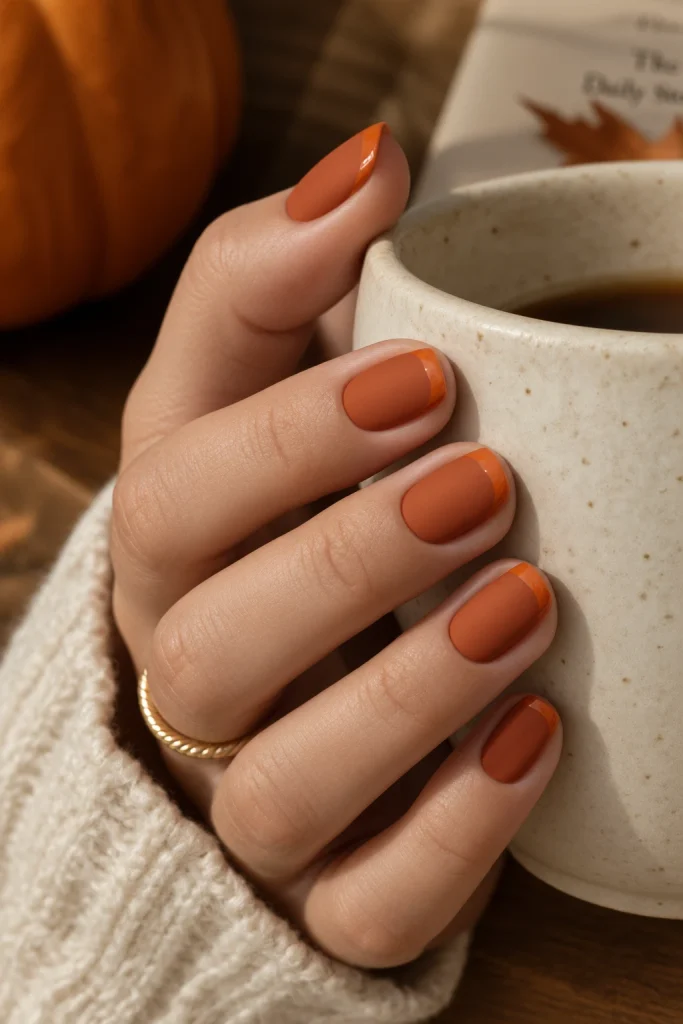
18. Black and Orange Abstract Swipes
Create a classic Halloween palette without using traditional symbols by brushing loose black and orange swipes across a cream or nude base. Each nail can have a slightly different arrangement.
The important part is to leave plenty of negative space between the strokes. This makes the manicure feel intentional rather than crowded. Medium almond nails give the brush marks room to curve, while short nails can use just one or two small strokes per accent nail.
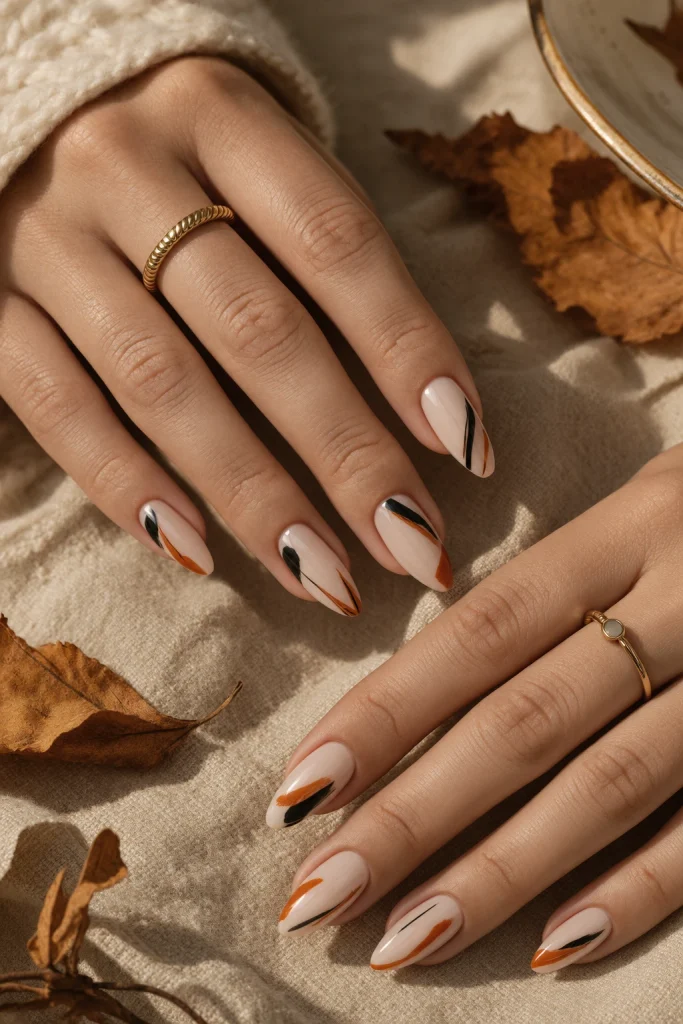
19. Black Satin With a Single Orange Stripe
Black satin polish creates a softer alternative to flat matte black. Paint the full set in a deep satin black and place one narrow orange stripe vertically down selected nails.
Keep the stripe slightly off-center rather than placing it perfectly in the middle. This tiny change makes the manicure feel more editorial while preserving the classic Halloween palette. Long square or coffin nails make the stripe dramatic, while short squoval nails create a cleaner everyday version.
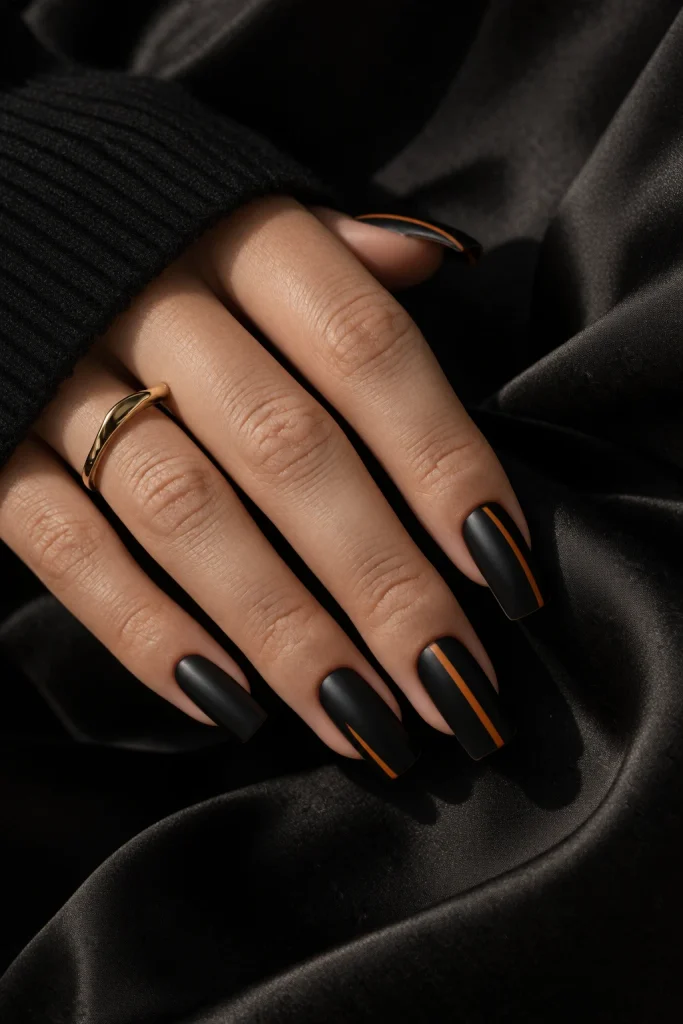
20. Orange and Cream Retro Waves
Combine creamy ivory with muted orange in wide, rounded waves that travel diagonally across each nail. The design should feel inspired by vintage packaging and mid-century graphics rather than modern Halloween character art.
Use the wave design on only two or three nails and keep the others solid orange or cream. This creates a balanced manicure that feels festive without becoming overly decorative. Medium oval and almond shapes are especially good because their curves complement the flowing lines.
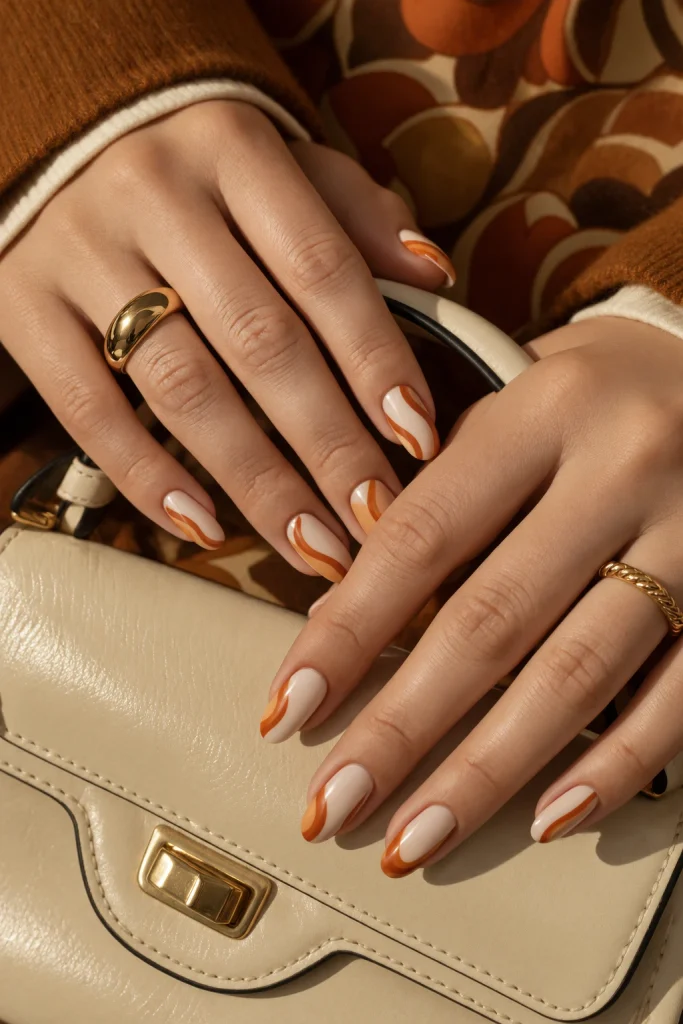
21. Black, Cream and Orange Dot Gradient
Start with a creamy base and place the largest orange dots near the center of two accent nails. Gradually reduce the size of black and orange dots as they move toward the edges.
The result creates a soft gradient without requiring an actual color blend. Use a dotting tool for consistency, but do not worry if every dot is perfectly positioned. The slightly organic arrangement is part of the charm. This is a playful option for short nails because the dots can be scaled to fit the available space.
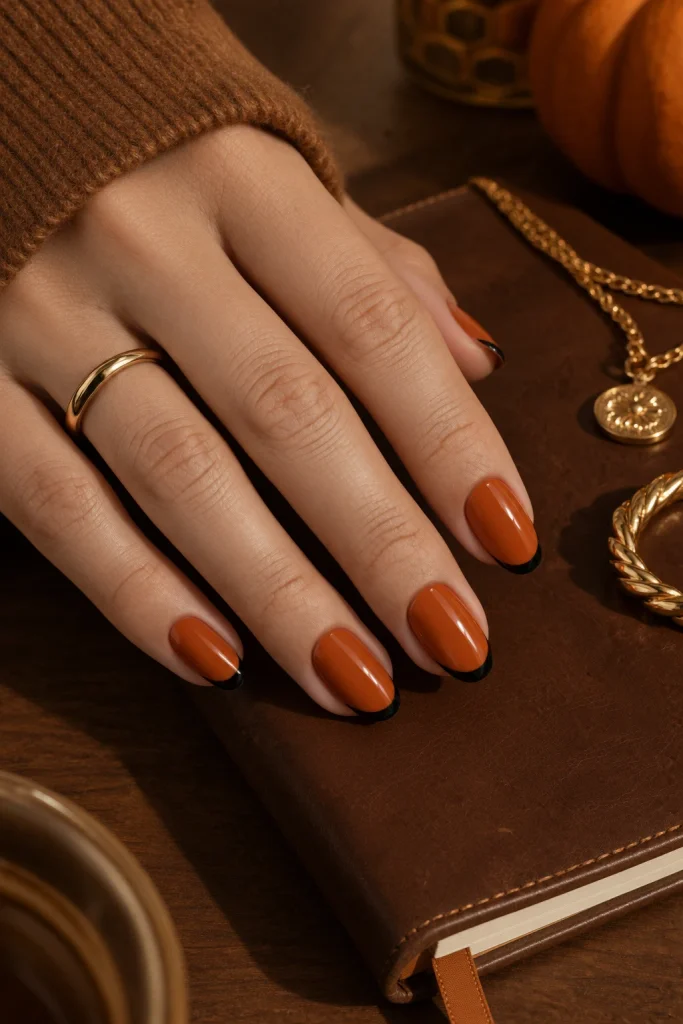
22. Burnt Orange With Black Gloss Tips
Give a traditional orange manicure a darker edge by using burnt orange across the nail and a very narrow glossy-black tip.
The contrast is enough to make the manicure immediately feel Halloween-inspired without requiring any artwork. Keep the orange base slightly muted so the black does not look too harsh. Short oval and squoval nails are ideal for a practical version, while almond nails can use a slightly sharper black tip.
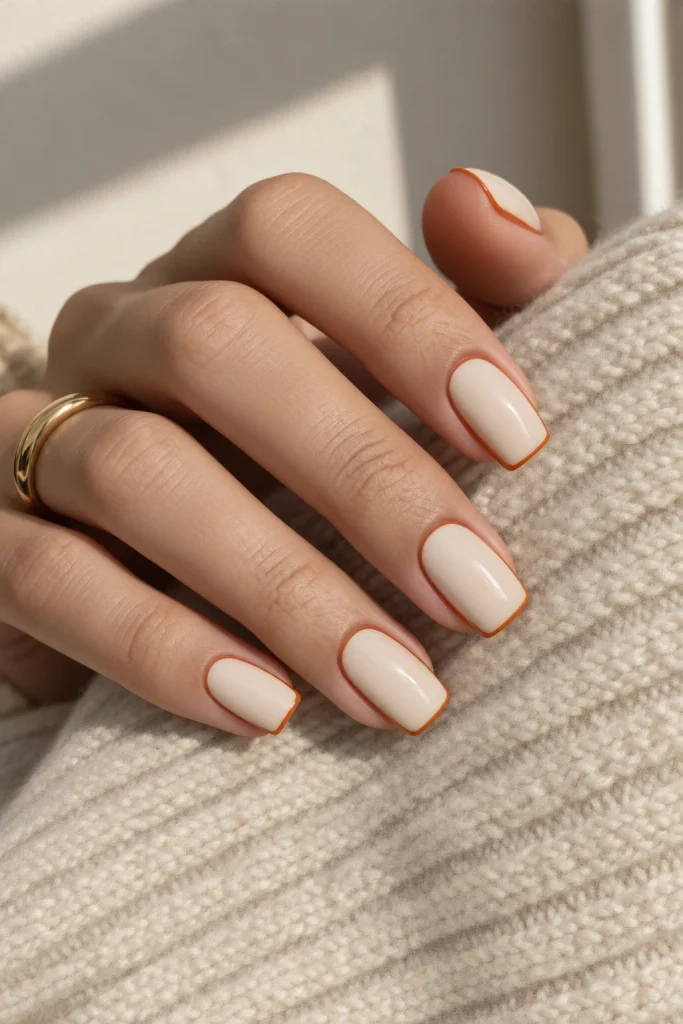
23. Cream Nails With Tiny Orange Border Lines
For a lighter classic Halloween manicure, paint the nails creamy ivory and trace an extremely thin orange line around the outer edge.
The effect resembles a delicate frame rather than a conventional French manicure. You can leave the frame continuous or break it slightly near the sidewalls for a more handmade appearance. This design is particularly good if you want Halloween nails that feel polished enough for daytime and can easily transition into the rest of fall.
24. Vintage Black, Orange and Cream Mix
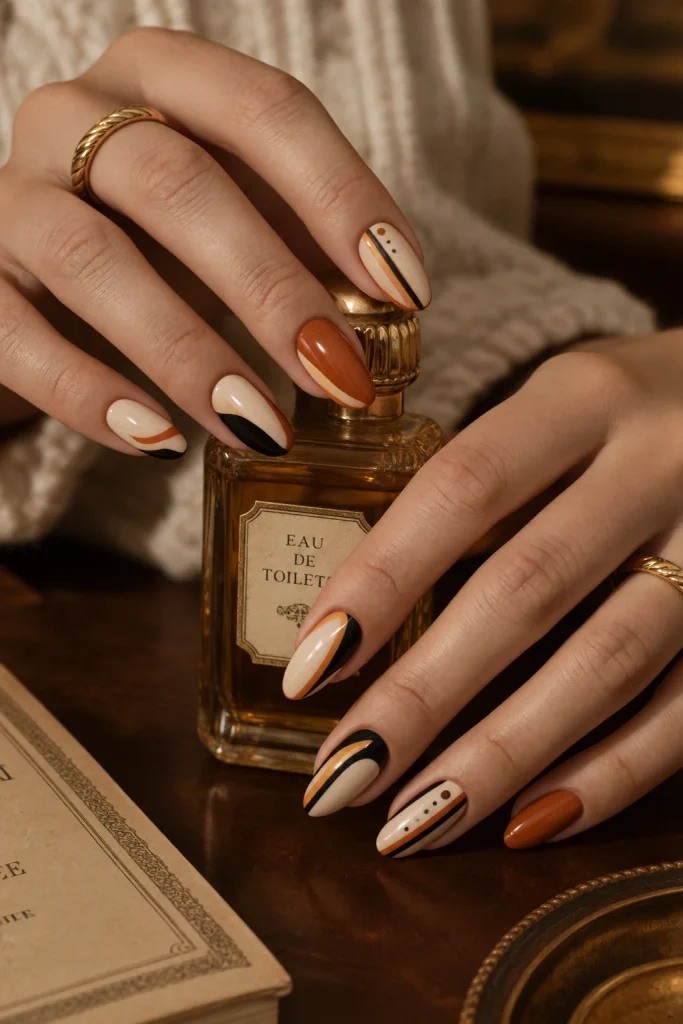
Use all three traditional colors, but assign each a different role: cream as the dominant base, black as the graphic detail and orange as the small accent.
One nail can feature an orange side stripe, another a black arch, and another a pair of tiny dots. Keep two nails completely cream. The manicure feels coordinated because the palette repeats, but every nail has enough variation to avoid looking like a uniform template.
25. Classic Halloween Accent Nail Set
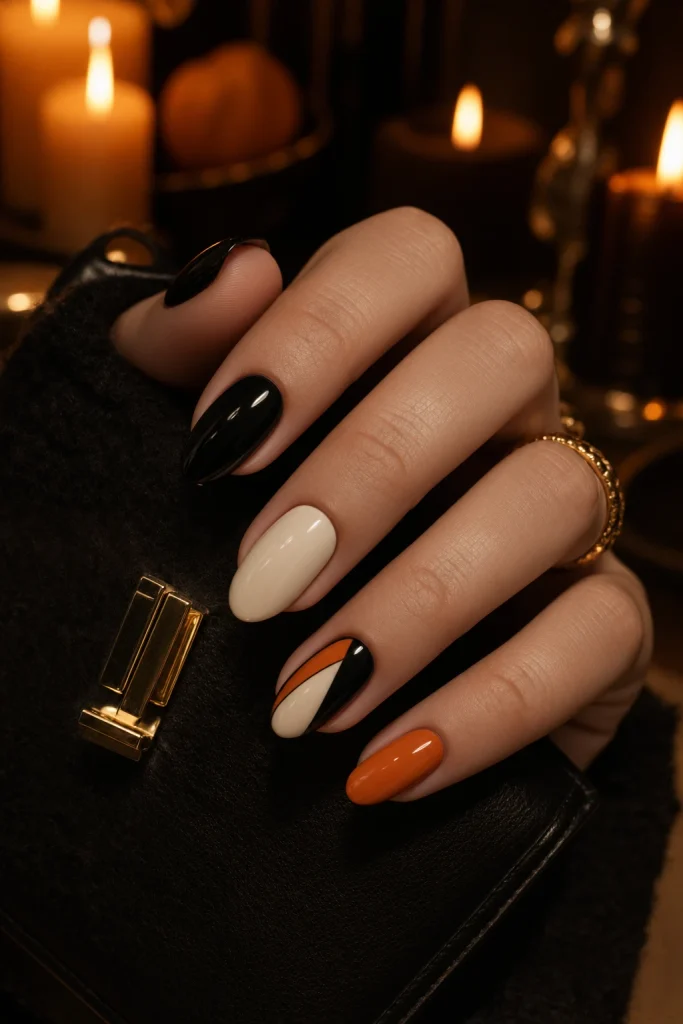
If you prefer a very traditional manicure without committing to a detailed full set, keep four nails in solid black, orange or cream and make one accent nail the visual centerpiece.
The accent can use a simple combination of two or three classic colors in stripes, dots, arches or geometric blocks. The key is restraint: one strong accent is often enough. This approach works on almost every nail shape and is especially useful if you are doing your manicure at home and want a polished result without spending hours on ten individual designs.
How to Choose a Classic Halloween Manicure
Start with the color palette before the artwork. Black and orange are the most immediately recognizable combination, while cream softens the contrast and deep red or brown gives the manicure a more mature autumn feel.
Next, consider how much decoration you actually want. If you prefer a timeless manicure, choose solid colors, French tips, half-moons or one accent nail. If you want something more playful, use dots, stripes, waves or color blocks instead of filling every nail with detailed characters.
Your nail shape also matters. Square and squoval nails are excellent for stripes, blocks and graphic designs. Almond and oval nails work beautifully with curved French tips, arches and flowing lines. Short nails generally look cleaner when the pattern is reduced rather than squeezed into a smaller version of a long-nail design.
Classic Halloween Colors That Always Work
You do not need an enormous polish collection to create a traditional Halloween manicure. A small palette can produce many combinations:
- Black + orange: the most recognizable Halloween pairing
- Black + cream: softer and more sophisticated
- Orange + cream: warm and vintage-inspired
- Black + red: darker and more dramatic
- Orange + brown: autumnal and wearable
- Cream + orange + black: balanced and unmistakably seasonal
For 2026, richer autumn colors and dimensional finishes are also appearing strongly in manicure coverage, so traditional Halloween colors can be updated without abandoning the classic foundation.
Are Classic Halloween Nails Still Stylish?
Yes. The appeal of classic Halloween nails is that the underlying color combinations and manicure structures do not depend on a short-lived trend. A black French tip, orange accent, half-moon manicure or black-and-orange color combination can be adjusted every year simply by changing the finish, nail shape or scale.
That also makes classic designs useful if you want a manicure you can wear for more than one Halloween event.
What Nail Shape Works Best for Classic Halloween Designs?
There is no single best shape. Square and squoval nails are particularly good for straight graphic designs, while almond and oval nails work naturally with curved details such as French tips, arches and side sweeps.
For shorter nails, prioritize designs with clear shapes and plenty of negative space. For longer nails, you have more room to combine multiple lines, color sections or decorative details.
Can Classic Halloween Nails Be Done at Home?
Many can. Solid-color combinations, dots, simple stripes, French tips and color blocks are among the more approachable choices. A fine detail brush, dotting tool and cleanup brush can cover most basic designs.
If your chosen design depends on perfectly symmetrical lines, intricate hand painting or specialized finishes, a nail technician may produce a cleaner result. The advantage of the classic approach is that you can simplify almost any design without losing the Halloween color story.
Final Thoughts
Classic Halloween nail ideas do not have to mean repeating the same pumpkin or ghost manicure every October. The strongest timeless looks often come from something much simpler: a familiar color palette, a clean manicure shape and one well-placed detail.
Whether you choose traditional black and orange, creamy retro tones, burnt-orange French tips, graphic color blocks or a single accent nail, the goal is to make the Halloween influence obvious without making the manicure feel dated. Start with the classic colors you love, choose a structure that suits your nail shape, and keep the details intentional.
One Comment